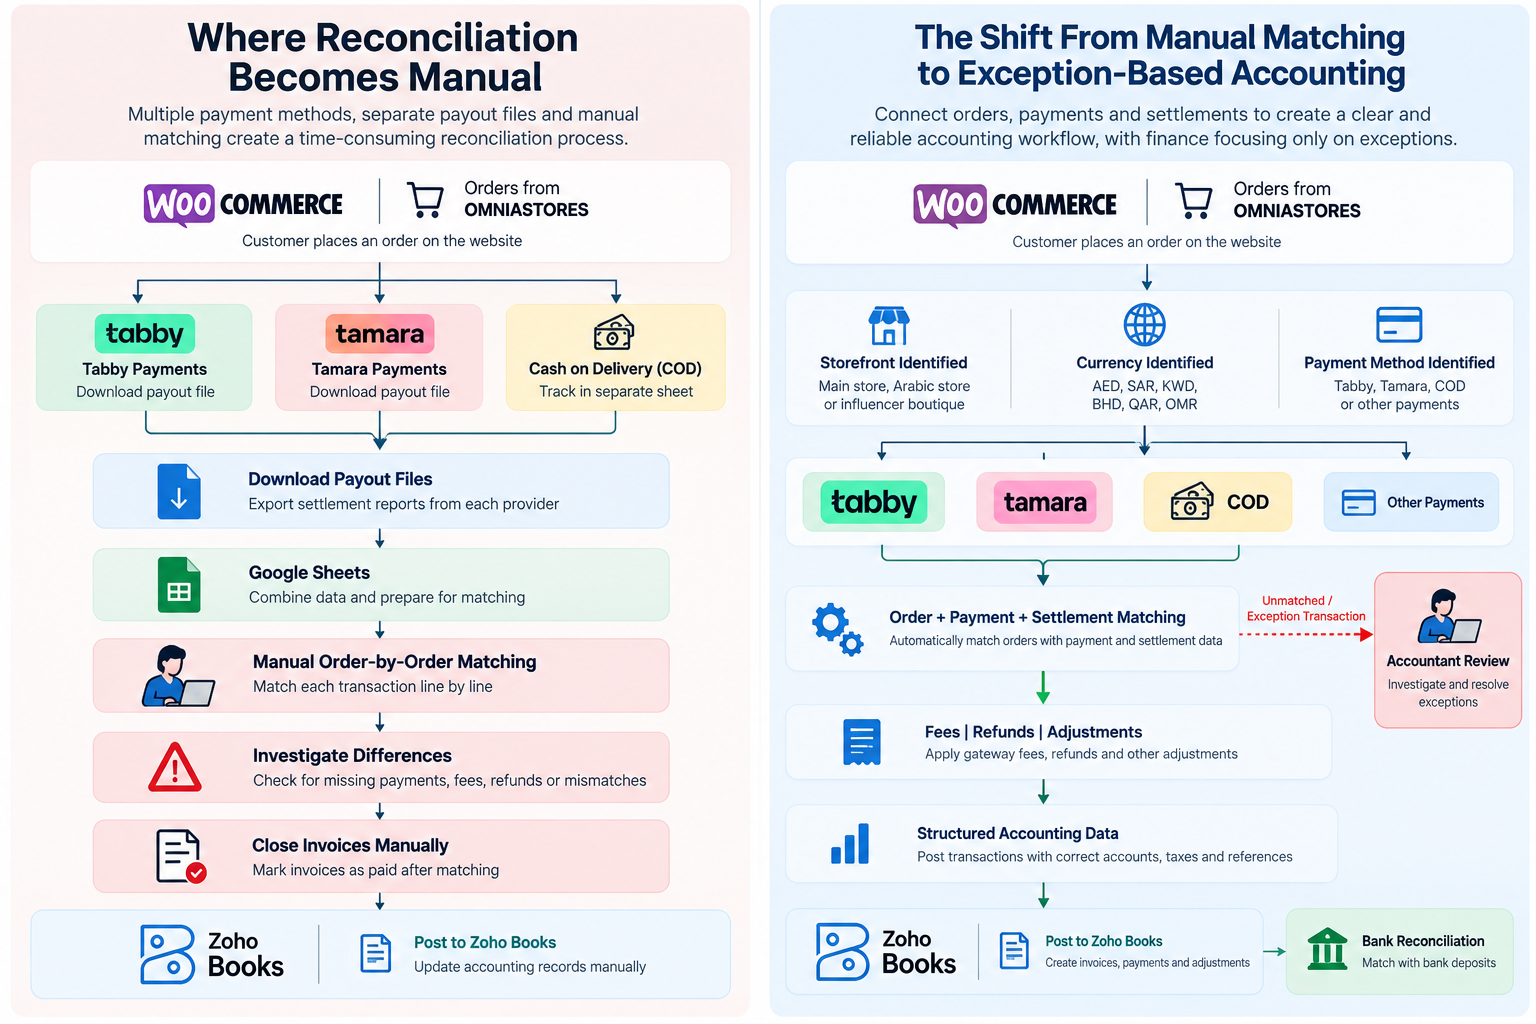
An ecommerce business can process hundreds of orders, receive customer payments, reconcile marketplace settlements, and maintain its accounting records without knowing whether all the information needed for an electronic invoice remains accessible.
Consider a UAE-based business selling through Shopify, WooCommerce, and Amazon.
Shopify holds individual customer orders. WooCommerce manages wholesale transactions. Amazon provides settlement reports containing sales, refunds, commissions, and other deductions. QuickBooks or Xero records the financial activity.
Each system may be working correctly, yet the business could still struggle to connect an invoice to its original transaction, customer details, tax treatment, and accounting entry.
The challenge is not simply moving data between applications. It is ensuring that the right information remains available, accurate, and traceable throughout the transaction lifecycle.
As UAE e-Invoicing requirements take effect, this becomes particularly relevant for businesses handling qualifying transactions across multiple ecommerce channels.
This guide examines how ecommerce data should move between storefronts, marketplaces, accounting systems, invoicing applications, and Accredited Service Providers (ASPs). It also explains where SyncTools can support financial data synchronization and reconciliation.
For regulatory deadlines, business applicability, and broader compliance preparation, read our UAE e-Invoicing 2027 guide.
Every ecommerce transaction creates several types of records.
An online store records what was purchased. A payment provider processes the collection. A marketplace may administer payments and deductions. An accounting system records the financial impact.
An invoicing application, meanwhile, needs the relevant transaction information to prepare the applicable electronic invoice.
These systems have different responsibilities.
| System | Primary responsibility | Relevant information |
|---|---|---|
| Shopify or WooCommerce | Ecommerce transactions | Customers, products, order lines, prices, discounts, taxes |
| Amazon or other marketplaces | Marketplace transaction management | Orders, returns, settlement reports, fees |
| Payment providers | Payment processing | Collections, refunds, transaction references |
| SyncTools | Supported ecommerce accounting integration | Sales, taxes, refunds, fees, accounting mappings, settlements |
| QuickBooks, Xero or ERP | Financial accounting | Ledgers, receivables, tax accounts, reconciliations |
| Invoicing application and ASP | Applicable electronic invoice processing | Required invoice fields, validation, structured exchange |
The important distinction is that accounting data and electronic invoice data are related, but they are not interchangeable.
For example, an accounting system might contain a summarized daily sales entry worth AED 25,000.
That entry may be appropriate for a configured financial reporting workflow. However, it does not necessarily contain the buyer identities, product descriptions, quantities, and tax details associated with every underlying sale.
If an in-scope transaction requires a structured electronic invoice, the relevant invoice information must remain accessible to the responsible invoicing solution.
### Three questions every ecommerce finance team should answerThese questions establish the foundation for an effective ecommerce data architecture.
Read the UAE e-Invoicing 2027 Guide
## 2. How Ecommerce Data Should Flow Between SystemsThere is no single technical architecture suitable for every ecommerce business.
The correct design depends on its sales channels, legal entities, customer types, accounting applications, invoicing arrangements, and supported integrations.
However, a practical architecture separates five responsibilities.
### Stage 1: Ecommerce platforms capture transactionsShopify, WooCommerce, and marketplaces generate transaction information, including order references, customer details, products, quantities, discounts, shipping, and applicable taxes.
Businesses need to identify which source records are authoritative.
### Stage 2: Accounting integration organizes financial activitySupported accounting integration software, such as SyncTools, can help transfer and categorize relevant ecommerce financial information into accounting systems.
Depending on the integration and configuration, this can include sales, refunds, fees, taxes, and settlement activity.
### Stage 3: Accounting and invoicing systems maintain their respective recordsAccounting systems manage financial records, while the responsible invoicing application must obtain the information needed to prepare applicable electronic invoices.
Businesses should not assume that all required invoice data is available simply because an accounting transaction has been posted successfully.
### Stage 4: The invoicing solution connects with the appointed ASPThe responsible invoicing environment must prepare the structured information required by the UAE framework and establish the appropriate connection with an Accredited Service Provider.
Invoice validation and regulated transmission require a compliant arrangement.
### Stage 5: Invoice exchange and accounting reconciliation remain connectedElectronic invoice processing and financial reconciliation should be treated as separate but related workflows.
A successful invoice exchange does not automatically prove that the associated payment has been collected or reconciled.
Likewise, a reconciled bank deposit does not establish that an electronic invoice contains every required field.
Key architectural principle: SyncTools supports the ecommerce accounting data layer. It is not presented as a UAE-accredited ASP or as a replacement for a compliant electronic invoicing solution.
## 3. Where Ecommerce Data Can Be Lost or MisinterpretedData problems do not always occur because an integration fails.
Sometimes data moves successfully but loses important context during transformation.
### Problem 1: Multiple transactions become one accounting summaryA store processes 150 orders and creates a summarized daily accounting entry.
The accounting totals may reconcile correctly, but the entry might not identify the individual business customers, purchased products, or original invoice references.
What to verify: Whether transaction-level source records remain available to the invoicing system.
### Problem 2: Customer information is incompleteA WooCommerce wholesale customer enters a company name and email address, but the checkout does not collect all the business identifiers required for the relevant invoice.
Accounting may still record the sale, while electronic invoice preparation requires additional information.
What to verify: Whether buyer records contain the applicable mandatory and conditional fields.
### Problem 3: Refund records lose their original referencesA customer purchases an item in August and returns it in September.
The accounting platform records the refund, but the original invoice reference may not be carried into the relevant adjustment workflow.
What to verify: Whether the refund can be connected to the underlying transaction and any applicable credit note.
### Problem 4: Payouts are mistaken for salesA marketplace transfers AED 45,000 after deducting commissions, returns, and service charges.
If the complete bank receipt is incorrectly recorded as revenue, the business can lose visibility into gross sales and the associated deductions.
What to verify: Whether sales and settlement components are correctly classified and reconciled.
### Problem 5: Different legal entities share one reporting workflowA multichannel business operates through multiple registered companies but combines transaction reports without reliable entity identifiers.
This can complicate supplier identification, tax accounting, and invoice preparation.
What to verify: Whether each transaction is assigned to the correct legal entity before downstream processing.
## 4. Shopify UAE e-Invoicing: How Order Data Should Be MappedShopify merchants often use accounting integrations to manage financial reporting across large numbers of orders.
However, businesses that also serve wholesale or corporate buyers need to pay particular attention to how customer and transaction information is maintained.
### Shopify order-to-invoice data mapping| Shopify information | Downstream purpose | Validation question |
|---|---|---|
| Customer information | Buyer identification | Can business buyers be identified correctly? |
| Order ID | Transaction traceability | Is the original order reference preserved? |
| Product descriptions | Invoice line information | Are descriptions sufficiently detailed? |
| Quantities and prices | Transaction values | Do line totals reconcile with the order? |
| Discounts | Financial and tax treatment | Are discounts classified correctly? |
| Shipping charges | Transaction calculation | Is the applicable tax treatment correct? |
| Tax details | Invoice and accounting tax information | Are rates, categories, and amounts consistent? |
| Refund details | Adjustments and credit notes | Can refunds be traced to original transactions? |
| Payment and payout references | Reconciliation | Can collections be matched appropriately? |
This is a practical mapping framework, not the complete UAE PINT-AE field specification.
### Example: A Shopify business selling wholesale and retailImagine a Shopify electronics merchant receives two orders.
Order A: An individual customer purchases accessories for personal use.
Order B: A UAE corporate customer purchases 80 accessories for business use.
Both transactions originate from Shopify, but the invoicing requirements may differ according to the nature of the supply and the applicable rules.
The merchant's data architecture should preserve the information needed to classify the transactions correctly.
The accounting workflow must also distinguish the financial components without assuming that every transaction requires the same electronic invoice process.
### Where SyncTools contributesFor supported Shopify accounting integrations, SyncTools helps businesses manage financial data synchronization, account mapping, and payout reconciliation.
This supports the accounting side of the transaction lifecycle.
Businesses must separately verify how their invoicing solution obtains the complete information needed for regulated electronic invoice processing.
Explore Shopify Accounting Integrations
## 5. WooCommerce UAE e-Invoicing: Why Plugin Configuration Matters 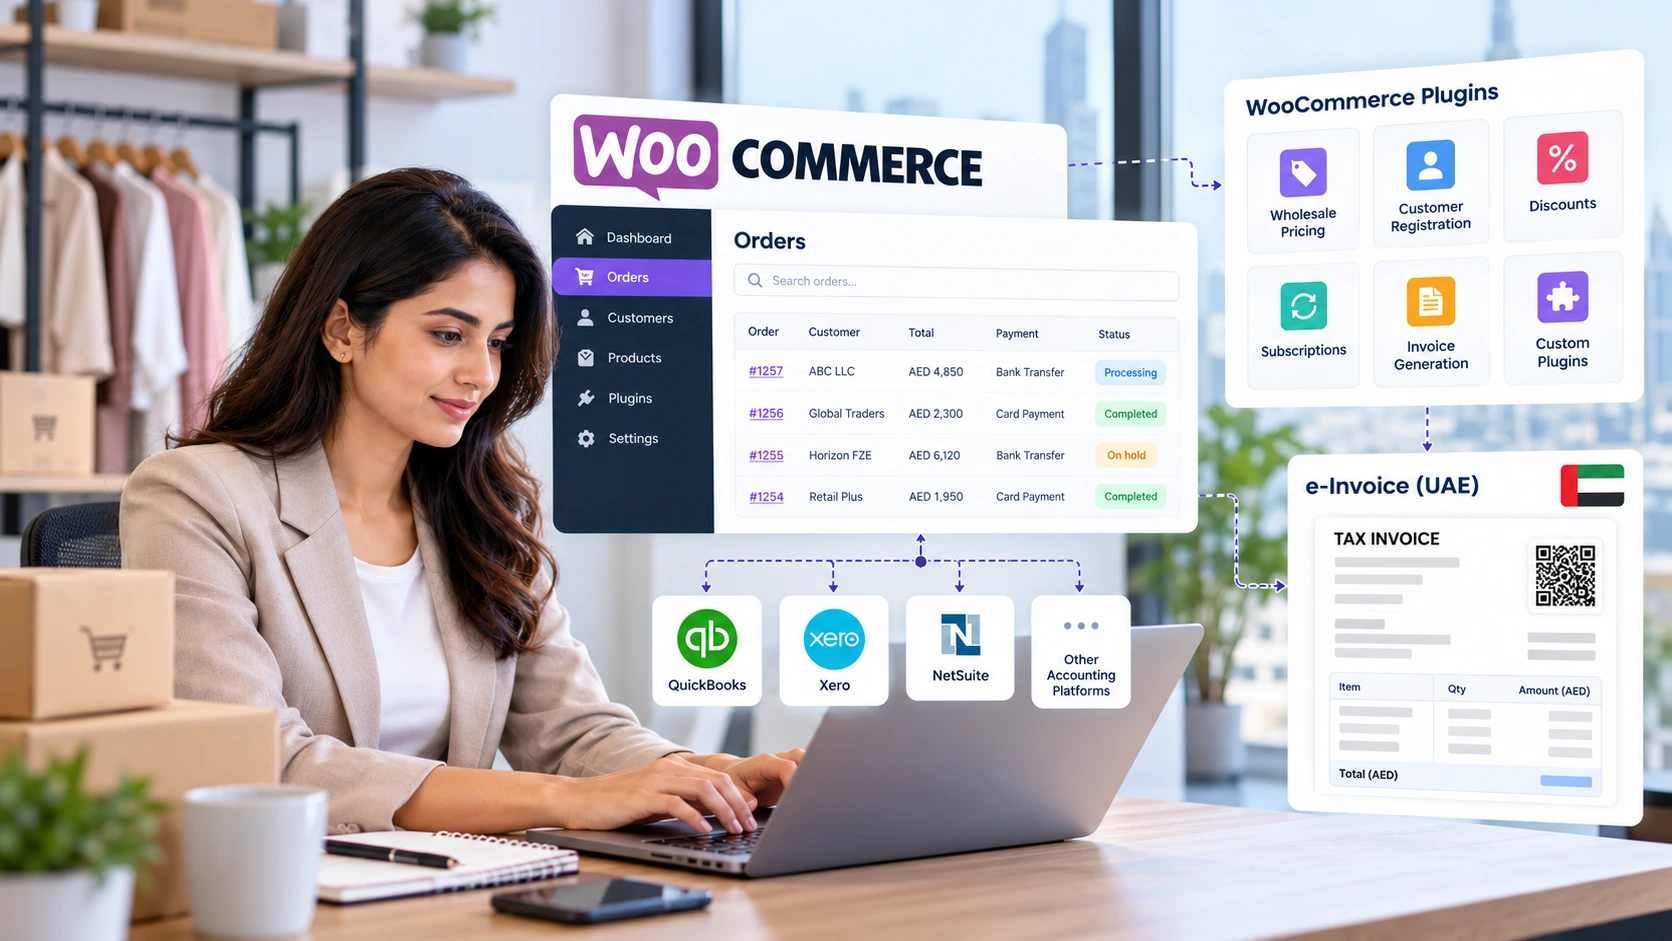WooCommerce presents a different integration challenge because merchants can customize their checkout, customer records, tax handling, and invoicing processes.
A WooCommerce business might use separate plugins for wholesale pricing, customer registration, discounts, subscriptions, and invoice generation.
These components do not necessarily maintain information in identical formats.
### Example: A WooCommerce B2B distributorA UAE distributor accepts corporate orders through WooCommerce.
The customer receives negotiated pricing, enters a purchase order number, and completes the transaction through a bank transfer.
The business must determine:
A plugin that creates a conventional invoice document should not automatically be treated as a complete UAE electronic invoicing solution.
### Recommended WooCommerce data controlsCustomer record validation: Determine which business identifiers should be mandatory for relevant customer types.
Plugin compatibility: Review how checkout, invoicing, and accounting plugins handle shared fields and custom metadata.
Order modification tracking: Establish how cancellations, discounts, refunds, and post-purchase changes are recorded.
Tax consistency: Compare checkout tax calculations with accounting and invoicing configurations.
Transaction traceability: Preserve the relationships between orders, payments, financial entries, and applicable invoice documents.
SyncTools supports WooCommerce accounting integrations for supported accounting platforms. The exact fields and workflows available should be confirmed for the selected integration.
## 6. Marketplace Accounting: Why Settlement Data Needs a Separate WorkflowMarketplace accounting often involves a timing difference between the original sale and the money received.
A seller may process hundreds of transactions across Amazon or another marketplace before receiving the associated net settlement.
The marketplace report can contain several components that require different accounting treatments.
### Illustrative marketplace reconciliationConsider the following hypothetical settlement.
| Financial component | Amount |
|---|---|
| Gross sales | AED 120,000 |
| Refunds | -AED 6,000 |
| Marketplace commissions | -AED 9,000 |
| Fulfilment-related charges | -AED 4,000 |
| Other deductions | -AED 1,000 |
| Net bank payout | AED 100,000 |
Illustrative example only. Actual settlement reporting may include taxes, reserves, adjustments, timing differences, and other components.
The AED 100,000 bank receipt is not equivalent to the AED 120,000 gross sales total.
Nor does the settlement report automatically serve as a structured electronic invoice for the underlying transactions.
### Three records that must remain distinguishableCommercial transaction record: Identifies what was supplied, the relevant parties, transaction values, and original references.
Marketplace settlement record: Explains how payment-related activity, commissions, refunds, and deductions contribute to a payout.
Accounting record: Represents the financial impact through the appropriate ledger accounts and reconciliation process.
For relevant in-scope transactions, the business must also establish the electronic invoice or credit-note responsibilities arising from the actual legal supplier and buyer relationship.
### Where SyncTools contributesSyncTools can help supported marketplace sellers organize and reconcile financial components such as gross sales, refunds, fees, taxes, and settlements.
This is important for finance teams seeking to understand why marketplace payments differ from recorded sales.
It does not replace the separate determination of invoicing obligations or the regulated invoice exchange process.
See Marketplace Accounting in Action
## 7. Transaction-Level Records vs Summarized Accounting EntriesOne of the most important architecture decisions is determining the level of transaction detail retained in each system.
Businesses commonly use summarized accounting because recording every ecommerce event individually may be unnecessary for their financial reporting configuration.
However, electronic invoice requirements can depend on information associated with individual supplies.
### When summarized accounting can become a limitationSuppose a WooCommerce store processes 300 orders in a day.
Its accounting integration posts a daily summary containing:
This may be useful for accounting.
But the summary alone may not identify which orders involved business customers or provide the line-level information required by a relevant electronic invoice.
The solution is not necessarily to replace summarized accounting with individual ledger postings.
Instead, businesses should design an arrangement where the invoicing environment can retrieve the necessary source information while accounting retains its appropriate structure.
### Recommended approachA reliable accounting summary and a complete invoice data source can coexist, provided their responsibilities and relationships are properly defined.
## 8. Handling Refunds, Credit Notes, and Post-Sale AdjustmentsRefund handling deserves particular attention because ecommerce adjustments frequently occur after the original order has been recorded.
Consider a Shopify merchant that sells equipment to a business customer.
The sale is processed and recorded in accounting. Two weeks later, the customer returns one item from a larger order.
The business must manage several distinct activities.
First, the ecommerce platform records the return.
Second, the payment process may issue a partial refund.
Third, the accounting environment must reflect the appropriate financial adjustment.
Fourth, the responsible invoicing process must determine whether an electronic credit note is required and preserve the necessary relationship with the original invoice.
These actions can take place in different systems and at different times.
### Data relationships to preserve| Record | Recommended relationship |
|---|---|
| Original order | Unique source transaction reference |
| Original invoice | Relevant document identifier |
| Refund event | Reference to original transaction |
| Credit note, where applicable | Reference required by applicable rules |
| Accounting adjustment | Appropriate financial posting |
| Settlement adjustment | Connection to marketplace or payment activity |
Finance teams should avoid treating the refund amount alone as sufficient evidence of a complete adjustment process.
Where supported, SyncTools accounting synchronization can help manage refund-related financial activity, while the invoicing environment remains responsible for applicable structured credit-note processing.
## 9. Managing Multichannel and Multi-Entity Ecommerce DataAs ecommerce businesses expand, their financial data architecture often becomes more complicated.
A group may operate:
The challenge is not simply consolidating all activity.
Businesses must maintain the distinctions that matter for legal, tax, accounting, and invoice processing purposes.
### Example: A UAE retail groupA group operates two companies.
Company A sells consumer products through Shopify.
Company B operates a WooCommerce wholesale business.
Both use a shared operational reporting process.
If the reporting system combines sales without retaining the original legal entity, it can become difficult to determine which company is responsible for individual transactions.
The integration architecture should therefore identify the relevant company before data is posted or routed downstream.
### Important architecture considerationsLegal entity mapping: Assign each transaction to the appropriate supplier entity.
Channel identification: Preserve which store or marketplace generated the activity.
Accounting organization mapping: Confirm that financial records reach the correct accounting environment.
Tax configuration: Review the applicable treatment for each relevant entity and transaction.
Invoice source identification: Determine which application holds the complete transaction information.
This separation helps protect the accuracy of both financial reporting and applicable invoice preparation.
## 10. Ecommerce Data Flow Audit: What Finance Teams Should TestBefore accepting an integration workflow, businesses should test real transaction scenarios rather than relying only on a successful connection message.
The following diagnostic framework can support internal reviews.
| Test scenario | Expected result | Primary owner |
|---|---|---|
| B2B customer places an order | Required buyer information remains accessible | Ecommerce / invoicing team |
| Order contains multiple tax treatments | Applicable line and tax information is preserved | Tax / invoicing team |
| Order is partially refunded | Adjustment remains connected to original transaction | Ecommerce / finance team |
| Marketplace deducts commissions | Relevant deductions are classified and reconciled | Accounting team |
| Settlement arrives in a later period | Timing difference is handled correctly | Finance team |
| Customer data is incomplete | Missing required information is identified | Customer data / invoicing team |
| Business operates multiple entities | Transaction retains correct legal entity | Finance / ERP team |
| Accounting uses daily summaries | Required source-level invoice data remains accessible | Integration / invoicing team |
The results should be documented as part of the business's integration design and acceptance testing.
### How to investigate a failed testA failed test does not automatically mean the accounting application or integration provider is responsible.
For example, an incomplete buyer identifier may originate in the ecommerce checkout.
A missing credit-note reference may involve the invoicing application.
An unexplained net payment difference may require settlement reconciliation.
Assigning each issue to the correct system owner prevents unnecessary changes elsewhere in the workflow.
Review the Data Flow Audit Framework
## 11. How SyncTools Supports Ecommerce Accounting Data ReadinessPreparing for UAE e-Invoicing offers an opportunity to examine how accurately and consistently ecommerce financial information reaches accounting systems.
This is where SyncTools can play a supporting role.
### Connecting supported ecommerce and accounting applicationsSyncTools supports accounting integrations involving platforms such as Shopify, WooCommerce, and Amazon with accounting applications including QuickBooks, Xero, and Zoho Books, subject to the available integration combination.
These integrations can reduce dependence on manually transferring financial reports between supported systems.
### Organizing marketplace payouts and financial componentsMarketplace payments frequently combine multiple commercial and financial events.
SyncTools helps finance teams organize relevant sales, refunds, fees, taxes, and settlement information through supported accounting workflows.
This provides additional context for reconciliation and financial reporting.
### Supporting accounting classification and mappingCorrect account mapping matters when financial transactions include different types of sales, liabilities, fees, and adjustments.
Configured accounting mappings help direct relevant financial components to the appropriate accounts.
AI-assisted suggestions and mapping configurations should remain subject to appropriate human review and approval.
### Reviewing historical financial activityWhere source data and integration capabilities support historical synchronization, businesses may be able to review previous ecommerce financial activity and investigate accounting discrepancies.
Historical accounting synchronization should not be interpreted as retrospective electronic invoice compliance.
### Maintaining clear system responsibilities| Activity | SyncTools contribution | Separate business responsibility |
|---|---|---|
| Ecommerce accounting integration | Supported financial data synchronization | Verify integration configuration |
| Sales and payout accounting | Transaction mapping and reconciliation support | Review financial accuracy |
| Refund and fee accounting | Supported categorization and synchronization | Approve accounting treatment |
| Historical financial review | Supported historical synchronization | Investigate outstanding differences |
| Required buyer invoice details | Not assumed to provide a complete solution | Customer and invoicing applications |
| PINT-AE electronic invoice generation | Not claimed | Compliant invoicing solution |
| Accredited electronic invoice exchange | Not claimed | Appointed UAE ASP |
SyncTools should be evaluated as part of the ecommerce accounting architecture, not as a substitute for a regulated electronic invoicing provider.
## 12. An Integration Acceptance Checklist for Ecommerce BusinessesThe following checklist focuses specifically on data movement and financial integration. It is not a replacement for the broader UAE regulatory readiness process.
### Ecommerce source systemsA completed checklist provides an operational basis for identifying integration gaps before production use.
## Final Thoughts: Ecommerce Data Readiness Starts at the Original TransactionFor Shopify, WooCommerce, and marketplace businesses, the quality of the final electronic invoice depends partly on information created much earlier in the transaction lifecycle.
An accounting system can reconcile successfully while an invoicing application still lacks important customer or line-item information.
A marketplace payment can reach the bank while gross sales, fees, and refunds require additional reconciliation.
A refund can be recorded financially while its original invoice reference remains unavailable to the relevant invoicing process.
These are different problems, and they require clearly defined system responsibilities.
The objective is to connect ecommerce operations, financial accounting, and invoicing processes without assuming one application must perform every function.
For businesses evaluating their systems ahead of UAE e-Invoicing implementation, understanding these dependencies provides a practical starting point.
Disclaimer: This article provides operational and technical guidance, not legal or tax advice. UAE electronic invoicing requirements, applicable exclusions, and technical specifications should be verified against current Ministry of Finance guidance and with qualified advisers.
## Frequently Asked Questions ### Does Shopify automatically transfer all required UAE e-Invoicing information to accounting software?Not necessarily. The information transferred depends on the integration, its configuration, and the fields supported by the receiving application. Businesses should separately verify whether the invoicing solution can access all required invoice data.
### Can WooCommerce custom fields be used in an electronic invoicing workflow?Potentially, depending on how the fields are stored, validated, and exposed to downstream applications. Custom checkout fields do not automatically satisfy regulatory requirements. Their completeness and suitability must be verified.
### Is a summarized accounting entry sufficient for electronic invoice generation?Not automatically. A summary may be appropriate for accounting, but applicable electronic invoices may require transaction-specific information that is not contained in the summary. The necessary source records must remain available.
### Should marketplace settlement reports be treated as electronic invoices?Not simply because they contain sales and payment information. Settlement reports explain financial activity between marketplace participants. Electronic invoice obligations depend on the underlying transactions and applicable legal requirements.
### How should a business handle refunds that occur after the original accounting period?The business should preserve the relationship between the refund and the original transaction, determine the appropriate accounting treatment, and establish whether an electronic credit note is required under the applicable rules.
### What happens if buyer details are missing from Shopify or WooCommerce?The missing information may need to be collected or corrected in the source or customer management system before the applicable invoice can be prepared. Accounting synchronization alone does not guarantee complete buyer records.
### Can QuickBooks or Xero be part of a UAE e-Invoicing architecture?Yes, depending on the configured invoicing arrangement and available integrations. Businesses must separately verify how required invoice information is collected, validated, and exchanged through the appropriate solution and ASP.
### How does SyncTools help with UAE ecommerce data readiness?SyncTools supports ecommerce accounting synchronization, mapping, and reconciliation for supported integrations. These capabilities help finance teams organize financial information associated with online sales. Electronic invoice generation and regulated exchange remain separate responsibilities.
### Does SyncTools send PINT-AE electronic invoices through the UAE Peppol network?SyncTools is not presented as an accredited UAE electronic invoicing service provider. Businesses should use an appropriately configured invoicing solution and the required ASP arrangement for regulated electronic invoice exchange.
### What should businesses test before connecting ecommerce data to an invoicing solution?They should test business customer records, tax information, original order references, refunds, invoice data availability, accounting mappings, settlement reconciliation, and exception handling. The exact acceptance criteria depend on their systems and applicable invoicing requirements.
--- ## How to Choose the Right Ecommerce Accountant for Your Business URL: https://synctools.ai/blog/how-to-choose-right-ecommerce-accountant Published: 2026-10-23Choosing an ecommerce accountant is not just about finding someone who knows QuickBooks, has a CPA credential, or offers a competitive monthly fee.
The more important question is:
Do they understand how money actually moves through your ecommerce business?
A $100 ecommerce sale may not result in a $100 bank deposit. Discounts, refunds, payment processing fees, marketplace commissions, taxes, chargebacks, currency conversion, and payout timing can all affect the amount that finally reaches your bank account.
That means an ecommerce accountant needs to understand more than bookkeeping. They should understand the transaction flow connecting your store, payment providers, marketplaces, payouts, bank account, inventory, and accounting system.
Before hiring one, give them a simple test:
"Walk me through how you would reconcile one real ecommerce payout from the underlying transactions to the bank deposit and then into QuickBooks or Xero."
Their answer can reveal more about their ecommerce accounting experience than a long list of credentials.
This guide explains what to look for, what questions to ask, which red flags to watch for, when you may need an ecommerce CPA or tax specialist, and how accounting technology can support the relationship.
An ecommerce accountant helps manage and interpret the financial activity generated by an online business.
That can include:
The exact services vary by firm and professional qualifications.
The important distinction is that ecommerce accountants understand how online selling platforms create financial data.
For example, they should understand that a Shopify Payments deposit isn't necessarily the same as sales revenue.
Shopify allows merchants to review the transactions, fees, and payouts that contribute to Shopify Payments activity. Refunds can also reduce upcoming payouts, and the original credit card processing fee generally is not returned when an order is refunded.
That creates an accounting problem a traditional bank-feed-only workflow may not fully explain.
## Why Ecommerce Accounting Requires Specialized KnowledgeConsider a simplified example.
Your Shopify store records the following activity:
| Activity | Illustrative Amount |
|---|---|
| Gross sales | $50,000 |
| Discounts | -$1,500 |
| Refunds | -$2,000 |
| Payment processing fees | -$1,300 |
| Other payout adjustments | -$200 |
| Illustrative amount available through payouts | $45,000 |
These figures are illustrative, but the accounting problem is real.
If someone sees $45,000 entering the bank and simply records:
Sales: $45,000
Important information disappears.
The business may lose visibility into:
Your accountant should be able to trace the activity behind the deposit.
### The Ecommerce Money TrailIf a prospective accountant can clearly explain that flow for your business, you are already asking a better question than:
"Have you worked with Shopify before?"
## When Do You Need an Accountant for an Ecommerce Business? Not every online seller needs a specialist from day one.
Your need usually increases with accounting complexity, not a specific revenue or order threshold.
Consider specialized ecommerce accounting support when:
Ask yourself:
Could I explain exactly how last month's ecommerce sales became the deposits appearing in my bank and the numbers appearing in my P&L?
If the answer is no, getting specialist help may be worthwhile.
## Ecommerce Accountant vs Bookkeeper vs Ecommerce CPAOne of the first questions should be:
What type of professional does my business actually need?
| Need | Ecommerce Bookkeeper | Ecommerce Accountant | Ecommerce CPA |
|---|---|---|---|
| Day-to-day bookkeeping | Strong fit | Yes | Yes |
| Payout reconciliation | Yes, with ecommerce experience | Yes | Yes |
| Monthly close | Yes | Yes | Yes |
| Financial reporting | Basic to moderate | Strong | Strong |
| Inventory/COGS accounting | Depends on experience | Strong | Strong |
| Financial analysis | Limited to moderate | Strong | Strong |
| Tax preparation | Depends on qualifications | Depends | Often |
| Tax planning | Usually limited | Depends | Stronger fit where relevant |
| IRS representation in the US | Generally no | Depends on credential | Yes |
| Strategic financial advice | Limited | Yes | Yes |
A CPA is not automatically a better ecommerce accountant.
A CPA might have excellent tax credentials but limited experience with Shopify settlements or Amazon marketplace accounting.
Conversely, an experienced ecommerce accountant or bookkeeper may understand marketplace reconciliation extremely well but not provide the tax services your business requires.
For US businesses, the IRS confirms that tax professionals can have different credentials, education, expertise, and representation rights. CPAs, enrolled agents, and attorneys generally have unlimited representation rights before the IRS.
The question is therefore not:
"Is a CPA better?"
It is:
"What work do I need this person to perform?"
## Do You Need an Ecommerce Tax Accountant?An ecommerce tax accountant becomes particularly relevant when tax complexity increases.
Examples include:
Tax rules depend heavily on where your business and customers are located.
Don't assume someone who understands ecommerce bookkeeping automatically understands every jurisdiction where you operate.
For US businesses specifically, the IRS recommends checking a tax professional's qualifications and credentials and provides its own preparer directory.
Important distinction
An ecommerce accountant can help build reliable accounting records.
An ecommerce tax accountant or appropriately qualified tax professional helps determine how relevant tax rules apply.
Depending on your business, you may need both.
## 9 Things to Look for When Comparing Ecommerce Accountants Searching for ecommerce accountants will produce plenty of options.
The harder part is evaluating them.
### 1. Experience With Businesses Similar to YoursDon't stop at:
"Do you have ecommerce clients?"
Instead ask:
"How many clients do you work with that have a similar sales-channel and accounting setup to ours?"
Compare experience based on:
An accountant supporting a small Shopify-only retailer may face very different accounting challenges from one handling Shopify, Amazon, wholesale, international currencies, and multiple entities.
Relevant experience matters more than the broad label ecommerce specialist accountant.
### 2. Understanding of Payout ReconciliationThis should be near the top of your evaluation.
Ask:
"How do you reconcile an ecommerce payout to the bank?"
A strong answer should go beyond matching the final deposit.
The accountant should consider the transactions that created it.
Depending on the platform, those can include:
Shopify provides merchants with payout and activity reporting to review transactions, fees, and payouts.
If an accountant focuses only on the bank deposit, ask more questions.
A strong reconciliation process should also account for refunds, fees, chargebacks, timing differences, failed transactions, and other adjustments that may explain why the payout differs from gross sales.
### 3. Understanding of Inventory and COGSInventory accounting deserves special attention for product businesses.
Your accountant should understand the relationship between:
Inventory purchases → Inventory asset → Product sale → COGS
Depending on your operation, they may also need to understand:
Ask:
"How would you verify whether our inventory and COGS numbers are accurate at month-end?"
The answer should include more than simply accepting whatever number appears in the e-commerce platform.
### 4. Experience With Your Accounting PlatformIf you use QuickBooks Online, your accountant should understand how ecommerce activity should fit into QuickBooks.
Relevant topics can include:
QuickBooks provides a ProAdvisor directory where businesses can find accounting professionals and filter by location, industry, and other criteria.
However, Intuit explicitly notes that ProAdvisors are independent professionals and encourages businesses to evaluate whether each advisor is genuinely right for them.
The same principle applies to Xero.
Xero's advisor directory includes firms with staff trained in Xero and at least eight Xero clients. It also lets businesses search for advisors with relevant industry experience, including ecommerce.
Certification is useful evidence of software knowledge.
It does not automatically prove ecommerce expertise.
## Xero Is an Accounting System. Your Ecommerce Workflow Determines What Gets Into It.Using Xero does not automatically mean your ecommerce accounting workflow is well designed.
Xero can provide the accounting ledger, bank reconciliation, reporting, contacts, invoices, bills, and other core accounting functionality.
But an ecommerce business still has to determine how its operational transaction data gets from Shopify, payment gateways, marketplaces, and other systems into Xero.
Consider a Shopify order.
The underlying activity may include:
The question is not simply:
“Can Xero record this?”
The more important question is:
“How will this information get into Xero accurately, consistently, and in a way that can be reconciled?”
### Basic Xero WorkflowA simpler ecommerce business might have a workflow such as:
Shopify → Xero → Bank Feed → Reconciliation
This can work when transaction volume and accounting complexity are relatively low.
But the bank feed only tells you what reached the bank.
It does not, by itself, explain the complete ecommerce transaction behind the deposit.
### Advanced Ecommerce Accounting WorkflowA more complex ecommerce operation may need:
Shopify → Orders/Refunds/Fees/Taxes/COGS → Accounting Integration → Xero → Clearing Accounts → Payout Reconciliation → Bank → Accountant Review
The additional workflow can become important when a business has:
Suppose Shopify generates $100,000 of gross sales but only $91,500 is ultimately deposited into the bank.
A basic workflow may focus on matching the $91,500 bank deposit.
An advanced workflow asks:
What created the $91,500?
For example:
$100,000 Gross Sales
− $3,000 Refunds
− $2,500 Payment Processing Fees
− $1,000 Other Adjustments
= $93,500 Settlement
The actual figures will vary, but the principle remains the same.
The accounting workflow should preserve the relationship between the original ecommerce transactions and the final settlement.
### What to Ask an Xero AccountantInstead of asking:
“Are you Xero certified?”
also ask:
“Show me how you would take one Shopify payout, identify the underlying sales, refunds, fees, taxes and other adjustments, and reconcile the final amount to Xero and the bank.”
That question tests ecommerce accounting workflow knowledge—not simply familiarity with accounting software.
### Where Automation FitsAn accounting platform such as Xero is the system of record.
An ecommerce accounting integration can sit between the ecommerce platform and Xero to move, map, summarize, and organize transaction data according to the accounting workflow.
The accountant remains responsible for:
The technology handles repeatable transaction-data movement.
That distinction is important.
Xero does not replace ecommerce accounting expertise.
And ecommerce automation does not replace the accountant.
They solve different parts of the workflow.
### 5. Tax Knowledge Relevant to Your BusinessDon't ask:
"Do you understand ecommerce tax?"
Ask:
"Which tax jurisdictions relevant to our business does your firm regularly work with?"
Then provide context:
Be cautious when a professional makes definitive tax claims before understanding those facts.
### 6. Understanding of Your Sales ChannelsAn accountant should understand that different sales channels can create different transaction and payout structures.
Shopify, Amazon, eBay, wholesale orders, and other channels do not necessarily send financial data to your accounting system in the same way.
Ask:
"Which of our sales channels have you worked with, and how does the accounting workflow differ between them?"
Look for whether they understand:
The goal is not simply to find someone who has heard of your platforms. You want someone who understands how their financial activity should be accounted for.
### 7. Financial ReportingGood bookkeeping answers:
"Are the transactions recorded?"
Good ecommerce accounting should also help answer:
"What are these numbers telling us?"
Ask what reports you will receive.
| Report | Business Question |
|---|---|
| Profit & Loss | Are we profitable? |
| Balance Sheet | What do we own and owe? |
| Cash Flow | Where is cash going? |
| Gross Margin | What remains after product costs? |
| Sales by Channel | Which channel generates revenue? |
| Refund Analysis | How much revenue is being reversed? |
| Inventory Report | How much capital sits in stock? |
| Payout Reconciliation | Do platform settlements match bank activity? |
Your exact reporting requirements will differ.
What matters is whether the accountant understands the decisions those reports need to support.
### 8. Technology and AutomationModern ecommerce accounting usually involves more than one system.
A typical technology stack may include:
An accountant does not need to develop integrations personally.
They should understand how accounting data moves between systems and which controls are required.
Ask:
"Which parts of our workflow would technology handle, and which parts would your team review?"
Good candidates should be comfortable explaining that boundary.
### 9. Communication and ExplanationTechnical knowledge matters.
Communication matters too.
Your accountant should be able to clearly explain:
If every explanation requires accounting jargon you cannot understand, the relationship may become frustrating.
A good accountant should make your numbers clearer, not more confusing.
## The Best Way to Test an Ecommerce Accountant Before HiringHere is where we recommend going beyond the standard interview checklist.
Give the candidate a realistic payout scenario.
### The Ecommerce Accountant Payout TestScenario
"My Shopify store shows $80,000 in gross sales for the period, but only $71,400 reached the bank. How would you investigate the difference and reconcile the activity in QuickBooks Online or Xero?"
Do not ask them to calculate the answer immediately.
Ask them to explain what they would investigate.
A capable accountant should start considering factors such as:
They should also explain how those components would be represented in your accounting records.
### Why this test worksAnyone can say:
"Yes, we specialize in ecommerce."
It is much harder to fake an understanding of the transaction flow.
You are not testing whether they memorize Shopify documentation.
You are testing whether they think like someone who regularly reconciles ecommerce businesses.
## 15 Questions to Ask an Ecommerce AccountantWhen speaking with prospective ecommerce accountants, ask questions that require explanations, not yes/no answers.
### Business experienceThe final question is especially useful.
Good accountants should have plenty of questions for you.
## What Happens When Something Doesn't Reconcile?A strong answer should describe a clear investigation process rather than simply saying they will "fix the difference."
Look for whether they explain how they would:
This question is particularly useful because reconciliation problems are rarely solved by looking at only one number.
## What Should an Ecommerce Accountant Ask You?The evaluation should work both ways.
An accountant cannot properly assess your business without understanding how it operates.
Expect them to ask about:
| Information | Why It Matters |
|---|---|
| Selling channels | Identifies transaction sources |
| Accounting platform | Defines ledger workflow |
| Payment gateways | Affects reconciliation |
| Order volume | Helps assess accounting complexity |
| Countries | Creates tax/currency considerations |
| Inventory | Affects inventory and COGS |
| Warehouses | Can affect inventory and tax considerations |
| Currencies | Adds FX complexity |
| Existing integrations | Shows how data currently moves |
| Tax registrations | Identifies existing obligations |
| Legal entities | Affects reporting |
| Management reporting | Determines required detail |
If an accounting firm quotes a monthly price immediately without understanding any of these details, ask what assumptions that quote is based on.
## Ecommerce Accounting Firm vs Independent AccountantAnother decision is whether to work with an individual professional or anecommerce accounting firm.
Neither is automatically better.
| Independent Accountant | Ecommerce Accounting Firm |
|---|---|
| Often more direct communication | Broader team resources |
| You may work with the same person | May have specialists for different areas |
| Potentially simpler relationship | Better capacity as complexity grows |
| Can provide highly personalized service | May provide bookkeeping, tax, and advisory under one roof |
| Capacity can depend heavily on one person | Work may be shared across team members |
When comparing ecommerce accounting firms, ask:
Who will actually perform the work?
A firm's website may feature senior partners, while another team manages your monthly bookkeeping.
That is not necessarily a problem.
You need to know:
Understanding the service model also makes pricing easier to evaluate.
## How to Evaluate Ecommerce Accounting ServicesDon't compare accounting providers based on monthly price alone.
Compare what is actually included.
For example:
| Service | Provider A | Provider B | Provider C |
|---|---|---|---|
| Monthly bookkeeping | ✓ | ✓ | ✓ |
| Payout reconciliation | ✓ | ✓ | ? |
| Inventory/COGS | ✓ | Extra | No |
| Tax preparation | Extra | ✓ | Extra |
| Monthly reporting | ✓ | ✓ | Quarterly |
| Advisory calls | Monthly | Quarterly | Extra |
| Ecommerce integrations | ✓ | Limited | ✓ |
| Historical cleanup | Extra | Extra | Included |
A $500 monthly package and an $800 package may not be comparable.
Define your requirements first.
Then compare.
## Ecommerce Accountant Near Me: Does Location Really Matter?Search demand shows that many business owners still search terms such as:
ecommerce accountant near me
or
ecommerce CPA near me
There is nothing wrong with wanting a local professional.
But ecommerce accounting itself is already digital.
Your sales platform, payment gateway, bank, QuickBooks/Xero account, reports, and supporting documents may all exist online.
That means expertise can often be more important than proximity.
QuickBooks and Xero both maintain directories that allow businesses to find accounting professionals, including by location and industry experience.
A better selection hierarchy may be:
There are exceptions.
If you need jurisdiction-specific tax services or a regulated professional service, location and professional licensing can matter more.
## Red Flags When Choosing Ecommerce AccountantsPay attention to how prospective accountants answer your questions.
### Red Flag 1: They Treat Net Deposits as RevenueIf they routinely record the entire payout as sales without reviewing the underlying transactions, your books can lose important detail.
### Red Flag 2: They Cannot Explain Payout ReconciliationAn ecommerce specialist should be able to explain what goes into a settlement.
### Red Flag 3: They Never Ask About InventoryFor product businesses, inventory and COGS can materially affect financial reporting.
### Red Flag 4: They Don't Ask About Sales ChannelsAmazon, Shopify, wholesale, and other channels can create different accounting workflows.
### Red Flag 5: They Say Ecommerce Accounting Is Basically the Same as Every Other BusinessThe basic accounting rules may be the same, but ecommerce businesses often deal with more complex transaction flows and day-to-day processes.
### Red Flag 6: They Recommend Software Before Understanding Your WorkflowTechnology should support the accounting design.
It should not define it blindly.
### Red Flag 7: They Promise That Automation Removes the Need for ReviewAutomation can reduce repetitive work.
Accounting controls and professional judgment are still required.
### Red Flag 8: They Make Broad Tax GuaranteesTax treatment depends on the business, transaction, and jurisdiction.
### Red Flag 9: They Cannot Tell You What Your Monthly Reports Will IncludeYou should know what you are buying.
### Red Flag 10: Nobody Can Explain Who Owns the AccountKnow who prepares, reviews, advises, and responds.
## Compare Ecommerce Accountants With a Practical Evaluation MatrixA weighted total can hide important weaknesses.
For example, someone could perform very well in general bookkeeping but still lack tax or marketplace reconciliation expertise.
Replace the entire section beginning:
"Use This Ecommerce Accountant Fit Scorecard"
Through the 85–100 / 70–84 scoring interpretation with this:
Rather than combining every capability into one overall score, compare candidates area by area.
A provider may be excellent at tax planning but less experienced with marketplace reconciliation.
Another may understand Shopify payouts extremely well but have limited experience with your tax jurisdiction.
That distinction matters more than one total number.
## SyncTools Ecommerce Accountant Comparison Matrix| Evaluation Area | Provider A | Provider B | Provider C |
|---|---|---|---|
| Ecommerce transaction knowledge | /5 | /5 | /5 |
| Payout reconciliation | /5 | /5 | /5 |
| Your sales channels | /5 | /5 | /5 |
| Inventory & COGS | /5 | /5 | /5 |
| Tax expertise | /5 | /5 | /5 |
| QuickBooks/Xero | /5 | /5 | /5 |
| Technology approach | /5 | /5 | /5 |
| Communication | /5 | /5 | /5 |
Score each provider from 1 to 5 based on the quality of their answers, relevant experience, and evidence they provide.
Don't choose solely based on the highest total.
Pay particular attention to low scores in areas that are critical to your business. For example, if you sell heavily through marketplaces, weak marketplace reconciliation should carry more weight in your decision than a high score in an area that is less important to your current setup.
## Specialist Ecommerce Networks and CommunitiesEcommerce communities, professional networks, software partner ecosystems, and referrals from other online businesses can also help you find accountants with relevant experience.
However, being listed in a specialist network should only be a starting point.
Use the same evaluation process to check their platform experience, payout reconciliation knowledge, inventory understanding, accounting software expertise, and tax capabilities.
## Should Your Accountant Use Ecommerce Accounting Software?Usually, the more useful question is:
Which parts of the accounting workflow should software handle?
Software is good at repeatable activity.
Examples include:
Human accounting expertise remains important for:
Think about the relationship this way:
Technology handles repeatable accounting data movement.
The accountant controls accounting judgment.
That distinction matters when evaluating both accountants and software.
## We Already Have Xero. Why Would We Need Ecommerce Accounting Automation?Having Xero does not necessarily mean your ecommerce accounting workflow is automated.
Xero is the accounting system where financial records are maintained and reported.
Your ecommerce platform is where orders, refunds, discounts, product information, and customer transactions originate.
Your payment provider or gateway may generate separate payment and settlement information.
Your bank records the final cash movement.
That creates a data-flow problem:
Shopify → Payment Provider → Payout/Settlement → Bank
while the accounting workflow needs to represent:
Sales → Refunds → Fees → Taxes → COGS → Clearing → Payout → Reconciliation
Xero can be the destination for those accounting records.
The question is how reliably the underlying ecommerce transaction data gets there.
### A Simple WorkflowShopify → Xero → Bank Reconciliation
This may be sufficient for a relatively simple operation.
### A More Advanced WorkflowShopify → Orders/Refunds/Fees/Taxes/COGS → Ecommerce Accounting Integration → Xero → Clearing/Reconciliation → Bank
The second workflow provides more opportunity to preserve transaction-level relationships and automate repetitive accounting data movement.
The right setup depends on transaction volume, sales channels, payment methods, inventory complexity, reporting requirements, and the accounting policies established for the business.
The goal is not to add technology for its own sake.
The goal is to make sure the accounting system receives the right information in a structure that can be reviewed and reconciled efficiently.
Xero remains the accounting system.
The integration handles the data flow.
The accountant controls the accounting judgment.
## Where SyncTools Fits Into the Accountant Relationship 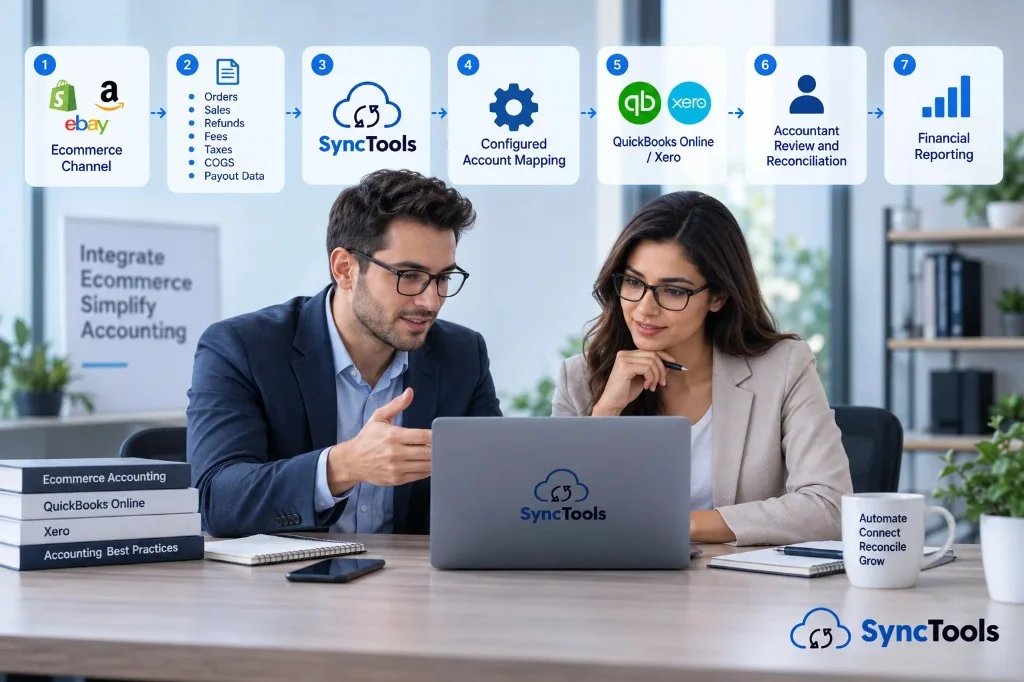This is where the accounting problem becomes a systems problem.
Your ecommerce accountant might know exactly how sales, fees, refunds, taxes, COGS, and payouts should appear in QuickBooks or Xero.
But someone or something still has to get that information there.
Without an appropriate integration, businesses can end up relying on:
That creates repetitive work before the accountant can even begin reviewing the numbers.
SyncTools connects ecommerce platforms with accounting systems such as QuickBooks Online and Xero.
For its Shopify and QuickBooks integration, SyncTools currently supports accounting workflows involving Shopify orders, refunds, fees, taxes, COGS, and payout settlements. It also offers summarized and individual transaction sync options, so businesses can configure the accounting flow to fit their needs.
The important point is what SyncTools doesn't replace.
It does not replace:
Instead, the relationship can work like this:
### Ecommerce Accounting WorkflowYour accountant decides how the books should be structured.
SyncTools moves and maps the underlying ecommerce data according to the configured accounting setup.
That lets the accounting team spend less time rebuilding transaction activity and more time reviewing exceptions, reconciling accounts, checking reporting, and advising the business.
## When Does the Accountant + Automation Model Make Sense?You may benefit from combining an ecommerce specialist accountant with accounting integration technology when:
The trigger does not have to be a particular number of orders.
A better signal is:
How much accounting complexity has the business accumulated?
## Before Hiring, Run This Final Five-Question CheckBefore signing an engagement agreement, make sure you can answer these five questions confidently.
### 1. Does the accountant understand my ecommerce platforms?Not just ecommerce generally.
Your platforms.
### 2. Can they explain how payouts reconcile to the bank?They should understand the transaction activity behind the deposit.
### 3. Do they understand my inventory, COGS, refunds, fees, and taxes?These are central parts of product-based ecommerce accounting.
### 4. Can they explain what technology handles and what their team reviews?Responsibilities should be clear.
### 5. Will their reporting help me make decisions?Clean books are important.
Useful financial information is better.
If you receive strong answers across all five areas, you are much closer to finding the right accountant for your ecommerce business.
## Final Thoughts: Choose the Accountant Who Understands the Money TrailThe best ecommerce accountant is not automatically:
The right professional understands how your business actually generates financial activity.
When evaluating ecommerce accountants, start with this flow:
Order → Payment → Refunds → Fees → Taxes → Payout → Bank → Accounting → Reconciliation
Then ask them to explain it.
If they understand that flow, ask good questions about your operation, know the systems you use, recognize where specialist tax expertise is required, and can explain how they'll review the numbers, you have a much stronger basis for choosing them.
Technology comes next.
Once the accounting rules are clear, you should not need highly skilled accountants spending their time repeatedly rebuilding ecommerce transactions from spreadsheets.
That is where SyncTools fits.
It connects ecommerce transaction data to QuickBooks Online or Xero based on your configured accounting workflow, while keeping your accountant responsible for the judgment, controls, review, and advice that require professional expertise.
If you already have a good accountant but month-end still depends on manually explaining Shopify sales, fees, refunds, COGS, and payouts, changing accountants may not be the first thing you need.
Map this process instead: Ecommerce platform → transaction data → account mapping → accounting system → payout reconciliation → accountant review
If the gap sits between your ecommerce platform and QuickBooks or Xero, explore how SyncTools can support that part of the workflow while your accountant remains in control of the accounting setup and review.
A Shopify Xero integration can move your store's data into Xero. It cannot, by itself, guarantee that your accounting is correct.
A Shopify order can involve a product sale, discount, tax, payment processing fee, refund, inventory movement, and eventual payout. The amount that reaches your bank can therefore be very different from the original order value.
That creates a more important question than "Does Shopify integrate with Xero?"
The real question is:
Can your Shopify data be mapped correctly, posted to Xero, reconciled with payment payouts and bank deposits, and monitored for exceptions?
That's the difference between a basic Shopify-Xero connection and a structured ecommerce accounting workflow.
For a simple Shopify store, a native Xero integration may be enough. As order volume, product complexity, refunds, payment gateways, inventory, COGS, and reconciliation requirements increase, you may need a more advanced Shopify accounting automation workflow.
This guide explains how Shopify, payment gateways, payouts, inventory, COGS, and Xero fit together; what can go wrong; how to configure the workflow; and where an accounting automation platform such as SyncTools can help.
The objective isn't to automate accounting blindly.
It's to create a workflow where:
Shopify generates the transaction data → payment gateways process payments → SyncTools organizes and maps the financial data → Xero records the accounting → payouts reconciled with the bank → exceptions are reviewed.
That is what makes a Shopify-Xero integration useful beyond simply moving data from one system to another.
"Can Shopify connect to Xero?"
It becomes:"Can our accounting workflow reliably transform Shopify and payment data into reconciled Xero records?"
### Native Connection vs Advanced Workflow| Requirement | Basic Shopify-Xero connection | Advanced accounting workflow |
|---|---|---|
| Shopify sales synchronization | ✓ | ✓ |
| Refund synchronization | ✓ | ✓ |
| Payment information | ✓ | ✓ |
| Payout reconciliation | ✓ | ✓ |
| Product/account mapping | Basic configuration | More structured mapping |
| Multiple payment gateways | Depends on setup | Designed around multiple data sources |
| High transaction volume | May require careful configuration | Better suited to structured automation |
| COGS workflow | Depends on inventory/accounting setup | Can incorporate defined COGS workflows |
| Exception management | Depends on integration | Explicit exception review |
| Complex ecommerce accounting | May require additional processes | Better suited to complex workflows |
| Detailed reconciliation | Depends on configuration | Central part of the workflow |
| Accounting controls | Depends on setup | Can be built into the process |
Map sales, fees, refunds, taxes, and payouts into Xero with a structured workflow that keeps reconciliation under control.
| Business situation | Potentially suitable approach |
|---|---|
| Low order volume | Individual transactions may be manageable |
| High order volume | Daily summaries can keep the ledger cleaner |
| Detailed customer reporting | Individual transactions |
| Simple revenue reporting | Daily summaries |
| Complex ecommerce accounting | Evaluate whether a specialized workflow is needed |
Shopify → Payment Gateway → Payout → Bank → Xero
An accounting automation layer can connect and organize the information flowing between these systems. ### 1. Shopify: The Commerce System Shopify is primarily where the ecommerce transaction originates. It can contain information such as:Customer transactions: $10,000
Refunds: −$500
Payment fees: −$300
Other adjustments: −$100
Payout: $9,100
Shopify transaction data → payment settlement → payout → bank deposit
A bank reconciliation confirms that the accounting records ultimately agree with the cash movement. ### 5. Xero: The Accounting Ledger Xero is where the relevant financial information is represented within the accounting system. Depending on the business and configuration, this can include:A Shopify order tells you what was sold.
A payment gateway tells you how the transaction was processed.
A payout tells you what was settled.
The bank confirms what was deposited.
Xero records the accounting impact.
A reliable ecommerce accounting workflow needs to connect those pieces rather than treating each system as an isolated source of truth. ## Shopify Xero Inventory Integration: Sales Data Is Not Inventory Data **Shopify Xero inventory integration** is often discussed as if inventory synchronization and accounting synchronization are the same thing. They are not. Shopify can track operational inventory. Your accounting system needs to represent the financial value and related accounting treatment of that inventory. Consider a product that sells for $100 but costs the business $40. The sale affects:Revenue → COGS → Inventory
Consider a product that sells for **$100** and has an accounting cost of **$40**. A simplified sale could produce:| Financial component | Amount |
|---|---|
| Sales revenue | $100 |
| COGS | −$40 |
| Gross profit | $60 |
| Inventory value released | −$40 |
Revenue tells you what the customer paid. COGS tells you what the product cost the business. Inventory represents the cost of products that have not yet been sold.
### Shopify Inventory and Accounting Inventory Are Not the Same Thing Shopify can track operational inventory quantities. For example:Opening stock: 100 units
Units sold: 20
Units remaining: 80
80 units × $40 = $3,200 inventory value
The accounting treatment may be more complicated when the business has:Net sales: $100
COGS: $40
Gross profit: $60
| Data sync | Accounting automation |
|---|---|
| Transfers transactions | Applies accounting rules |
| Moves sales data | Maps sales to accounts |
| Imports payments | Separates fees and payouts |
| Transfers refunds | Maps refunds appropriately |
| Imports products | Maps products and categories |
| Moves transaction data | Supports reconciliation |
| Reports successful sync | Identifies exceptions |
Shopify → Integration → Xero → Bank
Check whether the numbers match. ### Step 6: Monitor Exceptions Once the integration is live, do not simply assume that everything will remain correct. Monitor:Shopify sale = $200
Instead, the workflow needs to understand:| Component | Amount | Accounting consideration |
|---|---|---|
| Product sale | $200 | Revenue |
| Discount | -$20 | Reduces selling value |
| Refund | -$30 | Reduces revenue/cash received |
| Payment fee | -$5 | Payment/merchant expense |
| COGS | -$70 | Cost of goods sold |
| Remaining cash | Depends on settlement | Reconcile against payout |
Mapping → Classification → Reconciliation → Exception handling → Reporting
That is the difference between having connected software and having a scalable accounting workflow. ## Final Takeaway Once the accounting methodology and data sources are defined, automation can reduce the repetitive work involved in moving and mapping inventory and COGS-related information into the accounting workflow. For example:"Can Shopify sync inventory with Xero?"
Ask:"Can our ecommerce accounting workflow keep product sales, inventory, COGS, and financial reporting aligned?"
That is the more important question as the business grows. A Shopify-Xero integration can move sales data. A structured accounting workflow should help connect those sales to the costs and inventory values behind them. ## FAQ’s ### 1. How do I reconcile Shopify payouts in Xero? Shopify sales and the amount deposited into your bank may differ because of payment fees, refunds, adjustments, or other deductions. A proper reconciliation workflow matches the Shopify payout with the corresponding bank deposit and accounts for the transactions that explain the difference. ### 2. Why don't my Shopify sales match my Xero bank deposits? The two amounts can differ because Shopify sales represent the transaction value, while the bank deposit may reflect refunds, payment-processing fees, discounts, adjustments, or payout timing. Reviewing these components separately helps identify and resolve reconciliation differences. ### 3. How should Shopify payment fees be recorded in Xero? Payment-processing fees should generally be recorded separately from sales so that gross revenue and payment expenses are not mixed together. The exact account and treatment should follow your accounting setup and applicable accounting requirements. ### 4. Can Shopify and Xero keep product and inventory data aligned? They can, depending on the integration and inventory setup. Xero Inventory Plus supports Shopify connections for products, sales orders, customers, SKUs, and inventory-related workflows. However, businesses should separately verify that operational stock quantities, inventory values, and COGS are being handled correctly. ### 5. How should refunds affect Shopify accounting in Xero? Refunds should be reflected against the original transaction or through the appropriate refund account so that revenue is not overstated. If returned products are restocked, the inventory side of the transaction may also need to be considered. ### 6. When should I move from a basic Shopify-Xero connection to accounting automation? A basic connection may be sufficient for a small store with simple transactions. More advanced automation becomes useful when order volume, payment gateways, refunds, product mapping, COGS, inventory, or reconciliation creates significant manual work. The goal is to automate repeatable processes while keeping exceptions available for review. --- ## When Ecommerce Growth Outgrows the Accounting Workflow: Inside OMNIASTORES’ Reconciliation Challenge URL: https://synctools.ai/blog/omniastore-reconciliation-woocommerce-zoho-books Published: 2026-10-22How a Dubai luxury jewelry brand selling across multiple currencies, storefronts, and payment methods reached the point where spreadsheet-based reconciliation could no longer keep pace with its ecommerce operations.
An ecommerce order can take seconds to place.
Accounting for that same order can be considerably more complicated.
As an ecommerce business grows, the complexity rarely comes from sales alone. More orders bring more payments. New markets introduce additional currencies. Different payment providers create different settlement cycles. Refunds, fees, adjustments, and COD collections create additional records between the original sale and the money eventually received.
For OMNIASTORES, a Dubai-based luxury jewelry brand, that complexity had reached the finance team.
The business processes approximately 1,100 orders per month through WooCommerce, sells across six Gulf currencies, operates multiple storefront experiences, and accepts payment methods including Tabby, Tamara, and Cash on Delivery.
Its accounting system is Zoho Books.
The challenge lies in everything between the ecommerce order and the final accounting record.
And that makes OMNIASTORES' requirement relevant to far more than one ecommerce business in Dubai.
OMNIASTORES is a UAE-based luxury jewelry ecommerce business offering collections that include 925 sterling silver jewelry, lab-grown and moissanite pieces, bridal sets, and pearl collections.
Its ecommerce operation has evolved beyond a straightforward single-store setup.
The business operates with:
None of these elements is unusual on its own.
The accounting complexity appears when they all need to work together.
Because while ecommerce platforms are designed to make buying easy, finance teams still need to answer a much more detailed question:
What happened to the money after the customer placed the order?
## The Problem Wasn't Selling. It Was What Happened After the Sale.From the customer's perspective, the transaction is straightforward.
Choose the jewelry.
Select a payment method.
Place the order.
From the accountant's perspective, that order begins another journey.
Consider an order paid through a buy-now-pay-later provider.
WooCommerce records what the customer purchased and the amount charged.
The payment provider maintains its own transaction and settlement records.
Fees, refunds, or other adjustments may affect the final settlement amount.
Zoho Books needs the appropriate accounting records.
The bank ultimately receives the payout.
Finance needs to establish the relationship between them all.
The complete journey looks more like:
WooCommerce Order → Payment → Settlement → Accounting → Bank Deposit
When these systems don't pass enough connected information, someone has to rebuild that relationship manually.
At OMNIASTORES, that work currently falls heavily on the accountant.
## Inside the Manual Reconciliation WorkflowThe existing reconciliation process involves downloading payout files from Tabby and Tamara, working with that information in Google Sheets, matching transactions against individual orders, separately tracking COD transactions, and then manually closing the corresponding invoices.
The workflow effectively becomes:
There is nothing inherently wrong with using spreadsheets.
In fact, spreadsheets are often exactly how businesses solve operational problems before those processes become large enough to justify automation.
The issue appears when transaction volume grows, but the underlying finance process remains largely unchanged.
At approximately 1,100 monthly orders, OMNIASTORES isn't dealing with 1,100 isolated sales.
Its finance team is managing transactions that move through different payment methods, currencies, storefronts, and settlement paths.
That is where reconciliation stops being a simple bookkeeping exercise.
It becomes an ecommerce data and accounting workflow problem.
Tell us how orders, payment files, and bank deposits move through your ecommerce operation today.
This distinction matters for any ecommerce business evaluating accounting automation.
Connecting WooCommerce with Zoho Books can solve one part of the problem.
Orders can move from the ecommerce platform into the accounting system.
But moving an order and reconciling the money behind that order are not necessarily the same thing.
Finance ultimately needs answers to two questions:
| What did we sell?
And
| Does the money we received correctly correspond to what we sold?
The first question is primarily about transaction synchronization.
The second is about reconciliation.
A scalable ecommerce accounting workflow needs to consider both.
Imagine WooCommerce records an order worth AED 1,000.
Creating the corresponding sales record in Zoho Books establishes the transaction.
But finance may still need to determine:
Moving the sales transaction into accounting doesn't automatically establish all of these relationships.
This is why ecommerce accounting architecture should consider the full financial journey of an order, rather than simply moving data between two applications.
## Tabby, Tamara and COD Don't Follow the Same Accounting JourneyOMNIASTORES' requirement also demonstrates something that becomes increasingly important as ecommerce businesses expand:
Not every payment method behaves the same way after checkout.
Tabby has its own transaction and settlement process.
Tamara has another.
Cash on Delivery follows an entirely different operational journey.
Card processors and other payment gateways may have their own payout schedules.
The customer may see all of these simply as payment options.
Accounting does not.
Finance needs to understand how the original sale connects with the payment, settlement, fees, adjustments, and eventual bank deposit.
That means a useful reconciliation workflow needs to preserve relationships between data such as:
| Ecommerce Data | Payment/Settlement Data | Accounting Data |
|---|---|---|
| Order ID | Transaction reference | Invoice |
| Order amount | Settlement amount | Payment |
| Currency | Provider fees | Bank/clearing account |
| Refund | Settlement adjustment | Refund/credit entry |
| Payment method | Payout reference | Reconciliation status |
| Store/source | Settlement date | Accounting date |
The objective isn't simply to move these fields from one system to another.
It is to maintain the relationship between them.
That relationship allows finance to move from knowing:
“AED 24,000 reached the bank.”
to knowing:
“These specific orders, refunds, fees and adjustments make up the AED 24,000 deposit.”
That is the difference between recording money and reconciling it.
## Multi-Currency Commerce Adds Another Accounting LayerOMNIASTORES sells across six Gulf currencies:
AED | SAR | KWD | BHD | QAR | OMR
Multi-currency ecommerce can appear relatively straightforward from the customer's perspective.
The storefront displays the appropriate currency and the customer completes the purchase.
Accounting sees the transaction differently.
Finance needs visibility into the original order currency, the payment transaction, the settlement information, and the corresponding accounting record.
Depending on your payment and accounting setup, exchange rates and settlement currencies can add further considerations.
As ecommerce businesses expand internationally, these relationships become increasingly important.
This is why asking:
“Can WooCommerce connect with Zoho Books?”
is only the beginning.
A more useful question is:
Can our accounting workflow preserve the financial journey of each ecommerce transaction from order through payment and settlement to the books?
That question gets much closer to the actual business requirement.
## Multiple Storefronts Create Another Reporting RequirementOMNIASTORES' operating model adds another interesting layer.
Alongside its primary ecommerce operation, the business has a separate Arabic storefront and an ambassador boutique program involving six influencer boutiques.
That means finance may eventually need more than consolidated sales numbers.
Depending on management reporting requirements, transactions may need to remain identifiable by dimensions such as:
The specific accounting structure should always follow the company's approved Zoho Books configuration and reporting requirements.
But there is a broader lesson here.
Accounting automation should not remove information that the business needs later for reporting and decision-making.
A good ecommerce accounting workflow doesn't merely ask:
“What should we sync?”
It also asks:
“Which characteristics of the original transaction need to survive after it reaches accounting?”
That is a much more important architectural question.
## What the Desired OMNIASTORES Workflow Looks LikeThe requirement therefore extends beyond:
WooCommerce → Zoho Books
The desired workflow must account for the financial journey around those orders.
### 1. Capture the Ecommerce TransactionWooCommerce provides relevant order information, including products, order values, taxes, discounts, currencies, payment methods, and order status.
### 2. Preserve Transaction ContextThe workflow must retain the information needed to distinguish transactions by storefront, currency, payment method, or other relevant dimensions.
### 3. Structure the Accounting DataTransactions should follow the agreed Zoho Books accounting configuration, rather than requiring the accountant to manually reconstruct the records.
### 4. Connect Payments With OrdersPayment references need to remain connected with the corresponding e-commerce transactions wherever the required data is available.
### 5. Process Settlement InformationFor supported payment providers and workflows, settlement information can help establish which transactions belong to a particular payout.
### 6. Account for Fees, Refunds and AdjustmentsThe bank deposit should not become the only record finance relies on.
Relevant fees, refunds and adjustments need to retain their relationship with the original transaction and settlement.
### 7. Reconcile Against Accounting RecordsThe desired result is a clearer financial path:
Sale → Payment → Settlement → Accounting → Bank
### 8. Send Exceptions for ReviewAutomation should not mean processing every transaction without thinking.
If something doesn't match the expected data or accounting rules, that transaction should remain visible for finance to investigate.
This changes the accountant's role from:
reviewing and matching every transaction
to:
reviewing the transactions that actually require accounting judgment.
That is the shift from manual reconciliation to exception-based accounting.
## What Exception-Based Ecommerce Accounting Actually MeansThis distinction is worth understanding.
In a manual process, the accountant participates in the normal journey of almost every transaction.
Download → Match → Verify → Update → Close
As transaction volume increases, the workload generally increases with it.
An exception-based workflow changes the operating model.
The expected path becomes:
Capture → Match → Account → Reconcile
And only when something does not match:
Exception → Accountant Review
Finance remains in control.
What changes is where humans spend their attention.
Instead of using accounting expertise to match normal transactions repeatedly, accountants can direct that expertise toward unusual transactions, discrepancies, reporting, and financial review.
That is where automation becomes valuable.
Not because accountants disappear from the process.
Because accountants no longer have to process every predictable transaction manually.
SyncTools connects ecommerce transaction data with accounting systems so routine activity does not have to be matched by hand.
OMNIASTORES is based in Dubai.
But the accounting problem it represents is global.
Change the country and the platforms may change.
A Gulf ecommerce business might work with Tabby and Tamara.
A European merchant may accept Klarna.
An Australian business may work with Afterpay.
A global ecommerce operation may use combinations of Stripe, PayPal, marketplace settlements, local payment methods, and multiple bank accounts.
The providers change.
The underlying accounting question doesn't:
Can finance trace the journey from the original ecommerce transaction to the amount eventually received in the bank?
That is where many ecommerce integration projects fall short.
They concentrate on connecting applications.
A stronger approach connects the financial events happening across those applications.
## 5 Signs Your Ecommerce Accounting Has Reached the Same PointOMNIASTORES' situation provides several warning signs that other growing ecommerce businesses can recognize.
### 1. Your Accountant Regularly Downloads Payout ReportsIf finance has to download settlement files from payment providers before reconciliation can begin, there may be an opportunity to reduce manual handling.
### 2. Google Sheets Has Become Part of Your Accounting ArchitectureSpreadsheets are useful.
But when they permanently sit between ecommerce, payment providers, and accounting software, they may signal that you're manually rebuilding important relationships between systems.
### 3. Orders and Payments Are Matched One by OneThis can be manageable at low volumes.
At hundreds or thousands of monthly transactions, the process becomes increasingly difficult to scale.
### 4. Every Payment Method Has Its Own Reconciliation ProcessOne workflow for BNPL, another for cards, another for marketplaces, and another for COD creates fragmented finance operations.
Every new payment option can potentially create another reconciliation process.
### 5. Month-End Depends Heavily on One Person's Process KnowledgeIf reconciliation works because one accountant knows which exports to download, which spreadsheet to update, and how to match individual transactions, the business carries an operational dependency.
Automation doesn't aim to remove accounting judgment.
It is to stop consuming that judgment on repetitive matching work.
## Where SyncTools FitsThis type of ecommerce accounting challenge is exactly why you need to consider integration beyond basic order synchronization.
SyncTools connects ecommerce operations with accounting systems and supports moving structured financial data between them.
For a business like OMNIASTORES, though, the right approach isn't to assume you can turn on every part of the workflow.
The actual requirement needs to be evaluated across:
WooCommerce → Storefronts → Currencies → Payment Methods → Settlements → Zoho Books → Bank Reconciliation
Tabby, Tamara, COD, multi-currency transactions, multiple storefronts, and the required Zoho Books accounting treatment all need to be understood within the actual workflow.
That discovery is important.
Because the objective isn't simply to make WooCommerce and Zoho Books exchange data.
The objective is to create an accounting workflow where sales, payments, settlements, fees, refunds, and relevant transaction references remain connected enough for finance to reconcile them efficiently.
That is a very different integration objective.
And it is the one growing ecommerce businesses should be asking for.
Walk through your storefronts, currencies, payment methods, and accounting setup before deciding what should be automated.
OMNIASTORES' current challenge isn't unusual.
It signals an ecommerce business reaching a new level of operational maturity.
The process that worked when transaction volumes were smaller now requires reconsideration.
That's often how accounting automation opportunities emerge.
One spreadsheet becomes several.
One payment provider becomes three.
One currency becomes six.
One storefront becomes multiple selling experiences.
The accountant spends more and more time reconciling what has already happened instead of reviewing what the numbers mean.
Eventually, the systems that generate revenue begin moving faster than the processes that account for it.
OMNIASTORES is approaching that point.
The question is no longer whether its accountant can continue matching transactions manually.
Of course they can.
The more valuable question is:
Should a growing ecommerce business still need its finance team to do it this way?
## Still Reconciling Ecommerce Payouts in Spreadsheets?If your finance team is downloading payment-provider settlement files, matching ecommerce orders manually, maintaining separate COD spreadsheets, investigating payout differences one transaction at a time, or closing hundreds of invoices manually, your accounting software may not be the real problem.
The missing piece may be the workflow connecting your ecommerce, payment, settlement, and accounting data.
Tell the SyncTools team how your ecommerce operation works today.
Share your:
Ecommerce platform → Payment providers → Monthly transaction volume → Accounting software → Current reconciliation process
We'll help you identify where manual work exists, which financial data needs to remain connected, and where accounting automation may fit.
Let's Discuss Your Ecommerce Reconciliation Workflow
Let's Discuss Your Ecommerce Reconciliation Workflow
--- ## How Shopify Changes Affect Accounting: Payments, Sales, Inventory & Reconciliation URL: https://synctools.ai/blog/how-shopify-changes-affect-accounting Published: 2026-10-15A Shopify update may look operational to the ecommerce team and financial to the finance team only later.
A new payment method, sales channel, market, discount structure, fulfillment setup, or product configuration can change the transaction data flowing into QuickBooks Online or Xero.
That does not mean every Shopify change requires an accounting overhaul.
It does mean finance teams should know which changes can affect sales, refunds, fees, taxes, inventory, payouts, or account mapping.
A simple rule works well:
When Shopify changes how money, products, or transactions move through the business, check whether the accounting workflow needs to change with it.
Not every Shopify update has an accounting impact. But some operational changes deserve a quick finance review before they become reconciliation problems.
| Shopify change | What finance should review |
|---|---|
| New payment method | Payment and clearing account mapping, settlement timing, and fees |
| New sales channel | Revenue mapping, channel reporting, refunds, and transaction fees |
| New market or country | Currency, tax treatment, and reporting requirements |
| New discount or promotion structure | Discount treatment and net sales reporting |
| Shopify POS expansion | POS transactions, payment methods, and settlement reconciliation |
| New fulfillment location | Inventory, COGS, and location-level reporting |
| New products or variants | SKU mapping, inventory values, and COGS |
| Changes to returns or refunds | Refund transactions and reconciliation with payouts |
| Changes to Shopify Payments | Payout timing, fees, refunds, and clearing accounts |
| New marketplace integrations | Marketplace fees, settlements, refunds, and payout reconciliation |
The goal is not to involve finance in every Shopify decision.
It is to identify changes that can alter the financial data flowing from Shopify into the accounting system.
## Start With the PayoutsOne of the first things to review after a meaningful Shopify change is payout reconciliation.
The amount deposited into the bank is rarely the same as Shopify's gross sales. Refunds, fees, taxes, chargebacks, payment timing, and other adjustments can all affect the final payout.
That creates a simple reconciliation question:
Does the Shopify transaction activity still reconcile cleanly to the amount recorded in the accounting system and ultimately deposited into the bank?
This becomes especially important when a business adds payment methods, sales channels, markets, or other transaction flows.
Don't wait until month-end to discover that something changed.
Regularly checking for unmatched payouts, unexpected fees, missing refunds, or unusual clearing balances makes exceptions much easier to investigate while the underlying Shopify transactions are still easy to trace.
See how SyncTools records Shopify sales, refunds, fees, taxes, and payouts in QuickBooks Online or Xero so every deposit can be traced back to the underlying transactions.
Adding a new sales channel can change more than where customers place orders. It can also change how sales, fees, taxes, refunds, and payouts flow into your accounting system.
A Shopify business may sell through its online store, Shopify POS, marketplaces, social commerce channels, or international storefronts. Each channel can have different payment methods, fee structures, tax treatments, currencies, and payout schedules.
When adding or changing a sales channel, finance teams should check:
For example, adding a marketplace may introduce marketplace commissions and settlement deductions that do not exist on your Shopify storefront. Expanding Shopify POS may introduce different payment methods and payout flows. Selling into a new market may introduce different currencies and tax requirements.
The key question is not simply “Is the new channel syncing?” It is “Can the transactions from that channel still be accurately mapped, reconciled, and reported in the accounting system?”
As sales channels multiply, a simple combined sales figure may no longer provide enough financial visibility. The accounting workflow needs to keep pace with how the ecommerce business actually sells.
## Inventory Can Become Complicated QuicklyChanges to your Shopify product structure or fulfillment setup can have a direct impact on inventory accounting.
A store may start with a relatively simple catalog and later introduce new SKUs, variants, bundles, product cost changes, multiple fulfillment locations, or inventory transfers. While these changes may look operational from a Shopify perspective, they can affect how inventory value and COGS are calculated and reported in the accounting system.
When Shopify's product or fulfillment structure changes, finance teams should review:
For example, adding hundreds of new variants may not create an immediate accounting issue if the underlying SKU and cost mappings are correct. But if those variants are not mapped properly, inventory balances and COGS can gradually become unreliable.
The same applies when a business adds fulfillment locations or changes how products are bundled and sold. The Shopify setup may work perfectly from an ecommerce perspective while the accounting records require additional mapping or reconciliation.
The key question is: When Shopify changes how products are created, sold, fulfilled, or returned, does the accounting workflow still accurately reflect inventory and COGS?
A periodic review helps catch inventory and COGS discrepancies before they become a month-end or year-end reconciliation problem.
SyncTools connects Shopify to QuickBooks Online or Xero so new SKUs, variants, and fulfillment changes keep flowing into the books with consistent mapping.
Finance teams do not need to investigate every Shopify update.
When an operational change is announced or implemented, run five quick checks:
1. What changed?
Payment method, sales channel, market, product, fulfillment, discount, return flow, or something else?
2. Does money move differently?
Check sales, refunds, fees, taxes, payments, and payouts.
3. Does the accounting mapping still make sense?
Verify income, fee, tax, refund, inventory, and clearing accounts.
4. Does the reconciliation still work?
Look for unmatched transactions, failed syncs, duplicate entries, or unexpected balances.
5. Does reporting still tell the right story?
Make sure finance can still report revenue, fees, taxes, inventory, and profitability by the dimensions the business needs.
If all five checks pass, no accounting change may be necessary.
If one does not, investigate it before the next month-end close.
## Where SyncTools FitsFor Shopify businesses using QuickBooks Online or Xero, the challenge is not simply getting Shopify data into accounting software.
The harder problem is keeping sales, refunds, fees, taxes, inventory, gift cards, and payouts aligned and reconcilable as the ecommerce operation changes.
SyncTools helps automate that accounting flow, including transaction syncing, account mapping, and reconciliation workflows.
That means when a Shopify business adds channels, payment methods, products, or transaction volume, finance teams have a more consistent way to move ecommerce activity into the books.
The goal is simple:
Less manual transaction handling. Fewer reconciliation exceptions. More confidence in the numbers.
## Keep Shopify Changes From Becoming Accounting ProblemsMost Shopify changes do not require an accounting overhaul.
But when the change affects payments, sales channels, taxes, refunds, inventory, or payouts, a quick finance review can prevent much bigger reconciliation work later.
If your Shopify store is connected to QuickBooks Online or Xero, SyncTools helps automate the flow of ecommerce transactions into your accounting system while keeping reconciliation in focus.
Don't wait for the month-end to find out that a Shopify change affected your books.
Start your free SyncTools trial and make Shopify accounting easier to manage.
Running an eCommerce business can make bookkeeping look deceptively simple.
You sell a product for $100. The customer pays. Money reaches your bank. Record $100 as revenue, right?
Not necessarily.
Between the customer clicking Buy and money reaching your bank account, that transaction may pass through sales tax, discounts, payment processing fees, marketplace fees, shipping charges, refunds, chargebacks, currency conversions, inventory adjustments, and payout schedules.
What looks like one bank deposit could actually represent dozens or hundreds of underlying transactions.
That is one reason online business bookkeeping needs to go beyond recording deposits and expenses.
The market's scale makes this increasingly important. According to the U.S. Census Bureau, seasonally adjusted U.S. retail eCommerce sales reached an estimated $340.2 billion in Q2 2026, accounting for 17.1% of total retail sales.
As more commerce happens online, even relatively small businesses can generate large volumes of financial data across storefronts, marketplaces, payment gateways, banks, inventory systems, and accounting platforms.
This guide explains how to build an eCommerce bookkeeping process that keeps those moving parts connected, what records matter, where errors typically begin, and when automation may become useful.
Small business bookkeeping is the process of recording, organizing, categorizing, and reconciling the financial transactions a business generates.
For a traditional small company, that may primarily involve invoices, expenses, bank transactions, payroll, and supplier bills.
For an eCommerce business, the transaction chain can be considerably longer.
A typical order may create financial activity across:
Customer Order → Sales Channel → Payment Processor → Fees & Adjustments → Payout → Bank → Accounting System
And the original sale itself can contain:
This distinction matters.
QuickBooks, for example, explains that an eCommerce payout can contain sales, discounts, refunds, expenses, and other adjustments rather than representing a single sale.
So, if a business records only the amount arriving in its bank account, important accounting information may disappear inside that net deposit.
### A simple exampleImagine your store records:
| Transaction | Amount |
|---|---|
| Gross product sales | $10,000 |
| Sales tax collected | $700 |
| Refunds | -$500 |
| Marketplace/payment fees | -$400 |
| Other adjustments | -$100 |
| Net payout | $9,700 |
The $9,700 bank deposit is not necessarily your sales revenue.
Your bookkeeping needs to preserve the components that created that deposit.
Otherwise, revenue, expenses, tax liabilities, refunds, and profitability can become difficult to interpret.
## Business Bookkeeping: The Financial Records You Should Be Able to ExplainGood business bookkeeping isn't simply about having numbers in accounting software.
You should be able to explain where those numbers came from.
The IRS notes that businesses should maintain records that clearly show income and expenses, and that good records help businesses prepare financial statements, identify income sources, track deductible expenses, prepare tax returns, and support amounts reported on those returns.
For an eCommerce business, several records deserve particular attention.
### 1. Profit and Loss StatementYour Profit and Loss statement, or P&L, shows revenue and expenses over a specific period.
For an online retailer, that may include:
The usefulness of your P&L depends heavily on how accurately you categorize transactions before they reach the report.
### 2. Balance SheetThe balance sheet shows what the business owns, owes, and retains at a particular point in time.
For eCommerce businesses, important balance-sheet accounts can include:
A profitable P&L doesn't automatically mean the balance sheet is correct.
### 3. Cash Flow RecordsProfit and cash are different.
You could make a sale today but receive the marketplace payout days later. You could purchase inventory months before those products generate revenue.
Cash flow records help you understand what is actually entering and leaving the business.
### 4. Marketplace and Payment Processor ReportsDo not treat these as secondary records.
Shopify, Amazon, eBay, Stripe, PayPal, and other platforms can contain financial information that never appears clearly on the bank statement.
That may include fees, refunds, adjustments, reserves, disputes, and tax information.
### 5. Inventory and COGS RecordsFor product businesses, inventory affects more than operations.
Inventory purchased is generally not the same thing as COGS recognized from products sold.
Your bookkeeping process therefore needs a reliable way to connect product movement with its accounting impact.
### 6. Tax RecordsDepending on where you operate and sell, your records may need to distinguish between revenue and taxes collected from customers.
Tax requirements vary significantly by jurisdiction, so confirm the appropriate treatment with a qualified accounting or tax professional.
## Bookkeeping for Small Business: Why eCommerce Needs a Different ApproachBookkeeping for small businesses often starts with the basics.
A founder opens a business bank account, connects accounting software, categorizes expenses, and reconciles the account every month.
That may work while transaction volume is low.
But eCommerce introduces a problem: your bank is usually seeing the end of the transaction, not the beginning.
Consider this flow:
If your accounting starts only at the final bank deposit, the underlying financial activity can become difficult to reconstruct.
This is why eCommerce bookkeeping often needs to reconcile more than:
Books ↔ Bank
It may need to reconcile:
Orders ↔ Payouts ↔ Bank ↔ Accounting System
QuickBooks' current Shopify and Amazon workflows similarly import sales, refunds, fees, and payout information so you can review transactions against the payout and resulting bank deposit.
### The Practical Question to AskFor every payout, you should ideally be able to answer:
What transactions created this deposit?
If answering that question requires downloading multiple CSV files and manually rebuilding every payout, the bookkeeping process may be reaching the point where a more connected workflow is worth considering.
## Bookkeeping Best Practices for Small eCommerce BusinessesNo single bookkeeping setup fits every online seller. Your sales channels, transaction volume, jurisdictions, inventory structure, accounting method, and reporting requirements all matter.
However, these bookkeeping best practices can create a stronger foundation.
### 1. Separate Business and Personal ActivityMaintain separate business banking and payment accounts wherever appropriate.
Mixing personal and business transactions creates unnecessary categorization work and can make financial reporting harder to review.
### 2. Build the Chart of Accounts Around How Your Business OperatesAvoid creating an account for every possible transaction simply because the accounting system allows it.
Your chart of accounts should provide enough detail to answer important business questions without becoming unmanageable.
An eCommerce chart of accounts might distinguish:
Income
Contra-revenue / adjustments
Expenses
Assets
Liabilities
The right structure depends on your accounting requirements and should be reviewed with your accountant where necessary.
### 3. Record Gross Activity, Not Just the Net DepositSuppose your marketplace reports:
Gross sales: $5,000
Refunds: $300
Fees: $200
Net payout: $4,500
Recording $4,500 simply as sales removes visibility into the $300 refund and $200 expense.
Your accounting workflow should preserve the relevant components while still letting the final payout reconcile to the bank deposit.
### 4. Reconcile RegularlyDo not leave every discrepancy for year-end.
A monthly close is much easier when you've already investigated the previous month's payout, bank, inventory, and transaction issues.
Depending on transaction volume, some businesses may benefit from reviewing syncs, exceptions, or payout activity more frequently.
### 5. Keep Supporting RecordsRetain invoices, receipts, payout reports, supplier bills, sales reports, tax filings, and other supporting documents according to the rules applicable to your business.
For U.S. federal tax purposes, the IRS states that record-retention periods depend on what the document relates to. In many common situations, keep records supporting income, deductions, or credits until the applicable limitation period expires. Employment tax records generally need to be retained for at least four years.
Businesses operating elsewhere should follow their local requirements.
Keep sales, refunds, fees, and payouts organized with reliable accounting integrations built for your eCommerce business.
This is where bookkeeping becomes practical.
Consider an order with:
Product: $100
Discount: $10
Shipping: $5
Tax: $7
Customer payment: $102
Later, the payment processor deducts a $3 processing fee.
The business receives $99.
Recording only:
Bank deposit = $99 revenue.
Does not explain what happened.
Depending on your accounting setup, the transaction may need to preserve information relating to:
If the customer later returns the product, you may need additional entries.
That is why accurate eCommerce bookkeeping starts with transaction structure, not merely the bank feed.
## Why Your eCommerce Sales Rarely Equal Your Bank DepositsThis is one of the most common sources of confusion for bookkeeping for small business owners.
Your sales dashboard might show:
$50,000 sales
while the bank receives:
$43,850
That does not automatically mean $6,150 is missing.
The difference might include:
Do not immediately adjust the accounting entry simply to make reconciliation reach zero.
Instead, work backward.
Step 1: Find the exact bank deposit
Example:
Deposit: $43,850
Step 2: Find the corresponding platform payout
Check the settlement or payout report.
Step 3: Review the components
For example:
| Component | Amount |
|---|---|
| Gross sales | $50,000 |
| Refunds | -$2,500 |
| Platform fees | -$1,500 |
| Processing fees | -$650 |
| Other adjustments | -$1,500 |
| Net payout | $43,850 |
Step 4: Compare those components with your books
If the payout report equals $43,850 and the bank equals $43,850, but the accounting system does not, investigate the transaction mapping rather than changing the bank figure.
This approach turns reconciliation from guesswork into a traceable process.
SyncTools records the sales, refunds, fees, and taxes behind each Shopify, Amazon, WooCommerce, or eBay payout in QuickBooks or Xero, so every bank deposit reconciles without rebuilding it from CSV files.
Another key decision is when to recognize revenue and expenses.
Under the cash method, you generally record income when you receive it and expenses when you pay them.
Under the accrual method, you generally recognize income when earned and expenses when incurred, even if cash moves at another time.
For example:
You sell a product on December 29.
The marketplace pays you on January 3.
Under different accounting methods, recognition timing can differ.
Inventory can introduce additional considerations. IRS guidance notes that businesses that produce, purchase, or sell merchandise may be subject to inventory and accounting-method requirements, although exceptions exist for qualifying small businesses.
There is therefore no responsible universal answer to:
"Every eCommerce business should use cash accounting."
or:
"Every eCommerce business must use accrual accounting."
Your business structure, inventory, jurisdiction, tax requirements, and reporting needs should determine the approach, ideally with professional accounting guidance.
## How to Set Up Bookkeeping for Your eCommerce BusinessIf you are building your bookkeeping process from scratch, use this sequence.
### Step 1: Identify Every Source of Financial DataCreate a simple list:
Sales channels
Payment providers
Banking
Accounting
This creates your financial data map.
### Step 2: Establish Your Chart of AccountsDetermine where sales, refunds, fees, COGS, inventory, tax, shipping, and other transactions belong.
Do this before importing thousands of transactions.
Cleaning up poor mappings later can require significantly more work.
### Step 3: Decide the Level of Accounting DetailDo you need to record every order individually?
Or could summarized accounting provide the information you need?
The answer may depend on:
There is no universal winner.
A high-volume consumer seller may benefit from summarized entries, while another business may require order-level records.
### Step 4: Establish Product and COGS MappingProducts should be connected to the appropriate accounting treatment.
This becomes particularly important when different product groups have different:
A refund is not simply money leaving the bank.
Depending on the situation, it may affect:
Revenue → Tax → Inventory → COGS → Fees → Payout
Returns can become particularly complicated when the refund and physical return happen at different times.
### Step 6: Build the Payout Reconciliation ProcessEvery settlement should ultimately explain the corresponding bank movement.
Your target workflow is:
Before considering a month complete, review areas such as:
The exact checklist will vary by business.
Walk through your sales channels, chart of accounts, product and COGS mapping, refund rules, and payout reconciliation with our team, and see which repeatable steps SyncTools can automate.
For an early-stage entrepreneur with a small number of monthly transactions, manual bookkeeping may be perfectly reasonable.
A spreadsheet plus accounting software may be enough.
The challenge appears as volume and complexity increase.
Imagine processing manually:
1 store × 100 orders
versus:
4 channels × thousands of orders × refunds × fees × payouts × currencies × tax jurisdictions
The underlying accounting principles have not necessarily changed.
The volume of financial data has.
That is where accounting automation can become useful.
Rather than asking:
"Can software replace my accountant?"
a more useful question is:
"Which repetitive data-processing tasks should software handle, and which decisions should remain under human review?"
Automation may help with repetitive tasks such as:
Human involvement remains valuable for:
The strongest bookkeeping process does not necessarily remove people.
It gives them better-organized information to review.
## Where AI Fits Into eCommerce BookkeepingAI is increasingly being introduced into accounting workflows, but there is an important distinction between AI making a suggestion and AI having unrestricted authority over the books.
For account mapping, for example, an AI-supported workflow might look like:
This creates a more controlled model:
AI suggests. Humans approve.
The objective is not to remove accounting judgment.
It reduces repetitive work while keeping important accounting decisions reviewable.
## What Happens When You Have Months of Historical Transactions?A common bookkeeping problem isn't today's transactions.
It is everything that happened before today.
Perhaps the business:
In those cases, connecting future transactions alone won't close the historical gap.
You may need to determine:
Historical bookkeeping should therefore be approached carefully rather than treated as a simple bulk import.
SyncTools supports historical transaction syncing and white-glove onboarding, so past sales, refunds, fees, and payouts can be mapped carefully without duplicating entries or disturbing closed periods.
Doing your own bookkeeping can work when your financial activity remains manageable.
But there is usually a point where the owner's time is better spent elsewhere.
Signs that you may need bookkeeping help include:
A small business bookkeeper may manage transaction records and routine reconciliations. At the same time, accountants and tax professionals can provide additional guidance where reporting, tax, compliance, or accounting-method decisions require professional judgment.
The right combination depends on the business.
## Common eCommerce Bookkeeping Mistakes and How to Fix Them ### Mistake 1: Recording net payouts as salesProblem: Revenue and expenses become mixed.
Better approach: Break the payout into the financial components that produced the deposit.
### Mistake 2: Treating collected sales tax as revenueProblem: Revenue may be overstated where collected tax represents an amount owed or remitted to a tax authority.
Better approach: Configure the appropriate liability and tax treatment for your jurisdiction with professional guidance.
### Mistake 3: Ignoring marketplace feesProblem: Gross margin and channel profitability become harder to understand.
Better approach: Capture relevant marketplace and payment processing fees separately.
### Mistake 4: Recording inventory purchases directly as COGS without considering inventory accountingProblem: Expense timing may no longer align with product sales.
Better approach: Establish an inventory and COGS process appropriate to your accounting method and requirements.
### Mistake 5: Waiting until year-end to reconcileProblem: Twelve months of small differences become one large investigation.
Better approach: Establish a recurring reconciliation and month-end review process.
### Mistake 6: Connecting multiple tools without checking for duplicate postingProblem: The same transaction can potentially enter the books through more than one workflow.
Better approach: Decide which system owns each data flow before enabling automation.
### Mistake 7: Automating incorrect mappingsAutomation does not automatically mean accuracy.
If your original rule says:
Marketplace fee → Sales revenue
then automation can repeatedly apply the wrong treatment.
Better approach:
Configure → Test → Review → Approve → Scale
rather than:
Connect → Automate Everything → Investigate Later.
## A Practical Monthly eCommerce Bookkeeping ChecklistAt the end of each accounting period, ask:
### SalesIf several answers are consistently "no," the problem may not be the bookkeeping team.
It may be the bookkeeping workflow.
## How SyncTools Can Support an eCommerce Bookkeeping WorkflowAs an eCommerce business grows, the challenge is often less about understanding what bookkeeping is and more about moving large amounts of marketplace data into the accounting system in a usable format.
SyncTools sits between eCommerce platforms and accounting systems, helping organize financial data such as sales, refunds, fees, taxes, COGS, products, and payouts before it reaches the books. Current SyncTools materials describe connections between eCommerce channels such as Shopify, Amazon, WooCommerce, and eBay and accounting platforms including QuickBooks, Xero, Zoho Books, Sage, NetSuite, and Microsoft Dynamics 365.
A typical workflow can look like:
The goal is not simply to "sync data."
It is to preserve the accounting context behind the transaction.
### AI-assisted mapping with human controlSyncTools can use AI-assisted account mapping to support the mapping process. The intended approach is controlled rather than completely hands-off:
AI suggests → Human reviews → Human approves → Mapping is applied.
This can help businesses reduce repetitive mapping work while retaining human oversight over how financial data is categorized.
### Historical dataBusinesses moving from manual bookkeeping or changing their accounting workflow may also need to bring historical transactions into the accounting system.
SyncTools supports historical transaction syncing, which matters when a business needs to work with prior eCommerce data rather than starting only from the connection date.
Review the appropriate historical period and import approach carefully to avoid duplicates or changes to already finalized periods.
### White-glove onboardingFor businesses that do not want to configure mappings entirely on their own, SyncTools also supports white-glove onboarding.
This can be particularly useful where the initial setup involves multiple channels, product mappings, accounting accounts, payout structures, or historical data.
The objective is to establish the accounting workflow first, validate it, and then allow automation to handle repeatable activity.
## Your Bookkeeping System Should Answer Questions, Not Just Store TransactionsGood bookkeeping isn't measured by how many transactions exist in QuickBooks, Xero, or another accounting system.
It is measured by whether those transactions help you understand the business.
At any reasonable point, you should be able to investigate questions such as:
If your books cannot help answer those questions, adding more transactions is unlikely to solve the problem.
The bookkeeping process itself may need attention.
## Final Thoughts: Get the Flow Right Before You Automate IteCommerce bookkeeping does not become difficult because accounting suddenly follows different principles online.
It becomes difficult because the financial data is fragmented.
An order begins in one system.
Payment happens in another.
Fees are deducted somewhere else.
The payout reaches the bank later.
Inventory changes separately.
And eventually all of that information needs to make sense inside your accounting system.
The practical objective is therefore to build a traceable path:
Order → Financial Components → Payout → Accounting → Bank
Start by understanding that flow.
Then establish your accounts and mappings.
Reconcile the numbers.
Test the process.
Only then decide which repetitive parts to automate.
For businesses processing increasing eCommerce transaction volumes, SyncTools provides a connection layer between commerce platforms and accounting systems, supporting product mapping, sales, refunds, fees, tax mapping, COGS, payouts, historical data, and AI-assisted account mapping with human review.
Want to see how your current eCommerce-to-accounting workflow could be structured?
Explore SyncTools or speak with the team about your current sales channels, accounting platform, transaction volume, and reconciliation process.
## Frequently Asked Questions ### What is eCommerce bookkeeping? eCommerce bookkeeping is the process of recording and organizing the financial transactions generated by an online business. In addition to normal income and expenses, it may involve marketplace sales, payment processing fees, refunds, tax, inventory, COGS, chargebacks, and payouts. ### How do I do bookkeeping for a small eCommerce business? Start by identifying every sales channel, payment provider, bank account, and accounting platform the business uses. Establish a suitable chart of accounts, record the relevant components of sales rather than only net deposits, reconcile marketplace payouts with bank deposits, track inventory and COGS where applicable, and review the financial statements regularly. ### Can I do my own eCommerce bookkeeping? Yes, some business owners can manage their own bookkeeping, particularly when transaction volumes and sales channels are limited. As the business adds channels, inventory complexity, tax jurisdictions, currencies, or higher transaction volumes, professional bookkeeping support or accounting automation may become more practical. ### What is the difference between bookkeeping and accounting? Bookkeeping primarily focuses on recording, categorizing, organizing, and reconciling financial transactions. Accounting generally goes further into interpreting those records, preparing and analyzing financial statements, applying accounting principles, and supporting financial and tax decisions. ### Should I record Shopify or Amazon payouts as revenue? A payout should not automatically be treated as revenue. Platforms may deduct refunds, fees, adjustments, and other amounts before sending the final deposit. For example, current QuickBooks documentation describes Shopify and Amazon payouts as containing multiple underlying sales and adjustments. ### Why don't my eCommerce sales match my bank deposits? The sales figure generally represents customer activity, while a bank deposit may represent the net amount remaining after refunds, discounts, processing fees, marketplace fees, adjustments, or other deductions. Reviewing the payout or settlement report can help explain the difference. ### How often should a small business update its bookkeeping? The appropriate frequency depends on transaction volume and complexity. Businesses with significant eCommerce activity may benefit from monitoring transactions and exceptions throughout the month rather than waiting until month-end. Also review bank, payout, inventory, and balance-sheet accounts as part of a consistent close process. ### What records should a small eCommerce business keep? Relevant records can include sales reports, invoices, receipts, supplier bills, marketplace settlement reports, bank and credit-card statements, inventory records, payroll records, tax documentation, refund records, and financial statements. Retention requirements depend on jurisdiction and document type. ### Should an eCommerce business use cash or accrual accounting? It depends on the business structure, jurisdiction, inventory, tax rules, and reporting requirements. Cash accounting generally recognizes transactions when cash moves, while accrual accounting generally recognizes income when earned and expenses when incurred. Businesses should confirm the appropriate method with a qualified accountant or tax professional. ### When should I automate eCommerce bookkeeping? Automation may become worth evaluating when transaction volumes make manual entry difficult, multiple sales channels create repetitive reconciliation work, marketplace fees and refunds require frequent categorization, or finance teams spend substantial time manually rebuilding payout information. ### Can AI handle bookkeeping automatically? AI can support tasks such as transaction classification, account-mapping suggestions, anomaly identification, and repetitive processing. Important accounting decisions should still have appropriate controls and review. A model where **AI suggests and a human approves** can combine automation with accounting oversight. ### Can historical eCommerce transactions be synced into accounting software? Depending on the platforms and integration being used, historical syncing may be possible. Before importing historical activity, businesses should check for existing transactions, duplicate-entry risks, closed accounting periods, and previously filed tax periods. ### What is the biggest bookkeeping mistake an eCommerce business can make? No single mistake applies to every business, but recording net marketplace deposits as revenue without understanding the underlying sales, fees, refunds, taxes, and adjustments can significantly reduce financial visibility. A better process preserves those components and reconciles them back to the payout and bank deposit. --- ## Black Friday & Cyber Monday eCommerce Accounting Readiness Checklist for 2026 URL: https://synctools.ai/blog/black-friday-cyber-monday-ecommerce-accounting-checklist Published: 2026-10-09Black Friday and Cyber Monday can bring a surge in eCommerce sales, but increased order volume also creates accounting challenges that businesses cannot afford to overlook.
More transactions mean more payment processing fees, refunds, discounts, tax calculations, inventory changes, and marketplace payouts to reconcile. Without proper preparation, what looks like a successful holiday sales campaign can turn into weeks of bookkeeping corrections and uncertainty about actual profitability.
In 2027, Black Friday falls on November 26, and Cyber Monday falls on November 29. For eCommerce businesses selling through Shopify, Amazon, eBay, and other channels, the accounting preparation should begin well before these dates.
This Black Friday and Cyber Monday eCommerce accounting checklist covers what your finance team should review before, during, and after the holiday sales period. It will help you prepare your accounting integrations, minimize reconciliation issues, and understand how much profit your holiday sales actually generate.
Key Takeaways:
During a normal sales period, an eCommerce business might process a manageable number of daily transactions. Black Friday and Cyber Monday can dramatically change that workload.
A business selling through Shopify, Amazon, and other marketplaces may receive orders across several payment gateways, offer different promotional discounts, and collect sales tax in multiple jurisdictions.
The resulting accounting workload extends well beyond recording sales revenue.
### 1. Higher Transaction VolumesEvery order can generate multiple financial records, including sales, taxes, discounts, fees, and payment settlements.
If these records are manually transferred into accounting software, increased order volume can lead to delays, missing entries, or duplicate transactions.
### 2. Multiple Payout SchedulesMarketplaces and payment gateways do not necessarily transfer money to a business's bank account on the same day a sale occurs.
For example, a customer might purchase a product on Black Friday, but the corresponding settlement could arrive in December.
Without appropriate clearing accounts and reconciliation procedures, the business may struggle to explain why its sales reports do not match bank deposits.
### 3. Increased Refunds and ReturnsHoliday discounts can encourage customers to purchase more products, but some of those orders may later be returned or partially refunded.
Refunds can affect revenue, tax amounts, payment balances, inventory, and COGS.
Recording those adjustments accurately is essential for meaningful financial reporting.
### 4. Complicated Inventory and COGS CalculationsPromotional campaigns can change product sales volumes and margins considerably.
If inventory costs are outdated or products are incorrectly mapped to accounting records, the business may overstate its actual profit.
### 5. Multichannel Financial ReportingA seller operating across several marketplaces may need to answer questions such as:
Accurate answers depend on well-organized accounting data.
## Pre-Black Friday eCommerce Accounting Readiness Checklist 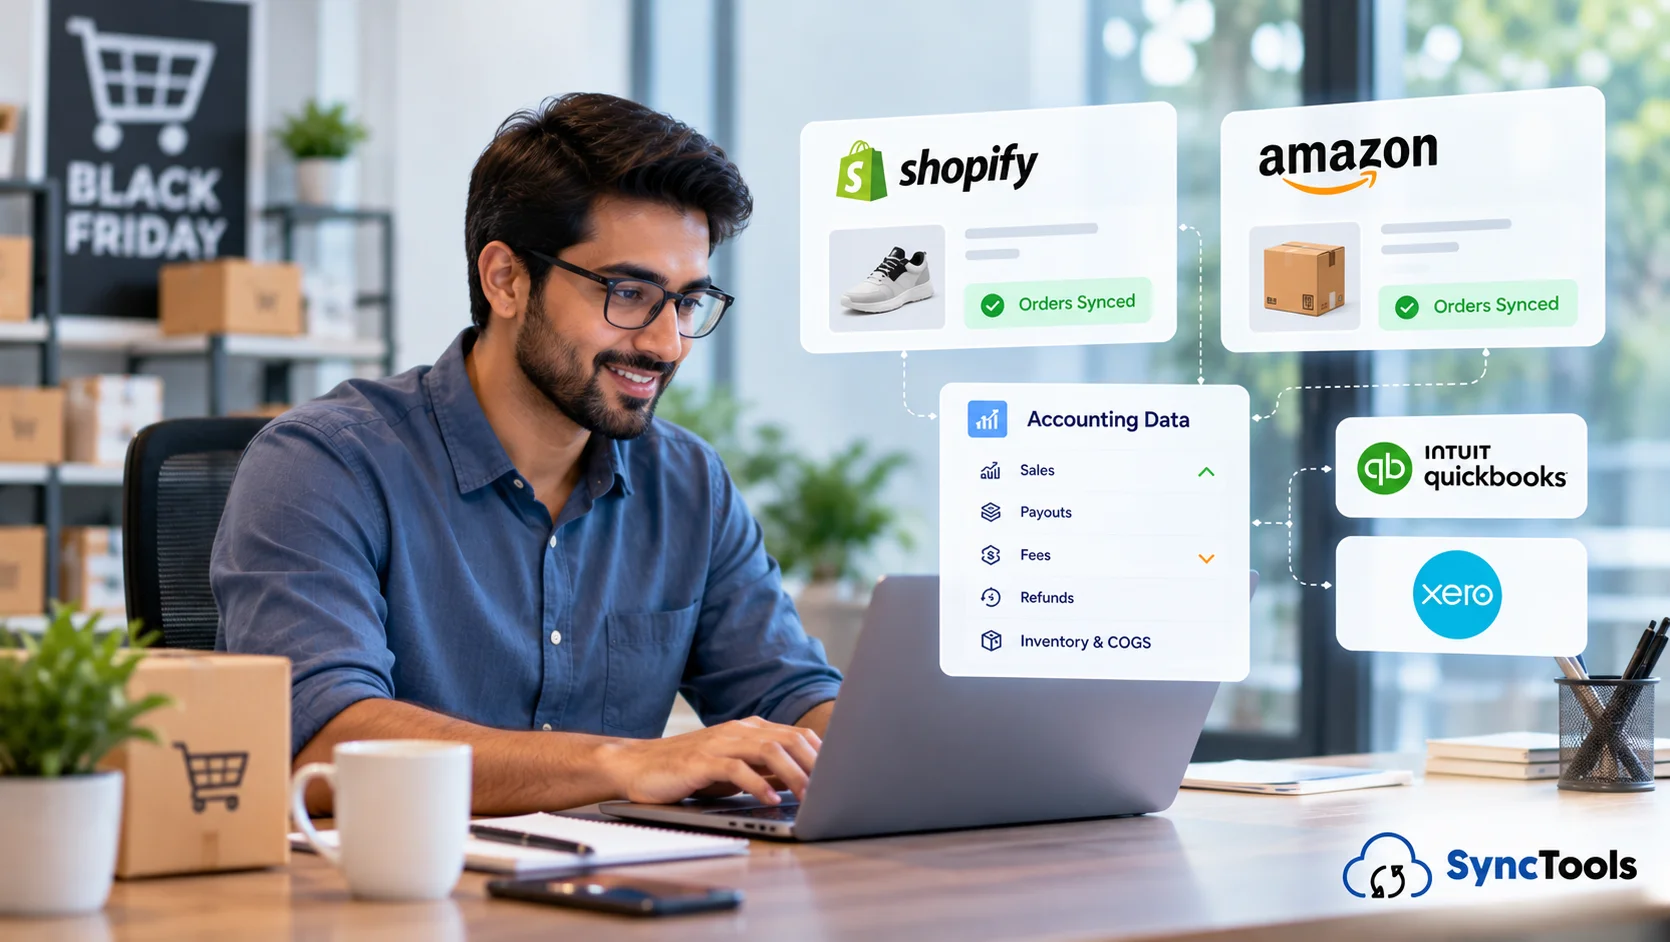The best time to identify accounting problems is before promotional activity begins.
Your finance team should review the following seven areas before Black Friday 2027.
### 1. Connect Your Sales Channels to Your Accounting SoftwareeCommerce businesses often rely on platforms such as Shopify and Amazon, while their finance teams work in QuickBooks Online or Xero.
If sales information is transferred manually, the finance team may need to export transactions, organize spreadsheets, and create accounting entries before reconciliation can begin.
Before Black Friday, verify that your existing integrations are working correctly.
Accounting readiness checklist:
Example: A Shopify merchant expecting a large increase in orders might prefer summarized daily accounting entries instead of creating a separate journal entry for each transaction. However, the finance team should still retain sufficient underlying order details to investigate refunds, fees, and reconciliation differences.
For supported Shopify integrations, SyncTools provides both individual and summarized transaction synchronization options for QuickBooks Online and Xero.
Explore: Shopify to QuickBooks Integration
### 2. Review Product Mapping and Chart of AccountsProduct mapping determines how product-related transactions are represented in your accounting system.
During Black Friday, businesses may introduce new products, promotional bundles, limited-time collections, or special pricing.
Incorrect mapping can result in sales appearing under the wrong revenue accounts or product categories.
Before the sales event, review your chart of accounts and verify the accounting treatment of key transaction types.
Transaction mapping table:
| Transaction type | Example accounting category |
|---|---|
| Product sales | Sales revenue |
| Promotional discounts | Sales discounts or contra-revenue |
| Customer refunds | Sales returns and allowances |
| Payment gateway charges | Payment processing expenses |
| Marketplace commissions | Marketplace fees |
| Product costs | Cost of Goods Sold |
| Sales tax collected | Sales tax payable |
| Unsettled payment receipts | Payment clearing account |
Actual account names and posting treatment should follow your accounting policy and the applicable reporting requirements.
Accounting readiness checklist:
Correct mapping makes it easier to analyze sales performance without manually reorganizing accounting records after the event.
### 3. Verify Payment Gateway Fees and Payout MappingOne of the most common sources of eCommerce accounting confusion is the difference between gross sales and actual bank deposits.
Payment providers and marketplaces may deduct transaction fees, refunds, or other adjustments before releasing funds.
Consider this simplified example.
Example: Black Friday payment settlement
| Item | Amount |
|---|---|
| Gross customer payments | $10,000 |
| Refunds included in settlement | −$500 |
| Payment processing fees | −$300 |
| Other settlement adjustments | −$100 |
| Net payout to bank | $9,100 |
Illustrative figures only. Actual settlements and accounting treatment vary by provider and transaction type.
If the business records only the $9,100 bank deposit as revenue, it can lose visibility into gross activity, refunds, and expenses.
The accounting process should separately record the relevant components and reconcile them to the actual payout.
Accounting readiness checklist:
Black Friday discounts can increase revenue while reducing the profit earned per product.
Without accurate inventory costs, a business may find it difficult to determine whether its promotional strategy was financially successful.
Cost of Goods Sold represents the cost of inventory sold during a reporting period, based on the business's inventory valuation method.
A simple profitability example illustrates why accurate COGS matters.
Profitability example:
| Metric | Regular sale | Black Friday sale |
|---|---|---|
| Selling price | $100 | $75 |
| Product COGS | $40 | $40 |
| Payment fees | $3 | $2.25 |
| Contribution before other costs | $57 | $32.75 |
In this example, the discounted product generates substantially less contribution per unit, even though sales volume may increase.
Accounting readiness checklist:
Accurate inventory and COGS data can help finance teams distinguish increased sales volume from actual profitability.
### 5. Validate Sales Tax and Tax MappingHoliday sales can increase the volume of taxable transactions across jurisdictions.
For businesses selling into different states or countries, tax treatment may vary depending on product type, customer location, marketplace arrangements, and applicable rules.
Businesses should confirm that their accounting systems appropriately record tax collected and any related liabilities.
Accounting readiness checklist:
Tax collected from customers should not automatically be treated as business revenue.
The correct classification helps prevent tax liabilities from distorting sales and profitability reports.
### 6. Configure Refunds, Returns, and DiscountsBlack Friday and Cyber Monday promotions often involve discount codes, flash sales, bundles, and other incentives.
These promotions can complicate accounting when customers request partial refunds, return only some items, or receive post-purchase price adjustments.
Before the event, review how those scenarios are recorded.
Accounting readiness checklist:
Example: A customer might order three discounted items but return only one in December. The accounting records should reflect the correct refund amount, applicable tax adjustment, and any required inventory correction, rather than reversing the entire original sale.
### 7. Test Your Accounting Integrations Before Peak SalesAn integration that works under normal transaction volumes should still be tested before a major promotional event.
The objective is to confirm that data is categorized correctly and that accounting exceptions can be identified quickly.
Create a small testing plan using representative transaction scenarios.
Test scenarios:
| Scenario | What to verify |
|---|---|
| Standard order | Correct sales and tax entries |
| Discounted order | Appropriate discount accounting |
| Partial refund | Accurate refund and tax adjustments |
| Multiple payment gateways | Correct fee and settlement mapping |
| Product return | Appropriate inventory and COGS treatment |
| Delayed payout | Correct clearing balance and later settlement |
| Failed sync | Error identification and safe recovery |
Accounting readiness checklist:
A successful test should demonstrate more than successful data transfer. It should verify that the financial records accurately represent the underlying transactions.
Automate transaction synchronization, payout reconciliation, and COGS tracking before holiday order volumes spike. SyncTools connects Shopify with QuickBooks Online and Xero.
Once holiday promotions begin, the focus shifts from preparation to monitoring.
Finance teams should not wait until the end of the promotional period to discover missing transactions, incorrect fees, or payout discrepancies.
A short daily review can help identify issues while the underlying transaction details are still readily available.
### 1. Monitor Sales and Accounting SynchronizationReview whether transactions from each active sales channel are reaching the accounting system.
Check transaction counts, gross sales totals, refunds, and synchronization logs.
Where synchronization errors occur, identify the cause before retrying transactions to avoid duplicate records.
### 2. Track Payment Gateway SettlementsCompare payment gateway reports with the corresponding accounting clearing accounts.
Remember that sales completed during Black Friday may be deposited into the bank several days later.
These timing differences should remain visible as outstanding settlement balances instead of being treated as missing revenue.
### 3. Review Discounts, Refunds, and Processing FeesEnsure that promotional discounts and payment processing charges are reflected in the correct accounts.
Review unusual refund amounts, unexpected fees, or transactions with incomplete financial information.
### 4. Monitor Accounting ExceptionsCreate a daily exception report that identifies:
Assign each exception to a finance team member and document its resolution.
### 5. Review Daily Profitability IndicatorsGross sales alone do not indicate campaign success.
Alongside sales revenue, monitor refunds, COGS, processing fees, and other measurable expenses.
These indicators help determine whether increased sales activity is translating into profitable growth.
Stop manually tracking payouts, fees, and refunds during your busiest sales period. SyncTools synchronizes your eCommerce transactions into QuickBooks Online or Xero automatically.
Cyber Monday marks the end of the main promotional period, but accounting work continues as payouts settle and customer returns arrive.
A structured reconciliation process helps ensure that holiday sales are accurately reflected in the financial statements.
### 1. Reconcile Marketplace and Payment Gateway PayoutsCompare the sales and settlement reports from each payment provider with the corresponding accounting records and bank deposits.
For each payout, verify:
Do not force a settlement match by creating unexplained adjustments. Investigate and document material differences.
### 2. Verify Refunds and ReturnsReview the refunds processed during and after the promotional period.
A December refund relating to a November order may require particular attention to financial reporting cutoffs, inventory adjustments, and applicable tax treatment.
The appropriate accounting treatment depends on the facts and relevant accounting policies.
### 3. Validate COGS and Inventory AdjustmentsCompare inventory movement and product costs with recorded sales activity.
Review returned products, damaged goods, promotional bundles, and any inventory adjustments.
The goal is to confirm that reported gross profit reflects the correct inventory costs.
### 4. Confirm Sales Tax LiabilitiesReconcile tax collected through sales channels with amounts recorded in relevant tax liability accounts.
Investigate incorrect jurisdiction mappings and refund-related tax differences before preparing returns.
### 5. Analyze Holiday Campaign ProfitabilityAfter the relevant transactions have been recorded, assess the financial performance of the campaign.
Consider the following simplified calculation:
| Financial metric | Illustrative amount |
|---|---|
| Gross sales | $100,000 |
| Discounts | −$15,000 |
| Refunds | −$5,000 |
| Net sales | $80,000 |
| COGS | −$35,000 |
| Gross profit | $45,000 |
| Payment and marketplace fees | −$4,000 |
| Fulfillment and shipping expenses | −$8,000 |
| Advertising expenses | −$10,000 |
| Contribution after listed expenses | $23,000 |
This example illustrates how strong sales figures can differ from the contribution remaining after operating costs. It is not a complete net-profit calculation.
Businesses should also account for other relevant costs before determining final profitability.
## Common Black Friday eCommerce Accounting Mistakes to AvoidEven businesses with established accounting processes can encounter problems during high-volume sales periods.
| Common mistake | Potential impact | Recommended action |
|---|---|---|
| Recording net payouts as sales | Inaccurate revenue and expense reporting | Record gross activity and reconcile deductions separately |
| Ignoring payment clearing balances | Unexplained differences between sales and bank deposits | Reconcile settlements and outstanding balances |
| Incorrect product mapping | Misclassified revenue and product performance | Validate mapping before promotions |
| Missing COGS entries | Overstated gross profit | Verify inventory costing and posting rules |
| Duplicate synchronization | Overstated transactions and incorrect balances | Review integration logs and retry procedures |
| Incorrect refund handling | Misstated sales, taxes, or inventory | Test full and partial refund scenarios |
| Delaying reconciliation | Larger backlogs and harder investigations | Monitor exceptions daily |
The most effective approach is to establish clear accounting procedures before the transaction volume increases.
## How Accounting Automation Helps During Peak Holiday SalesManual bookkeeping becomes more demanding as an eCommerce business expands across stores, marketplaces, payment gateways, and accounting systems.
Accounting automation helps reduce repetitive transaction processing while maintaining consistent mapping rules and supporting reconciliation.
### How SyncTools Supports eCommerce AccountingSyncTools connects supported eCommerce platforms with accounting systems such as QuickBooks Online and Xero.
Its Shopify integrations support synchronization of orders, refunds, discounts, taxes, payment processing fees, COGS, and payout information.
Relevant capabilities include:
Automated transaction synchronization: Transfer supported sales and financial transaction data into the accounting system without repeatedly preparing manual exports.
Product and account mapping: Categorize transaction types according to configured accounting rules.
COGS and refund accounting: Incorporate product costs and refund-related adjustments into financial records.
Payout reconciliation: Help match payment settlements with accounting records, accounting for fees, refunds, and adjustments.
Individual and summarized accounting: Choose transaction-level records or summarized entries based on reporting requirements and supported configurations.
For businesses expecting higher Black Friday order volumes, these capabilities can help finance teams spend less time on repetitive data entry and more time reviewing exceptions, cash settlements, and profitability.
SyncTools automates eCommerce accounting for Shopify, QuickBooks Online, and Xero — including orders, refunds, fees, taxes, COGS, and payout reconciliation. Set up before Black Friday 2027.
Use this consolidated checklist to track accounting readiness across the entire promotional period.
Before Black Friday:
During Black Friday & Cyber Monday:
After Cyber Monday:
Black Friday and Cyber Monday success should be measured by more than order volume and revenue.
Accurate accounting helps eCommerce businesses understand payment settlements, refund activity, product costs, tax liabilities, and the actual profitability of holiday promotions.
Preparing these workflows before the sales event can reduce avoidable corrections and give finance teams greater confidence in their financial reporting.
SyncTools helps eCommerce businesses organize supported sales, refund, fee, tax, COGS, and payout transactions within QuickBooks Online and Xero.
Get your holiday accounting ready with SyncTools.
Peak season can bring record-breaking orders for fashion eCommerce brands. Black Friday, Cyber Monday, holiday promotions, and end-of-season clearance events can increase sales across Shopify, marketplaces, and direct-to-consumer (DTC) stores.
But increased revenue also brings accounting challenges.
A single clothing style may have dozens of size and color combinations. Promotional discounts reduce selling prices, returns and exchanges affect inventory, and payment gateways deduct fees before releasing payouts.
If these transactions are not recorded correctly, fashion brands may struggle to determine how much profit their peak-season campaigns actually generated.
Preparing your fashion eCommerce accounting before peak season is essential for accurate inventory valuation, COGS calculations, refund processing, and payout reconciliation.
This guide provides a practical accounting readiness checklist for fashion retailers, apparel brands, and Shopify merchants preparing for high-volume sales periods.
Key Takeaways
Fashion businesses face several accounting challenges that become more visible during high-volume sales periods.
Unlike businesses selling a limited number of standardized products, fashion retailers often manage hundreds or thousands of product variants.
A single shirt available in five sizes and four colors represents 20 distinct SKUs. Each variant may have different inventory quantities, sales patterns, return rates, and sometimes production costs.
During peak season, several factors add complexity.
### Higher Order and Transaction VolumesIncreased sales create additional transactions involving customer payments, discounts, shipping charges, taxes, refunds, and processing fees.
If accounting teams depend on spreadsheets or manual entry, transaction volumes can create reconciliation backlogs.
### Multiple Sizes, Colors, and Product VariantsFashion inventory requires accurate SKU identification.
Incorrect product mapping can affect inventory records and make it difficult to determine which variants generate the highest margins.
### Seasonal Discounts and Markdown CampaignsFashion brands regularly use promotional discounts to increase sales or clear older inventory.
Although discounts may improve order volume, they can reduce gross margins.
Accounting systems must accurately distinguish gross selling prices, discounts, net revenue, and inventory costs.
### Returns and ExchangesClothing returns often involve sizing issues, damaged items, product exchanges, or customer preferences.
These transactions can affect sales revenue, inventory valuation, COGS, taxes, and payout reconciliation.
### Delayed Marketplace and Payment Gateway PayoutsA fashion brand may record hundreds of orders on one day while receiving the related funds several days later.
Marketplace commissions, refunds, and payment processing charges may also be deducted before funds reach the bank.
Without accurate reconciliation, bank deposits may not match reported sales.
SyncTools connects Shopify and marketplaces with QuickBooks Online and Xero, automating transaction sync, COGS recording, and payout reconciliation for fashion brands.
Fashion businesses should prepare their accounting processes before launching major seasonal campaigns.
The following seven checks help identify potential issues before order volumes increase.
### 1. Audit Your Product SKUs and Variant MappingSKU mapping is one of the most important accounting preparation activities for fashion retailers.
A fashion product usually consists of a parent style and multiple variants.
Consider a hoodie available in three colors and four sizes.
| Product | Color | Size | SKU |
|---|---|---|---|
| Classic Hoodie | Black | S | HD-BLK-S |
| Classic Hoodie | Black | M | HD-BLK-M |
| Classic Hoodie | Black | L | HD-BLK-L |
| Classic Hoodie | Navy | M | HD-NVY-M |
| Classic Hoodie | White | XL | HD-WHT-XL |
Each variant must be identified correctly within the relevant inventory and accounting workflows.
Incorrect SKU mapping can result in:
Pre-season SKU checklist:
Practical recommendation: Complete a SKU mapping audit before seasonal collections go live. This reduces the risk of discovering inventory mismatches during promotional campaigns.
For a deeper explanation of apparel variant structures, read the Fashion eCommerce Inventory Accounting Guide.
### 2. Verify Inventory Valuation and SKU-Level COGSCost of Goods Sold (COGS) represents the inventory costs associated with products sold.
For fashion brands, inventory costs may include manufacturing, applicable inbound freight, customs duties, and other directly attributable costs, depending on the business's accounting policies.
Before peak season, verify that product costs are accurate and consistently recorded.
Example: Calculating the cost of a fashion product
Consider a fashion brand selling jackets through Shopify.
| Cost component | Amount per jacket |
|---|---|
| Manufacturing cost | $30 |
| Inbound freight | $4 |
| Import duties | $3 |
| Other eligible inventory costs | $3 |
| Total inventory cost | $40 |
If the jacket sells for $100, its gross profit before other expenses is $60.
However, if the brand offers a 30% Black Friday discount, the selling price becomes $70.
The resulting gross profit falls to $30 before payment fees and other operating expenses.
This illustrates why accurate COGS is essential when evaluating seasonal promotions.
Pre-season COGS checklist:
Fashion brands should also review older inventory that may require markdowns or inventory write-downs.
A promotional selling-price reduction does not automatically require an inventory write-down. Finance teams should assess inventory values under their applicable accounting standards.
### 3. Prepare Accounting for Returns and ExchangesReturns and exchanges are particularly important for fashion eCommerce businesses because customers frequently purchase products in multiple sizes or colors.
A return may affect more than the original payment.
Depending on the transaction, accounting adjustments can involve:
For example, a customer purchases a jacket for $120 but later returns it because the size is incorrect. The brand may issue a refund or exchange the jacket for another size.
If the original product is returned in sellable condition, the inventory records must reflect its recovery. If it is damaged, a separate inventory assessment may be required.
Pre-season returns checklist:
Important: A refund does not automatically mean the returned product should be added back to sellable inventory. Its physical condition must be verified.
Fashion brands expecting substantial post-holiday returns should also review whether they need to estimate expected returns under their applicable financial reporting framework.
For detailed treatment of these transactions, refer to the Apparel eCommerce Returns & Refund Accounting Guide.
### 4. Review Seasonal Discounts and Markdown AccountingFashion retailers frequently use promotional pricing to increase sales or reduce seasonal inventory.
Common promotions include:
These campaigns can affect revenue recognition and product profitability.
Before launching a promotion, accounting teams should verify that discounts are captured correctly.
Example: Seasonal discount impact
A fashion brand sells a dress with a regular selling price of $100 and inventory cost of $45.
| Financial metric | Regular sale | Seasonal sale (30% off) |
|---|---|---|
| Selling price | $100 | $70 |
| COGS | $45 | $45 |
| Gross profit | $55 | $25 |
| Gross margin | 55% | 35.7% |
Although the promotional campaign may generate more orders, the gross margin per item decreases considerably.
This does not necessarily mean the promotion is unsuccessful. Higher sales volumes may increase total contribution, but the business needs reliable cost and revenue information to evaluate the outcome.
Pre-season discount checklist:
Fashion brands often receive payments through multiple providers and marketplaces.
These payment sources may deduct fees, refunds, commissions, or other adjustments before transferring funds.
As a result, the amount received in the bank may differ from gross sales.
Example: Shopify payment reconciliation
Consider a fashion retailer with the following settlement activity:
| Settlement component | Amount |
|---|---|
| Gross customer payments | $20,000 |
| Refunds deducted | -$1,000 |
| Payment processing fees | -$600 |
| Other settlement adjustments | -$200 |
| Net payout | $18,200 |
Illustrative example. Actual payout composition varies by payment provider.
Recording only the $18,200 deposit as revenue would hide important information about the underlying transaction activity.
Instead, accounting records should appropriately distinguish sales, refunds, fees, taxes, and settlement balances.
Pre-season payout checklist:
Completing these checks before peak season gives finance teams a more reliable starting position.
### 6. Check Sales Tax and Multichannel AccountingFashion brands selling across multiple regions or marketplaces may encounter different tax rules and reporting requirements.
For example, sales tax treatment can vary based on customer location, product type, marketplace arrangements, and applicable jurisdiction.
Accounting systems should correctly distinguish taxes collected from business revenue.
Pre-season tax checklist:
Businesses should work with their accountant or tax advisor to confirm relevant obligations before entering new markets or launching significant promotions.
### 7. Test Your Shopify Accounting Integration Before Sales IncreaseAn accounting integration should do more than transfer orders successfully.
It should record the relevant components of each transaction in the appropriate accounting categories.
Before peak season, test representative order scenarios.
| Scenario | Accounting validation |
|---|---|
| Regular clothing order | Correct sales and tax entries |
| Discounted product | Correct promotional discount |
| Size exchange | Accurate sales and inventory adjustments |
| Partial refund | Correct refund and tax treatment |
| Returned inventory | Appropriate inventory and COGS adjustment |
| Multiple payment methods | Correct payment and fee mapping |
| Delayed payout | Accurate clearing account balance |
| Failed transaction sync | Error identification without duplicate entries |
Integration readiness checklist:
For brands using QuickBooks Online or Xero, connecting Shopify with their accounting system can reduce repeated manual data entry.
SyncTools automates Shopify order sync, COGS recording, refund mapping, and payout reconciliation into QuickBooks Online and Xero — so your finance team starts peak season on solid footing.
Fashion brands often evaluate campaign performance using revenue, orders, and conversion rates.
However, returns and exchanges can materially change the final profitability of those sales.
Consider a fashion retailer that sells 200 dresses during a promotional campaign.
Assume:
The retailer initially reports $9,000 in gross profit before other expenses.
Now suppose 30 dresses are returned and fully refunded. The business issues $2,400 in refunds.
Of the returned dresses, 25 are resellable and five are damaged beyond resale, with no recovery value.
Assuming the relevant costs are adjusted appropriately, the simplified final position is:
| Metric | Amount |
|---|---|
| Initial sales | $16,000 |
| Customer refunds | -$2,400 |
| Net sales | $13,600 |
| COGS for 170 retained sales | $5,950 |
| Loss on five unsellable returned dresses | $175 |
| Gross profit after these adjustments | $7,475 |
This example excludes payment processing fees, return shipping, restocking expenses, and other operating costs.
It demonstrates why brands should connect refund activity with inventory condition and product costing.
Simply recording the customer refund does not provide the complete financial picture.
## Tracking COGS and Profit Margins Across Fashion SKUsPeak-season campaigns can create substantial differences in product profitability.
Some apparel variants sell quickly at limited discounts, while others require larger markdowns to clear inventory.
Finance teams should therefore analyze profitability beyond total store revenue.
Useful measures include:
SKU-level gross margin: Helps identify which product variants remain profitable after discounts.
Return rate by SKU: Highlights products associated with frequent sizing or quality-related returns.
Sell-through rate: Measures the proportion of available inventory sold during a period.
Inventory aging: Identifies older products that may require markdown or valuation review.
Contribution margin: Evaluates revenue after the relevant variable costs, including payment processing and fulfillment expenses.
These reports help fashion brands make better decisions about future purchasing, promotional pricing, and inventory allocation.
## Managing Shopify and Marketplace Payouts During Peak SeasonA high volume of orders does not necessarily mean an equivalent amount of cash will immediately appear in a business's bank account.
During peak season, payment settlements may include transactions from multiple days and deductions relating to previous orders.
For example, a Shopify payout received in December may contain transactions originating from late November.
Accounting teams should keep sales activity, payout settlement dates, and bank deposits appropriately reconciled.
A useful payout reconciliation process follows four steps:
Unexplained differences should be investigated rather than absorbed into miscellaneous accounting adjustments.
## Daily Accounting Checks During Peak Fashion SalesOnce seasonal promotions begin, accounting teams should monitor exceptions rather than postpone reconciliation until the promotional period ends.
A short daily review can help prevent small issues from becoming a larger month-end backlog.
| Daily accounting check | Purpose |
|---|---|
| Transaction synchronization | Identify missing or failed transactions |
| SKU mapping | Detect products assigned to incorrect records |
| Refund processing | Review incomplete or unmatched refunds |
| Payment gateway fees | Identify unexpected deductions |
| Payout reconciliation | Track deposits and outstanding balances |
| Inventory and COGS | Review unusual quantity or cost differences |
| Accounting exception report | Resolve problems before they accumulate |
The frequency of each check should match the business's transaction volume and operational risk.
## Post-Peak Season Fashion Accounting Reconciliation ChecklistThe end of a promotional campaign does not necessarily mean all associated financial activity is complete.
Payouts may still be pending, customers may initiate returns, and inventory adjustments may require review.
Use the following checklist after the sales period:
For campaigns close to year-end, finance teams should also carefully review transaction cutoff dates and returns-related reporting requirements.
## Common Fashion eCommerce Accounting Mistakes to AvoidEven established fashion brands can encounter accounting errors during peak sales periods.
| Accounting mistake | Potential impact | Preventive action |
|---|---|---|
| Missing variant-level SKUs | Incorrect inventory and cost records | Audit SKU mappings |
| Outdated product costs | Unreliable gross profit | Verify inventory costs |
| Treating refunds only as cash movements | Incomplete revenue and inventory adjustments | Connect refund and inventory accounting |
| Recording net payouts as sales | Misstated revenue and expenses | Reconcile gross activity and fees |
| Incorrect discount accounting | Unreliable margin analysis | Test promotional transactions |
| Ignoring damaged returns | Overstated recoverable inventory | Review return condition |
| Delaying reconciliation | Larger accounting backlogs | Monitor exceptions regularly |
The most practical prevention strategy is to test the accounting workflow before promotional transactions increase.
## How SyncTools Helps Fashion Brands Prepare for Peak SeasonFashion brands frequently manage accounting information across Shopify, marketplaces, inventory systems, payment processors, and accounting software.
When information is transferred manually between these systems, increased transaction volumes can create additional bookkeeping work.
SyncTools is an eCommerce accounting automation platform that connects supported sales channels with accounting systems such as QuickBooks Online and Xero.
Depending on the integration and configuration, SyncTools supports workflows involving:
### Product MappingSyncTools helps organize product-related transaction information according to configured accounting mappings, reducing the need for repetitive manual categorization.
### COGS AccountingSupported COGS workflows help businesses record product costs alongside relevant sales activity, improving the information available for financial reporting.
### Refund and Discount MappingSyncTools helps transfer supported refund and discount information into accounting workflows so these adjustments are not overlooked.
### Payment Fees and Payout ReconciliationBy organizing payment-related transactions, deductions, and settlements, SyncTools can help finance teams investigate payout differences and reconcile accounting balances.
### QuickBooks Online and Xero IntegrationsFashion businesses using supported integrations can connect eCommerce transaction data with their accounting software.
Depending on configuration, individual or summarized accounting records can be used to support different reporting requirements.
For peak-season preparation, the value of automation is not simply processing more orders. It is helping finance teams maintain consistent accounting records as transaction complexity increases.
Automation still requires appropriate configuration, financial review, and reconciliation controls.
Explore SyncTools to learn more about supported eCommerce accounting integrations.
## Fashion eCommerce Accounting Readiness ChecklistUse this final checklist to organize accounting preparation before, during, and after peak season.
### Before Peak SeasonPeak season offers significant sales opportunities for fashion and apparel brands, but the financial benefits depend on accurate accounting.
Product variants, promotional discounts, refunds, inventory costs, and delayed payouts can all affect reported profitability.
Preparing these accounting workflows before order volumes increase helps businesses reduce avoidable corrections and maintain better visibility into financial performance.
Map this process: eCommerce platform → transaction data → account mapping → accounting system → payout reconciliation → accountant review
SyncTools helps eCommerce businesses connect supported sales channels with QuickBooks Online and Xero, organize transaction data, and reduce repetitive accounting work.
Before your next seasonal campaign, review your product mappings, validate your COGS, test refund scenarios, and check payout reconciliation.
Prepare your fashion accounting for peak season with SyncTools.
UAE e-Invoicing is approaching, and for ecommerce businesses, preparing involves more than changing how invoices are generated.
Mandatory implementation begins on 1 January 2027 for businesses with annual revenue of AED 50 million or more. Businesses below AED 50 million move into mandatory implementation from 1 July 2027.
For ecommerce businesses selling through Shopify, WooCommerce, marketplaces, or multiple channels, the bigger question is:
Is the transaction data behind your invoices ready?
Orders, taxes, discounts, refunds, fees, credit notes, customer information, and accounting records can sit across several systems. Before relevant transactions can move through the UAE Electronic Invoicing System, businesses need to understand how this data reaches their accounting or ERP environment.
And for the first group, the timeline is already tight.
The UAE is introducing mandatory e-Invoicing in phases.
| Business category | ASP appointment deadline | Mandatory implementation |
|---|---|---|
| Annual revenue ≥ AED 50 million | 30 October 2026 | 1 January 2027 |
| Annual revenue < AED 50 million | 31 March 2027 | 1 July 2027 |
| Government entities | 31 March 2027 | 1 October 2027 |
Important: The June 2026 UAE Electronic Invoicing Guidelines show 31 July 2026 as the ASP appointment deadline for the ≥ AED 50 million group. The Ministry of Finance subsequently extended this deadline to 30 October 2026. The mandatory implementation date of 1 January 2027 remains unchanged.
For businesses in the first phase, e-Invoicing preparation is therefore no longer something to put on a 2027 roadmap.
It needs attention now.
## Why Ecommerce Businesses Have a Different Readiness ChallengeFor a traditional business, an invoicing process may look relatively straightforward:
Sale → Invoice → Accounting
Ecommerce can look very different:
Store/Marketplace → Payment → Order → Fees → Tax → Refund/Adjustment → Accounting/ERP → Reconciliation
One transaction can involve multiple systems before the final amount reaches the bank.
A Shopify order, for example, can include:
Marketplace transactions can add another layer because the marketplace, payment processor, seller, customer, and accounting platform may each hold different parts of the transaction.
That is why ecommerce businesses should not treat UAE e-Invoicing as an invoice-generation project alone.
It is also a data-readiness and systems-readiness project.
## First, Understand What UAE e-Invoicing Actually Means.Sending a PDF invoice by email does not make it an Electronic Invoice under the UAE framework.
The UAE Ministry of Finance defines an Electronic Invoice as structured invoice data that can be issued, transmitted, received, and processed electronically.
The UAE framework uses XML based on the applicable PINT-AE specifications.
So the transition is not simply:
Paper invoice → PDF invoice
It is closer to:
Business transaction → Structured invoice data → Accredited Service Provider → Peppol network → Buyer + tax reporting
For ecommerce businesses already using digital invoices, this distinction is important.
Your invoicing process may already be digital but not ready for the UAE Electronic Invoicing System.
## How Peppol Fits Into UAE e-InvoicingThe UAE Electronic Invoicing System uses a 5-Corner Model based on the Peppol framework.
In simplified terms:
Relevant tax information is also reported to the Federal Tax Authority (FTA).
The supplier's Accredited Service Provider validates and processes invoice data and transmits the required information through the network.
This introduces another important consideration for ecommerce businesses.
The ASP cannot fix every upstream data issue.
If required transaction information is incomplete, misclassified, or unavailable from the ecommerce and accounting systems feeding the process, businesses may face problems later in the invoice workflow.
That is why readiness needs to start before the ASP connection.
## B2B and B2G vs B2C: Know Which Transactions MatterThis distinction is particularly important for ecommerce businesses.
Under the current UAE framework, relevant transactions involving businesses and government entities fall within e-Invoicing requirements, subject to applicable rules and exclusions.
Transactions made to natural persons who are not conducting business are outside the Electronic Invoicing System.
In simple terms:
| Transaction | Current UAE e-Invoicing treatment |
|---|---|
| Business → Business | In scope |
| Business → Government | In scope |
| Government → Business | In scope |
| Government → Government | In scope |
| Business → Consumer | Outside the current scope |
For a pure B2C ecommerce store, this distinction may reduce the immediate transaction scope.
For businesses operating both B2C and B2B ecommerce, however, it creates another data requirement.
Imagine the same Shopify store receives:
They may all enter through the same storefront.
Their invoicing treatment may differ.
Businesses therefore need a reliable way to identify who the customer is and determine how the transaction should flow downstream.
Understand how B2B, B2G, and B2C transactions are treated under UAE e-Invoicing requirements.
Shopify and WooCommerce can hold rich transaction information.
But the more important question is:
What information actually reaches your accounting or ERP system?
Businesses should review how information such as the following moves downstream:
This becomes particularly important when e-commerce data is being summarised, manually entered, exported through spreadsheets, or passed between multiple applications.
The Ministry of Finance's own readiness guidance asks businesses to determine whether their accounting or ERP systems can extract the required Electronic Invoice data points.
That makes accounting integration part of e-Invoicing preparation, not an unrelated back-office project.
## Marketplace Sellers Need to Map Who Does WhatMarketplace sellers have another question to answer:
Who is responsible for the invoice?
A marketplace may process the transaction, collect payment, deduct fees, issue documentation, and transfer a net settlement to the seller.
That does not necessarily move the supplier's responsibility to the marketplace.
The UAE MoF guidelines state that for e-commerce supplies, responsibility for issuing an Electronic Invoice remains with the supplier even where an e-commerce platform issues an invoice on the supplier's behalf.
For every marketplace you sell through, document:
Do not assume every marketplace follows the same transaction flow.
## Refunds Cannot Stop at the Payment Gateway. Returns and refunds are routine ecommerce events.
But they matter more when invoice and accounting workflows need to stay connected.
Consider:
AED 1,000 order → Electronic Invoice → AED 250 product returned → AED 250 refund
The payment platform may process the refund.
But the financial story does not end there.
Accounting records and the applicable Electronic Credit Note process must also reflect what happened.
Under the UAE framework, Electronic Credit Notes can be required for circumstances including:
Ecommerce businesses should therefore test:
Order → Invoice → Full refund → Credit note
Order → Invoice → Partial refund → Partial credit note.
Order → Invoice → Subsequent adjustment → Correct accounting treatment.
The important question is whether these events remain connected across ecommerce, payment, accounting, and invoicing systems.
## Your Accounting or ERP System Sits at the Center of ReadinessThe Ministry of Finance specifically recommends that businesses identify changes required within their accounting, ERP, and invoicing systems.
For ecommerce companies, that means finance and technology teams need to work together.
Finance understands what needs to be recorded.
Your ecommerce platform holds the commercial transaction.
Your accounting or ERP environment holds the financial record.
Your ASP provides the connection required for the Electronic Invoicing System.
The complete workflow may therefore look something like:
Every connection matters.
## Where SyncTools Fits Into UAE e-Invoicing ReadinessFor ecommerce businesses, preparing the ASP connection is only part of the picture.
The data reaching your accounting system also matters.
This is where SyncTools can support the ecommerce-to-accounting side of the readiness journey.
SyncTools helps connect ecommerce transaction data with accounting workflows, including areas such as:
For businesses operating across ecommerce platforms and accounting systems, this can help reduce the gap between what happens in the storefront and what appears in the books.
For example:
Ecommerce platform → SyncTools → Accounting system → ASP/e-Invoicing workflow
SyncTools should not be considered a replacement for an Accredited Service Provider or represented as the Peppol/e-Invoicing compliance layer.
Its role is earlier in the process:
helping ecommerce businesses organize their transaction and accounting data before it supports downstream financial and e-Invoicing processes.
That distinction matters.
An ASP can connect to the UAE Electronic Invoicing System.
But e-commerce businesses still need to make sure the accounting data feeding that process reflects what actually happened across their stores, marketplaces, payments, refunds, and adjustments.
## Selecting an ASP Is Only One StepBusinesses within scope need to appoint an Accredited Service Provider and complete the required onboarding.
The MoF readiness guidance includes steps such as:
But appointing an ASP does not automatically make the rest of your ecommerce technology stack ready.
If your business has disconnected ecommerce and accounting data, address that problem alongside ASP onboarding.
## Test Real Ecommerce Scenarios, Not Just One Successful InvoiceEnd-to-end testing is an important part of the MoF implementation guidance.
For ecommerce businesses, testing should reflect what actually happens after customers start placing orders.
Do not test only a clean B2B sale.
Test:
Testing unusual transactions before go-live can reveal where data, integrations, or internal processes need attention.
Validate real-world orders, refunds, cancellations, and exceptions before going live.
The UAE e-Invoicing deadline tells you when your business needs to be ready.
It does not tell you whether the systems behind your invoices are ready.
For ecommerce businesses, preparation starts further upstream.
Can you trace a Shopify, WooCommerce, or marketplace transaction from the original order through taxes, fees, refunds, accounting, and reconciliation?
Can your accounting system access the downstream information it needs?
Can you distinguish B2B transactions from consumer orders?
Can you trace a partial refund back to the original sale?
And can your ecommerce data reach the accounting environment that will ultimately connect with your chosen ASP?
These are questions worth answering before go-live.
## Prepare Your Ecommerce Accounting Data for What's ComingSyncTools helps ecommerce businesses connect sales, refunds, fees, product data, tax mappings, COGS, and payout information with their accounting workflows.
If your business is preparing for UAE e-Invoicing, now is the time to review what happens before your accounting data reaches the ASP.
Review your ecommerce-to-accounting workflow with SyncTools and identify the data gaps you need to address before 2027.
Get your ecommerce accounting foundation ready for UAE e-Invoicing → Explore SyncTools.
## Frequently Asked Questions ### 1. When will UAE e-Invoicing become mandatory?Businesses with annual revenue of AED 50 million or more must implement it from 1 January 2027.
Businesses with annual revenue below AED 50 million must implement it from 1 July 2027.
Government entities follow from 1 October 2027.
Businesses should also note the earlier deadline for appointing an Accredited Service Provider.
### 2. What is the ASP deadline for businesses with revenue of AED 50 million or more?The latest Ministry of Finance update extended the ASP appointment deadline for this group to 30 October 2026.
The mandatory implementation date remains 1 January 2027.
Businesses relying on the June 2026 guidelines should therefore be aware that the original 31 July 2026 ASP date has subsequently been amended.
### 3. Does UAE e-Invoicing apply to B2C ecommerce orders?Under the current framework, supplies to natural persons who are not conducting business are outside the Electronic Invoicing System.
Businesses operating both B2B and B2C ecommerce should therefore be able to distinguish between different customer and transaction types.
### 4. Does UAE e-Invoicing apply to Shopify and WooCommerce businesses?The ecommerce platform itself does not determine whether a transaction falls within scope.
Businesses selling through Shopify, WooCommerce, marketplaces, or other ecommerce channels need to assess their transactions against the UAE e-Invoicing requirements.
Where transactions fall within scope, businesses also need to ensure the required transaction information reaches their accounting/ERP and downstream e-Invoicing workflow.
### 5. Are PDF invoices compliant with UAE e-Invoicing?A PDF sent by email is not, by itself, an Electronic Invoice under the UAE framework.
Electronic Invoices use structured data capable of automated electronic processing and follow the applicable UAE technical specifications.
### 6. What happens when an ecommerce customer receives a refund?Depending on the transaction and circumstances, a refund, cancellation, reduction in consideration, or return may require an Electronic Credit Note.
Ecommerce businesses should therefore connect refund workflows with their accounting and invoice-adjustment processes rather than treating payment refunds as isolated events.
### 7. Do ecommerce businesses need an Accredited Service Provider?Businesses subject to the UAE Electronic Invoicing System need to appoint an Accredited Service Provider according to the applicable implementation requirements and deadlines.
Businesses should use the official Ministry of Finance information when reviewing accredited providers.
### 8. Does SyncTools provide UAE e-Invoicing or Peppol compliance?SyncTools should not be considered a replacement for an Accredited Service Provider.
Its role is on the ecommerce-to-accounting side of the workflow, helping businesses move and organize ecommerce transaction data within accounting processes.
Businesses will still need to address their applicable ASP, Peppol, and UAE e-Invoicing requirements separately.
### 9. When should ecommerce businesses start preparing?Businesses with revenue of AED 50 million or more should already be preparing, as mandatory implementation begins 1 January 2027.
Businesses below the threshold have more time, but mapping e-commerce systems, cleaning accounting data, selecting an ASP, integrating systems, and testing workflows can require significant preparation.
Waiting until the mandatory implementation date means leaving the most important work until the end.
--- ## Fable England URL: https://synctools.ai/blog/fable-england-ecommerce-accounting Published: 2026-09-29 > How SyncTools untangled a multi-region eCommerce ledger and helped Fable England grow revenue by 22% CASE STUDY # How SyncTools Simplified Multi-Region eCommerce Accounting How SyncTools untangled a multi-region eCommerce ledger and helped Fable England grow revenue by 22% **22%** — Revenue growth after finance clean-up **3** — Regions unified — US, UK & EU **1** — Consolidated Xero parent-subsidiary structure ## Client Overview Fable England is a multi-channel eCommerce brand selling across the United States, United Kingdom, Australia, and wider Europe through channels including Shopify and Macy's. As the business scaled across regions and channels, its financial data grew faster than its financial infrastructure could keep up with. SyncTools was brought in to make sense of the books, unify the company's financial structure, and take over day-to-day bookkeeping so leadership could trust its numbers again. ## The Challenge When SyncTools team of CPA accountants and product engineers first opened Fable England's books, the scale of the disorganization became clear. - **Books that didn't add up.** Opening balances, intercompany transactions, the profit and loss statement, and payout data from Shopify and Macy's were all disconnected from one another and did not reconcile with actual sales. - **Duplicate data, distorted revenue.** Fable England was running [multiple accounting connectors](https://synctools.ai/integrations) at once, which created duplicate sales entries and left reported revenue showing a distorted, inaccurate picture of the business. - **No structural uniformity.** Sales spanned the US, UK, Australia, and Europe, each with its own currency and its own accounts configured under different regional rules, leaving no consistency in how currency and revenue were recorded. ## Our Approach The SyncTools team designed a plan to clean, restructure, and then manage Fable England's finances end-to-end. - **Clean-up first.** Selected a single threshold date and used it to draw a clean line under the historic mess, correcting and closing out everything before it before rebuilding forward. - **Entity restructuring.** Recommended and built a two-company structure in Xero, with one parent company and the remaining entities set up as subsidiaries, giving each region and currency a proper home while still consolidating cleanly at the top. - **Organized chart of accounts.** Rebuilt the chart of accounts with multiple sales accounts, each mapped to its own control account, so revenue from every channel and region rolled up accurately instead of piling into one another. - **Eliminated duplicate connectors.** Removed the redundant sync connectors that were creating duplicate sales, so Shopify, Macy's, and other channel payouts finally matched actual sales. - **Personalized the build.** Made targeted tweaks within SyncTools standard bookkeeping product to fit Fable England's specific operating model, rather than forcing a one-size-fits-all setup. - **Managed, audited bookkeeping.** Took over Fable England's full bookkeeping function, with every synced transaction audited and reviewed by SyncTools CPA team before being treated as final. - **Right-sized the tech stack.** Reviewed Fable England's existing tax technology and found Avalara was not the right fit for their needs, helping the business cut an unnecessary cost. ## The Team The engagement was led on the client side by Joe Hawkins, Head of Operations at Fable England, working closely with SyncTools Solutions' team of CPA accountants and product engineers, who managed the clean-up, the Xero restructuring, and the ongoing audited bookkeeping. ## The Results With clean, consolidated, and properly audited financial data, Fable England could finally see its business clearly. - **Granular visibility.** Sales performance became visible by product, by country, and by season, replacing guesswork with real numbers. - **Cross-team alignment.** Warehousing and other operational teams could align product launches and inventory decisions with actual, trustworthy sales data. - **Financial clarity.** Leadership could see its true, realized profits for the first time and use that clarity to forecast revenue and profitability for the year ahead. - **Revenue growth.** By organizing its books and outsourcing its finance department to SyncTools, Fable England grew revenue by 22%. ## From Uncertain Figures To Useful Decisions The work gave Fable England a clearer way to follow sales through its accounting records and review performance across the business. Leadership could assess realized profit and plan ahead using more dependable figures. Operations and warehousing teams could also connect their decisions to sales by product and market. For a business selling across several channels and regions, that visibility made the books more useful beyond month-end reporting. **Managing similar accounting complexity?** [Schedule a SyncTools demo](https://synctools.ai/schedule-a-demo) to discuss your sales channels, payouts and accounting setup. --- ## Ecommerce Inventory Management Software: 2026 Guide for Online Stores & DTC Brands URL: https://synctools.ai/blog/ecommerce-inventory-management-software Published: 2026-09-24For an ecommerce business, inventory is not simply stock sitting in a warehouse.
It is cash that has already left the business and is waiting to return through a sale.
Buy too much, and working capital gets locked into products that may take months to sell. Buy too little, and bestselling products disappear from stock just when customers are ready to purchase.
Add multiple SKUs, warehouses, Shopify stores, marketplaces, returns, suppliers, fulfillment partners, and changing product costs, and inventory management quickly becomes more complicated than updating quantities in a spreadsheet.
This is where ecommerce inventory management software becomes important.
The right system helps businesses understand what they have, where it is located, how quickly it is selling, what needs to be reordered, and how inventory activity affects COGS and profitability.
This guide covers three fundamental questions:
QUICK ANSWER
Ecommerce inventory management software helps online businesses track stock quantities, SKUs, locations, orders, purchases, inventory movements, and replenishment. More advanced workflows also connect inventory activity with product costs, COGS, accounting, and profitability.
Ecommerce inventory management is the process of planning, purchasing, storing, tracking, selling, returning, and replenishing products sold through online channels.
It answers basic operational questions such as:
But growing ecommerce businesses need to answer another question:
What is all of this inventory doing to our cash and profitability?
That distinction matters.
A warehouse system may tell you that 500 units remain.
Finance needs to understand what those 500 units are worth, how much COGS has already been recognized, whether costs have changed between purchases, and how much money remains tied up in stock.
## Why Ecommerce Inventory Management Gets Harder as You GrowInventory complexity rarely arrives all at once.
A business might begin with:
50 SKUs → One Shopify store → One warehouse
Then growth introduces:
500 SKUs → Shopify + marketplaces → 3PL → retail → multiple warehouses → international sales
Every additional channel creates another place where inventory can move.
The biggest challenges usually include:
| Challenge | Business Impact |
|---|---|
| Stockouts | Missed sales and poor customer experience |
| Overstocking | Cash tied up in slow-moving products |
| Incorrect stock quantities | Overselling and canceled orders |
| Multiple locations | Poor visibility into where stock actually sits |
| Returns | Differences between physical and recorded inventory |
| Changing product costs | Incorrect margins and COGS |
| Disconnected systems | Manual reconciliation and inconsistent reporting |
| Slow-moving inventory | Higher storage costs and weaker cash flow |
WHY THIS MATTERS
Inventory problems rarely stay inside the warehouse. They eventually appear in cash flow, gross margin, COGS, purchasing decisions, and financial reporting.
A useful inventory system should cover more than quantity-on-hand.
Here are the core capabilities to evaluate.
### 1. Inventory TrackingThe foundation is knowing:
For businesses operating multiple warehouses or fulfillment locations, location-level tracking becomes especially important.
Shopify, for example, supports separate inventory quantities for individual locations such as warehouses, retail stores, dropshipping apps, and fulfillment providers.
### 2. SKU and Variant ManagementInventory should normally be tracked at the actual sellable SKU level.
Consider a clothing brand selling one T-shirt in:
5 sizes × 4 colors = 20 variants
Although customers may see one parent product, each variant can have a different:
Without accurate SKU relationships, product-level decisions become much harder.
### 3. Multi-Channel Inventory VisibilityModern ecommerce rarely happens through one storefront.
Inventory may be sold through:
Online Store → POS → Marketplace → Social Commerce → Wholesale
The inventory system needs to maintain enough visibility across channels to reduce situations where multiple channels attempt to sell the same unavailable stock.
### 4. Order ManagementInventory and orders are inseparable.
When an order is confirmed, the system should correctly account for its effect on available inventory.
The workflow becomes more complicated when orders are:
Good inventory visibility therefore depends on order status being reflected correctly.
### 5. Purchase Order ManagementInventory management does not start when products reach the warehouse.
It starts when they are purchased.
Purchase order functionality helps businesses track:
Supplier → Quantity Ordered → Product Cost → Shipment → Receipt → Available Stock
Growing businesses should also monitor expected inventory so purchasing teams understand what is already on the way before placing another order.
### 6. Warehouse and Location TrackingA single inventory number becomes less useful once stock is distributed across locations.
For example:
| Location | Units |
|---|---|
| US Warehouse | 800 |
| Canada Warehouse | 250 |
| 3PL | 600 |
| Retail Store | 150 |
| Total | 1,800 |
Knowing that you own 1,800 units is useful.
Knowing where those units are available to fulfill demand is much more useful.
### 7. Returns ManagementReturns can make inventory accuracy difficult.
When a customer sends an item back, the business must determine whether it is:
Sellable → return to inventory
or
Damaged / unsellable → adjustment or write-off
A refund therefore does not automatically mean the item should return to available stock.
For businesses with significant return volume, the distinction can materially affect reported inventory and product profitability.
### 8. Inventory and Accounting IntegrationThis is where inventory management becomes financially meaningful.
Your inventory system may know:
25 Units Were Sold
Your accounting system needs to know:
What was the cost associated with those 25 units?
Inventory activity can affect:
Inventory Asset → COGS → Gross Profit → Balance Sheet → P&L
QuickBooks Online, for example, can track quantities on hand, restocking, product purchases, and COGS within supported inventory configurations.
ACCOUNTING CHECK
Having the correct number of units in your warehouse does not automatically mean your accounting is correct.
Quantity accuracy and inventory-value accuracy need to work together.
Software is useful only if it helps you make better decisions.
These metrics provide a clearer picture of inventory efficiency.
### Inventory Turnover RatioInventory turnover measures how frequently inventory is sold during a period.
Formula:
Inventory Turnover = COGS ÷ Average Inventory
Suppose:
COGS = $600,000
Average Inventory = $150,000
Inventory turnover:
$600,000 ÷ $150,000 = 4
The business turns its inventory approximately four times during the period.
A low turnover rate can signal excessive stock, weak demand, or slow-moving products, although appropriate benchmarks vary significantly by industry and product type.
### Days Inventory OutstandingDIO estimates how long inventory remains in the business before being sold.
Formula:
DIO = (Average Inventory ÷ COGS) × Days in Period
Using the same numbers:
Average inventory = $150,000
COGS = $600,000
For a 365-day year:
($150,000 ÷ $600,000) × 365 = 91.25 days
The business holds inventory for approximately 91 days on average.
### Sell-Through RateSell-through shows how much inventory received during a period was sold.
Formula:
Sell-Through Rate = Units Sold ÷ Units Received × 100
Example:
Received = 1,000 units
Sold = 700 units
Sell-through:
70%
This can be particularly useful for seasonal products, new collections, and product launches.
### Reorder PointThe reorder point indicates when replenishment should begin.
Formula:
Reorder Point = Average Daily Sales × Lead Time + Safety Stock
Example:
Daily sales = 20 units
Supplier lead time = 10 days
Safety stock = 100
Reorder point:
20 × 10 + 100 = 300 units
Once inventory reaches approximately 300 units, the business should consider initiating replenishment based on its purchasing policy.
### Safety StockSafety stock protects the business against unexpected demand or supplier delays.
It becomes particularly important when:
Track turnover, stock levels, sell-through, reorder points, and other key inventory metrics in one place. Automate inventory monitoring and make faster, more informed decisions as your ecommerce business grows.
Managing inventory well does not require one universal strategy.
Different SKUs require different approaches.
### Use ABC Inventory AnalysisABC analysis separates products based on their business importance.
A simple structure is:
| Category | Typical Characteristics | Management Priority |
|---|---|---|
| A | High-value or high-impact products | Closely monitored |
| B | Moderate-value products | Regular monitoring |
| C | Lower-value products | Simpler controls |
The exact percentage split should depend on the business rather than being treated as a rigid formula.
The important point is this:
Not every SKU deserves the same amount of purchasing attention.
### Consider FIFO Where AppropriateFIFO means First In, First Out.
Operationally, older inventory is sold or dispatched first.
For accounting, FIFO assigns older inventory costs to COGS first.
Consider:
100 units purchased at $15
100 units purchased later at $18
If 120 units are sold under FIFO:
100 × $15 = $1,500
20 × $18 = $360
COGS = $1,860
80 units remain at $18 each:
Ending Inventory = $1,440
The appropriate inventory costing method depends on applicable accounting requirements and the business's circumstances, so accounting policies should be reviewed with a qualified accountant.
### Identify Dead and Slow-Moving Stock EarlyDead inventory does more than consume warehouse space.
It traps cash.
A useful inventory dashboard should help identify products where:
The earlier a slow-moving product is identified, the more options the business has.
These might include:
Discounting → Bundling → Promotions → Reduced Purchasing → Product Discontinuation
PRACTICAL QUESTION
Don't only ask:
"How many units do we have?"
Ask:
"How long have we had them, what did they cost, and how quickly are they turning back into cash?"
Demand forecasting helps determine how much inventory should be purchased and when.
Useful inputs include:
Historical sales + seasonality + promotions + lead times + current stock + incoming inventory
For example, last year's sales alone may not be enough.
Suppose monthly sales usually average 2,000 units.
A major campaign planned next month is expected to increase demand by 35%.
Expected demand becomes approximately:
2,000 × 1.35 = 2,700 units
Purchasing teams must then compare expected demand with:
Inventory software should make those relationships easier to see.
## 5. Ecommerce Inventory Software vs Native Ecommerce Inventory ToolsPlatforms such as Shopify already provide useful inventory functionality.
Shopify can track products across multiple locations, manage quantities independently by location, and work with fulfillment services and apps.
For a simple business, this may be sufficient.
But requirements often expand as a business adds:
More SKUs + More Channels + More Warehouses + More Vendors + More Accounting Complexity
At that point, dedicated inventory, ERP, WMS, or accounting-connected systems may become necessary.
### When Native Inventory May Be EnoughNative ecommerce inventory functionality may work well when you have:
Consider specialized ecommerce inventory management software when you need:
When comparing systems, focus on business requirements rather than the longest feature list.
| Capability | Why It Matters |
|---|---|
| SKU-level tracking | Maintains accurate product visibility |
| Multi-location inventory | Tracks where stock physically sits |
| Multi-channel support | Reduces inventory inconsistencies |
| Purchase orders | Improves replenishment management |
| Supplier tracking | Supports purchasing decisions |
| Reorder alerts | Helps reduce stockouts |
| Forecasting | Improves purchase planning |
| Returns handling | Maintains inventory accuracy |
| Product costing | Improves margin visibility |
| COGS integration | Connects inventory to financial reporting |
| Accounting integration | Reduces disconnected data |
| API access | Supports future integrations |
| Reporting | Makes inventory data actionable |
BUYER CHECKLIST
Before choosing inventory software, ask:
There is no universal best inventory platform.
The better question is:
Which type of inventory system matches your operational complexity?
#### Small Ecommerce BusinessA smaller store may mainly need:
Stock tracking + low-stock alerts + basic purchasing + ecommerce integration
Built-in ecommerce inventory features may be sufficient.
#### Growing Ecommerce BrandA growing business may require:
Multi-location inventory + supplier management + purchase orders + forecasting + accounting integration
At this stage, spreadsheets usually become harder to maintain reliably.
#### Multichannel BrandA multichannel business may need:
Central inventory + channel synchronization + warehouse/3PL integration + SKU mapping + product-cost visibility
#### Complex or Enterprise OperationLarger businesses may require:
ERP + WMS + procurement + forecasting + inventory accounting + advanced reporting + customized integrations
Choose an inventory system that fits your business today and scales with your operations as you grow.
This distinction is particularly important.
Inventory software focuses primarily on the movement and availability of products.
Accounting software focuses on their financial impact.
Consider one ecommerce sale.
Operationally:
Financially:
This is why connecting ecommerce, inventory, and accounting data matters.
## 9. How Inventory Affects COGS and ProfitabilityImagine a store sells a product for:
Selling price: $100
Its product cost is:
$35
Gross profit before considering other costs:
$100 − $35 = $65
Now imagine the accounting system records the $100 sale but misses the $35 COGS.
Reported gross profit becomes:
$100
That creates an incorrect picture of profitability.
At higher volumes, these differences can become significant.
This is why finance teams need product costs and ecommerce transactions to reach accounting in a structured way.
KEY TAKEAWAY
Revenue tells you how much you sold.
Inventory and COGS help explain how much those sales actually cost.
You need both to understand gross profit.
SyncTools should not be positioned as a warehouse management system.
Its role is different.
It helps connect ecommerce transaction data with accounting systems so finance teams can maintain the financial side of ecommerce activity.
For Shopify and QuickBooks Online, SyncTools can synchronize items including orders, refunds, fees, taxes, COGS, payouts, products, and related accounting information. It also supports summarized journal entries or individual transaction syncing depending on the accounting workflow.
That creates a workflow such as:
Shopify → Orders & Product Activity → SyncTools → QuickBooks → Financial Reporting
SyncTools also supports product and category-based accounting mappings, which can help finance teams build more useful product-level reporting inside QuickBooks.
The goal is not to replace the operational inventory platform.
It is to help make sure ecommerce activity reaches accounting with the detail needed for:
Sales → Refunds → Fees → Taxes → COGS → Payouts → Reconciliation
## 11. Ecommerce Inventory Management Software Implementation ChecklistBuying software does not automatically fix an inventory process.
Before implementation, work through the following:
#### Clean Product DataStandardize:
Your new system needs a reliable starting point.
Incorrect opening quantities can carry errors forward.
#### Review SKU MappingOne SKU should represent the same sellable product consistently across connected systems wherever possible.
#### Define Inventory LocationsDocument every location holding inventory.
#### Review Costing PoliciesConfirm how product costs, landed costs, adjustments, and COGS should be handled.
#### Connect Ecommerce and Accounting SystemsDecide which information should move between:
Store → Inventory → Fulfillment → Accounting
#### Test Before Full RolloutUse a controlled period or sample products before moving the entire catalog.
#### Reconcile RegularlyCompare:
Physical inventory → Inventory system → Ecommerce platform → Accounting
Differences should be investigated rather than simply overwritten.
## 12. Common Ecommerce Inventory Management MistakesEven strong software cannot compensate for poor data.
Watch for these common problems:
Using duplicate SKUs
The same product exists under multiple identifiers.
Ignoring returns
Refunded products are returned financially but not operationally, or vice versa.
Reordering from intuition alone
Purchasing is based on instinct rather than velocity and lead time.
Ignoring product costs
Teams track quantities but have limited visibility into actual COGS.
Treating every SKU equally
Low-value products receive the same purchasing attention as major revenue drivers.
Over-relying on spreadsheets
Manual files become increasingly difficult to maintain as channels, SKUs, and locations multiply.
Disconnecting operations from finance
Warehouse data and accounting data tell different stories.
Inventory management is often treated as an operations problem.
It is also a cash-flow problem.
A stockout can cost revenue.
Overstock can trap working capital.
Incorrect product costs can distort margins.
Missing COGS can make profitability look stronger than it is.
And disconnected inventory and accounting systems can leave finance teams spending month-end trying to reconstruct what actually happened.
The right ecommerce inventory management software should therefore do more than tell you how many products are sitting on a shelf.
It should help your business understand:
For ecommerce finance teams, the final piece is making sure those operational events are properly represented in accounting.
SyncTools connects ecommerce activity with accounting data, helping turn orders, refunds, fees, taxes, COGS, payouts, and product information into financial records that are easier to review, reconcile, and use for decision-making.
Connect your ecommerce sales and product activity with your accounting workflow using SyncTools.
Keep COGS, refunds, fees, taxes, payouts, and product reporting connected to the numbers your finance team actually uses.
Ecommerce inventory management software helps online businesses monitor stock, SKUs, inventory locations, purchases, sales, transfers, returns, and replenishment. More advanced systems may also support forecasting, supplier management, product costing, and integrations with accounting software.
### Why do ecommerce businesses need inventory software?As ecommerce businesses add products, warehouses, and sales channels, manually keeping inventory accurate becomes increasingly difficult. Inventory software creates better visibility into quantities, locations, sales velocity, replenishment, and inventory movement.
### Does Shopify have inventory management?Yes. Shopify provides inventory tracking and supports quantities across multiple locations such as stores, warehouses, and compatible fulfillment services. Businesses with more complex operational, forecasting, purchasing, manufacturing, or accounting needs may require additional software.
### Can QuickBooks manage inventory?QuickBooks Online provides inventory functionality in supported configurations, including quantity-on-hand tracking, low-stock alerts, purchasing, restocking, and inventory reports. Availability varies by plan and configuration.
### What is the difference between inventory and COGS?Inventory generally represents products that remain unsold and are held as an asset. COGS represents the cost assigned to products that have been sold during the accounting period.
### What is the best inventory management method for ecommerce?There is no single method that fits every ecommerce business. FIFO, weighted-average costing, ABC analysis, safety-stock planning, and reorder-point management solve different parts of the inventory problem. Accounting-costing policies should also follow applicable standards and professional accounting guidance.
### What should I look for in ecommerce inventory software?Focus on SKU tracking, multi-channel support, multiple locations, purchase orders, returns, forecasting, inventory costing, supplier management, reporting, accounting integration, and the ability to support increasing transaction volume.
### Does inventory management software integrate with accounting software?Many inventory platforms offer accounting integrations. The important question is not only whether an integration exists but which data actually moves between the systems, such as product quantities, inventory value, COGS, purchases, refunds, and adjustments.
--- ## What Is Deferred Revenue? Meaning, Accounting, Examples & Why It's a Liability URL: https://synctools.ai/blog/what-is-deferred-revenue Published: 2026-09-18Getting paid does not always mean you have earned the revenue.
A customer may pay today for a product that will ship next month, a subscription covering the next 12 months, or a service that will be delivered over time. The business has the cash, but it still owes something to the customer.
That is where deferred revenue comes into accounting.
Deferred revenue represents money received from a customer before the related goods or services have been fully provided. Instead of recognizing the entire payment as revenue immediately, the business records an obligation and recognizes revenue when that obligation is fulfilled.
For eCommerce businesses, this can become particularly relevant with pre-orders, subscriptions, backorders, memberships, and other situations where payment and fulfillment happen at different times.
This guide explains what is deferred revenue, why it appears as a liability, how deferred revenue accounting works, and what it can look like in an eCommerce business.
Deferred revenue is money received before a business has delivered the related goods or services. It is recorded as a liability until the revenue is earned.
Because the business has not yet completed its obligation, the amount generally cannot be treated as earned revenue immediately.
Instead, it is recorded as a liability until the promised product or service is provided.
Consider a simple example.
A customer pays an online retailer $500 in September for furniture that will not ship until October.
The retailer has received $500 in cash. However, if the criteria for revenue recognition have not yet been satisfied, the $500 is recorded as deferred revenue rather than sales revenue.
Once the relevant performance obligation is satisfied, the business can move the appropriate amount from deferred revenue into revenue.
Under IFRS 15, when a customer pays before the business transfers the promised goods or services, the business records a contract liability. Revenue is then recognized as the related performance obligation is satisfied.
### Deferred Revenue Meaning in Simple TermsThe easiest way to understand the deferred revenue meaning is:
The customer has paid, but the business still owes the customer something.
Think of deferred revenue as revenue that is waiting to be earned.
The cash may already be sitting in the company's bank account, but accounting looks at more than when the money arrives. It also considers whether the business has actually delivered what the customer paid for.
## How Does Deferred Revenue Work?Deferred revenue usually involves two different events:
1. The customer pays the business
Cash is received, but the product or service is still outstanding.
2. The business fulfills its obligation
Once the required goods or services are delivered, the appropriate amount can be recognized as revenue.
For example, imagine an eCommerce brand accepts a $300 pre-order.
When the customer pays:
| Account | Debit | Credit |
|---|---|---|
| Cash / Clearing Account | $300 | |
| Deferred Revenue | $300 |
At this stage, cash increases, but revenue has not yet been recognized.
Later, when the product is fulfilled and the relevant revenue-recognition requirements are met:
| Account | Debit | Credit |
|---|---|---|
| Deferred Revenue | $300 | |
| Sales Revenue | $300 |
The liability decreases, and revenue is recognized.
The exact accounting treatment depends on the transaction, contract terms, applicable accounting standards, and the business's accounting policies.
## Is Deferred Revenue a Liability?Yes. Deferred revenue is generally recorded as a liability because the business has received payment but still owes goods or services to the customer.
Receiving the money creates an obligation.
Until that obligation is fulfilled, the business may have to:
That outstanding obligation is why deferred revenue normally appears on the liability side of the balance sheet.
## Why Is Deferred Revenue a Liability?A common question is: Why is deferred revenue a liability if the company already has the money?
Because revenue recognition and cash receipt are not always the same event.
Suppose a customer pays $1,200 upfront for a 12-month subscription.
The business receives all $1,200 immediately. But assuming the service is provided evenly throughout the year, it may need to recognize the revenue over the service period rather than treating the entire $1,200 as revenue on day one.
The remaining unearned portion represents an obligation to continue providing the service.
This is why the business may initially record the payment as a liability and gradually reduce that liability as its obligations are fulfilled.
IFRS 15 describes a contract liability as an obligation to transfer goods or services to a customer where payment has already been received or is due.
Track deferred revenue, recognize revenue accurately, and stay on top of your financial obligations with smarter accounting workflows.
Deferred revenue can be a current liability, but it is not automatically current in every situation.
The classification generally depends on when the business expects to satisfy the underlying obligation.
If the product or service is expected to be delivered within the business's normal operating cycle or the applicable period for current-liability classification, the deferred amount will generally be presented as current.
For example:
A retailer receives payment today for a product shipping next month.
That deferred revenue would normally fall into the current portion of liabilities.
However, suppose a company receives an advance payment covering services extending over several years. Depending on the facts, accounting framework, and reporting requirements, part of the obligation may need to be classified separately from the current portion.
So when someone asks "is deferred revenue a current liability?", the more accurate answer is:
Often, yes, but the classification depends on when the underlying obligation is expected to be fulfilled.
## Is Deferred Revenue an Asset?No. Deferred revenue itself is not an asset.
The confusion often comes from the fact that the business receives cash.
Cash is an asset.
Deferred revenue is the corresponding liability created because the business still owes the customer a product or service.
For example, if a company receives $5,000 in advance:
Assets
Cash: +$5,000
Liabilities
Deferred Revenue: +$5,000
The cash increases the company's assets, while deferred revenue represents the obligation associated with that payment.
So for the question "is deferred revenue an asset?", it is important to separate the cash received from the accounting obligation created by the advance payment.
## Deferred Revenue Accounting Explained Deferred revenue accounting is based on the idea that revenue should be recognized when the appropriate revenue-recognition conditions are satisfied, rather than simply when payment reaches the bank.
Under IFRS 15, businesses recognize revenue to reflect the transfer of promised goods or services to customers. The framework includes identifying the contract and performance obligations, determining and allocating the transaction price, and recognizing revenue when those obligations are satisfied.
Although the details can become complex, a basic deferred revenue workflow looks like this:
For finance teams, the challenge becomes keeping these stages properly reflected in the accounting system.
This can become harder when a business has hundreds or thousands of orders moving through different fulfillment stages at the same time.
## Deferred Revenue Example: Annual SubscriptionSuppose a business sells an annual subscription for $1,200 and the customer pays the entire amount upfront.
Rather than immediately recognizing $1,200 of revenue, the accounting treatment may recognize revenue over the period in which the service is provided.
For a service provided evenly across 12 months, that could mean recognizing:
$1,200 ÷ 12 = $100 per month
Initially:
After the first month:
After six months:
The liability continues decreasing as the company provides the service.
## Common Examples of Deferred RevenueDeferred revenue is not limited to software subscriptions. Businesses across different industries can encounter it.
### Pre-ordersA customer may pay for a product weeks or months before it becomes available.
Until the appropriate fulfillment or revenue recognition condition is met, the payment may need to remain deferred.
### Subscription ProductsAn eCommerce company may collect payment upfront for monthly subscription boxes or recurring products.
Revenue recognition should reflect when the underlying goods or services are provided.
### MembershipsBusinesses selling annual memberships often receive the full membership fee before completing all of the associated services.
### Gift CardsA business receives cash when the gift card is purchased but generally has an outstanding obligation until the card is redeemed or other applicable recognition criteria are met.
### Backorders and Delayed FulfillmentAn online seller might accept payment even though an item will not ship immediately.
Depending on the circumstances and accounting policy, this can create deferred revenue until the relevant obligation has been fulfilled.
## Deferred Income vs Deferred RevenueDeferred income and deferred revenue are often used to describe the same basic concept: payment received before the related revenue has been earned.
You may also see terms such as:
The terminology used can vary according to the accounting framework, accounting software, organization, or context.
The underlying idea remains similar: the business has received consideration but still has an obligation to the customer.
## Deferred Revenue vs Accrued RevenueDeferred revenue and accrued revenue can sound similar, but they represent almost opposite situations.
| Deferred Revenue | Accrued Revenue | |
|---|---|---|
| Payment received? | Yes, generally before revenue recognition | Not yet |
| Goods/services delivered? | Not fully | Generally already provided |
| Typical balance sheet classification | Liability | Asset |
| Main issue | Cash arrived before revenue was earned | Revenue was earned before cash arrived |
With deferred revenue, cash comes first.
With accrued revenue, earning the revenue comes first.
Understanding this distinction helps keep revenue, receivables, cash, and liabilities properly separated.
## How Deferred Revenue Affects Financial Statements 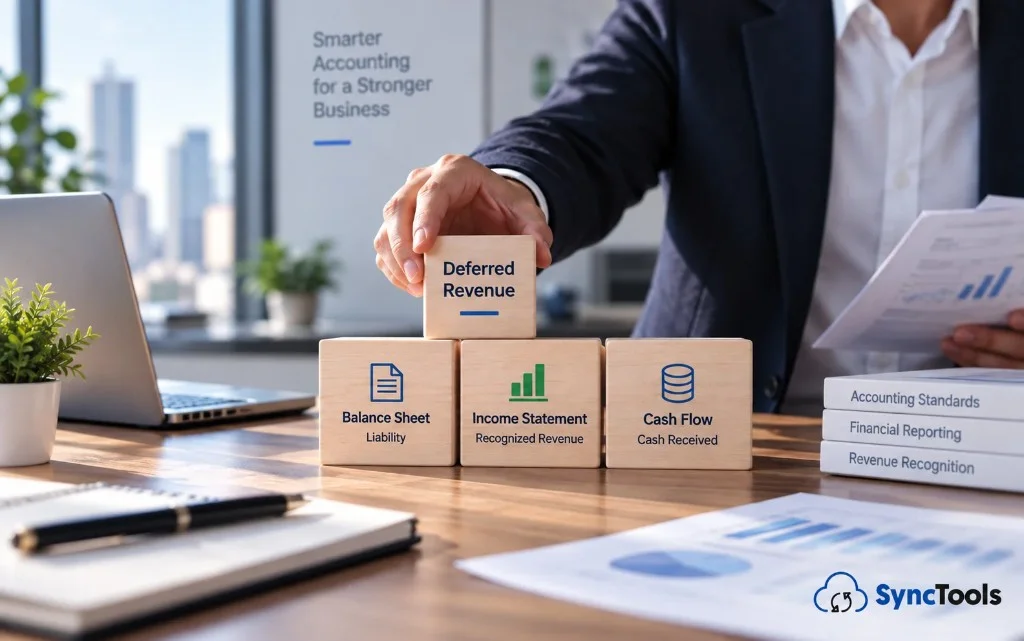Deferred revenue can affect several parts of a company's financial reporting.
### Balance SheetThe unearned amount appears as a liability rather than revenue.
As the business satisfies its obligations, the liability decreases.
### Income StatementDeferred revenue does not become reported revenue simply because cash has been collected.
The appropriate portion reaches the income statement when the applicable revenue-recognition criteria are satisfied.
### Cash FlowThe company may receive cash before recognizing the related revenue.
This means cash inflow and reported revenue can occur in different accounting periods.
That distinction is important when analyzing business performance. A strong month for customer collections does not always mean the same amount should appear as revenue for that month.
## Why Deferred Revenue Matters for eCommerce BusinessesFor an eCommerce business processing a few orders, tracking payment and fulfillment manually may seem manageable.
The situation changes at scale.
Consider a store handling:
The payment date and fulfillment date may not always match.
If every paid Shopify order is automatically treated as earned sales revenue without considering fulfillment and applicable revenue-recognition rules, accounting records may recognize revenue earlier than intended.
The finance team then has to identify which orders remain unfulfilled, calculate what should stay deferred, move amounts between accounts, and repeat the process when fulfillment occurs.
This is where transaction volume turns a straightforward accounting concept into an operational accounting problem.
## How SyncTools Manages Deferred Revenue for Shopify and QuickBooksSyncTools includes deferred revenue management for Shopify + QuickBooks Online, allowing businesses to account for qualifying payments based on Shopify fulfillment status.
A business first creates an appropriate Deferred Revenue account in QuickBooks and enables the deferred revenue configuration within SyncTools.
The business can then configure how fulfillment should affect recognition.
For example, SyncTools supports rules that can recognize revenue when:
Businesses can also configure the feature for all applicable Shopify orders or subscription orders, depending on their accounting requirements.
For an unfulfilled qualifying order, SyncTools can record the amount against the configured deferred revenue account.
When the applicable fulfillment condition is reached, SyncTools can generate the corresponding accounting entry that reduces deferred revenue and records the amount to the relevant sales account.
This connects Shopify fulfillment activity with the accounting workflow in QuickBooks without requiring finance teams to manually identify and reclassify every eligible transaction.
Learn how to configure it:
Shopify + QuickBooks Deferred Revenue Setup with SyncTools
Even though the concept is straightforward, several practical issues can affect deferred revenue accounting.
### Recognizing Revenue as Soon as Payment ArrivesA bank deposit does not necessarily determine when revenue should be recognized.
The underlying transaction and performance obligations need to be considered.
### Mixing Deferred Revenue With Accounts ReceivableAccounts receivable generally represents money customers owe the business.
Deferred revenue represents money the business has received while still owing something to the customer.
They serve very different accounting purposes.
### Forgetting Partially Fulfilled OrdersOne order can contain several products with different fulfillment dates.
Businesses need an accounting policy that determines how these situations should be handled.
### Leaving Fulfilled Orders in Deferred RevenueRevenue should not remain deferred indefinitely after the relevant obligation has been satisfied.
Regular reconciliation helps identify amounts that should have been recognized.
### Applying One Rule to Every TransactionSubscriptions, pre-orders, standard product sales, memberships, and long-term service arrangements may not have identical revenue-recognition requirements.
Your accounting treatment should reflect the nature of the transaction and the accounting framework applicable to your business.
## Final ThoughtsUnderstanding what is deferred revenue starts with one simple distinction: receiving cash and earning revenue are not always the same thing.
When customers pay before the business has fulfilled its obligation, the amount may initially be recorded as deferred revenue, deferred income, or a contract liability.
That explains both why deferred revenue is a liability and why it should not be confused with an asset.
For eCommerce companies, the concept becomes increasingly important as pre-orders, subscriptions, backorders, and split fulfillments grow.
Having the right accounting rules, transaction mappings, fulfillment data, and accounting integration can help finance teams keep revenue recognition aligned with what is actually happening in the business.
SyncTools can connect Shopify fulfillment activity with QuickBooks deferred revenue accounting, helping businesses move qualifying transactions from deferred revenue to sales based on configured fulfillment rules.
## Frequently Asked Questions About Deferred Revenue ### What is deferred revenue?Deferred revenue is payment received from a customer before the business has fulfilled the related goods or services. Until the applicable revenue-recognition conditions are satisfied, the amount is generally recorded as a liability rather than revenue.
### Is deferred revenue a liability?Yes. Deferred revenue is generally a liability because the company has received payment while still having an obligation to provide goods or services to the customer.
### Why is deferred revenue a liability?It is a liability because the business still owes the customer something. Once that obligation is satisfied, the relevant amount can be moved from deferred revenue into recognized revenue.
### Is deferred revenue a current liability?Deferred revenue is commonly recorded as a current liability when the related obligation is expected to be fulfilled within the applicable current period or operating cycle. Amounts associated with longer-term obligations may require different classification.
### Is deferred revenue an asset?No. Deferred revenue is a liability. The cash received from the customer is an asset, while deferred revenue represents the corresponding obligation to provide goods or services.
### What is deferred income?Deferred income is another term commonly used for income received before it has been earned. In many accounting contexts, deferred income and deferred revenue refer to the same general concept.
### Where does deferred revenue appear on the balance sheet?Deferred revenue normally appears in the liabilities section of the balance sheet. Depending on when the obligation will be satisfied, amounts may be classified according to applicable current and non-current presentation requirements.
### When does deferred revenue become revenue?Deferred revenue becomes recognized revenue when the business satisfies the applicable performance obligation and meets the relevant revenue-recognition criteria.
### What is an example of deferred revenue in eCommerce?A common example is a customer paying today for a pre-order that will ship later. Until the appropriate recognition condition is met, the payment may remain in a deferred revenue account rather than immediately being treated as sales revenue.
### Can SyncTools manage deferred revenue for Shopify orders?Yes. SyncTools provides deferred revenue configuration for Shopify + QuickBooks Online. Businesses can configure revenue handling based on Shopify order fulfillment, including rules for complete or partial fulfillment.
--- ## Ecommerce Demand Forecasting: How to Predict Sales, Plan Inventory, and Improve Profitability URL: https://synctools.ai/blog/ecommerce-demand-forecasting Published: 2026-09-17Ecommerce businesses have plenty of data to work with, from product sales and customer orders to inventory, refunds, advertising, and marketplace fees. The challenge is turning that data into a useful view of what might happen next.
That is where ecommerce demand forecasting comes in. It uses past sales and other relevant factors to estimate future demand, helping businesses decide what to stock, when to reorder, and how much cash to set aside.
A good forecast is not about predicting sales perfectly. It is about giving teams better information for purchasing, inventory, promotions, and financial planning.
This guide explains how ecommerce demand forecasting works, what data you need, which methods you can use, and how to connect forecasting with inventory and profitability decisions.
Ecommerce demand forecasting is the process of estimating how much customers are likely to buy over a future period using historical sales, market conditions, seasonality, pricing, promotions, and other relevant factors.
Past sales are a useful starting point, but they do not tell the whole story. Instead of simply adding a percentage to last year’s numbers, look at trends, promotions, competitor activity, stock availability, and other factors that may have affected sales.
Demand and sales forecasting are related, but they focus on different things. Sales forecasting estimates expected revenue or orders, while demand forecasting estimates how many units customers are likely to want, even when stock shortages affect actual sales.
This is important because a drop in sales does not always mean lower demand. For example, if a product was out of stock in July, customers may still have wanted to buy it. A good forecast helps businesses decide what to buy, when to buy it, and how much money to set aside.
### Demand Is Not Always the Same as Observed SalesA common forecasting mistake is treating historical sales as a perfect representation of historical demand.
They are not always the same.
Observed sales = what customers actually purchased.
Demand = what customers would have purchased if the product had been available under the relevant conditions.
Consider a simple example.
A Shopify store had 1,000 units of a product available in January and sold 800.
In February, demand increased, but the business only had 300 units available and sold all 300.
Looking only at sales history could suggest:
January: 800 units
February: 300 units
A simple forecasting model might conclude that demand fell sharply.
But the inventory data tells a different story.
The business sold out.
The 300 units represent constrained sales, not necessarily the full level of customer demand.
This is why demand forecasting should consider:
The distinction matters because a forecast based on constrained sales can systematically underestimate future demand and contribute to repeated stockouts.
### A Practical Forecasting PrincipleBefore asking:
"How many units did we sell?"
also ask:
"Could we have sold more if we had had the inventory available?"
That question is particularly important for high-volume SKUs, seasonal products, and products with long supplier lead times.
## Why Is Demand Forecasting Important for Ecommerce?Forecasting helps ecommerce teams plan ahead with more confidence. It can guide stock levels and purchase timing, prepare for seasonal demand, and help set aside cash for inventory and supplier payments.
Too much stock ties up cash and increases storage costs, while too little stock can lead to missed sales and lost revenue. It also helps with supplier planning. Since orders often need to be placed weeks or months in advance, a forecast helps businesses decide what to order and prepare for busy seasons.
Forecasting can also help businesses make smarter promotion and product decisions. It shows whether a discount is likely to drive enough extra sales to be worthwhile. It can also help identify which products to promote more and which ones may not be worth keeping.
## What Data Do You Need for Ecommerce Demand Forecasting?A forecast is only as good as the data behind it. Revenue alone is not enough because it shows what customers paid, not why sales changed or what the business earned from those sales.
Historical sales data gives you the starting point for a forecast. This includes the number of units sold for each SKU, across different sales channels and time periods. Having 12–24 months of data can also help reveal seasonal trends and recurring changes in demand.
Inventory data is just as important. If a product has lower sales for a few weeks, it does not necessarily mean customers are losing interest. The product may have been out of stock. Without considering inventory levels, a forecast can mistake limited availability for lower demand and lead to the same stockout happening again.
Separate pricing and promotion data from baseline sales. A spike caused by a 30%-off promotion should not automatically become the new expected demand level.
Customer and marketing data—such as traffic, ad spend, and conversion rates can help explain whether sales growth came from lasting demand or a temporary acquisition push.
Returns and refunds also matter. A product with a high return rate may generate strong gross sales but much lower net demand. Forecasting should account for that difference.
COGS and profitability data complete the picture. They help answer a question that sales data alone cannot: is rising demand for this product actually good for the business?
The key point is simple: looking only at revenue does not show the full picture. A useful forecast also needs to consider sales, inventory, and other factors that affect demand.
## What Factors Affect Ecommerce Demand?Demand does not move in a vacuum. A useful ecommerce forecasting process considers the factors that can change customer behavior.
Seasonality can be calendar-driven, such as holiday or back-to-school demand, but some categories also move with weather, school years, or industry-specific cycles.
Pricing affects both how much a product sells and how much profit it makes. A lower price may bring in more sales but reduce profit, while a higher price may mean fewer sales but better margins.
Promotions can also cause a short-term jump in sales. Keep these spikes separate from the normal sales trend when forecasting.
Product lifecycle also matters. A new SKU, a growing bestseller, a mature product, and a declining product should not all be forecast in the same way.
Competitor pricing, launches, promotions, and stock availability can shift demand even when nothing changes within your own business.
Customer behavior can also change through repeat purchase rates, average order value, and changing category preferences.
Supply constraints affect demand indirectly. Repeated stockouts can cause customers to switch permanently to another seller or product.
Finally, broader conditions such as inflation, consumer confidence, or category-wide slowdowns can affect demand independently of product performance.
## Types of Ecommerce Demand ForecastingThe right forecast depends on two things: how far ahead you are planning and how detailed the forecast needs to be.
### By Forecasting PeriodShort-term forecasting covers the next few weeks or months. It helps with reorder timing, stock levels, fulfillment, and near-term promotions.
Medium-term forecasting looks further ahead to support supplier orders, seasonal inventory builds, and cash planning.
Long-term forecasting supports broader decisions such as product launches, warehouse capacity, and annual planning. These forecasts are useful for identifying direction, but they are naturally less precise.
### By Level of DetailSKU-level forecasting estimates demand for individual products and is especially useful for purchasing and replenishment decisions.
Category-level forecasting looks at broader product groups and can help identify changing customer preferences or category growth.
Channel-level forecasting helps businesses understand expected demand across websites, marketplaces, or other sales channels.
In practice, businesses may use several levels at once. For example, a seller might use SKU-level forecasts for replenishment while using category and channel forecasts for broader purchasing and financial planning.
From SKU-level replenishment to channel and seasonal planning, get the insights you need to predict demand, optimize inventory, and make smarter purchasing decisions.
There is no single best method. The right approach depends on the amount and quality of historical data, demand stability, seasonality, and the decision being made.
Historical sales analysis is the simplest starting point. It works well for stable products but can be misleading if stockouts, promotions, or unusual events aren't identified and adjusted for.
Moving averages use sales from a recent period to calculate an average and estimate future demand. They are simple and work well for products with fairly steady sales, but they may not react quickly when demand suddenly changes.
Time-series forecasting uses past sales to spot trends and seasonal patterns. It works well when products have consistent buying patterns and enough sales history.
Regression analysis looks at how factors such as price, promotions, advertising, or the day of the week affect demand. It helps explain what drives changes in sales.
AI and Machine Learning can work with large datasets and forecast demand across many SKUs. However, the results are only as reliable as the data being used.
For most ecommerce businesses, you don't need one method for everything. Simpler methods may work well for steady products, while more advanced models can help with products with higher sales volumes or more complex demand.
 ## How to Create an Ecommerce Demand ForecastBuilding a forecast should be a repeatable process, not a one-time analysis.
Forecasting and inventory planning go hand in hand. Forecasting shows how much customers may buy, while inventory planning helps decide what to order, when to order it, and how much extra stock to keep.
Supplier lead time determines how far ahead the forecast needs to look. With an eight-week lead time, for example, the purchasing decision is based on a forecast made well before actual demand is known.
The reorder point is the stock level that tells you when to place a new order. It covers expected demand while you wait for the shipment, plus some extra stock as a buffer.
Safety stock acts as a backup when demand is higher than expected, or deliveries are delayed. Products with less predictable sales or longer lead times usually need more safety stock, while stable products can get by with less.
Purchase planning combines expected demand, reorder points, safety stock, supplier lead times, and minimum order quantities to determine the order quantity and timing.
When these pieces are disconnected, businesses can end up holding too much stock in slow-moving SKUs while running out of products with stronger demand.
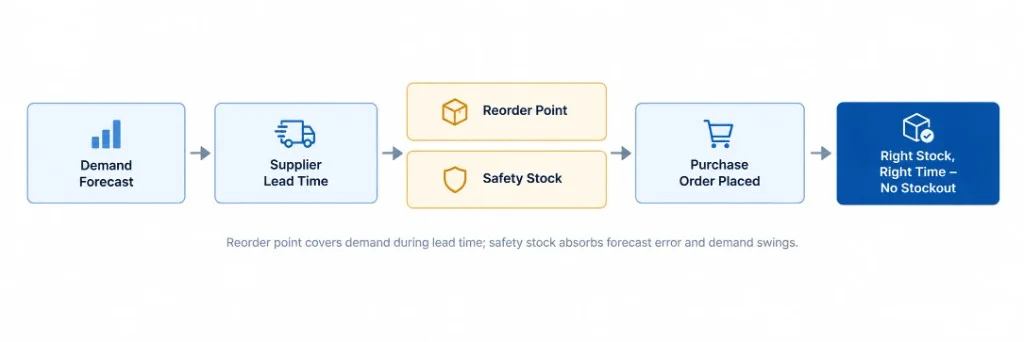| Forecasting Input | Inventory Decision it Drives |
|---|---|
| Expected demand during lead time | Reorder point |
| Demand volatility | Safety stock level |
| Full forecast period demand | Purchase order quantity |
| Supplier lead time | How far ahead the order must be placed |
Demand forecasting is usually thought of as an ecommerce or supply-chain problem.
In practice, finance data can materially improve the quality of the decisions that follow the forecast.
Consider a product that generated $100,000 in gross sales.
That number alone does not tell the purchasing team whether increasing inventory is a good decision.
Finance and accounting data can add important context:
Sales → Discounts → Refunds → COGS → Fees → Fulfillment → Contribution Margin
This helps separate:
High demand
from
High-value demand.
For example, two SKUs may each be forecast to sell 1,000 units.
| Metric | SKU A | SKU B |
|---|---|---|
| Forecast units | 1,000 | 1,000 |
| Selling price | $100 | $100 |
| Unit COGS | $70 | $40 |
| Returns | 12% | 4% |
| Marketplace/payment costs | High | Moderate |
| Expected contribution | Lower | Higher |
The forecasted unit demand is identical.
The inventory and financial decision may not be.
This is why ecommerce forecasting works better when sales data can be evaluated alongside inventory, COGS, refunds, returns, fees, and settlement data.
### Where Accounting Integrations HelpFor businesses selling through Shopify, Amazon, and other channels, these data points may sit across multiple systems.
An ecommerce accounting integration can help create a more consistent underlying dataset by connecting transaction information with accounting records.
For example, SyncTools can help connect ecommerce transaction data with accounting platforms such as QuickBooks Online and Xero, including relevant sales, refunds, fees, COGS, and payout information according to the configured accounting workflow.
The purpose is not to make the accounting system replace a forecasting platform.
It is to reduce the data gaps between what the ecommerce business sold, what it cost, what was refunded, what fees were incurred, and what ultimately reached the accounting system.
That gives finance and ecommerce teams a more reliable foundation for analyzing product economics alongside demand.
## How Demand Forecasting Can Improve Ecommerce ProfitabilityHigher sales do not always mean higher profit. A product may sell quickly but still deliver weak margins after COGS, marketplace fees, fulfillment costs, advertising, returns, and refunds are taken into account.
For example, a high-volume SKU with expensive fulfillment and frequent returns may contribute less profit than a lower-volume product with healthier margins. Looking at these costs alongside expected demand gives businesses a better basis for deciding what to stock, promote, discount, or scale.
Together, these inputs help estimate contribution margin by SKU. That makes the forecast more useful for deciding what to stock, promote, discount, or scale.
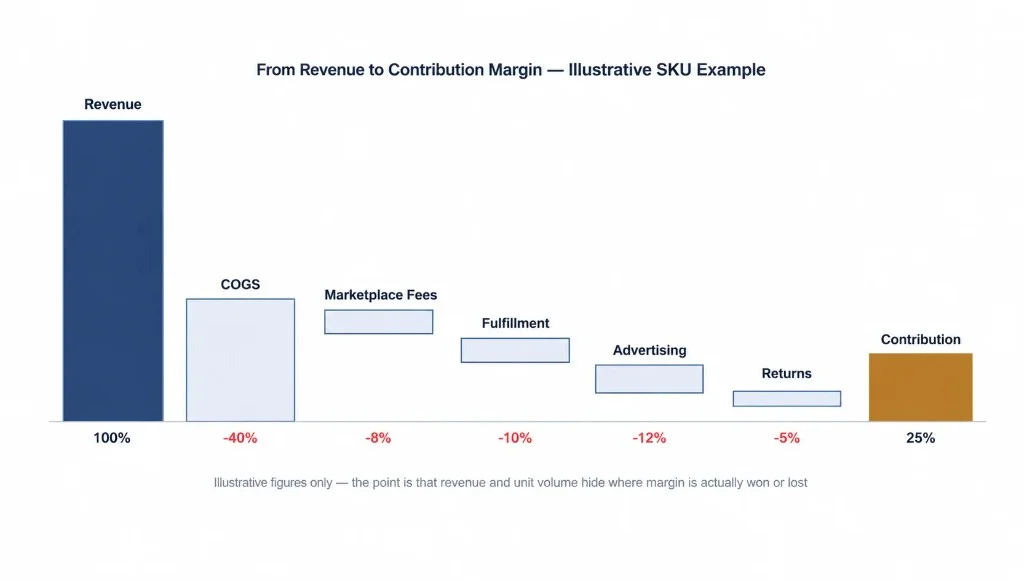 ## Common Ecommerce Demand Forecasting MistakesMost forecasting issues come from a few common mistakes:
Most of these aren’t methodology problems they’re data and process problems. A sophisticated forecasting model built on fragmented, uncleaned data will still produce an unreliable forecast.
## How to Measure Ecommerce Forecast AccuracyForecasting only becomes useful when you check how closely it matches actual demand. Compare your forecast with actual sales for each period and SKU, then look at where the biggest gaps occurred.
A few common measures can help:
Forecast variance shows the difference between forecasted and actual demand. It helps identify which products or periods had the largest misses.
Forecast error shows how far the forecast was from actual demand, often as a percentage. This makes it easier to compare products with different sales volumes.
MAE (Mean Absolute Error) measures the average size of forecast errors in units. It gives you a simple view of how many units the forecast typically misses by.
MAPE (Mean Absolute Percentage Error) measures forecast error as a percentage, making it easier to compare accuracy across products of different sizes. For example, a MAPE of 10% is easier to interpret than being off by 43 units. However, MAPE can be misleading for products with very low or zero sales, so it should not be used on its own.
Forecast bias shows whether forecasts are consistently too high or too low. A repeated bias can point to an issue with the forecasting method or the assumptions behind it.
The numbers are useful, but the real value comes from understanding why the forecast was wrong. A stockout, unexpected promotion, supplier delay, or sudden change in demand can all affect the result.
A simple improvement cycle is:
Forecast → Compare → Investigate → Adjust → Forecast again
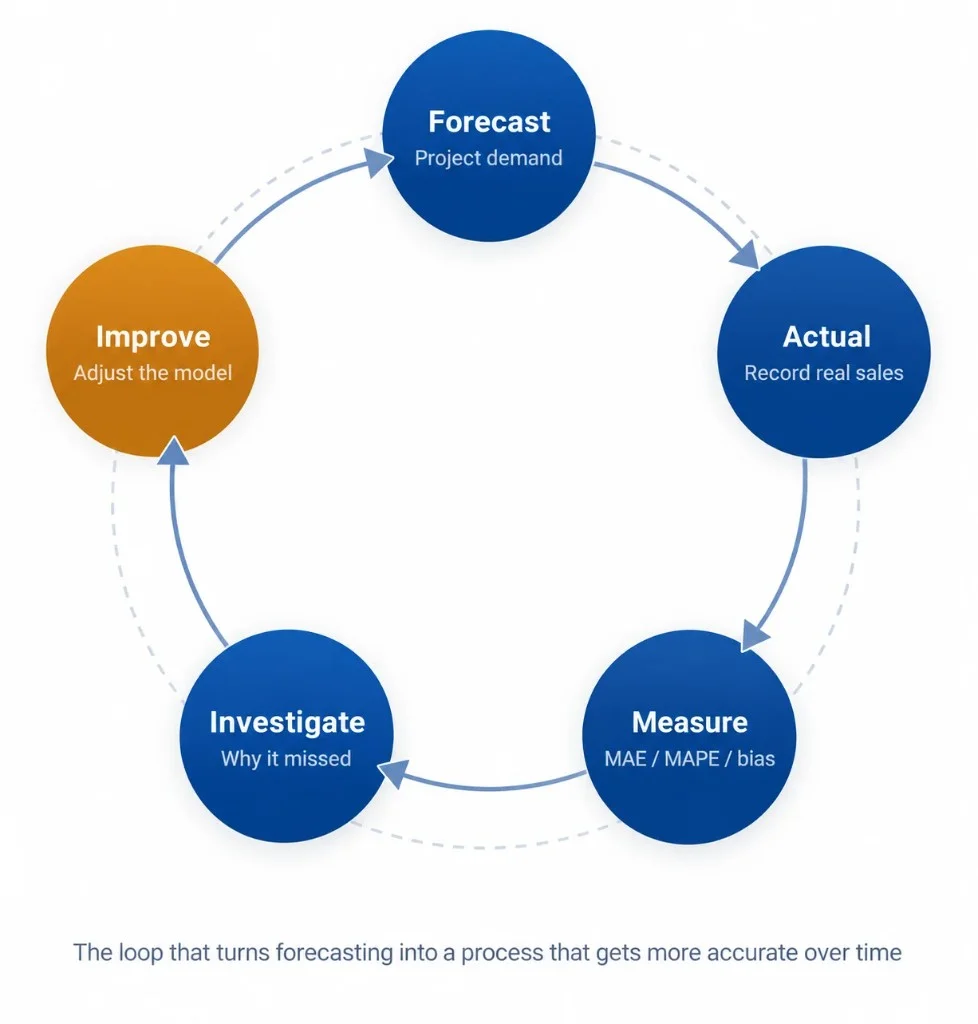 ## Can AI Improve Ecommerce Demand Forecasting?AI can be useful for large ecommerce catalogs where many products and factors need to be considered. It can spot patterns across pricing, seasonality, promotions, and traffic, and update forecasts as new data comes in.
But AI still depends on good data. If important details such as stockouts, promotions, or returns are missing, the forecast may still be wrong.
## Best Practices for Ecommerce Demand ForecastingA simple checklist to review regularly:
Forecasting depends on having a clear picture of what happened before. In ecommerce, that information is often spread across multiple systems.
Sales may come from Shopify, Amazon Seller Central, or other marketplaces, while inventory, COGS, refunds, returns, and marketplace fees may be tracked separately. When these records do not line up, it becomes harder to understand actual product performance.
This is where accounting and forecasting overlap. Accurate product mapping, COGS allocation, settlement reconciliation, refund handling, and inventory records can give forecasting teams a more reliable starting point.
A platform like SyncTools can bring sales, inventory, COGS, fees, and returns into a more connected view, reducing the need to rely on manually reconciled reports.
The goal is not to use a more complicated forecasting model. It is to start with data you can trust.
## ConclusionEcommerce demand forecasting is not about getting every number exactly right. It is about using the information available to make better decisions about inventory, purchasing, promotions, and cash.
The process starts with reliable data. Sales history needs to be considered alongside inventory availability, promotions, returns, costs, and other factors that can change how demand looks. From there, businesses can choose a forecasting method that fits their products and review the results against actual sales.
The most useful forecast is the one that helps the business act with more confidence knowing what to order, when to reorder, and where to put its money next.
## About the SyncTools Content TeamThe SyncTools content team covers ecommerce accounting, marketplace reconciliation, inventory, COGS, fees, and financial reporting. Our content focuses on practical ways ecommerce businesses can organize their financial data and make better decisions across sales channels.
## Frequently Asked Questions ### Why is demand forecasting important for ecommerce businesses? It helps businesses plan inventory, avoid excess stock, prepare for demand changes, and manage cash more effectively. ### How do you forecast demand for an ecommerce product? Start with past sales, then account for factors such as stockouts, promotions, and seasonal changes. Choose a forecasting method based on the product and available data. ### What data is needed for ecommerce demand forecasting? Start with sales history, inventory levels, pricing, promotions, returns, and refunds. COGS, fees, and fulfillment costs can provide additional context. ### What is the difference between demand forecasting and sales forecasting? Demand forecasting estimates how many units customers may want, while sales forecasting focuses on expected revenue or orders. Stock availability can make the two figures quite different. ### What is the best forecasting method for ecommerce, and how accurate is it? For steady sales, a simple forecasting method may be enough. Seasonal or unpredictable products may need time-series or AI-based methods. Review the results regularly and change the approach if it doesn't provide reliable forecasts. ### How does demand forecasting help inventory and cash flow management? A good forecast helps you decide how much stock to order and when to place the order. This makes it easier to avoid excess stock, prevent shortages, and plan for upcoming inventory payments. --- ## Finding the Right Amazon Accountant: A Step-by-Step Guide URL: https://synctools.ai/blog/finding-the-right-amazon-accountant Published: 2026-09-11Finding the right Amazon accountant is not simply about finding someone who knows QuickBooks, prepares tax returns, or has worked with an e-commerce company before.
You need someone who understands what happens between an Amazon order and the numbers that eventually appear in your P&L, balance sheet, tax records, and bank reconciliation.
That includes Amazon settlements, FBA fees, refunds, reimbursements, inventory, cost of goods sold, marketplace-collected taxes, advertising costs, multiple currencies, and timing differences.
The best accountants for Amazon sellers should be able to explain that entire process clearly.
This guide will show you how to evaluate them, what questions to ask, what good answers should sound like, and how to determine whether an accountant's technology and accounting process can support your business as it grows.
Most importantly, they should be able to show you how Amazon transactions become reconciled accounting records, rather than simply telling you they "work with Amazon sellers."
## Why Amazon Sellers Often Need Specialist Accounting Knowledge Amazon accounting creates a basic problem that traditional bookkeeping does not always encounter:The amount Amazon deposits into your bank account is not necessarily your sales revenue.
Amazon may process sales and then account for refunds, referral fees, FBA charges, shipping-related charges, advertising or other expenses, taxes, reimbursements, and adjustments before the money reaches the seller. Amazon's own pricing information distinguishes selling plan fees, referral fees, FBA costs, advertising, and other optional services. Referral fees also vary by product category. That distinction matters. Consider this simplified example.| Amazon activity | Illustrative amount |
|---|---|
| Gross product sales | $100,000 |
| Customer refunds | -$8,000 |
| Amazon/FBA fees | -$18,000 |
| Advertising charged through seller account | -$5,000 |
| Reimbursements | +$1,000 |
| Other adjustments | -$500 |
| Illustrative amount remaining | $69,500 |
Example only. Taxes, reserves, timing differences, and other settlement components have intentionally been excluded.
A bookkeeper who records the $69,500 bank deposit as revenue would hide important business information.
Your books should allow you to understand what was sold, what was refunded, what Amazon charged, what other adjustments occurred, and how the resulting payout reconciles with cash received.
That is one of the first things an Amazon seller accountant should understand.
## Amazon Bookkeeper, Amazon Accountant, or CPA: Which Do You Actually Need?  These roles overlap, but they are not identical.| Role | Typically best suited for |
|---|---|
| Amazon bookkeeper | Recording transactions, categorization, reconciliations and maintaining books |
| Amazon accountant | Financial statements, accounting treatment, month-end processes, analysis and broader financial oversight |
| CPA for Amazon sellers | US tax preparation, tax planning, compliance and other services requiring or benefiting from CPA expertise |
| Amazon tax accountant | Income tax, entity taxation, tax planning, and potentially state or international tax matters depending on expertise |
| Fractional controller/CFO | Forecasting, cash planning, management reporting and strategic financial decisions |
One firm may provide several of these services.
The important question isn't the person's title.
Ask:
Which parts of my financial operation are you responsible for, and which parts require another specialist?
For example, a strong Amazon bookkeeper may handle settlement reconciliation exceptionally well but may not provide income-tax advice.
Likewise, an experienced Amazon CPA may handle tax planning but expect another team to maintain the monthly books.
Knowing the difference prevents expensive gaps in responsibility.
## Step 1: Define What You Actually Need Before Comparing Accountants Do not start by searching Google for **"best amazon cpa."** Start with your business.Write down:
Then classify your needs.
### Level 1: Bookkeeping and ReconciliationYou primarily need:
An experienced Amazon bookkeeper may be sufficient.
### Level 2: Bookkeeping + TaxYou also need:
You may need an Amazon tax accountant or CPA for Amazon sellers alongside bookkeeping support.
### Level 3: Complex Amazon or Multi-Channel FinanceYour requirements may include:
At this level, evaluate both the accountant and the accounting system they plan to operate.
## Step 2: Ask Them to Explain an Amazon Settlement This is one of the highest-value questions you can ask.Do not ask:
"Do you understand Amazon settlements?"
They will almost certainly say yes.
Ask instead:
"Walk me through how you would take one Amazon settlement and reconcile it to my accounting system and bank deposit."
A strong answer should discuss separating relevant components such as:
They should also explain how those components map to your chart of accounts and how they verify that the recorded settlement matches the actual payout.
### Red Flag"We record whatever Amazon deposits into the bank account as Amazon income."
A net payout may be a useful reconciliation endpoint, but it should not automatically replace the underlying accounting detail needed to understand revenue and deductions.
## Step 3: Test Their Knowledge of Amazon Fees This is becoming more important, not less.Amazon announced that US FBA fees would increase by an average of $0.08 per unit sold in 2026, while also stating that no new FBA fee types would be introduced for the year. Amazon provides tools such as its Revenue Calculator and Fee Preview reporting to help sellers assess fees and economics.
Your Amazon FBA accountant therefore needs to understand more than revenue.
Ask:
"How will my accounting reports show the financial impact of Amazon fees?"
Then ask which fee categories they normally separate.
You want reports that make economically important expenses visible instead of burying every Amazon deduction inside a single generic marketplace-fee account.
The exact level of detail should reflect your business and reporting needs.
Too little detail hides problems.
Too much detail can create accounting records nobody can realistically review.
A good Amazon FBA accountant should help find the useful middle ground.
## Step 4: Find Out How They Handle Inventory and COGS For product businesses, accounting does not stop when the sale is recorded.Inventory affects the balance sheet, cost of goods sold, gross margin, cash planning, purchasing decisions, and tax reporting.
For US businesses, IRS guidance explains that businesses required to account for inventory generally need beginning and ending inventory values to determine COGS. However, specific rules and exceptions can apply to qualifying small businesses.
Ask your prospective accountant:
"How will you determine and validate COGS for products sold through Amazon?"
Follow with:
There is no responsible one-size-fits-all answer.
Your accounting method, entity, jurisdiction, inventory system, and business circumstances matter.
A good accountant should explain the methodology they recommend and why it applies to you.
## Step 5: Test Their Understanding of Amazon Taxes Without Accepting Over-Simplified Answers  Tax expertise is another area where sellers should ask precise questions.For US marketplace transactions, Amazon operates Marketplace Tax Collection in jurisdictions where marketplace-facilitator rules apply. Amazon's documentation explains that relevant tax collected and remitted through these rules appears in Seller Central reporting. Amazon also tells sellers to consult their tax professional regarding any remaining obligations.
Therefore, be cautious if an accountant says either:
"Amazon handles all your taxes."
or
"Every Amazon seller has the same sales-tax obligations."
Both are too simplistic.
Marketplace collection and your business's filing, registration, income-tax, non-marketplace, international, or other obligations are not necessarily the same thing.
Ask:
"Which taxes does Amazon handle in my situation, and which obligations still sit with my business?"
A competent Amazon seller CPA should clearly separate:
If your accountant does not personally cover every area, that is not automatically a problem.
The problem is when nobody knows who owns it.
## Step 6: Ask How They Handle Form 1099-K US sellers should understand another important distinction:Form 1099-K is not your profit-and-loss statement.
Current IRS guidance states that for third-party settlement organizations, the federal reporting threshold is generally more than $20,000 and more than 200 transactions. The IRS also emphasizes that you still need to report business income even if you don't receive a Form 1099-K.
Ask a prospective CPA for Amazon sellers:
"How do you reconcile information reported on Form 1099-K with my accounting records and tax return?"
A good answer should recognize that a tax information form, Amazon settlement reporting, bank deposits, revenue, fees, refunds, and taxable profit are different concepts that need to be reconciled, not assumed to be equal.
## Step 7: Evaluate Their Accounting Technology, Not Just Their Credentials A seller with 50 orders per month and a seller with 20,000 orders per month should not necessarily use the same bookkeeping workflow.Ask:
"How exactly does Amazon data get into my accounting software?"
Possible processes may include:
There is no universal answer.
The right setup depends on volume, reporting requirements, tax requirements, audit trail, accounting software, and the level of transaction detail your finance team needs.
What matters is whether the accountant can explain the process clearly.
### Ask These Five Technology QuestionsIf the answer to question four is effectively "we hope that does not happen," keep interviewing.
## Where SyncTools Fits Into the Amazon Accountant Relationship Accounting software should not replace an accountant's judgment.It should reduce the amount of accounting work spent moving, reformatting, and matching marketplace data.
For example, SyncTools can connect Amazon settlement data with accounting platforms including QuickBooks, Xero, and Zoho Books. Its current Amazon integrations can handle financial information including sales, refunds, fees, taxes, COGS, and payouts. SyncTools also supports summarized and individual posting approaches depending on how much transaction-level detail the business wants in its accounting system.
That changes the conversation you should have with an accountant.
Instead of asking:
"Will you manually enter my Amazon accounting?"
Ask:
"Which parts should the software process automatically, which exceptions should your team review, and what controls will you perform at month-end?"
That is a much more useful question.
### Figure: What the Accounting Workflow Should Look LikeAutomation isn't meant to remove the accountant.
It is to give the accountant a repeatable data process they can review and control.
## Step 8: Ask What You Will Actually Receive Every Month Many sellers compare accountants by monthly fee. Compare deliverables first.Ask each seller accountant to list exactly what you receive.
At minimum, determine whether the engagement covers:
| Deliverable | Included? | Frequency | Who reviews it? |
|---|---|---|---|
| Amazon settlement reconciliation | |||
| Bank reconciliation | |||
| P&L | |||
| Balance sheet | |||
| Inventory/COGS review | |||
| Amazon fee categorization | |||
| Refund/reimbursement review | |||
| Tax liability review | |||
| Cash-flow reporting | |||
| Management commentary | |||
| Tax filing | |||
| Year-end support |
This one table can prevent many misunderstandings.
"Monthly accounting" can mean very different things at different firms.
## Step 9: Check Whether They Can Handle Your Future Business, Not Just Today's Business Suppose you currently sell only through Amazon US.Next year, you might add:
Ask:
"If we add another marketplace or sales channel, what would have to change in our accounting architecture?"
Your accountant should understand whether that expansion affects:
This is particularly important when comparing Amazon FBA accountants for a business that expects to become multi-channel.
You do not want to rebuild the entire finance process every time the sales team adds a channel.
## Step 10: Evaluate Security and Account Access Your accountant may need access to Amazon, accounting software, bank statements, financial reports, tax records, and other sensitive systems.Ask how access is managed.
Amazon advises sellers not to share their Seller Central password and recommends granting users only the permissions needed for their work. External service providers should use the appropriate authorized-access mechanisms.
Ask prospective accountants:
That final question is commonly overlooked.
Your financial system should remain usable if you change accountants.
## Step 11: Ask for Evidence, Not Just Ecommerce Claims "Amazon specialist" is easy to put on a website.Ask for evidence.
Useful evidence may include:
You do not necessarily need an accountant from your city.
You need someone who can handle your operating model.
If you are searching for an Amazon Seller Central business tax accountant, prioritize Amazon workflow expertise, relevant tax qualifications, jurisdiction knowledge, and communication over physical proximity.
## Step 12: Give the Accountant a Practical Test Here is a much better hiring method than asking 20 theoretical questions.Give each shortlisted accountant a simplified scenario.
### Example"Our Amazon sales report shows $100,000 of sales. Amazon paid $69,500 after refunds, fees, advertising, and adjustments. Explain how you would record, reconcile, and review the month."
Then listen.
Do they ask:
Those questions tell you far more than a polished sales presentation.
A real specialist usually wants to understand the data before deciding how to record it.
## Amazon Accountant Evaluation ScorecardUse the following scoring model to compare finalists.
This is a suggested evaluation framework, not an accounting industry standard.
| Evaluation area | Weight |
|---|---|
| Amazon settlement and payout accounting | 25% |
| Inventory and COGS knowledge | 15% |
| Tax expertise and ability to define tax responsibilities | 15% |
| Accounting technology and automation | 15% |
| Month-end controls and reporting | 15% |
| Multi-channel/international scalability | 10% |
| Communication and responsiveness | 5% |
| Total | 100% |
80–100: Strong fit.
65–79: Good option, but review the gaps.
Below 65: May not be the right fit.
Do not automatically select the highest-scoring candidate.
A tax-heavy business may need to weight tax expertise more heavily.
A high-volume seller may care more about accounting architecture and reconciliation.
The scorecard makes your reasoning visible.
## 15 Questions to Ask an Amazon Accountant Before HiringTake these questions into your discovery calls.
The quality of the explanations matters more than whether every answer matches a predetermined script.
## Red Flags When Hiring Accountants for Amazon SellersBe cautious when you hear statements like:
### "Amazon deposits equal your revenue."Ask them to demonstrate the reconciliation.
### "Amazon handles all the tax."Ask which tax, in which jurisdictions, and under which rules.
### "We don't need to reconcile Amazon because the bank reconciles."Bank reconciliation alone does not explain the financial components behind Amazon activity.
### "Inventory doesn't really matter until year-end."For a product-heavy business, inventory and COGS may materially affect gross margin and management decisions throughout the year.
### "We use the same chart of accounts for every ecommerce client."Standardization can be useful, but your reporting structure should still reflect what management needs to understand.
### "Just give us your Amazon password."Amazon recommends controlled access rather than password sharing.
### "Our software handles everything automatically."Automation still requires configuration, accounting rules, exception management, and review.
Software does not eliminate accounting responsibility.
## What Does a Good Amazon Accounting Setup Look Like?You should eventually be able to answer questions such as:
You should not need three spreadsheets and two hours of investigation every time management asks one of these questions.
This is where a capable accountant and the right accounting infrastructure matter.
## Should Your Accountant Use SyncTools? Not automatically.The better question is:
Does SyncTools match the accountant's required Amazon accounting workflow and your reporting needs?
For Amazon businesses using supported accounting platforms, SyncTools can provide the connection layer between Amazon data and the accounting ledger.
For example, the Amazon-to-QuickBooks integration supports Amazon sales, refunds, fees, taxes, COGS, and payout settlements, with options for summarized or individual transaction posting. Its Amazon-to-Xero integration provides similar transaction and COGS workflows.
This can be especially relevant when your accountant currently spends significant time:
The accountant should remain responsible for defining how that information is treated, mapped, reviewed, and reported.
Think of it this way:
SyncTools moves and organizes Amazon accounting data.
Your accountant decides what the numbers mean and whether the accounting is correct.
That division of responsibility is healthier than expecting either software or an accountant to do everything alone.
## A Better Way to Choose Between Two Amazon Accountants Suppose Accountant A charges less but relies heavily on manual spreadsheets.Accountant B costs more but uses a defined Amazon accounting process, can explain settlement reconciliation, understands inventory, documents tax responsibilities, uses controlled integrations, and provides monthly management reporting.
The cheaper option is not automatically cheaper.
Compare the total finance process, including:
Likewise, the most expensive accountant is not automatically the best.
You are buying a reliable financial process, not prestige.
## Final Checklist Before SigningBefore appointing an accountant for Amazon sellers, make sure you can answer yes to the following:
If several of these remain unclear after the sales call, do not rush the decision.
## Conclusion: Hire the Process, Not Just the Accountant The right Amazon accountant should do more than prepare tax returns and categorize bank transactions.They should understand how your Amazon operation produces financial data and how that data becomes trustworthy books.
That means being able to explain:
Amazon sale → fees/refunds/tax/COGS → settlement → accounting entry → payout → bank reconciliation → financial reporting.
The strongest Amazon accountants will also tell you what software should handle and where professional judgment still matters.
That is the bigger hiring test.
Do not ask only:
"Are you an Amazon accountant?"
Ask:
"Show me how you would make my Amazon numbers reliable every month."
Their answer will tell you whether you have found an accountant who merely recognizes Amazon Seller Central or one who can actually support an Amazon business.
Before choosing your next Amazon accountant, test the accounting workflow they plan to use.
If your business uses QuickBooks, Xero, or Zoho Books, explore how SyncTools can move Amazon sales, refunds, fees, taxes, COGS, and payout data into your accounting workflow. Then ask your accountant how they would configure the mappings, review exceptions, reconcile payouts, and close the month.
See how Amazon accounting works with SyncTools and decide whether the workflow fits your accountant before committing to another manual process.
Returns are part of apparel ecommerce, but accounting for them is more complicated than simply reversing a sale.
A single return can affect revenue, inventory, cost of goods sold (COGS), taxes, payment fees, shipping costs, store credit, Shopify payouts, and bank reconciliation. These effects may also happen on different dates.
For apparel brands managing multiple sizes, colors, SKUs, exchanges, and high return volumes, apparel ecommerce returns accounting needs to connect what happened financially with what happened to the physical product.
This guide explains how to account for returns and refunds properly, where accounting errors commonly appear, and how ecommerce accounting automation can help finance teams maintain better visibility as transaction volumes increase.
What is a return?
A return represents the physical product being sent back or expected back from the customer.
It is primarily an inventory and operational event.
What is a refund?
A refund represents money being returned to the customer.
It is primarily a financial event.
The two can happen on completely different dates.
### Example Consider this timeline:| Event | Date |
|---|---|
| Customer buys a blazer | August 25 |
| Return requested | August 30 |
| Warehouse receives product | September 3 |
| Product inspected | September 4 |
| Refund issued | September 5 |
| Refund included in Shopify payout | September 8 |
| Returned Product Condition | Possible Inventory Treatment |
|---|---|
| New and resalable | Return to sellable inventory |
| Packaging damaged | Inspect or repackage before restocking |
| Minor defect | Refurbish or downgrade |
| Seasonal item | Consider markdown or valuation impact |
| Heavily damaged | Write down or write off |
| Wrong item received | Investigate before adjustment |
| Product missing | Do not automatically restore stock |
Medium / Black
but the accounting or inventory workflow restores:Medium / White
The total unit count may still appear correct. But the actual inventory is wrong. **That can affect:**| Line item | Amount |
|---|---|
| Gross Sales | $500,000 |
| Less: Returns and Refunds | $45,000 |
| Net Sales | $455,000 |
| Item | Amount |
|---|---|
| Jacket selling price | $120 |
| Product cost | $42 |
| Payment processing fee | $4 |
| Outbound shipping cost | $8 |
| Return label | $7 |
Total remaining direct cost: $19
This excludes warehouse labor, inspection, customer support, packaging, or potential markdowns. A full customer refund does not mean the company fully recovers its costs. ## Partial Refund Accounting Needs More Detail Not every apparel customer returns the complete order. **A customer might purchase:**Original purchase
Blue Dress / Medium: $100
Exchange
Blue Dress / Large: $100
There may be no cash refund.
But inventory still changes.
Medium: +1 returned
Large: -1 shipped
Shopify sales for a period
$50,000
Bank deposit
$42,800
The $7,200 difference is not automatically missing revenue.
It might contain:How many refunds have already been processed?
Finance may also need to assess:How much of this revenue do we reasonably expect to retain?
The company's accountant or auditor should confirm the exact accounting approach based on the applicable reporting framework and jurisdiction. ## International Refunds Can Create Currency Differences International apparel brands face another issue. The exchange rate applied when a refund is processed may differ from the exchange rate used when the original order was placed. Suppose:| Data Point | Why It Matters |
|---|---|
| Order ID | Links refund to original sale |
| Original order date | Reporting period |
| Return date | Return timing |
| Refund date | Financial timing |
| SKU | Inventory tracking |
| Size | Variant analysis |
| Color | Variant analysis |
| Quantity returned | Inventory adjustment |
| Refund value | Net sales |
| Tax adjustment | Tax reporting |
| Shipping refund | Revenue adjustment |
| Return fee | Return economics |
| Payment processing fee | Margin analysis |
| Product cost | COGS |
| Product condition | Inventory valuation |
| Restock status | Inventory availability |
| Replacement SKU | Exchange accounting |
| Shopify payout ID | Bank reconciliation |
| Sales channel | Channel reporting |
Returned Units ÷ Units Sold × 100
Shows how frequently physical products come back. ### Refund RateRefund Value ÷ Gross Sales × 100
Shows how much gross revenue is being reversed. ### Exchange RateExchange Transactions ÷ Total Return Transactions × 100
Shows how much return demand is retained through exchanges. ### Sellable Recovery RateReturned Units Restored to Sellable Inventory ÷ Returned Units Received × 100
Shows how much returned stock can actually be sold again. ### Average Refund Lag One useful approach is:Refund Date − Original Order Date
Finance teams can also measure:Refund Date − Return Receipt Date
The first highlights the complete customer transaction cycle. The second highlights how quickly the team processes returned merchandise financially after it arrives back. ### Return Cost per Order Return cost can include:| Variant | Units Sold | Units Returned | Unit Return Rate |
|---|---|---|---|
| Small | 300 | 30 | 10.0% |
| Medium | 400 | 48 | 12.0% |
| Large | 310 | 90 | 29.0% |
| XL | 180 | 27 | 15.0% |
Original Sale → Returned Product → Refund → Inventory → COGS → Shopify Payout → Bank Deposit
A spreadsheet can contain all the numbers while still losing the connection between them. That is when automation becomes increasingly valuable. ## How SyncTools Supports Apparel Returns and Refund Accounting SyncTools helps connect ecommerce transaction data with accounting platforms such as QuickBooks Online and Xero. Rather than manually rebuilding Shopify activity at month-end, finance teams can create accounting workflows around data including:Customer returned item → Issue refund → Reduce sales.
A complete return can affect:Original Sale → Return → Inspection → Refund → Inventory Decision → COGS Adjustment → Payout Reconciliation
For growing apparel brands, this provides more than cleaner bookkeeping. It helps finance teams understand what returns are actually costing, which products are creating problems, how much inventory is being recovered, and whether Shopify settlements genuinely match the books. If your team is spending every month manually connecting Shopify refunds, returned SKUs, COGS adjustments, fees, and payout differences, SyncTools can help automate the accounting data flow between your ecommerce operations and QuickBooks or Xero.Explore SyncTools for Apparel & Fashion and see how your return accounting workflow can move beyond simply recording refunds.
If you want to cancel your Shopify store, go to Settings > Plan > Cancel plan from the Shopify admin. For eligible paid stores, Shopify schedules the store for deactivation at the end of the current billing cycle.
But canceling the subscription is only the first step.
Before your Shopify store closes, you should review pending payouts, refunds, chargebacks, outstanding charges, app subscriptions, domains, customer obligations, and accounting records. Your store may be deactivated while some financial activity continues to be processed afterward.
If you're not sure whether you want to leave Shopify permanently, you can also consider Pause and Build, which disables checkout while allowing you to continue working on your store.
| Action | What it means | Best for |
|---|---|---|
| Cancel your Shopify plan | Starts the process of ending your subscription | Stores you want to close |
| Deactivate your store | Your store stops operating at the end of the billing cycle | Businesses leaving Shopify |
| Pause and Build | Checkout is disabled while you retain access to the store | Temporary breaks or seasonal businesses |
| Reactivate | You reopen a deactivated store by selecting a new plan | Businesses returning to Shopify |
| Delete store data | Permanently deletes eligible customer/store personal data | Businesses that don't plan to return |
| Check Before Closing | Why It Matters |
|---|---|
| Pending orders | Customers may still be waiting for products |
| Refunds and returns | They can affect your final sales and payouts |
| Shopify Payments payouts | Money may still be on its way to your bank |
| Outstanding Shopify charges | Fees can remain payable |
| App subscriptions | Some external app charges may continue |
| Chargebacks | Customers may dispute earlier transactions |
| Gift cards | Outstanding customer obligations may remain |
| Domain renewals | Cancelling Shopify does not automatically stop every domain renewal |
| Billing and payout exports | You may need these records later |
| Accounting records | Final sales, fees, taxes and refunds should be reconciled |
Settings > Plan
You will see the plan currently connected to your store. ### Step 3: Select Cancel Plan If you have a paid subscription, choose:Cancel plan
If the store is still within its free trial period, Shopify may instead display Cancel trial. ### Step 4: Review the Alternatives Before completing the cancellation, Shopify may show other choices, such as: - Moving to another subscription - Switching to Pause and Build - Starting another store If you expect to start selling again, pausing may make more sense than completely shutting down your Shopify store. ### Step 5: Review Domains and Pending Charges Before you continue, take a quick look at: - Shopify-managed domains - App charges that are still pending - Transaction fees - Shipping label costs - Any other unpaid Shopify charges Closing the store doesn't always clear these costs right away, so it is best to review them first. ### Step 6: Confirm the Cancellation Choose the option to cancel your plan and uninstall the apps connected through Shopify. Shopify will ask why you are leaving. Select your reason, continue, and enter your password. Once confirmed, your subscription is scheduled to end, and your store will deactivate at the end of the current billing cycle.Important Cancelling today does not necessarily mean your Shopify store disappears today. Under Shopify's current process, an eligible paid store is deactivated when its existing billing cycle ends.
## How to Deactivate a Shopify Store From Your Phone You can also deactivate your Shopify store through the Shopify app. The process is similar: 1. Sign in to the Shopify app as the store owner. 2. Open Settings. 3. Select Plan. 4. Choose Cancel plan or Cancel trial. 5. Review any alternatives Shopify displays. 6. Check outstanding charges and domains. 7. Continue with cancellation. 8. Select your reason for leaving. 9. Enter your password. 10. Confirm the cancellation. Shopify sends a confirmation email once it deactivates the store. ## Should You Pause Shopify Instead of Canceling It? Not every seller looking for how to stop Shopify wants to leave permanently, so you may need a few months away from selling instead. You may need a few months away from selling. Shopify's Pause and Build plan is designed for this situation. **When an eligible store moves to Pause and Build:** - The storefront can remain accessible. - Customers cannot complete checkout. - You retain access to Shopify admin. - You can continue working on products and your storefront. - A reduced subscription fee applies. - Apps can remain active and may continue charging. You need to select a new eligible Shopify plan when you are ready to start selling again. Pause and Build is available only after the free trial has ended and isn't available to Shopify Plus stores. ### Pause vs Cancel Shopify| Choose Pause When... | Choose Cancel When... |
|---|---|
| You expect to sell again | You are closing the business/store |
| Your business is seasonal | You are permanently moving platforms |
| You are rebuilding your store | You no longer need Shopify |
| You still need admin access | You are ready to complete final records |
| You want to retain your setup | You have no immediate plans to return |
| Shopify Activity | Accounting Impact |
|---|---|
| Product sale | Revenue |
| Refund | Reduction in sales |
| Shopify/payment fee | Expense |
| Sales tax collected | Usually tracked separately from revenue |
| Chargeback | Payment adjustment |
| Discount | Reduction/adjustment to sales |
| Payout | Settlement of underlying transactions |
Important: Canceling and pausing Shopify do not have the same effect on apps. Apps are automatically uninstalled when you cancel the store, while apps can remain active and continue charging when you use Pause and Build.
However, outstanding app usage charges can still become payable. There is also an important exception: some third-party apps bill merchants outside Shopify's billing system. Some third-party apps bill merchants **outside Shopify's billing system**. Uninstalling Shopify or closing the store may not cancel those external subscriptions. Shopify recommends reviewing separately billed subscriptions directly with the relevant app provider. If you choose **Shopify Pause and Build** instead, apps generally remain active unless you uninstall them so that recurring charges can continue. ## What Happens to Your Shopify Domain? A domain is another item to handle, and you should review it before closing to make sure you don't miss anything. If you bought your domain through Shopify and plan to keep using it elsewhere, consider transferring it to another domain provider. If a third-party domain is connected to Shopify and you no longer need it, review its renewal settings with the domain provider. Shopify states that domain renewals aren't automatically canceled simply because you cancel the store. This is easy to overlook, especially when you're focused on closing orders and payments. ## Don't Close Shopify Before You Close the Books Knowing how to close a Shopify account handles the platform side, but your accounting still needs a clean ending. Your accounting still needs a clean ending. **Before the store becomes inactive, make sure your accounting records cover:**Before you cancel Shopify, reconcile your final sales, refunds, fees, taxes, COGS, and payouts with SyncTools.
Connect Shopify with QuickBooks Online or Xero and get your final Shopify transactions organized before you close the store.
Closing your Shopify store? Don't leave your final payouts to reconcile later.
Sync your Shopify sales, refunds, fees, taxes, COGS, and payouts with your accounting system before deactivation.
The cheapest marketplace isn't determined by its headline selling fee. Amazon, eBay, and Facebook Marketplace use different fee structures, and your actual cost can change based on product category, selling volume, fulfillment, advertising, shipping, refunds, and location.
For a meaningful comparison, calculate:
Total marketplace cost ÷ gross marketplace sales = effective marketplace cost rate
Then compare the resulting rate across channels using the same products, order volume, and period.
“fee percentage” in a marketplace comparison table without specifying the transaction model and market.
## How to Calculate Your Effective Marketplace Fee
**Effective marketplace fee rate = Total marketplace fees ÷ Gross marketplace sales × 100**
For example:
| Metric | Amount |
|---|---|
| Gross marketplace sales | $50,000 |
| Marketplace selling fees | $5,000 |
| Payment fees | $1,000 |
| Advertising | $1,000 |
| Fulfillment/storage | $2,000 |
| Total marketplace-related costs | $9,000 |
| Effective marketplace cost | 18% |
## Why Marketplace Sales Don't Equal Your Bank Deposit
Suppose Amazon reports:
**Gross sales: $20,000**
During the settlement period:
- **Refunds:** –$1,500
- **Referral fees:** –$2,400
- **FBA fees:** –$1,800
- **Advertising:** –$700
- **Other adjustments:** –$100
The resulting payout is:
**$13,500**
Your bank statement therefore shows **$13,500**, but your [accounting records](/blog/fashion-ecommerce-accounting-guide) still need to explain the underlying **$20,000** of gross sales and the deductions that produced the payout.
This is why recording only the **bank deposit** as revenue can make marketplace accounting difficult to analyze.
## How Marketplace Fees Should Flow Into Ecommerce Accounting
A marketplace transaction can generate several separate financial events:
**Order → Gross sale → Discount → Tax → Marketplace fee → Fulfillment → Refund → Adjustment → Payout**
Your accounting workflow should preserve these components rather than treating the final **bank deposit** as the entire transaction.
For each marketplace, consider tracking:
- Gross sales
- Discounts
- Refunds
- Marketplace fees
- Payment processing fees
- Fulfillment fees
- Storage fees
- Advertising costs
- Shipping
- Taxes
- Other adjustments
- Net payout
This gives finance teams enough detail to **reconcile** marketplace statements with accounting records and evaluate channel profitability.
## Which Marketplace Has the Lowest Fees?
There is no universal winner.
Amazon, eBay, and Facebook Marketplace use different **fee models**, and the lowest advertised fee does not necessarily produce the lowest total cost.
A better comparison is:
**Effective marketplace cost = all marketplace-related costs ÷ gross marketplace sales**
For example, a seller using Amazon FBA may have higher total marketplace costs than a seller fulfilling orders independently on eBay, even if the headline selling fee appears similar.
Likewise, a local Facebook Marketplace transaction may have a very different cost structure from a transaction where the platform facilitates payment and shipping.
Compare the **total cost** of a completed sale, not one fee in isolation.
**Last updated:** August 2026
Fee information in this article applies to U.S. marketplace accounts unless otherwise stated. Marketplace pricing and seller terms can change, so verify current fees with the marketplace before making pricing or channel decisions.
## Stop Letting Marketplace Payouts Hide Your Real Costs
Marketplace fees are only part of the equation.
To understand what a marketplace actually contributes to your business, you need to connect **gross sales**, **refunds**, **fees**, **fulfillment costs**, **taxes**, **adjustments**, and final payouts back to your accounting records.
Doing that manually across Amazon, eBay, Facebook Marketplace, Shopify, and other channels can turn every month-end close into a spreadsheet exercise.
SyncTools automates the flow of ecommerce sales and marketplace transaction data into your [accounting workflow](/blog/best-ecommerce-accounting-software), helping you reconcile what was sold, what the marketplace deducted, and what ultimately reached your bank.
With SyncTools, you can bring together:
- Marketplace sales
- Fees and commissions
- Refunds and adjustments
- Taxes
- Payouts
- Channel-level transaction data
So instead of accounting for a single bank deposit, you can see the financial activity behind it.
Automate marketplace accounting and payout reconciliation with SyncTools.
Connect your ecommerce channels with QuickBooks, Xero, and other accounting systems.
“six weeks without a sale means dead stock.”
A meaningful threshold depends on the **product category** and lifecycle.
A six-week sales gap may be serious for **fast fashion** but completely normal for **seasonal**, **luxury**, or occasionwear.
Brands should therefore define **inventory-aging thresholds** based on:
- Product lifecycle
- Seasonality
- Historical sell-through
- Expected demand
- Current inventory position
- Planned markdowns
- Expected selling price
The objective is to identify **slow-moving variants** early enough for merchandising and finance teams to act.
## Returns at SKU granularity
Apparel returns can be materially higher than ecommerce returns overall, particularly because customers cannot physically assess **fit**, **sizing**, or **fabric** before purchasing.
Just as importantly, returns don't necessarily distribute evenly across variants.
### Fit-driven return patterns
Certain sizes or styles may consistently generate higher returns because of **fit** or **sizing** issues.
If returns are tracked only at the **style level**, the pattern can disappear.
**SKU-level reporting** can reveal:
**Style → Size → Return rate → Return reason**
That information can become useful not only to **finance**, but also to **product** and **merchandising** teams.
### Returned inventory needs condition tracking
A returned product doesn't necessarily go straight back into normal sellable inventory.
It may be:
- **Restocked** as sellable inventory
- Sent for inspection
- Refurbished
- Sold at a discount
- **Written off** because it cannot be resold
The inventory workflow should distinguish between these outcomes.
Otherwise, a business can end up reporting the same quantity as **available inventory** even though some returned units are damaged or otherwise not immediately saleable.
### Accounting treatment of returns
A customer return can affect both **revenue** and inventory accounting.
Depending on the applicable accounting framework and the company's established policy, the accounting workflow may need to address:
- **Refund or revenue adjustment**
- **Recovery of returned inventory**
- **COGS adjustment**
- **Condition of returned inventory**
- Any required inventory valuation adjustment
A returned item should therefore not be treated as simply “+1 inventory unit.”
The financial and inventory treatment should reflect what actually happened to the product.
[Automating return workflows](/blog/accounting-challenges-in-ecommerce-business) can help connect the original **transaction**, **refund**, **inventory movement**, and **accounting records** without requiring every adjustment to be entered manually.
## Multi-Channel SKU Mapping
Fashion brands rarely sell through a single channel. **Shopify**, **Amazon**, **wholesale**, and **marketplaces** each generate their own SKU or listing IDs, and those IDs frequently don't match your **internal variant SKU** structure.
When that mapping breaks down, so does your **reconciliation**: sales get recorded against the **wrong SKU**, **inventory counts** drift between what a channel reports and what you actually hold, and **cost-of-goods** calculations end up applied to the wrong variant.
This is one of the least-discussed pain points in fashion ecommerce accounting. Most guidance focuses on single-channel **DTC** brands, but for any brand selling across more than one platform, it's often the single biggest source of reconciliation errors.
[AI-powered reconciliation tools](/blog/ai-powered-automated-reconciliation-software) are increasingly how brands close this gap without manually cross-checking SKU IDs channel by channel.
## What SKU-level profitability analysis actually requires
A fashion business doesn't necessarily need to produce its **statutory financial statements** at SKU level.
But if management wants to understand which variants are profitable, the underlying data needs to connect **inventory**, **cost**, **sales**, **returns**, **discounts**, and **channel activity** to the appropriate SKU.
At minimum, the data structure should capture:
- **Parent product and variant SKU:** linked but independently identifiable
- **Applicable inventory cost:** based on the company's costing method
- **Sales by channel:** Shopify, marketplace, wholesale, or other channels
- **Units sold:** by SKU and period
- **Discounts and promotions:** where relevant to profitability analysis
- **Returns and refunds:** linked to the original transaction and SKU
- **Inventory position:** units available, committed, returned, or otherwise unavailable
- **Inventory aging:** to identify slow-moving variants
- **Relevant fulfillment or channel costs:** where the business wants contribution-level profitability
This creates the foundation for **SKU-level profitability analysis** without confusing **management reporting** with statutory financial reporting.
**For example:**
**Net sales**
− applicable **COGS**
− **discounts**
− **returns**
− **channel/payment costs**
− relevant **fulfillment costs**
= **SKU contribution**
The exact profitability calculation should reflect the metrics the business chooses to manage.
The key is that the underlying **transaction** and **inventory data** needs to be reliable enough to support that analysis.
**Manual spreadsheets** can technically hold this information. The challenge is maintaining the relationships accurately when **SKU counts**, **sales channels**, **returns**, and **inventory movements** grow.
## How to fix fashion ecommerce inventory complexity
The solution isn't to force every financial report down to the SKU level.
It's to make sure the data underneath your **accounting system** preserves the detail required to manage the inventory correctly.
The key capabilities are:
### Variant-level inventory tracking
Maintain inventory quantities and identifiers at the sellable SKU level while preserving the relationship to the parent style.
### Consistent inventory costing
Apply the inventory costing method adopted by the business consistently and ensure product costs flow correctly into COGS.
### Variant-level sell-through analysis
Measure inventory velocity by size and color instead of relying only on the blended performance of the parent style.
### Condition-aware returns
Connect refunds and returned inventory to the original SKU and distinguish resalable, discounted, refurbished, and non-resalable units.
### Channel-level SKU mapping
Maintain a reliable mapping between internal SKUs and the identifiers used by Shopify, marketplaces, wholesale systems, and other sales channels.
### Inventory reconciliation
Regularly compare ecommerce, warehouse, inventory-management, and accounting records so discrepancies can be identified before they distort financial reporting.
### SKU-level profitability analysis
Connect sales, costs, returns, discounts, and relevant channel costs to the appropriate variant so management can understand where margin is actually being generated.
This is the difference between an accounting system that can technically store ecommerce transactions and an **accounting workflow** that can keep pace with the operational complexity of fashion.
## Bottom line
Fashion inventory accounting doesn't fail because **financial statements** need to show every size and color separately.
It fails when the underlying data loses the relationship between:
**Style → Variant → Cost → Inventory → Sale → Return → Channel → Accounting**
When those relationships are maintained, a brand can report financial results at the level appropriate for the business while still having the detail needed to understand SKU-level performance.
That detail matters because **aggregate numbers** can hide:
- **Slow-moving sizes**
- **Underperforming colorways**
- **Variant-level cost differences**
- **High-return SKUs**
- **Channel-specific margin problems**
- **Inventory aging**
- **Markdown opportunities**
The answer isn't simply more spreadsheet discipline.
It's a **data structure** and **accounting workflow** designed to preserve the detail of how fashion products are actually sold, returned, and replenished without requiring someone to manually maintain thousands of SKU-level relationships every month.
## Your accounting system shouldn't have to understand fashion. Your data layer should.
As **SKU counts** grow, the difficult part isn't creating another product record.
It's keeping **SKU**, **cost**, **inventory**, **sales**, **returns**, **channels**, and **accounting** records connected as transactions multiply.
SyncTools helps fashion and apparel brands automate the movement and reconciliation of ecommerce data into their accounting workflows, reducing the **manual work** involved in managing complex product and transaction data.
**Shopify & marketplaces → Orders & payouts → SKU mapping → Returns → Inventory → Accounting → Reconciliation**
If your fashion business is dealing with growing **SKU complexity**, multiple **sales channels**, or increasingly **manual reconciliation**, see how SyncTools supports accounting automation for apparel and fashion brands.
[Explore SyncTools for Apparel & Fashion](/industries/apparel-fashion)
## Frequently Asked Questions
### How many SKUs does one style actually generate?
Multiply the **active colors** by the **active sizes**. A style available in five colors and six sizes can create **30 sellable variants**.
The actual number may be lower if certain size/color combinations aren't offered.
### Should I track cost at the SKU level or the style level?
Track inventory operationally at the **SKU or variant level**, while applying the **inventory costing method** appropriate to your accounting framework and business circumstances.
A style may have the same underlying cost across several variants, while genuine differences in **material**, **construction**, or other applicable costs may require different treatment.
The important distinction is between **SKU-level inventory visibility** and the method used to calculate **inventory cost** and COGS.
### What's the difference between a parent SKU and a variant SKU?
A **parent product** represents the overall style, while a **variant SKU** represents a specific sellable combination such as size and color.
**For example:** **Parent:** Classic Hoodie. **Variant:** HD-BLK-XL.
The e-commerce storefront may display one product page for the hoodie, but **inventory** and **transaction systems** need to identify the specific variant purchased.
### How do I check whether my system is using FIFO or weighted-average?
Check the **inventory accounting settings** in the system responsible for calculating your financial inventory and **COGS**. Confirm how the system handles a SKU purchased at **different costs** over time.
Don't assume that the **product-cost field** in Shopify or another e-commerce platform represents your **financial inventory-costing method**.
Your accountant should confirm the costing method used for financial reporting and whether the **ecommerce**, **inventory**, and **accounting** systems are aligned.
### At what SKU count do spreadsheets stop being viable?
There is no universal **SKU threshold**.
A business with **1,000** relatively simple SKUs and one sales channel may be easier to manage than a business with **500 SKUs** spread across **Shopify**, **Amazon**, **wholesale**, and multiple warehouses.
The better indicators are **reconciliation effort**, number of **manual updates**, **error frequency**, number of **inventory locations**, number of **sales channels**, **return volume**, and frequency of cost changes.
When maintaining the data becomes more time-consuming than analyzing it, automation becomes increasingly valuable.
### Does SKU-level tracking actually change when I mark down inventory?
**SKU-level tracking** can make **commercial markdown** decisions more precise because **sell-through**, **inventory age**, and **demand** can be evaluated by variant.
However, SKU-level tracking does not by itself determine whether an **accounting write-down** is required.
A commercial markdown answers: “What price should we sell this product at?”
An accounting valuation assessment answers: “Is the inventory still appropriately valued under the applicable accounting requirements?”
Those decisions are related but should not be treated as the same thing.
### Can Shopify track fashion inventory by size and color?
**Shopify** can represent products with multiple variants such as **size** and **color**, but the broader accounting question is how that variant information, **inventory cost**, **returns**, and **sales data** flow into the **accounting system**.
For brands with complex inventory and multiple sales channels, maintaining consistent **SKU mapping** between ecommerce, inventory, and accounting systems becomes increasingly important.
### Why is SKU-level inventory important for fashion brands?
Because fashion demand is rarely uniform across every variant.
The same style can have strong demand in one **color** and weak demand in another, while certain **sizes** can have very different **sell-through** or return rates.
**SKU-level inventory data** makes those differences visible before they become end-of-season inventory problems.
### Should every SKU have a separate P&L?
No. A business does not necessarily need a separate formal **P&L** for every SKU.
Instead, the underlying data should be detailed enough to support **SKU-level profitability analysis** when management needs it.
**Financial reporting** can remain at the appropriate aggregate level while **management reporting** uses SKU-level data to identify product and inventory decisions.
---
## Best Ecommerce Accounting Software for 2026
URL: https://synctools.ai/blog/best-ecommerce-accounting-software
Published: 2026-07-29
> A direct guide to choosing the best ecommerce accounting software, covering platforms, integration requirements, and what a complete accounting stack looks like for online sellers.
**Quick answer:** No single product is the "best ecommerce accounting software" in isolation. The right setup combines an accounting platform (QuickBooks Online, Xero, Sage, or NetSuite) with a dedicated ecommerce integration that translates sales channel data into accurate bookkeeping entries. The two work in tandem: accounting platforms manage the ledger; integrations make ecommerce data ledger-ready. This guide covers both layers.
## Why Ecommerce Accounting Requires More Than Standard Accounting Software
Off-the-shelf accounting software is built for businesses that issue invoices and receive payments. A reliable accounting system for ecommerce has requirements that those systems don't address natively.
**Settlement accounting.** Shopify and Amazon don't pay per order; they issue periodic payouts that net revenue, marketplace fees, shipping costs, refunds, and adjustments into a single deposit. Reconciling a payout against the underlying orders requires a calculation step that standard accounting software skips entirely.
**Sales tax across jurisdictions.** An online retailer selling into multiple US states or countries faces economic nexus obligations in each. The accounting system needs to capture tax data at the point of sale, categorized by jurisdiction, not inferred from bank deposits.
**Inventory and COGS.** Ecommerce merchants tracking cost of goods sold need consistent inventory valuation. At high order volumes, manual COGS entries aren't feasible; the accounting system or its integration layer must handle them automatically.
**Multi-channel complexity.** A business selling on Shopify, Amazon, and WooCommerce runs three separate revenue streams with three different fee structures and payout schedules. Each channel needs to reconcile cleanly in the books.
The accounting platforms below handle the ledger. An ecommerce accounting integration handles the translation layer between your sales channels and the ledger. You need both.
## The Accounting Platforms
### QuickBooks Online
QuickBooks Online is the dominant cloud accounting software for small and mid-market businesses in the United States. Its capabilities include double-entry accounting, accounts receivable and payable, bank reconciliation, payroll, sales tax tracking, and a 750+ app marketplace through the QuickBooks App Store.
**Ecommerce assessment.** QBO has no native Shopify, Amazon, or WooCommerce connector. It accepts manual journal entries or CSV imports, but neither approach scales past a few hundred orders per month. For ecommerce merchants, QBO functions well as the accounting backend when paired with a dedicated integration that pulls channel data, categorizes it correctly, and posts reconciled entries to QBO rather than raw transaction noise.
**QuickBooks Desktop.** QuickBooks Desktop (Pro, Premier, Enterprise) remains common in established businesses that haven't migrated to the cloud. Most ecommerce-to-QB integrations target QBO only. If your business or accounting team runs QuickBooks Desktop, verify integration compatibility before committing to any tool.
**Best for:** US-based merchants seeking software for ecommerce accounting that integrates with Shopify, Amazon, or WooCommerce, backed by a widely understood platform with strong US accountant and bookkeeper support.
### Xero
Xero is a cloud accounting platform founded in New Zealand, widely adopted by accounting firms in Australia, the UK, and Canada, with growing adoption in the United States. Its strengths include a clean bank reconciliation workflow, multi-currency support, a large accountant partner network (Xero Gold and Platinum tiers), and 1,000+ integrations through the Xero App Store.
**Ecommerce assessment.** Like QBO, Xero has no native ecommerce channel connectors. Xero's bank feed imports raw transactions, sufficient for a brick-and-mortar business but insufficient for an ecommerce merchant processing thousands of transactions across multiple platforms. As accounting software with ecommerce integration, Xero performs best when paired with a connector that batches and reconciles channel data before it reaches the Xero ledger.
**Best for:** Ecommerce merchants with an accounting firm that works in the Xero ecosystem, UK/AU/EU sellers with VAT requirements, or businesses where multi-currency support is a primary requirement.
### Sage Business Cloud Accounting
Sage is an established accounting software provider with products spanning small business to enterprise. Sage Business Cloud Accounting (formerly Sage One) is its cloud offering for smaller businesses; Sage 50cloud and Sage Intacct serve the mid-market and enterprise.
**Ecommerce assessment.** Sage's accounting software ecommerce integration ecosystem is smaller than QBO's or Xero's. Its app marketplace is growing, but fewer native connectors exist for Shopify, Amazon, or WooCommerce. Merchants choosing Sage should verify that an integration supporting their specific channel mix is available before committing to the platform.
**Best for:** UK and European businesses where Sage has strong accountant adoption, or businesses already in the Sage ecosystem that need it as accounting software for online retail business.
### Oracle NetSuite
NetSuite is a cloud ERP platform that combines accounting, inventory management, CRM, and order management in one system. It is positioned for businesses that have outgrown what QBO or Xero can handle.
**Ecommerce assessment.** NetSuite's SuiteCommerce module provides native ecommerce order management and inventory tracking. For businesses using third-party channels (Shopify, Amazon), NetSuite still requires integration, but the integration ecosystem is mature. The tradeoff: NetSuite's implementation and licensing costs are substantially higher than QBO or Xero. Implementation typically requires a specialist partner and takes months, not days.
**Best for:** Mid-market to enterprise ecommerce businesses with complex inventory requirements, multi-subsidiary structures, or a need to consolidate ERP and accounting functions.
## Platform Comparison
| Factor | QuickBooks Online | Xero | Sage Business Cloud | NetSuite |
| --- | --- | --- | --- | --- |
| US market / sales tax | Strong | Adequate | Limited | Strong |
| UK / AU / VAT support | Adequate | Strong | Strong | Strong |
| Accountant ecosystem | Largest (US) | Large (AU/UK/CA) | Established (UK) | Enterprise |
| Native ecommerce connectors | None | None | None | Partial |
| QuickBooks Desktop migration path | Direct | No | No | No |
| Scale ceiling | ~$10M revenue | ~$10M revenue | ~$10M revenue | No ceiling |
## What Ecommerce Accounting Integration Does
The accounting platforms above manage the ledger. What they don't do is convert raw ecommerce data (Shopify payout reports, Amazon settlement files, WooCommerce order exports) into proper double-entry accounting entries. That is the function of accounting software for e-commerce integration, also called ecommerce accounting integration software.
A capable ecommerce accounting integration:
1. **Connects to your sales channels** (Shopify, Amazon Seller Central, WooCommerce, Linnworks, and others) and pulls transaction data automatically on a defined schedule.
2. **Categorizes revenue, fees, refunds, and adjustments** into the correct chart-of-accounts categories without manual intervention.
3. **Handles settlement timing:** mapping each payout deposit in your bank feed to the orders, fees, and adjustments it comprises.
4. **Manages tax data:** passing sales tax amounts at the correct jurisdiction level to your accounting platform, not as a single undifferentiated tax line.
5. **Reconciles:** your books balance to the penny against actual payments received.
Without this layer, ecommerce merchants reconciling manually at high order volume are typically running one to two months behind. Beyond a few hundred orders per month, manual reconciliation introduces errors that compound at month-end close.
## SyncTools
SyncTools is an ecommerce accounting integration that connects Shopify, Amazon, WooCommerce, and Linnworks to QuickBooks Online, QuickBooks Desktop, Xero, Sage, and NetSuite.
**Ecommerce assessment.** SyncTools handles settlement-level reconciliation, mapping each payout to its constituent orders, fees, and adjustments rather than posting a gross revenue figure. It supports QuickBooks Desktop in addition to QBO, which most competing integrations do not. Transaction categorization uses automated matching with exception handling for transactions that don't reconcile automatically. SyncTools holds certified status with QuickBooks and Xero and has a Catalyst Partnership with Linnworks.
SyncTools is listed on the Shopify App Store, QuickBooks App Store, Xero App Store, and Linnworks App Store.
**Best for:** Merchants needing QuickBooks Desktop support, Linnworks users, or businesses managing multi-channel sales across Shopify, Amazon, and WooCommerce.
## How to Choose the Best Accounting Software for Ecommerce
Choosing the right platform involves two decisions: accounting software and integration. The right combination depends on your channel mix, your accountant's existing platform, and your order volume.
**Choose your accounting platform based on:**
- Where your accountant or bookkeeper works (QBO for US-based; Xero for AU/UK/CA)
- Tax requirements (VAT: Xero or Sage; US sales tax: QBO or NetSuite)
- Whether you're on QuickBooks Desktop (if so, confirm your integration supports it)
- Revenue scale (QBO/Xero handle most businesses under $10M revenue; NetSuite for enterprise)
**Choose your integration based on:**
- **Channel coverage:** confirm support for all your selling channels, not just the primary one
- **Accounting platform support:** most integrations support QBO and Xero; fewer support Sage, NetSuite, or QuickBooks Desktop
- **Reconciliation depth:** does it reconcile at the order level or post summary journal entries? Summary entries are faster to configure but harder to audit and reconcile against bank statements
- **Tax handling:** does it pass per-jurisdiction tax amounts or aggregate them?
- **Exception handling:** what happens to transactions that don't match automatically? The quality of exception management determines how much manual review time the integration saves
## FAQ
### What is the best accounting software for an ecommerce business?
For most small to mid-market ecommerce businesses, the right choice is QuickBooks Online or Xero paired with a dedicated ecommerce accounting integration. QBO is the default for US-based merchants; Xero is preferred by accounting firms in Australia, the UK, and Canada. Use the platform your accountant works in, combined with an integration that supports your channels. Neither platform connects natively to Shopify, Amazon, or WooCommerce, so an integration is required to translate channel data into accounting entries the platform can use.
### Do I need separate ecommerce accounting software and a general accounting platform?
For most ecommerce merchants, yes. General accounting platforms (QBO, Xero, Sage) manage the ledger but lack native connectors to Shopify, Amazon, or WooCommerce. Ecommerce accounting integration software bridges that gap by pulling channel data and converting it into properly categorized ledger entries. Running both is standard practice for any merchant processing more than a few hundred orders per month.
### What is the difference between ecommerce accounting software and an ERP?
Accounting software manages the financial ledger: revenue, expenses, bank reconciliation, and reporting. An ERP (such as NetSuite) adds inventory management, order management, and operational functions in one system. Most small and mid-market ecommerce businesses start with an accounting platform plus integrations; ERPs make financial sense when the overhead of maintaining multiple disconnected systems exceeds the cost of a consolidated platform.
### Can QuickBooks Online handle ecommerce accounting?
QuickBooks Online handles ecommerce accounting when paired with an integration that connects your sales channels to QBO. QBO alone (relying on manual entry or CSV imports) doesn't scale past a few hundred orders per month. With a proper integration handling settlement reconciliation and transaction categorization, QBO works well for high-volume ecommerce merchants.
### Can Xero handle ecommerce accounting?
Xero works well as the accounting backend for ecommerce when paired with an integration. Its bank feed imports raw transactions, but ecommerce merchants need categorized, reconciled entries, not raw bank data. Xero's multi-currency support and accountant network make it the most practical choice for UK, Australian, and international sellers.
### What accounting software do Shopify sellers use?
Shopify merchants most commonly use QuickBooks Online or Xero for bookkeeping. UK-based Shopify merchants frequently choose Xero for its VAT handling; US-based merchants tend toward QBO for its larger accountant community and US sales tax tools. Both require a dedicated integration to sync Shopify sales data into the accounting platform accurately.
### How does ecommerce accounting software handle Amazon FBA?
Amazon FBA accounting is complex because Amazon pays via bi-monthly settlement reports that net sales, marketplace fees, FBA fulfillment costs, refunds, storage charges, and other adjustments into a single deposit. Proper ecommerce accounting integration breaks each settlement into its components: recognizing revenue separately from fees, mapping each line to the correct chart-of-accounts category, and reconciling the net deposit against the constituent transactions. Posting the gross payout as revenue overstates income and creates reconciliation problems that compound over time.
### What is the best bookkeeping software for ecommerce?
QuickBooks Online Simple Start or Xero Starter combined with a low-cost ecommerce integration is the standard starting point. Both platforms handle the ledger accurately at scale when the integration is correctly configured. The integration layer matters more than the platform tier as order volume grows; prioritize one that handles your channel mix accurately. QBO Simple Start is the standard US starting point for small businesses.
### Do I need an accountant if I use ecommerce accounting software?
Ecommerce accounting software and integrations automate transaction categorization and reconciliation, but they don't replace the judgment an accountant provides on tax elections, inventory valuation methods, depreciation, entity structure, and financial planning. Most ecommerce merchants benefit from a bookkeeper managing day-to-day entries and an accountant reviewing month-end and handling tax filing.
### What should ecommerce accounting software handle automatically?
At minimum: channel transaction import, settlement reconciliation (mapping each deposit to the underlying orders and fees it represents), sales tax capture by jurisdiction, refund accounting, and standard financial report generation. More capable integrations also handle COGS recognition, multi-currency conversion at correct exchange rates, and exception flagging for transactions that don't reconcile automatically.
### What is the best online accounting software for ecommerce?
QuickBooks Online is the standard choice for US-based merchants; Xero for UK, Australian, and Canadian sellers. Both are cloud platforms with mature integration ecosystems. Either performs accurately only when paired with a dedicated integration handling settlement reconciliation, fee categorization, and multi-channel data.
### How do I choose between ecommerce accounting integrations?
Start with channel coverage: the integration must support all the platforms you sell on, not just your primary one. Then evaluate: reconciliation depth (order-level vs. summary journal entries), accounting platform support (especially relevant if you're on QuickBooks Desktop or Sage), per-jurisdiction tax handling, pricing relative to your order volume, and the quality of exception handling for transactions that don't match automatically. The last point, exception handling, is the primary driver of ongoing manual review time.
*SyncTools connects Shopify, Amazon, WooCommerce, and Linnworks with QuickBooks, Xero, Sage, and NetSuite. Listed on the Shopify App Store, QuickBooks App Store, Xero App Store, and Linnworks App Store.*
---
## Ecommerce Accounting: A Complete Guide for Online Business Owners
URL: https://synctools.ai/blog/ecommerce-accounting-guide
Published: 2026-07-29
> Learn ecommerce accounting, bookkeeping, software, reconciliation, taxes, inventory, and monthly processes with this beginner-friendly guide.
Running an online store involves more than generating sales and fulfilling orders. Every transaction creates financial data that must be recorded, categorized, reconciled, and reviewed.
That is where ecommerce accounting becomes important.
Unlike traditional business accounting, online sellers must manage marketplace payouts, payment processing fees, refunds, shipping income, sales tax, inventory costs, discounts, chargebacks, and transactions from multiple platforms.
A single bank deposit may represent hundreds of customer orders after fees, refunds, taxes, and other deductions have already been applied. QuickBooks explains that ecommerce payouts can include sales, refunds, discounts, expenses, and adjustments within one deposit.
Without a reliable ecommerce bookkeeping process, it becomes difficult to understand:
- How much revenue the business actually generated
- Which fees were deducted
- Whether payouts match accounting records
- Which products are profitable
- How much inventory is available
- Whether sales tax has been recorded correctly
- How much cash the business can safely spend
This guide explains accounting for ecommerce businesses in simple terms, including the processes, software, services, reports, and automation options online sellers should consider.

## What Is Ecommerce Accounting?
Ecommerce accounting is the process of recording, organizing, reconciling, and reporting the financial activity generated by an online business.
It covers money entering and leaving the business through ecommerce platforms, marketplaces, payment processors, banks, suppliers, advertising platforms, shipping providers, and other systems.
A complete ecommerce business accounting process may include:
- Recording online sales
- Tracking platform and payment fees
- Managing refunds and chargebacks
- Recording shipping income and expenses
- Tracking sales tax or VAT
- Managing inventory
- Calculating cost of goods sold
- Reconciling marketplace payouts
- Categorizing operating expenses
- Preparing financial statements
- Monitoring cash flow and profitability
Good accounting for an ecommerce business should help the owner understand not only how much money reached the bank but also how that amount was calculated.
## Why Is Ecommerce Accounting Different?
Traditional businesses may receive payments directly from customers and record each transaction in a relatively straightforward way.
Ecommerce businesses often sell through platforms such as Shopify, Amazon, eBay, WooCommerce, Walmart, Etsy, or social commerce channels.
These platforms may:
- Combine multiple orders into one payout
- Deduct transaction and marketplace fees
- Subtract refunds and chargebacks
- Hold reserves
- Collect sales tax
- Process payments in different currencies
- Delay deposits for several days
- Apply adjustments after a sale
For example, your online store may generate $12,000 in sales during a payout period.
The amount deposited into your bank could be $10,450 after the platform deducts:
- $600 in refunds
- $400 in processing fees
- $300 in marketplace fees
- $250 in other adjustments
If you record the $10,450 deposit as total sales, your revenue and expenses will both be inaccurate.
Correct ecommerce accounting should record the $12,000 gross sales separately from refunds, fees, taxes, and adjustments.
## Ecommerce Bookkeeping vs Ecommerce Accounting
Ecommerce bookkeeping and ecommerce accounting are closely connected, but they serve different purposes.
| Comparison Point | Ecommerce Bookkeeping | Ecommerce Accounting |
|---|---|---|
| Primary purpose | Records and organizes daily financial transactions | Analyzes financial data to support business decisions |
| Main focus | Transaction accuracy and record maintenance | Financial performance, planning, and compliance |
| Common tasks | Recording sales, fees, refunds, expenses, and payouts | Preparing reports, reviewing margins, forecasting cash flow, and tax planning |
| Frequency | Daily, weekly, or monthly | Monthly, quarterly, or annually |
| Typical outputs | Ledgers, reconciliations, categorized transactions, and supporting records | Profit and loss statements, balance sheets, forecasts, and financial insights |
| Ecommerce-specific work | Matching marketplace payouts, recording payment fees, and tracking refunds | Evaluating channel profitability, inventory performance, and financial risks |
| Usually handled by | Business owners, bookkeepers, or accounting software | Accountants, financial controllers, or finance professionals |
| Business value | Keeps ecommerce accounts complete and accurate | Helps owners understand profitability and make informed decisions |
### What Is Ecommerce Bookkeeping?
Ecommerce bookkeeping focuses on the regular recording and organization of financial transactions.
Typical ecommerce bookkeeping tasks include:
- Recording sales and expenses
- Importing marketplace transactions
- Categorizing platform fees
- Matching payouts with bank deposits
- Recording refunds
- Reconciling bank and credit card accounts
- Maintaining supporting documents
- Updating accounts payable and receivable
Bookkeeping creates the financial records that accounting decisions rely on.
### What Is Ecommerce Accounting?
Ecommerce accounting uses bookkeeping data to analyze the financial performance and position of the business.
Accounting tasks may include:
- Preparing financial statements
- Reviewing profit margins
- Managing tax reporting
- Selecting accounting methods
- Forecasting cash flow
- Evaluating inventory performance
- Planning budgets
- Supporting funding or investment decisions
In simple terms, bookkeeping records what happened, while accounting helps explain what those numbers mean.
## What Should Ecommerce Businesses Track?
Accounting for online sellers requires tracking more than sales and bank deposits.
### Gross Sales
Gross sales represent the total value of products sold before refunds, discounts, fees, and other deductions.
Tracking gross sales helps you measure total customer demand and compare performance across different sales channels.
### Discounts
Discounts reduce the selling price of an order and should normally be recorded separately from gross revenue.
Separating discounts makes it easier to understand how promotions affect revenue and margins.
### Refunds and Returns
Refunds reduce revenue, but returned products may also affect inventory.
Your accounting treatment may depend on whether the returned item:
- Goes back into inventory
- Is damaged
- Is written off
- Is replaced
- Is refunded without being returned
### Marketplace and Payment Fees
Online sellers may pay:
- Marketplace commissions
- Payment processing fees
- Listing fees
- Fulfillment fees
- Storage fees
- Subscription fees
- Advertising fees
- Currency conversion charges
These expenses should be categorized correctly so you can calculate your actual cost of selling through each platform.
### Shipping Income and Costs
Shipping amounts collected from customers should usually be tracked separately from the amount paid to carriers or fulfillment partners.
This helps determine whether shipping is generating income or creating an additional expense.
### Sales Tax and VAT
Sales tax or VAT collected from customers is generally not business revenue. It may represent money collected on behalf of a tax authority.
Some marketplaces calculate, collect, and remit taxes for sellers, while others leave part of the responsibility with the business.
Because requirements vary by country, state, product, and sales channel, ecommerce businesses should consult an accountant or tax professional familiar with their locations and business model.
### Inventory
Inventory purchased for resale is generally recorded as an asset until the product is sold. Once sold, its cost moves to cost of goods sold.
Accurate inventory accounting helps ecommerce businesses understand:
- The value of stock on hand
- Product availability
- Inventory shrinkage
- Gross profit
- Slow-moving products
- Reorder requirements
### Cost of Goods Sold
Cost of goods sold, commonly called COGS, represents the direct cost of purchasing or producing the products sold during a particular period.
Depending on the business, COGS may include:
- Product purchase costs
- Raw materials
- Direct production labor
- Packaging
- Inbound freight
- Manufacturing expenses
Accurate COGS is necessary for calculating gross profit.
Gross profit = Revenue − Cost of goods sold
Without reliable COGS data, a product may appear profitable even when its true margin is very low.
### Advertising Expenses
Advertising is often one of the largest expenses for ecommerce businesses.
Track spending from platforms such as:
- Google Ads
- Meta Ads
- TikTok Ads
- Amazon Advertising
- Influencer campaigns
- Affiliate programs
- Email marketing software
Separating advertising expenses by channel can help you compare marketing spend with revenue and profitability.
## Ecommerce Accounting Process
A reliable ecommerce accounting process should follow a repeatable sequence.
### Step 1: Separate Business and Personal Finances
Use a dedicated business bank account and business credit card.
Mixing personal and business expenses can make bookkeeping, tax preparation, and financial reporting unnecessarily difficult.
### Step 2: Choose an Accounting Method
The two common accounting methods are cash and accrual accounting.
#### Cash Accounting
Under cash accounting, revenue is generally recorded when money is received, while expenses are recorded when they are paid.
This method may be easier for small businesses with simple financial activity.
#### Accrual Accounting
Under accrual accounting, revenue is recorded when it is earned, and expenses are recorded when they are incurred, regardless of when the money moves.
The IRS describes cash and accrual accounting using these timing differences.
Accrual accounting may provide a clearer view for ecommerce businesses that manage:
- Inventory
- Delayed marketplace payouts
- Supplier invoices
- Customer credit
- Returns
- Prepaid expenses
Accounting and tax requirements differ between jurisdictions, so businesses should confirm the correct method with a qualified accountant.
### Step 3: Select Ecommerce Accounting Software
Accounting software provides the central system where financial data is recorded and reported.
Popular options include:
- QuickBooks Online
- Xero
- Zoho Books
- Sage
- NetSuite
- Microsoft Dynamics 365 Business Central
The best accounting software for an ecommerce business depends on transaction volume, company size, reporting needs, inventory complexity, locations, and existing systems.
### Step 4: Create an Ecommerce Chart of Accounts
A chart of accounts organizes transactions into categories.
An ecommerce chart of accounts may include:
**Revenue**
- Product sales
- Shipping income
- Gift card income
- Marketplace sales
- Wholesale sales
**Cost of goods sold**
- Product costs
- Packaging
- Freight
- Manufacturing costs
**Operating expenses**
- Marketplace fees
- Payment fees
- Advertising
- Software
- Warehousing
- Shipping
- Professional services
**Assets**
- Bank accounts
- Inventory
- Accounts receivable
- Payment clearing accounts
**Liabilities**
- Sales tax payable
- Accounts payable
- Loans
- Gift card liabilities
- Marketplace reserves
The chart should be detailed enough to support decision-making without creating hundreds of unnecessary categories.
### Step 5: Connect Sales Channels and Accounting Software
Your ecommerce platform, payment processors, marketplaces, and accounting system should exchange data accurately.
Manual CSV imports may work for a small store, but they become difficult to manage as order volume increases.
A connection between ecommerce and accounting systems can transfer information such as:
- Orders
- Customers
- Products
- Discounts
- Shipping
- Taxes
- Payments
- Refunds
- Fees
- Payouts
- Inventory
- COGS
SyncTools connects ecommerce channels including Shopify, Amazon, and eBay with accounting platforms including QuickBooks, Xero, and Zoho Books.
### Step 6: Record Sales Correctly
Decide whether your accounting system should receive:
- Every individual order
- Daily summarized sales
- Payout summaries
- Channel-level summaries
Individual transaction syncing provides detailed records but may create a high volume of accounting entries.
Summary accounting reduces the number of entries while keeping important categories such as sales, fees, refunds, shipping, and taxes visible.
The right approach depends on reporting requirements, order volume, accounting software capacity, and reconciliation preferences.
### Step 7: Reconcile Ecommerce Payouts
Payout reconciliation confirms that the amount deposited into the bank matches the financial activity reported by the sales channel.
A typical reconciliation may compare:
- Gross sales
- Minus refunds
- Minus platform fees
- Minus payment fees
- Minus adjustments
- Plus or minus tax activity
- Equals bank payout
Unreconciled payouts can result in duplicated sales, missing fees, incorrect revenue, and unexplained differences in the bank account.
### Step 8: Reconcile Bank and Credit Card Accounts
Bank reconciliation compares the transactions recorded in accounting software with actual bank activity.
This helps identify:
- Missing transactions
- Duplicate entries
- Incorrect amounts
- Unrecorded fees
- Failed payments
- Timing differences
- Unauthorized transactions
Bank and credit card accounts should be reconciled regularly rather than only at the end of the year.
### Step 9: Update Inventory and COGS
Inventory quantities and values should reflect purchases, sales, returns, damage, and adjustments.
When products are sold, the related inventory cost should move into COGS.
This allows the profit and loss statement to show the gross margin generated during the period.
### Step 10: Review Financial Reports
Once bookkeeping is complete, review the main financial statements.
#### Profit and Loss Statement
The profit and loss statement shows revenue, COGS, expenses, and profit over a selected period.
It helps answer:
- Is the business profitable?
- Are margins improving?
- Are fees increasing?
- Is advertising spending sustainable?
- Which expenses need attention?
#### Balance Sheet
The balance sheet shows what the company owns, what it owes, and the owner’s equity at a specific date.
Important ecommerce balance sheet accounts may include:
- Cash
- Inventory
- Accounts receivable
- Sales tax payable
- Accounts payable
- Loans
- Marketplace reserves
#### Cash Flow Statement
The cash flow statement explains how money moves through operating, investing, and financing activities.
A profitable ecommerce business can still experience cash shortages because money may be tied up in inventory, advertising, delayed payouts, or supplier payments.

## Monthly Ecommerce Bookkeeping Checklist
Ecommerce business owners can use this checklist during each month-end close:
- Import sales channel activity
- Record gross sales separately from deductions
- Categorize platform and payment fees
- Record refunds, discounts, and chargebacks
- Verify sales tax or VAT accounts
- Match marketplace payouts with bank deposits
- Reconcile bank and credit card accounts
- Update inventory balances
- Record cost of goods sold
- Review accounts payable and receivable
- Check payment clearing accounts
- Review the profit and loss statement
- Review the balance sheet
- Analyze cash flow
- Investigate unusual balances
- Save supporting reports and documents
Completing these steps each month makes year-end accounting and tax preparation much easier.
## Common Ecommerce Accounting Mistakes
### Recording Net Payouts as Revenue
A marketplace deposit is not necessarily the same as sales revenue.
The payout may already include deductions for refunds, fees, taxes, or other adjustments.
### Ignoring Marketplace Fees
Marketplace and payment processing fees can significantly reduce margins.
Recording only the bank deposit hides these expenses.
### Failing to Reconcile Payouts
Without payout reconciliation, it is difficult to confirm whether every sale, refund, fee, and adjustment has been recorded.
### Mixing Personal and Business Expenses
Using personal accounts for business spending makes transaction categorization and tax preparation more complicated.
### Recording Sales Tax as Revenue
Tax collected from customers may represent a liability rather than revenue.
Incorrect classification can overstate sales and profit.
### Tracking Revenue Without COGS
High revenue does not always mean high profitability.
Without accurate product costs, business owners cannot calculate reliable gross margins.
### Waiting Until Year-End
Trying to correct an entire year of ecommerce accounts at once can lead to missing records, unexplained payouts, and expensive cleanup work.
### Relying Only on Spreadsheets
Spreadsheets can be useful during the early stages of a business, but manual copying, formulas, downloads, and file versions become harder to manage as transaction volume grows.
## Ecommerce Accounting Software vs Accounting Services
Ecommerce businesses can manage accounting through software, professional services, or a combination of both.
### Ecommerce Accounting Software
Ecommerce accounting software helps businesses:
- Record transactions
- Categorize income and expenses
- Reconcile bank accounts
- Track inventory
- Generate reports
- Manage invoices
- Maintain financial records
Accounting software works best when it receives complete and well-organized data from ecommerce channels.
### Ecommerce Accounting Integration Software
Integration software connects ecommerce platforms with accounting systems.
It can reduce manual work by transferring sales, fees, refunds, taxes, payments, and payout data into the accounting platform.
This is particularly valuable for businesses with high transaction volumes or multiple sales channels.
### Ecommerce Accounting Services
Ecommerce accounting services may include:
- Monthly bookkeeping
- Payout reconciliation
- Tax preparation
- Inventory accounting
- Management reporting
- Cash flow forecasting
- Financial planning
- Cleanup of historical accounts
Hiring an accountant for an ecommerce business may be useful when the company has complex tax obligations, international operations, high inventory volume, multiple entities, or investor reporting requirements.
## When Should You Hire an Ecommerce Accountant?
Consider hiring an ecommerce accountant or bookkeeper when:
- Monthly bookkeeping takes too much time
- Payouts no longer match bank deposits
- The business sells through multiple channels
- Inventory values are unreliable
- Sales tax responsibilities are unclear
- Financial reports cannot be trusted
- The company is expanding internationally
- You are preparing for funding or a sale
- Historical records need correction
- Revenue is growing faster than financial processes
Look for ecommerce accountants who understand marketplaces, payment gateways, inventory, COGS, clearing accounts, and payout reconciliation.
A general accountant may understand financial reporting but may not be familiar with the way ecommerce platforms combine transactions into deposits.
## How Automation Supports Ecommerce Accounting
Automation can reduce repetitive accounting work, but it should be configured around the business’s actual accounting requirements.
Useful accounting automation may include:
- Importing ecommerce transactions
- Mapping sales to revenue accounts
- Categorizing fees
- Recording refunds
- Applying tax rules
- Posting payment entries
- Matching payouts
- Syncing inventory data
- Recording COGS
- Flagging synchronization errors
- Producing summarized entries
Automation does not remove the need for financial review.
Business owners, bookkeepers, or accountants should still review mappings, exceptions, account balances, tax treatment, and financial reports.
The goal is to reduce manual data handling while maintaining accounting control.
## How SyncTools Helps With Ecommerce Accounting
SyncTools connects ecommerce sales channels with accounting software so transaction data does not have to be repeatedly downloaded and entered manually.
Depending on the selected integration and configuration, businesses can sync information such as:
| Criterion | What we looked for |
|---|---|
| Accounting accuracy | Gross sales, refunds, discounts, taxes, and payment fees mapped to the appropriate accounts |
| Payout reconciliation | Shopify Payments payouts matched against the underlying transactions and bank deposits |
| Sync flexibility | Support for both summarized payout-level accounting and individual transaction-level sync |
| Channel coverage | Support for Shopify alongside marketplaces and other ecommerce channels |
| Exception handling | How unmatched or unusual transactions are surfaced for review |
| Setup and migration | Connection process, account mapping, historical data import, and implementation complexity |
| Pricing | Entry price, volume limits, channel costs, and features included at each tier |
| Security and trust | Published security controls, certifications, marketplace presence, and product maturity |
| Decision factor | SyncTools | A2X | Synder | Webgility |
|---|---|---|---|---|
| Shopify | ✓ | ✓ | ✓ | ✓ |
| Amazon | ✓ | ✓ | ✓ | ✓ |
| WooCommerce | ✓ | — | ✓ | — |
| Linnworks | ✓ | — | — | — |
| QuickBooks Online | ✓ | ✓ | ✓ | ✓ |
| QuickBooks Desktop | Verify current support | — | — | ✓ |
| Summarized sync | ✓ | ✓ | ✓ | ✓ |
| Individual transaction sync | ✓ | — | ✓ | ✓ |
| Payout reconciliation | ✓ | ✓ | ✓ | ✓ |
| Multi-channel management | ✓ | Partial | ✓ | ✓ |
| AI accounting features | ✓ | — | — | — |
| Partner/accountant tools | ✓ | ✓ | — | — |
| Free plan | ✓ | — | — | — |
| Best suited for | Multi-channel ecommerce | Payout-level accounting | Stripe + ecommerce | QuickBooks Desktop |
| Setup complexity | Low–Medium | Low–Medium | Medium | Medium–High |
| Merchant profile | Monthly orders | Channels | What matters most |
|---|---|---|---|
| Small Shopify seller | 100–200 | Shopify | Low entry cost and simple setup |
| Growing DTC brand | 1,000–2,000 | Shopify + Amazon | Payout reconciliation and multi-channel support |
| Multi-channel merchant | 5,000+ | Shopify + Amazon + WooCommerce | Volume pricing and broad channel coverage |
| Accounting firm | Multiple client stores | Multiple | Partner dashboard and centralized account management |
| Criteria | Why It Matters |
|---|---|
| Accounting Accuracy | Correct handling of gross sales, taxes, fees, discounts, shipping, and refunds. |
| Payout Reconciliation | Ability to reconcile Shopify Payments deposits against Xero bank feeds with minimal manual work. |
| Sync Flexibility | Support for summarized journals, individual transaction sync, or both. |
| Multi-Currency Support | Accurate exchange-rate handling for international stores and multiple Shopify Markets. |
| Marketplace Support | Ability to manage Shopify alongside Amazon, WooCommerce, Etsy, eBay, Walmart, or other sales channels. |
| Ease of Setup | Time required to configure accounts, mappings, taxes, and payouts. |
| Scalability | Whether the solution continues to perform well as order volumes increase. |
| Pricing Transparency | Predictable pricing without hidden add-ons or per-channel costs. |
| Accounting Firm Features | Multi-client management, partner dashboards, and centralized monitoring. |
| Security & Compliance | Certifications, data handling practices, and access controls. |
Note: Features, pricing, and capabilities were verified using publicly available product documentation and vendor information as of March 2026. Product capabilities may change over time.
## Best Shopify Xero Integration Apps 2026 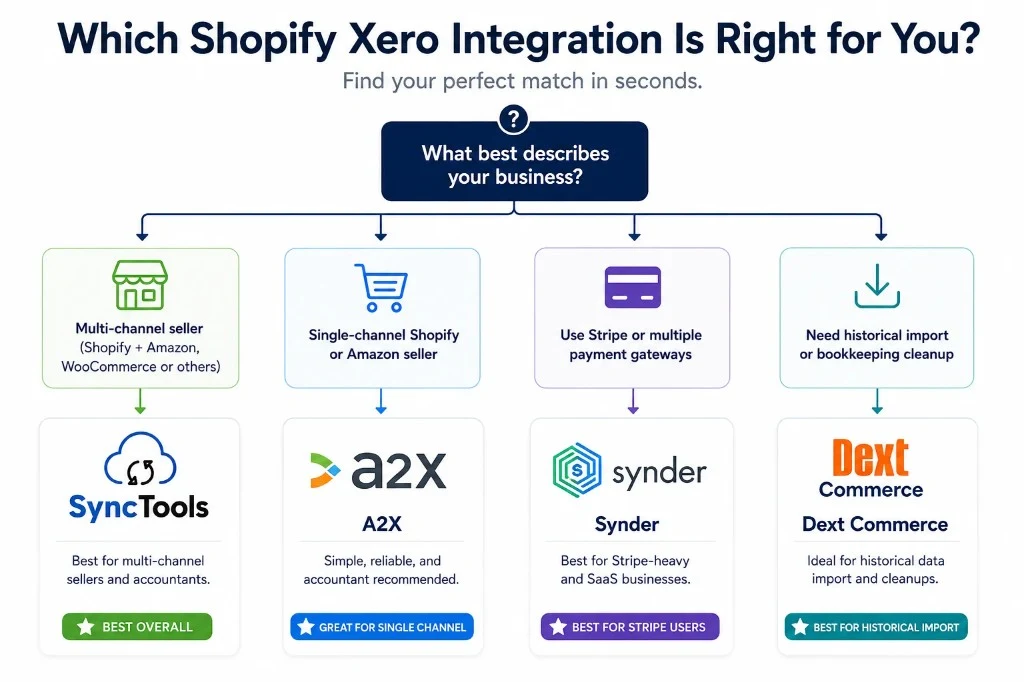 ### #1 SyncTools **Price:** Free (200 orders/month) · Paid from $19/month **Best for:** Multi-channel sellers, accounting firms, sellers wanting AI features - Growing Shopify brands - Multi-channel sellers - Accounting firms - International businesses - Businesses wanting both summarized and detailed sync SyncTools is the most complete Shopify Xero integration available in 2026. It handles all four baseline requirements correctly and adds features no other tool in this category offers: - **Multi-currency support** - handles international Shopify stores with accurate currency conversions for Xero compliance - **AI accounting agent** - natural language queries for financial data ("What were my net Shopify fees in Q1?" or "Which orders reconciled against last week's payout?") - **One-click payout reconciliation** - SyncTools groups transactions to match each Shopify Payments payout exactly, so the bank reconciliation in Xero is a single click - **Both sync modes** - summarized (one journal entry per payout period) or individual transaction sync (one entry per order) - **Multi-channel from one account** - Shopify, Amazon, WooCommerce, eBay, Etsy, Walmart, and Linnworks all connect to Xero from one SyncTools account - **Partner dashboard** - accounting firms manage all client accounts from one interface - **SOC 2 certified** **Pricing:** Free plan syncs 200 orders/month. Paid plans: Lite $19/month, Standard $59/month (2,000 orders/month), Plus $89/month (5,000 orders/month). Volume pricing - no per-channel add-ons. **Rating:** 4.9/5 across 2,000+ clients. **Verdict:** SyncTools is the best Shopify Xero integration for multi-channel sellers and accounting firms. The multi-currency support makes it particularly strong for UK and Australian Shopify merchants. ### Strengths - Free plan available - Supports both summarized and individual transaction sync - Excellent payout reconciliation - Strong multi-currency support - Multi-channel support from one account - AI accounting assistant - Partner dashboard for accountants - Competitive pricing - SOC 2 certified ### Considerations - Businesses with very simple single-store accounting needs may not require the broader multi-channel capabilities. - Teams already standardized on another accounting workflow may need time to migrate mappings. [Start Free with SyncTools →](https://app.synctools.ai/on-boarding/) --- ### #2 A2X **Price:** From $29/month **Best for:** Single-channel Shopify or Amazon sellers with accountant recommendation - Shopify-only sellers - Amazon sellers - Businesses working closely with Xero accountants - Merchants who prefer summarized accounting A2X connects Shopify and Amazon to Xero with clean summarized payout-level sync. It has a long track record in this specific use case and is recommended by many accountants in the Xero ecosystem. **Key limitations:** A2X offers summarized payout sync only - no individual transaction-level sync. It does not support WooCommerce. Pricing scales per channel count. No free plan. For a single-channel Shopify seller whose Xero accountant already recommends A2X, it's reliable. For multi-channel sellers or those who need transaction-level detail, SyncTools is the stronger option. ### Strengths - Mature product - Well established within the Xero ecosystem - Excellent summarized payout accounting - Widely recommended by accountants - Reliable documentation and support ### Considerations - No individual transaction sync - No free plan - Limited marketplace coverage beyond Shopify and Amazon - Pricing increases as additional channels are added --- ### #3 Synder **Price:** ~$52–$101/month (base + Smart Rules) **Best for:** SaaS or DTC brands with Stripe subscription revenue alongside Shopify - SaaS companies - Subscription businesses - Businesses with significant Stripe revenue - Companies using multiple payment gateways Synder connects Stripe, PayPal, Square, Shopify, and Amazon to Xero. Its Stripe integration is particularly strong for businesses with SaaS or subscription revenue streams. **Key limitation:** Auto-categorization (Smart Rules) is an add-on at ~$49/month. Real entry cost for most eCommerce sellers: ~$101/month. Setup complexity is Synder's most-cited negative review across G2 and Capterra. For Shopify + Xero sellers without a Stripe component, SyncTools is simpler and significantly cheaper. ### Strengths - Excellent Stripe integration - Supports multiple payment providers - Flexible synchronization options - Good transaction-level visibility ### Considerations - Higher total cost once Smart Rules are included - Initial configuration is more involved - Can feel overly complex for Shopify-only merchants --- ### #4 Dext Commerce **Price:** Varies by region **Best for:** Clean historical transaction import for Xero - Historical data migration - Bookkeeping cleanup - Legacy Shopify imports - Accounting firms performing catch-up bookkeeping Dext Commerce (formerly known as Greenback) focuses on importing historical Shopify data into Xero for tax and bookkeeping purposes. It is stronger for historical cleanup than ongoing sync workflows. ### Strengths - Strong historical import capabilities - Clean transaction history migration - Useful during accounting system transitions - Well suited for bookkeeping projects ### Considerations - Less focused on continuous real-time synchronization - Smaller feature set for ongoing operational accounting - Limited automation compared with dedicated sync platforms --- 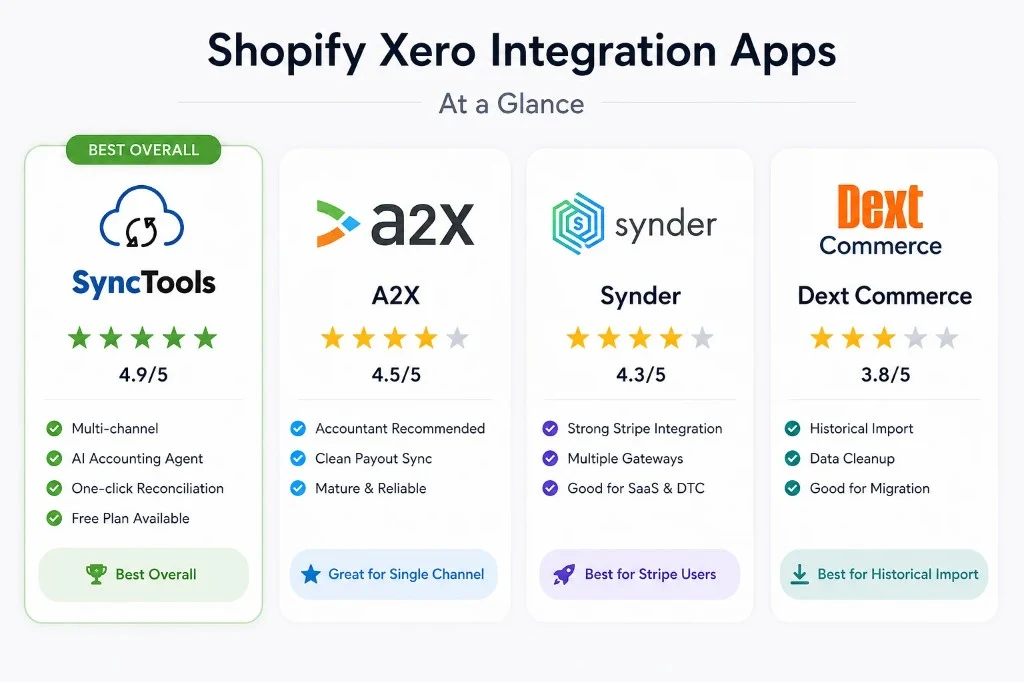 ## Shopify Xero Integration Comparison Table| Feature | SyncTools | A2X | Synder | Dext Commerce |
|---|---|---|---|---|
| Free Plan | ✅ | ❌ | ❌ | ❌ |
| Starting Price | Free | $29/mo | ~$52/mo* | Varies |
| Individual Transaction Sync | ✅ | ❌ | ✅ | Partial |
| Summarized Journal Sync | ✅ | ✅ | ✅ | ✅ |
| Shopify Payments Reconciliation | ✅ One-click | ✅ | Partial | Partial |
| Refund Handling | ✅ | ✅ | ✅ | Limited |
| Multi-Currency | ✅ | ✅ | ✅ | Limited |
| Shopify Markets Support | ✅ | ✅ | ✅ | Partial |
| Amazon Integration | ✅ | ✅ | ✅ | ❌ |
| WooCommerce Integration | ✅ | ❌ | ✅ | ❌ |
| Etsy Integration | ✅ | ❌ | ❌ | ❌ |
| eBay Integration | ✅ | ❌ | ❌ | ❌ |
| Walmart Integration | ✅ | ❌ | ❌ | ❌ |
| AI Features | ✅ | ❌ | ❌ | ❌ |
| Accounting Firm Dashboard | ✅ | ❌ | ❌ | Limited |
| SOC 2 Certification | ✅ | ✅ | Not publicly stated | Not publicly stated |
| Best For | Multi-channel sellers | Shopify & Amazon | Stripe-heavy businesses | Historical imports |
* Additional features such as Smart Rules may increase total monthly cost.
## Benchmark Comparison ### Shopify → Xero Accounting Benchmark To help compare real-world accounting outcomes, we evaluated how each platform performs across the workflows that typically generate the most manual bookkeeping effort. 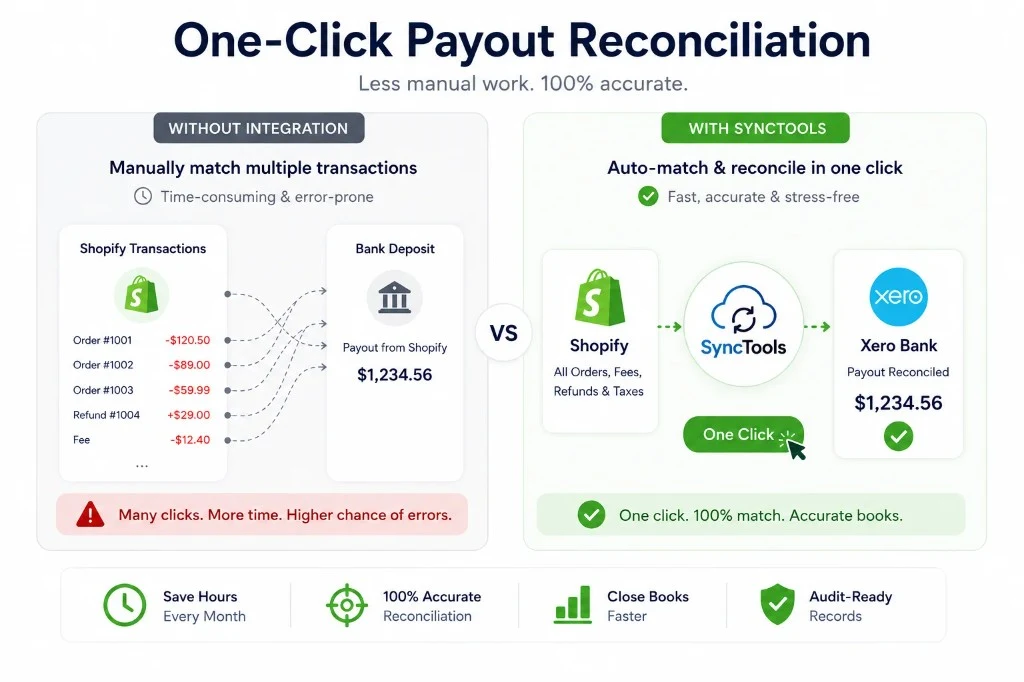| Workflow | SyncTools | A2X | Synder | Dext Commerce |
|---|---|---|---|---|
| Gross vs Net Revenue | Excellent | Excellent | Good | Good |
| Tax Mapping | Excellent | Excellent | Good | Good |
| Refund Processing | Excellent | Excellent | Good | Good |
| Shopify Fee Recording | Excellent | Excellent | Good | Partial |
| Bank Reconciliation | Excellent | Excellent | Good | Limited |
| Multi-Currency Accuracy | Excellent | Good | Good | Limited |
| Multi-Channel Support | Excellent | Limited | Good | Limited |
| Accountant Workflow | Excellent | Good | Moderate | Moderate |
| Magento Data | QuickBooks Treatment |
|---|---|
| Product revenue (gross) | Sales or Product Revenue income account |
| Shipping charged to customer | Shipping Revenue income account |
| Discount / coupon applied | Discount contra-revenue or expense account |
| Sales tax collected | Sales Tax Payable liability account |
| Payment gateway fee (Stripe, PayPal, Braintree) | Payment Processing Fees expense account |
| Credit memo / refund | Negative adjustment to original revenue accounts |
| Payout deposit to bank | Cleared against clearing account in bank reconciliation |
| Business Type | Recommended Approach | Why |
|---|---|---|
| New Magento store (under 50 orders/month) | Manual CSV export | Lowest cost while transaction volume remains small. |
| Growing merchant (50 to 300 orders/month) | Cloud integration | Eliminates repetitive bookkeeping and improves reporting accuracy. |
| High-volume retailer (300+ orders/month) | SyncTools | Automated reconciliation, refunds, fees, tax mapping and historical sync significantly reduce finance workload. |
| Multi-store Adobe Commerce | SyncTools | Supports multiple websites, store views and QuickBooks class mapping. |
| Enterprise with Avalara or Vertex | SyncTools | Preserves complex tax calculations and liability reporting without manual adjustments. |
| Feature | Manual CSV | Marketplace Extension | SyncTools |
|---|---|---|---|
| Initial setup | Easy | Moderate | Easy |
| Developer required | No | Usually | No |
| Multi-store support | Manual | Partial | ✓ |
| Bundle products | Manual | Partial | ✓ |
| Refund automation | ✗ | Partial | ✓ |
| Historical imports | Manual | Varies | ✓ |
| Multi-currency | ✗ | Varies | ✓ |
| Scheduled sync | ✗ | ✓ | ✓ |
| Real-time sync | ✗ | Partial | ✓ |
| Payment gateway fees | Manual | Partial | ✓ |
| Sales tax mapping | Manual | ✓ | ✓ |
| Bank reconciliation | Manual | Partial | ✓ |
| Maintenance | Manual | Extension updates | Cloud managed |
| Best for | Very small stores | Existing Magento extension users | Growing & enterprise merchants |
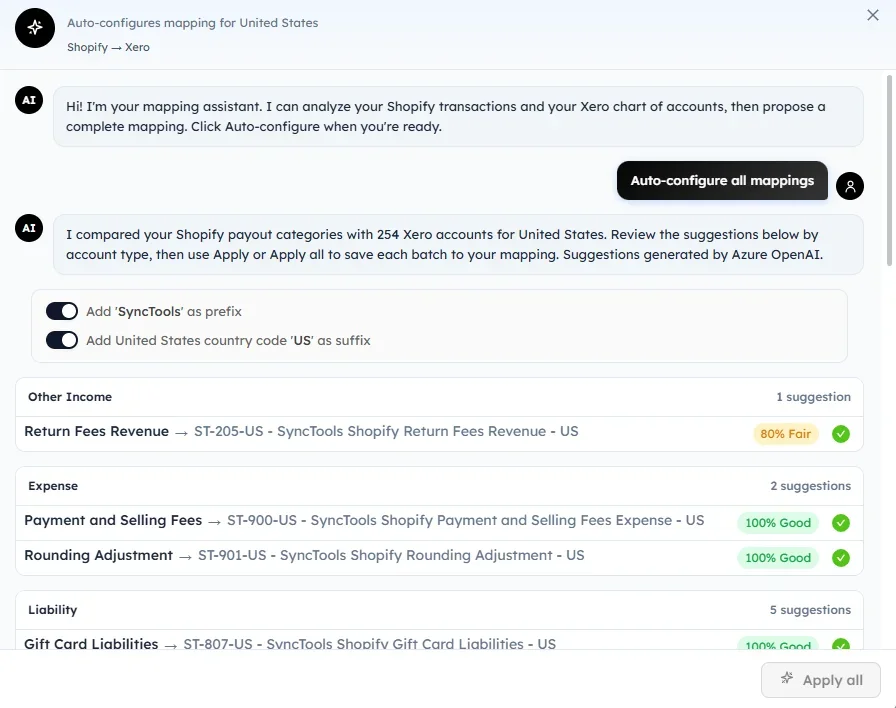 ## How AI Generates Account Mapping Recommendations
When you click Auto-configure All Mappings, SyncTools performs the following actions automatically:
- Retrieves all supported eBay transaction categories.
- Downloads the latest Chart of Accounts from QuickBooks Online.
- Compares each eBay category with available QuickBooks accounts.
- Evaluates account names, account types, and accounting purpose.
- Calculates the best matching account for each category.
- Assigns a confidence score to every recommendation.
- Displays the results grouped by account type.
This process usually takes only a few seconds.
## How to Review AI Account Mapping Suggestions
Once the analysis is complete, the recommendations are displayed by account type, making them easier to review.
Examples include:
- Income
- Expense
- Liability
- Asset
- Cost of Goods Sold
- Other Income
Each mapping displays:
- eBay transaction category
- Recommended QuickBooks account
- Confidence score
- Mapping status
Review each suggestion carefully before applying it.
## How AI Generates Account Mapping Recommendations
When you click Auto-configure All Mappings, SyncTools performs the following actions automatically:
- Retrieves all supported eBay transaction categories.
- Downloads the latest Chart of Accounts from QuickBooks Online.
- Compares each eBay category with available QuickBooks accounts.
- Evaluates account names, account types, and accounting purpose.
- Calculates the best matching account for each category.
- Assigns a confidence score to every recommendation.
- Displays the results grouped by account type.
This process usually takes only a few seconds.
## How to Review AI Account Mapping Suggestions
Once the analysis is complete, the recommendations are displayed by account type, making them easier to review.
Examples include:
- Income
- Expense
- Liability
- Asset
- Cost of Goods Sold
- Other Income
Each mapping displays:
- eBay transaction category
- Recommended QuickBooks account
- Confidence score
- Mapping status
Review each suggestion carefully before applying it.
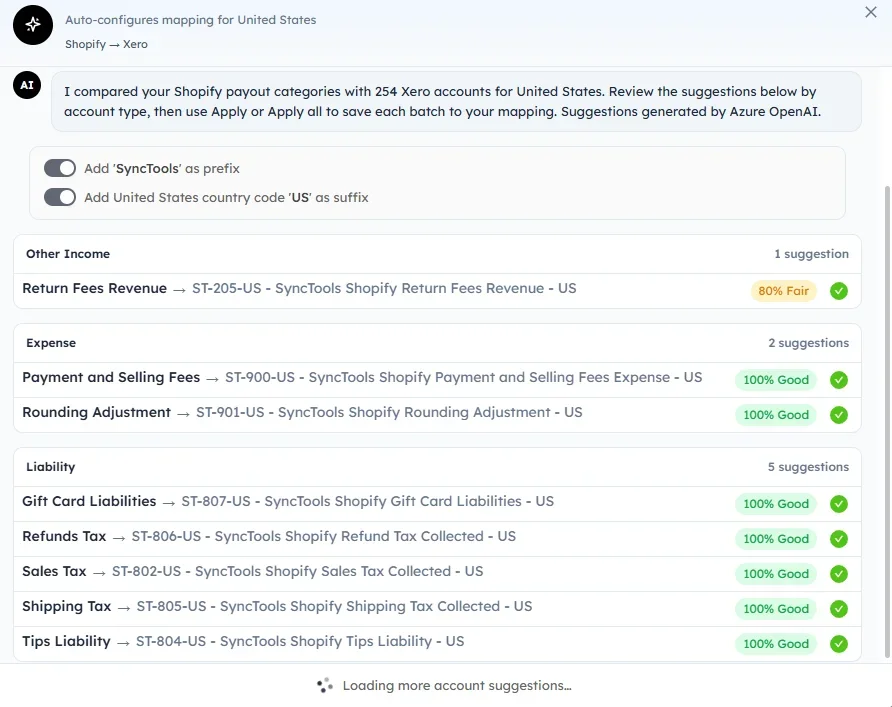 ## Understanding AI Mapping Confidence Scores
Every AI recommendation includes a confidence indicator that reflects how closely the suggested QuickBooks account matches the eBay transaction category.
| Confidence | Meaning |
|---|---|
| 95–100% | Excellent match. The AI is highly confident that the suggested account is appropriate. |
| 80–94% | Good match. The recommendation is suitable but should be reviewed before applying. |
| Below 80% | Low confidence. The mapping should be reviewed and confirmed manually. |
The confidence score is intended to assist with decision-making and does not prevent you from selecting a different account.
## How to Apply AI Account Mapping Recommendations
You can choose to:
- Apply a single mapping.
- Modify a suggested account before saving.
- Apply all recommendations at once.
To save all AI-generated mappings:
1. Review the suggested mappings.
2. Click Apply All.
3. Wait for the confirmation message.
Once applied, the mappings become part of your active integration configuration.
---
## AI Threshold Advisor
URL: https://synctools.ai/help/ebay-quickbooks-integration/ebay-quickbooks-ai-threshold-advisor
> How SyncTools AI Threshold Advisor helps eBay sellers set the right transaction grouping thresholds for QuickBooks - balancing detail level with accounting performance.
## What Is SyncTools AI Threshold Advisor?
AI Threshold Advisor helps eBay sellers monitor their tax registration thresholds across the countries in which they sell. Instead of manually researching tax regulations or tracking sales against registration limits, SyncTools continuously analyzes your sales activity and compares it with the latest tax threshold requirements for your selected countries.
The advisor provides AI-powered recommendations, displays the applicable threshold limit, explains why the threshold applies, and includes the official government source used to determine the recommendation. This helps businesses prepare for tax registration at the right time and reduces the risk of non-compliance.
## Before You Begin
Before using AI Threshold Advisor, ensure that:
- Your eBay account is connected.
- Your QuickBooks Online company is connected.
- You have selected the countries where your business operates.
- Your synchronization settings have been completed.
## How to Open AI Threshold Advisor in SyncTools
1. Log in to SyncTools.
2. Open your eBay → QuickBooks Online integration.
3. Navigate to Settings.
4. Select AI Threshold Advisor.
5. Choose the country you want to review.
The advisor automatically loads the latest threshold information for the selected country.
## Understanding AI Mapping Confidence Scores
Every AI recommendation includes a confidence indicator that reflects how closely the suggested QuickBooks account matches the eBay transaction category.
| Confidence | Meaning |
|---|---|
| 95–100% | Excellent match. The AI is highly confident that the suggested account is appropriate. |
| 80–94% | Good match. The recommendation is suitable but should be reviewed before applying. |
| Below 80% | Low confidence. The mapping should be reviewed and confirmed manually. |
The confidence score is intended to assist with decision-making and does not prevent you from selecting a different account.
## How to Apply AI Account Mapping Recommendations
You can choose to:
- Apply a single mapping.
- Modify a suggested account before saving.
- Apply all recommendations at once.
To save all AI-generated mappings:
1. Review the suggested mappings.
2. Click Apply All.
3. Wait for the confirmation message.
Once applied, the mappings become part of your active integration configuration.
---
## AI Threshold Advisor
URL: https://synctools.ai/help/ebay-quickbooks-integration/ebay-quickbooks-ai-threshold-advisor
> How SyncTools AI Threshold Advisor helps eBay sellers set the right transaction grouping thresholds for QuickBooks - balancing detail level with accounting performance.
## What Is SyncTools AI Threshold Advisor?
AI Threshold Advisor helps eBay sellers monitor their tax registration thresholds across the countries in which they sell. Instead of manually researching tax regulations or tracking sales against registration limits, SyncTools continuously analyzes your sales activity and compares it with the latest tax threshold requirements for your selected countries.
The advisor provides AI-powered recommendations, displays the applicable threshold limit, explains why the threshold applies, and includes the official government source used to determine the recommendation. This helps businesses prepare for tax registration at the right time and reduces the risk of non-compliance.
## Before You Begin
Before using AI Threshold Advisor, ensure that:
- Your eBay account is connected.
- Your QuickBooks Online company is connected.
- You have selected the countries where your business operates.
- Your synchronization settings have been completed.
## How to Open AI Threshold Advisor in SyncTools
1. Log in to SyncTools.
2. Open your eBay → QuickBooks Online integration.
3. Navigate to Settings.
4. Select AI Threshold Advisor.
5. Choose the country you want to review.
The advisor automatically loads the latest threshold information for the selected country.
 ## How AI Threshold Advisor Works
When a country is selected, SyncTools automatically performs the following actions:
- Identifies the selected country.
- Retrieves the applicable tax registration threshold for that country.
- Reviews your eBay sales activity for that region.
- Compares your sales against the country's threshold.
- Calculates your progress toward the threshold.
- Displays an AI recommendation with a confidence score.
- Provides links to the official government or tax authority source.
This allows merchants to understand when they may need to register for tax without manually researching country-specific regulations.
## How AI Threshold Advisor Works
When a country is selected, SyncTools automatically performs the following actions:
- Identifies the selected country.
- Retrieves the applicable tax registration threshold for that country.
- Reviews your eBay sales activity for that region.
- Compares your sales against the country's threshold.
- Calculates your progress toward the threshold.
- Displays an AI recommendation with a confidence score.
- Provides links to the official government or tax authority source.
This allows merchants to understand when they may need to register for tax without manually researching country-specific regulations.
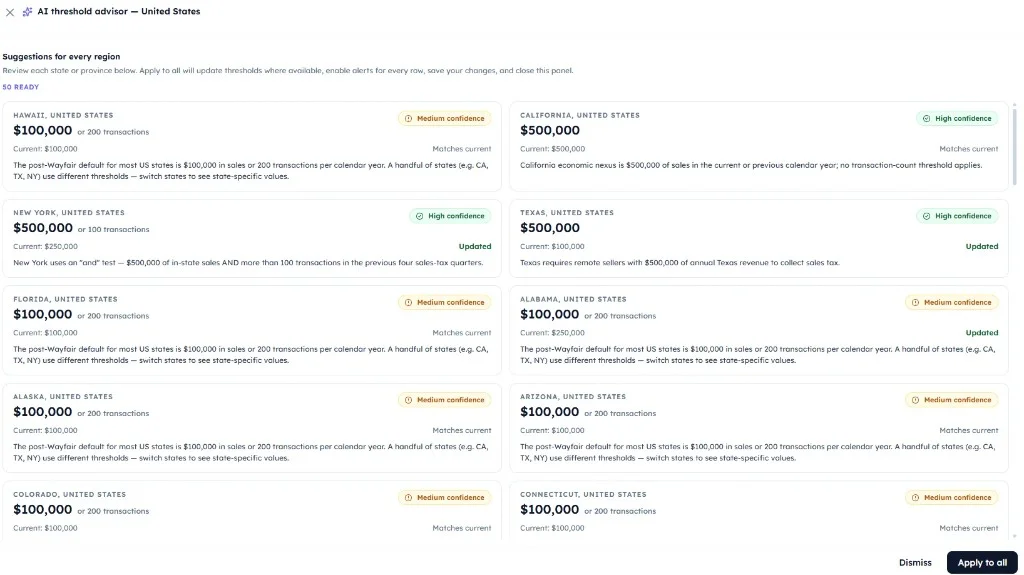 ## Understanding Tax Registration Threshold Information
For each selected country, AI Threshold Advisor displays:
- Country name
- Applicable tax type (for example, Sales Tax, VAT, or GST)
- Registration threshold
- Current sales value
- Remaining amount before reaching the threshold
- AI recommendation
- Confidence level
- Official government source
- Date the threshold information was last updated
This information is presented in a simple, easy-to-understand format so merchants can quickly assess their compliance status.
## Understanding AI Threshold Recommendations
Based on your sales activity, the advisor generates one of the following recommendations:
### Below Threshold
Your sales are currently below the registration threshold.
No immediate action is required, but SyncTools will continue monitoring your sales.
### Approaching Threshold
Your sales are nearing the registration threshold.
The advisor recommends preparing the required tax registration documents and reviewing local tax obligations.
### Threshold Reached
Your sales have reached or exceeded the country's registration threshold.
The advisor recommends reviewing your tax obligations and registering with the appropriate tax authority as required by local regulations.
### Confidence Score
Each recommendation includes a confidence indicator that reflects how accurately the AI has matched your sales data with the applicable tax rules.
| Confidence | Meaning |
|---|---|
| 95–100% | High confidence. Threshold information and recommendation are strongly supported. |
| 80–94% | Good confidence. Review the recommendation and official source. |
| Below 80% | Additional review recommended before making compliance decisions. |
The confidence score is provided as guidance and should be considered alongside the referenced government documentation.
## Understanding Tax Registration Threshold Information
For each selected country, AI Threshold Advisor displays:
- Country name
- Applicable tax type (for example, Sales Tax, VAT, or GST)
- Registration threshold
- Current sales value
- Remaining amount before reaching the threshold
- AI recommendation
- Confidence level
- Official government source
- Date the threshold information was last updated
This information is presented in a simple, easy-to-understand format so merchants can quickly assess their compliance status.
## Understanding AI Threshold Recommendations
Based on your sales activity, the advisor generates one of the following recommendations:
### Below Threshold
Your sales are currently below the registration threshold.
No immediate action is required, but SyncTools will continue monitoring your sales.
### Approaching Threshold
Your sales are nearing the registration threshold.
The advisor recommends preparing the required tax registration documents and reviewing local tax obligations.
### Threshold Reached
Your sales have reached or exceeded the country's registration threshold.
The advisor recommends reviewing your tax obligations and registering with the appropriate tax authority as required by local regulations.
### Confidence Score
Each recommendation includes a confidence indicator that reflects how accurately the AI has matched your sales data with the applicable tax rules.
| Confidence | Meaning |
|---|---|
| 95–100% | High confidence. Threshold information and recommendation are strongly supported. |
| 80–94% | Good confidence. Review the recommendation and official source. |
| Below 80% | Additional review recommended before making compliance decisions. |
The confidence score is provided as guidance and should be considered alongside the referenced government documentation.
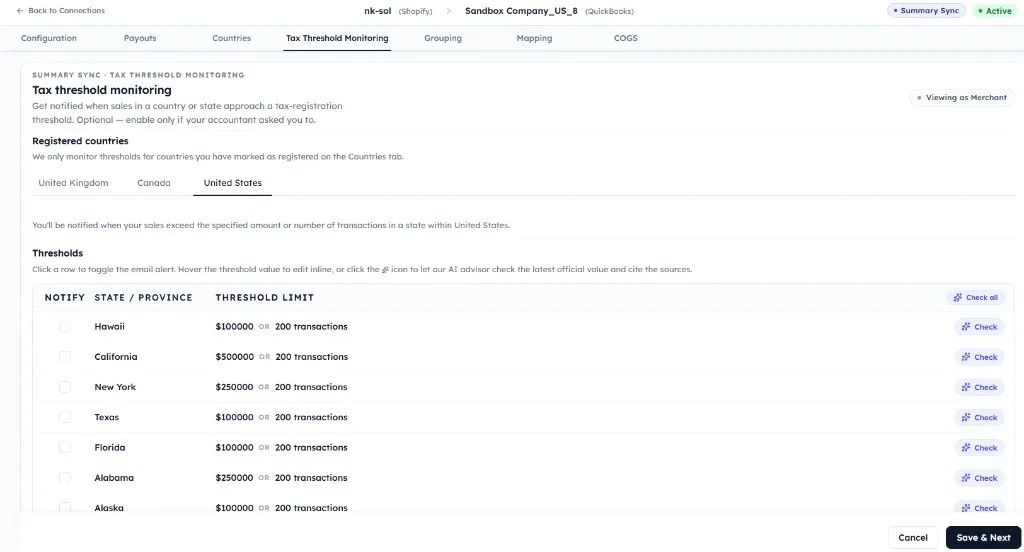 ---
## Complete User Guide
URL: https://synctools.ai/help/ebay-quickbooks-integration/ebay-quickbooks-complete-user-guide
> A full walkthrough of the eBay QuickBooks integration in SyncTools - from initial setup to daily sync management, account mapping, and reconciliation.
## How SyncTools eBay QuickBooks Integration Works
The eBay - SyncTools - QuickBooks integration automates accounting for your entire eBay sales cycle, eliminating manual data entry and keeping your QuickBooks Online books reconciled to the penny. Once your eBay account and QuickBooks are connected, SyncTools imports your Orders, Items, Refunds, Fees, and Payouts, then posts accurate, correctly categorized entries into QuickBooks on the schedule you choose - daily, weekly, or monthly - in either summarized or individual mode.
**eBay Fees We Match** - Every fee eBay deducts is captured and posted to its own QuickBooks expense account - not buried in the net payout - so profitability stays accurate and totals tie back to your Managed Payments statement.
**Refunds** - Each eBay refund syncs as a Credit Note linked to the original invoice where possible, reversing revenue, tax, and inventory correctly. Handles full & partial refunds, goodwill (no-return) refunds, shipping/tax refunds, multiple staged refunds per order (each its own credit note for traceability), and refunds issued after a payout - with no double-counting.
**Payouts** - When eBay releases a Managed Payments payout, SyncTools records the exact net deposit and splits it into its true parts - gross sales as income, fees as expenses, refunds as credit notes - so it ties out against your bank feed. It aggregates multiple orders into one payout while preserving order references, and handles mixed payouts, refund-inclusive payouts, and payouts without orders (reserve releases, fee reversals).
---
## AI Features for eBay QuickBooks Integration
**AI Account Mapping:** Goes beyond standard auto-mapping - AI recognizes each eBay transaction type and suggests or creates the correct QuickBooks chart-of-accounts mapping, cutting setup time and mis-categorization so books are accurate from the first sync.
**AI Threshold Advisor:** Continuously monitors sales against tax-registration thresholds across your selling regions (US economic nexus, UK/EU VAT) and proactively alerts you as you approach or cross a limit - helping you register at the right time and stay compliant.
---
## How to Create Your SyncTools Account
1. Go to the SyncTools site: https://app.synctools.ai/sign-in
2. Click on "Create your account" if you're a new user, or click on "Sign-in" after filling in the details if you're an existing user.
**Create your account Flow**
- You'll be prompted to enter your email address. Type in your email address.
- After entering your work email address, click on the "Continue" button.
---
## Complete User Guide
URL: https://synctools.ai/help/ebay-quickbooks-integration/ebay-quickbooks-complete-user-guide
> A full walkthrough of the eBay QuickBooks integration in SyncTools - from initial setup to daily sync management, account mapping, and reconciliation.
## How SyncTools eBay QuickBooks Integration Works
The eBay - SyncTools - QuickBooks integration automates accounting for your entire eBay sales cycle, eliminating manual data entry and keeping your QuickBooks Online books reconciled to the penny. Once your eBay account and QuickBooks are connected, SyncTools imports your Orders, Items, Refunds, Fees, and Payouts, then posts accurate, correctly categorized entries into QuickBooks on the schedule you choose - daily, weekly, or monthly - in either summarized or individual mode.
**eBay Fees We Match** - Every fee eBay deducts is captured and posted to its own QuickBooks expense account - not buried in the net payout - so profitability stays accurate and totals tie back to your Managed Payments statement.
**Refunds** - Each eBay refund syncs as a Credit Note linked to the original invoice where possible, reversing revenue, tax, and inventory correctly. Handles full & partial refunds, goodwill (no-return) refunds, shipping/tax refunds, multiple staged refunds per order (each its own credit note for traceability), and refunds issued after a payout - with no double-counting.
**Payouts** - When eBay releases a Managed Payments payout, SyncTools records the exact net deposit and splits it into its true parts - gross sales as income, fees as expenses, refunds as credit notes - so it ties out against your bank feed. It aggregates multiple orders into one payout while preserving order references, and handles mixed payouts, refund-inclusive payouts, and payouts without orders (reserve releases, fee reversals).
---
## AI Features for eBay QuickBooks Integration
**AI Account Mapping:** Goes beyond standard auto-mapping - AI recognizes each eBay transaction type and suggests or creates the correct QuickBooks chart-of-accounts mapping, cutting setup time and mis-categorization so books are accurate from the first sync.
**AI Threshold Advisor:** Continuously monitors sales against tax-registration thresholds across your selling regions (US economic nexus, UK/EU VAT) and proactively alerts you as you approach or cross a limit - helping you register at the right time and stay compliant.
---
## How to Create Your SyncTools Account
1. Go to the SyncTools site: https://app.synctools.ai/sign-in
2. Click on "Create your account" if you're a new user, or click on "Sign-in" after filling in the details if you're an existing user.
**Create your account Flow**
- You'll be prompted to enter your email address. Type in your email address.
- After entering your work email address, click on the "Continue" button.

 ---
## How to Connect eBay and QuickBooks to SyncTools
### How do I Connect my eBay Account?
1. Navigate to Integrations. This is typically found in the settings section of your SyncTools account.
2. Once you're in the Integrations section, click on "Create connection". Select Source eBay store and click on Connect once you hover on it.
---
## How to Connect eBay and QuickBooks to SyncTools
### How do I Connect my eBay Account?
1. Navigate to Integrations. This is typically found in the settings section of your SyncTools account.
2. Once you're in the Integrations section, click on "Create connection". Select Source eBay store and click on Connect once you hover on it.
 3. Click on "Connect to eBay". You'll likely be prompted to authorize SyncTools to access your eBay account data. Kindly follow the on-screen instructions to grant access.
4. After clicking Connect, a new window will pop up, typically displaying the eBay sign-in page.
5. Enter your eBay login credentials (username and password) into the fields provided in the new window and grant the application access.
6. After authorizing access and providing any necessary information, complete the connection process. SyncTools should now be connected to your eBay account.
3. Click on "Connect to eBay". You'll likely be prompted to authorize SyncTools to access your eBay account data. Kindly follow the on-screen instructions to grant access.
4. After clicking Connect, a new window will pop up, typically displaying the eBay sign-in page.
5. Enter your eBay login credentials (username and password) into the fields provided in the new window and grant the application access.
6. After authorizing access and providing any necessary information, complete the connection process. SyncTools should now be connected to your eBay account.
 ---
### How do I connect QuickBooks?
To connect your QuickBooks Online with SyncTools, please follow similar steps to those used while connecting your eBay account, and it should connect successfully with SyncTools. After clicking the "Connect to QuickBooks" button, a new window will open, prompting you to log in to your QuickBooks Online account. Here's what you should do next:
1. Navigate to the Integrations section in SyncTools and select the QuickBooks App if not selected earlier. Once QuickBooks is selected, click on the "Connect to QuickBooks" button.
---
### How do I connect QuickBooks?
To connect your QuickBooks Online with SyncTools, please follow similar steps to those used while connecting your eBay account, and it should connect successfully with SyncTools. After clicking the "Connect to QuickBooks" button, a new window will open, prompting you to log in to your QuickBooks Online account. Here's what you should do next:
1. Navigate to the Integrations section in SyncTools and select the QuickBooks App if not selected earlier. Once QuickBooks is selected, click on the "Connect to QuickBooks" button.
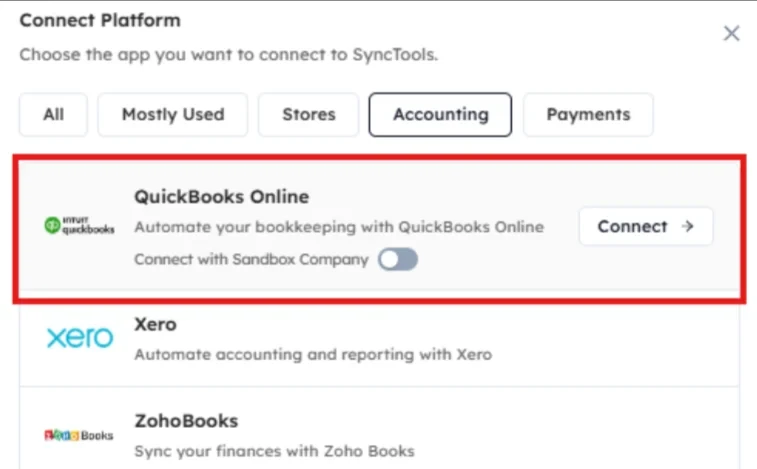 2. After clicking the button, a new window will pop up, typically displaying the QuickBooks login page.
3. Enter your QuickBooks Online login credentials (username and password) into the fields provided in this new window.
4. Once logged in, QuickBooks will ask you to authorize SyncTools to access your QuickBooks Online account. Select the preferred QuickBooks Company, review the permissions requested, and click on the "Allow" button to grant SyncTools access.
5. After authorizing access, the new window will likely close automatically, and you'll be redirected back to SyncTools.
6. You will receive a confirmation message within SyncTools indicating that the connection to QuickBooks was successful.
7. Once eBay & QuickBooks are connected successfully with SyncTools, you're good to go ahead with configuration and setting up your system. To do so, click on "Next".
2. After clicking the button, a new window will pop up, typically displaying the QuickBooks login page.
3. Enter your QuickBooks Online login credentials (username and password) into the fields provided in this new window.
4. Once logged in, QuickBooks will ask you to authorize SyncTools to access your QuickBooks Online account. Select the preferred QuickBooks Company, review the permissions requested, and click on the "Allow" button to grant SyncTools access.
5. After authorizing access, the new window will likely close automatically, and you'll be redirected back to SyncTools.
6. You will receive a confirmation message within SyncTools indicating that the connection to QuickBooks was successful.
7. Once eBay & QuickBooks are connected successfully with SyncTools, you're good to go ahead with configuration and setting up your system. To do so, click on "Next".
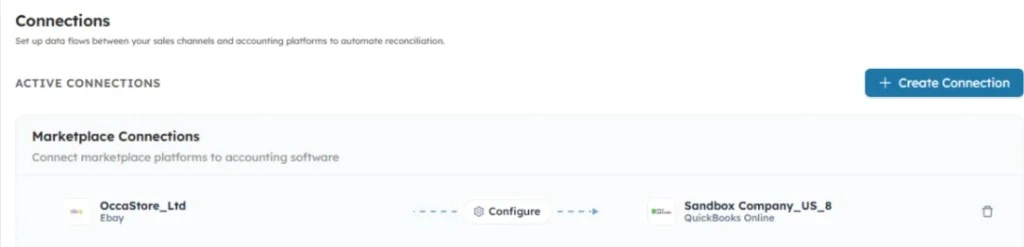 ---
## Configure eBay QuickBooks Synchronization Settings
What are the synchronization options and which one is considered more advantageous?
SyncTools offers two synchronization options: Summarized Entries and Individual Transaction Entries. Users can configure their preferred synchronization method based on their business needs.
---
## Configure eBay QuickBooks Synchronization Settings
What are the synchronization options and which one is considered more advantageous?
SyncTools offers two synchronization options: Summarized Entries and Individual Transaction Entries. Users can configure their preferred synchronization method based on their business needs.
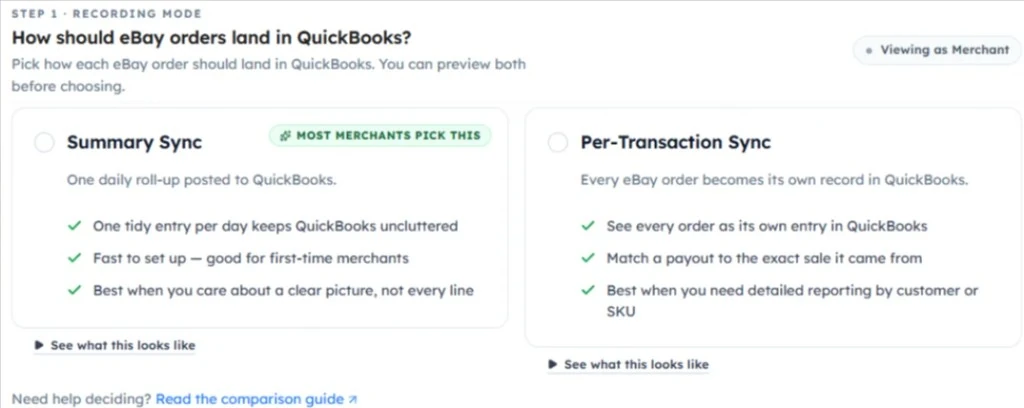 SyncTools strongly recommends using Summarized Entries for synchronization.
**Note:** Selection of the synchronization option depends entirely on your specific business needs. SyncTools doesn't mandate users to opt for Summarized entries.
- Summarized Entries consolidate multiple transactions into a single Journal Entry in QuickBooks.
- The consolidation process is based on the selected time-period frequency and configuration mapping within SyncTools.
- Summarized Entries simplify financial records, making reporting more concise and easier to understand.
- This approach saves time and effort during reconciliation and analysis processes.
- SyncTools also provides early access to the Individual Transaction Entries feature for beta users.
- Users interested in exploring this functionality before its official release can request access from the Sales team at sales@synctools.ai.
**How to choose the frequency of Journal Entry creation in eBay to QuickBooks?**
SyncTools offers flexibility in determining the frequency of Journal Entry creation, allowing you to tailor the synchronization process according to your business needs. You can select from three options: Daily, Weekly, or Monthly.
SyncTools strongly recommends using Summarized Entries for synchronization.
**Note:** Selection of the synchronization option depends entirely on your specific business needs. SyncTools doesn't mandate users to opt for Summarized entries.
- Summarized Entries consolidate multiple transactions into a single Journal Entry in QuickBooks.
- The consolidation process is based on the selected time-period frequency and configuration mapping within SyncTools.
- Summarized Entries simplify financial records, making reporting more concise and easier to understand.
- This approach saves time and effort during reconciliation and analysis processes.
- SyncTools also provides early access to the Individual Transaction Entries feature for beta users.
- Users interested in exploring this functionality before its official release can request access from the Sales team at sales@synctools.ai.
**How to choose the frequency of Journal Entry creation in eBay to QuickBooks?**
SyncTools offers flexibility in determining the frequency of Journal Entry creation, allowing you to tailor the synchronization process according to your business needs. You can select from three options: Daily, Weekly, or Monthly.
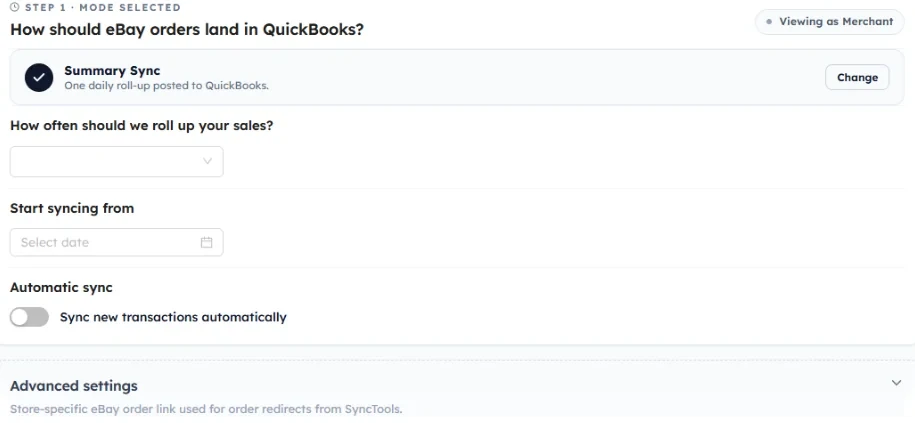 After selecting the eBay order-data importing date and sync frequency, click on "Save & Next". You will then be required to select the countries in which your business operates.
**Why choose countries?**
After selecting the eBay order-data importing date and sync frequency, click on "Save & Next". You will then be required to select the countries in which your business operates.
**Why choose countries?**
 Click on "Save & Next" once the countries are selected, and you will be redirected to "Tax threshold" Preferences. You can either opt for tax preferences if your business is already registered for taxation purposes and engaged in the collection or remittance of sales tax, or hit "No" if this doesn't sound relevant to you.
---
### Tax Threshold Monitoring
Click on "Save & Next" once the countries are selected, and you will be redirected to "Tax threshold" Preferences. You can either opt for tax preferences if your business is already registered for taxation purposes and engaged in the collection or remittance of sales tax, or hit "No" if this doesn't sound relevant to you.
---
### Tax Threshold Monitoring
 ---
### Grouping
This configuration enables how your eBay sales are grouped by SyncTools and determines how journals will be created in your QuickBooks. The screen is divided into two areas - Default Grouping and Classes & Locations.
---
### Grouping
This configuration enables how your eBay sales are grouped by SyncTools and determines how journals will be created in your QuickBooks. The screen is divided into two areas - Default Grouping and Classes & Locations.
 **Default Grouping**
- **Group by Country:** Enabled by default. SyncTools groups your eBay transactions by the countries your business is registered in and operates in. Each registered country (for example, United Kingdom) appears as a selectable checkbox - tick the countries you want included in the grouping.
- **Group by Gateway:** Groups your eBay sales by the payment method used at checkout. The available eBay payment methods are listed as checkboxes - enable the ones you want SyncTools to group and post separately in QuickBooks:
- eBay Managed Payments
- PayPal
- Credit Card
- Apple Pay
---
### Account Mapping
After setting up grouping, you can also enable QuickBooks' class and location mapping with eBay payouts.
Once all grouping settings are configured, you can proceed to map the QuickBooks chart of accounts with eBay transaction types under "Mapping" in the left navigation pane. This mapping process ensures that transactions from eBay are correctly categorized and recorded in QuickBooks according to your desired account structure.
**Default Grouping**
- **Group by Country:** Enabled by default. SyncTools groups your eBay transactions by the countries your business is registered in and operates in. Each registered country (for example, United Kingdom) appears as a selectable checkbox - tick the countries you want included in the grouping.
- **Group by Gateway:** Groups your eBay sales by the payment method used at checkout. The available eBay payment methods are listed as checkboxes - enable the ones you want SyncTools to group and post separately in QuickBooks:
- eBay Managed Payments
- PayPal
- Credit Card
- Apple Pay
---
### Account Mapping
After setting up grouping, you can also enable QuickBooks' class and location mapping with eBay payouts.
Once all grouping settings are configured, you can proceed to map the QuickBooks chart of accounts with eBay transaction types under "Mapping" in the left navigation pane. This mapping process ensures that transactions from eBay are correctly categorized and recorded in QuickBooks according to your desired account structure.
 Additionally, SyncTools offers a "Bulk create and Map" option - it automatically maps your eBay transactions to recommended QuickBooks accounts for the selected country. This will pre-populate common mappings to save your time.
---
### COGS
Additionally, SyncTools offers a "Bulk create and Map" option - it automatically maps your eBay transactions to recommended QuickBooks accounts for the selected country. This will pre-populate common mappings to save your time.
---
### COGS
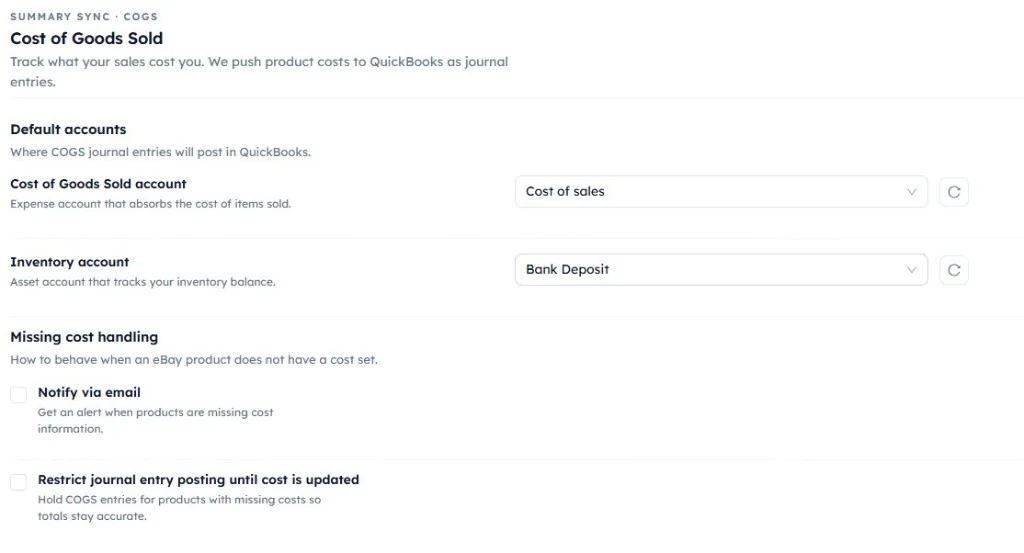 The Cost of Goods Sold (COGS) settings allow you to automatically record the cost of sold products in your accounting software by creating journal entries during synchronization. To configure this feature, select the Cost of Goods Sold Account, which is the expense account where the cost of sold items will be recorded, and the Inventory Account, which is the asset account used to track your inventory value. If newly created accounts are not displayed, click the Refresh icon to reload the account list.
The Missing Cost Handling section determines how SyncTools should handle products that do not have a cost assigned. Enable Notify via Email to receive an alert whenever products with missing cost information are encountered during synchronization, allowing you to update the missing values without interrupting the sync process.
If maintaining accurate financial records is critical, enable Restrict Journal Entry Posting Until Cost is Updated. When this option is selected, SyncTools will not create COGS journal entries for products with missing costs until the cost information is updated. This helps ensure that your inventory valuation and Cost of Goods Sold reports remain accurate and free from incomplete or incorrect accounting entries.
---
### Enable Auto-Sync
On the configuration screen, you will see an "Automatic sync" option, which will help to start the eBay orders syncing automatically per day.
The Cost of Goods Sold (COGS) settings allow you to automatically record the cost of sold products in your accounting software by creating journal entries during synchronization. To configure this feature, select the Cost of Goods Sold Account, which is the expense account where the cost of sold items will be recorded, and the Inventory Account, which is the asset account used to track your inventory value. If newly created accounts are not displayed, click the Refresh icon to reload the account list.
The Missing Cost Handling section determines how SyncTools should handle products that do not have a cost assigned. Enable Notify via Email to receive an alert whenever products with missing cost information are encountered during synchronization, allowing you to update the missing values without interrupting the sync process.
If maintaining accurate financial records is critical, enable Restrict Journal Entry Posting Until Cost is Updated. When this option is selected, SyncTools will not create COGS journal entries for products with missing costs until the cost information is updated. This helps ensure that your inventory valuation and Cost of Goods Sold reports remain accurate and free from incomplete or incorrect accounting entries.
---
### Enable Auto-Sync
On the configuration screen, you will see an "Automatic sync" option, which will help to start the eBay orders syncing automatically per day.
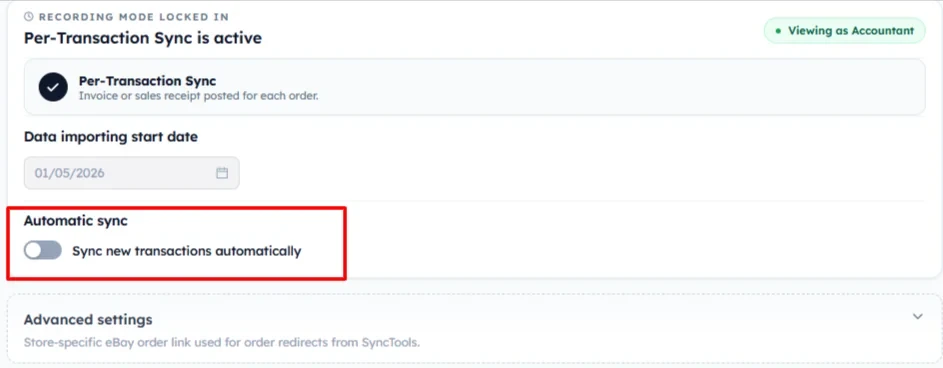 - Auto Sync automates the process of posting eBay payouts in QuickBooks at regular intervals.
- This automation saves time, reduces errors, and ensures up-to-date and accurate financial records by synchronizing data between eBay and QuickBooks automatically, eliminating the need for manual intervention.
---
### Bank Account Configuration
Under this configuration, users can choose the bank account where all eBay payout deposits need to be recorded, and choose one account where any eBay negative balance is to be recorded in QuickBooks.
- Auto Sync automates the process of posting eBay payouts in QuickBooks at regular intervals.
- This automation saves time, reduces errors, and ensures up-to-date and accurate financial records by synchronizing data between eBay and QuickBooks automatically, eliminating the need for manual intervention.
---
### Bank Account Configuration
Under this configuration, users can choose the bank account where all eBay payout deposits need to be recorded, and choose one account where any eBay negative balance is to be recorded in QuickBooks.
 ---
## How to Review and Post eBay Payouts to QuickBooks
1. Begin by accessing the eBay orders downloaded in SyncTools.
2. Review the eBay Payout details alongside a QuickBooks preview for the specific payout.
3. Once satisfied with the accuracy, proceed to successfully post it into your QuickBooks account by clicking on "Post to QuickBooks". This will turn the payout status to "Posted" in SyncTools.
---
## How to Review and Post eBay Payouts to QuickBooks
1. Begin by accessing the eBay orders downloaded in SyncTools.
2. Review the eBay Payout details alongside a QuickBooks preview for the specific payout.
3. Once satisfied with the accuracy, proceed to successfully post it into your QuickBooks account by clicking on "Post to QuickBooks". This will turn the payout status to "Posted" in SyncTools.
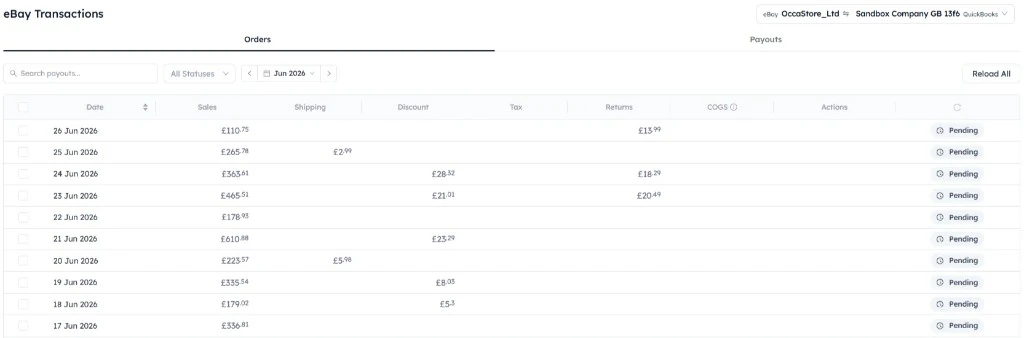 ---
### eBay Payout Details
The posted eBay Payout creates a Journal Entry in QuickBooks Online with details in the "Memo" field and a CSV attachment of all the eBay transactions posted in that particular Journal Entry.
---
### eBay Payout Details
The posted eBay Payout creates a Journal Entry in QuickBooks Online with details in the "Memo" field and a CSV attachment of all the eBay transactions posted in that particular Journal Entry.
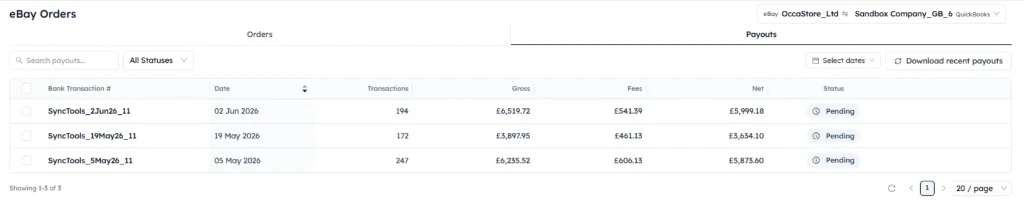 ---
## Track eBay QuickBooks Synchronization History
- Access to sync history is crucial for transparency and troubleshooting when managing eBay Orders.
- Sync history enables tracking of synchronization processes over time.
- It includes details like sync dates, times, transaction statuses, encountered errors, and actions taken.
---
## Get Help with Your eBay QuickBooks Integration
Access to a dedicated support team is essential for assistance and queries related to setup and ongoing operation of synchronization processes. Support extends to clarifying setup instructions and offering general assistance to enhance the user experience.
---
## Track eBay QuickBooks Synchronization History
- Access to sync history is crucial for transparency and troubleshooting when managing eBay Orders.
- Sync history enables tracking of synchronization processes over time.
- It includes details like sync dates, times, transaction statuses, encountered errors, and actions taken.
---
## Get Help with Your eBay QuickBooks Integration
Access to a dedicated support team is essential for assistance and queries related to setup and ongoing operation of synchronization processes. Support extends to clarifying setup instructions and offering general assistance to enhance the user experience.
 You can reach out to us at any time for any kind of support!
Feel free to contact us through the following channels in case of any queries or concerns:
- Email: [support@synctools.ai](mailto:support@synctools.ai)
- [Schedule a demo](/schedule-a-demo?ebay-quickbooks-complete-user-guide)
- Visit the [Help Center](/help)
---
## Returns, Refunds & Fees
URL: https://synctools.ai/help/ebay-quickbooks-integration/ebay-quickbooks-returns-refunds-fees
> How SyncTools handles eBay returns, refunds, and seller fees when syncing to QuickBooks Online - including partial refunds, fee credits, and reconciliation.
## Configure eBay Refunds in QuickBooks Online
You can reach out to us at any time for any kind of support!
Feel free to contact us through the following channels in case of any queries or concerns:
- Email: [support@synctools.ai](mailto:support@synctools.ai)
- [Schedule a demo](/schedule-a-demo?ebay-quickbooks-complete-user-guide)
- Visit the [Help Center](/help)
---
## Returns, Refunds & Fees
URL: https://synctools.ai/help/ebay-quickbooks-integration/ebay-quickbooks-returns-refunds-fees
> How SyncTools handles eBay returns, refunds, and seller fees when syncing to QuickBooks Online - including partial refunds, fee credits, and reconciliation.
## Configure eBay Refunds in QuickBooks Online
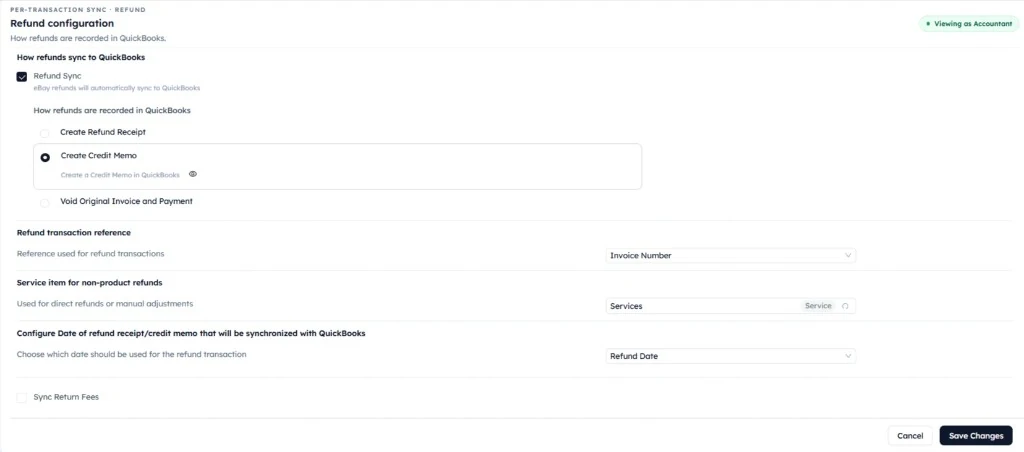 The Refund Configuration settings allow you to control how eBay refunds are synchronized and recorded in QuickBooks.
Enable **Refund Sync** to automatically sync refund transactions from eBay into QuickBooks Online.
Choose how each refund should be created in QuickBooks by selecting one of these options:
- **Create Refund Receipt**
- **Create Credit Memo**
- **Void Original Invoice and Payment**
Pick the method that matches how your business manages refunds and accounting records.
You can further customize refund synchronization with these settings:
- **Refund Transaction Reference** — sets the reference value (such as the invoice number) used on refund transactions in QuickBooks.
- **Service Item for Non-product Refunds** — records manual adjustments, goodwill refunds, and other charges that are not tied to a specific product.
- **Refund date** — choose whether QuickBooks should use the refund date or the order date so financial reporting stays consistent.
## How to Sync eBay Return Fees to QuickBooks Online
If your business needs to account for marketplace return charges, enable **Sync Return Fees** to synchronize return-related fees along with the refund transaction.
Configuring these settings ensures refund transactions are accurately reflected in QuickBooks while staying consistent with your eBay records and accounting practices.
---
## Getting Started
URL: https://synctools.ai/help/linnworks-quickbooks-integration/how-do-i-get-started-with-synctools-setup-login
> NULL
## Getting Started with SyncTools for Linnworks & QuickBooks Integration
SyncTools is your all-in-one solution to seamlessly **connect Linnworks with QuickBooks** for automated accounting.
SyncTools simplifies your workflow and secures your financial data.
### ? Your Data is Protected
SyncTools values your privacy. We host our services on **Google Cloud**, following rigorous data security and compliance standards, ensuring **encrypted and secure storage** for all your business data.
## Step-by-Step Guide to Get Started
### 1. Visit the SyncTools Website
- Go to [**https://synctools.ai**](https://synctools.ai)
- Click on the **"Free Trial"** button on the homepage.
### 2. Select Your Integration Channel
Choose **Linnworks** as your starting channel. SyncTools also supports platforms like Shopify, WooCommerce, Magento, and others.
### 3. Choose How to Sign Up
You have two simple options:
#### Sign Up with Xero
Already using Xero? Click on **“Sign Up with Xero”**.
Don’t have a Xero account? You can easily create one during this step.
#### Manual Sign-Up
Prefer not to use Xero? Simply fill in your business and contact details on the **SyncTools registration form**.
Click **Register** to create your account.
### Log in to SyncTools
- After registration, click on **Login**. (Make sure, that you have verified the account from the inbox)
- You can log in using:
- Your registered email and password
- Your Xero or QuickBooks credentials
---
## Foreign Currency Conversion
URL: https://synctools.ai/help/shopify-quickbooks-integration/how-synctools-converts-foreign-currency-to-your-home-currency-for-accurate-reconciliation
> NULL
Before SyncTools can properly convert foreign currencies from your Shopify store to your home currency in QuickBooks, you need to enable and configure multicurrency features in QuickBooks Online. This guide walks you through the necessary steps to prepare your QuickBooks account for seamless integration with SyncTools.

IMPORTANT: Once multicurrency is enabled in QuickBooks, it cannot be turned off. Please read through this entire guide before proceeding.
## How to Enable Multicurrency in QuickBooks Online
### Step 1: Access Account and Settings
- Log in to your QuickBooks Online account
- Click on the gear icon (⚙️) in the top right corner to open the settings menu
- Select "Account and settings" from the YOUR COMPANY column
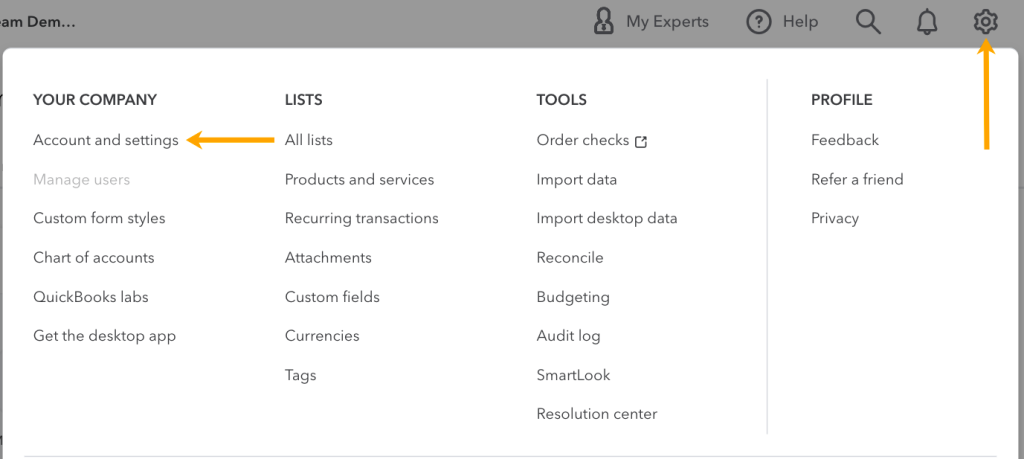
### Step 2: Navigate to Currency Settings
- In Account and settings, click on the "Advanced" tab on the left sidebar
- Scroll down to find the "Currency" section

### Step 3: Enable Multicurrency
- In the Currency section, you'll see your Home Currency already set (e.g., United States Dollar)
- Next to "Multicurrency," click the checkbox to enable this feature
- Click on the "Manage Currencies" link
- On the Currencies page, you'll see your home currency listed
- Click the "Add currency" button in the top right
- From the dropdown menu, select the currency you want to add (e.g., AUD - Australian Dollar)
- Click "Add" to confirm

## How SyncTools Converts Foreign Currency for Accurate Reconciliation
Let's say you sell a product for €100 EUR, and your home currency is USD:
- Shopify processes the payment and converts it to $110 USD
- SyncTools retrieves both the original amount (€100) and the converted amount ($110)
- SyncTools creates an entry in QuickBooks showing:
- Revenue of $110 USD
---
## Install Connector
URL: https://synctools.ai/help/linnworks-quickbooks-integration/how-to-install
> Learn how to integrate QuickBooks with Linnworks using SyncTools seamlessly. Follow our detailed instructions for installing the QuickBooks Connector app from the Linnworks app store and setting it up hassle-free. Get your orders synced effortlessly and efficiently.
All the emails (Confirmation + User information) will be sent to the email that **is registered in the Linnworks account.** If the Linnworks email is of another team member, you will need them to forward two emails to you.**Note:** Direct Sign-up from the website is not available. So the user must install it from the Linnworks app store.
- Please select the **Linnworks account from which** you want to sync the orders.
## Steps to install SyncTools app
Open and Log in to Linnworks
- Click on **Application > Application store**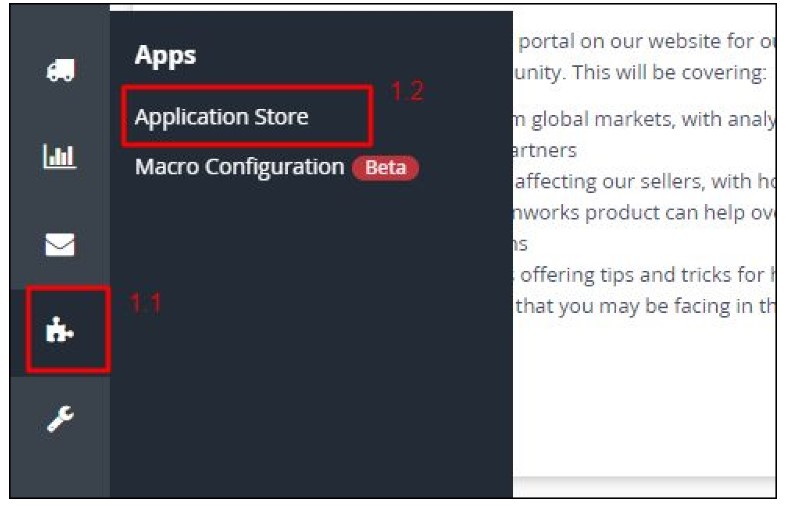
- Search for QuickBooks connector
- Click on the Read More button of QuickBooks connector tool
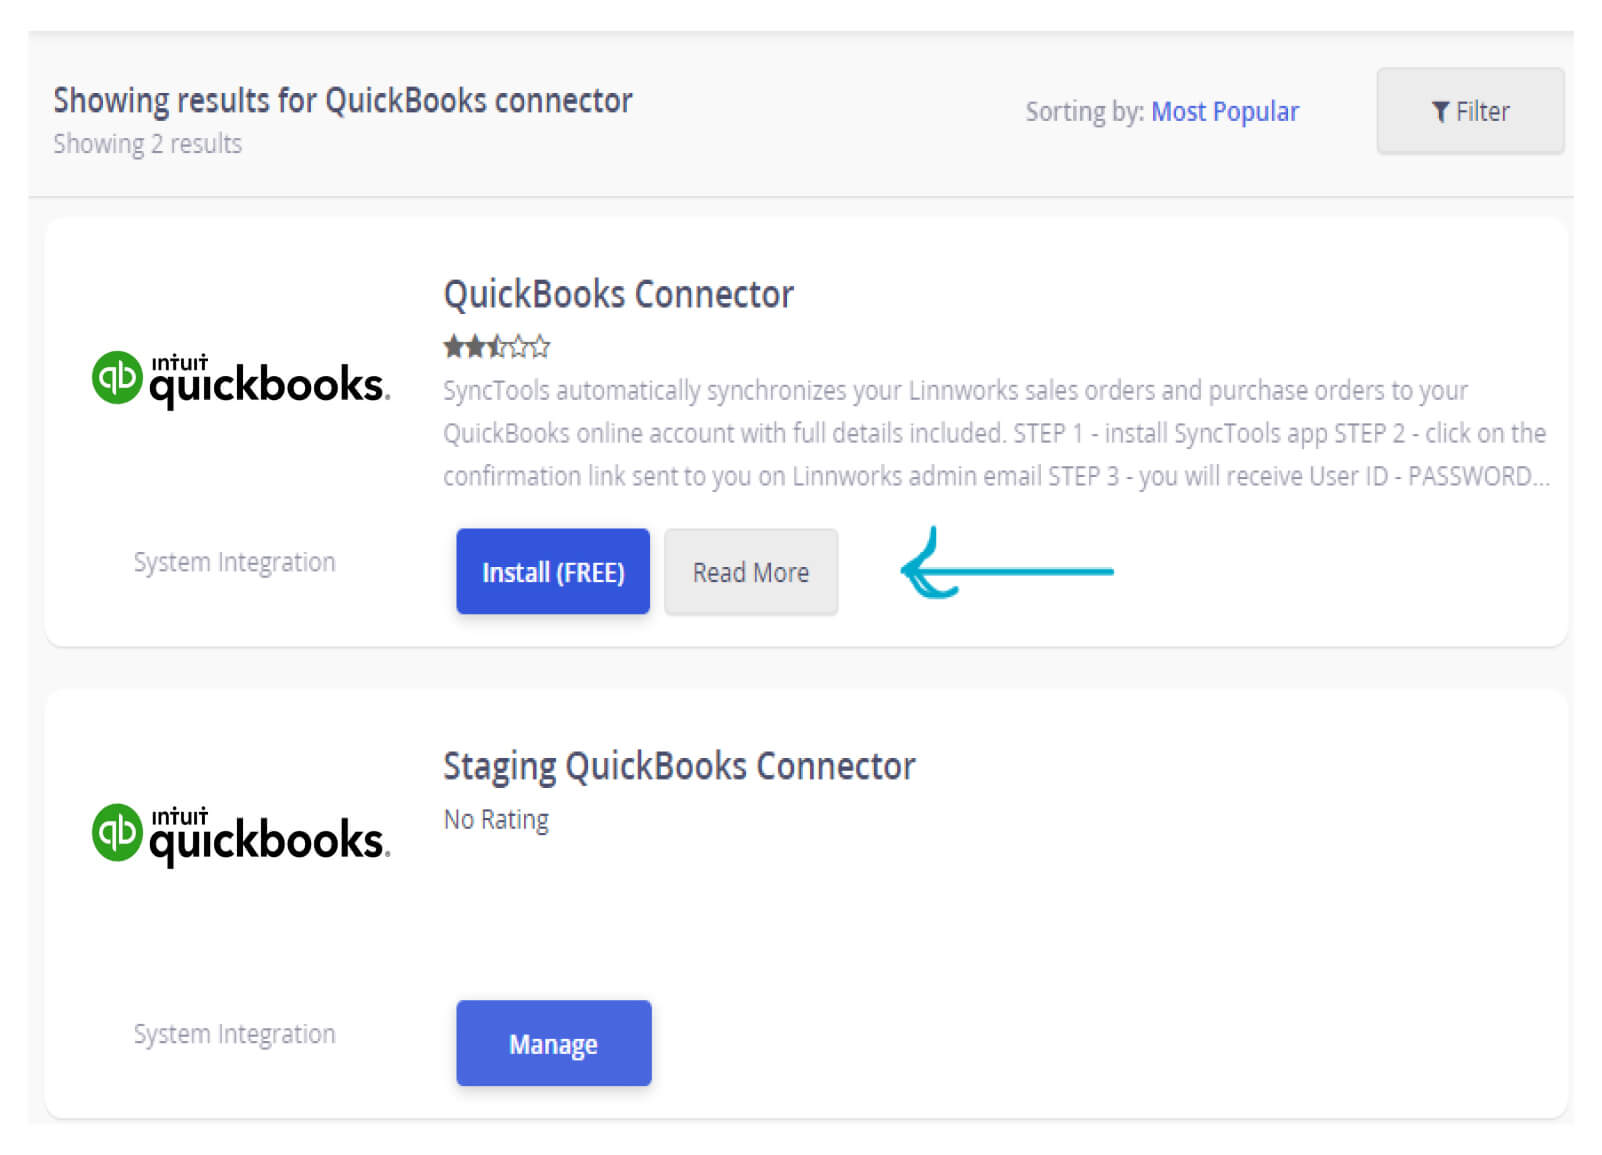
- Make sure the developer name is **SyncTools.io** and click on install button
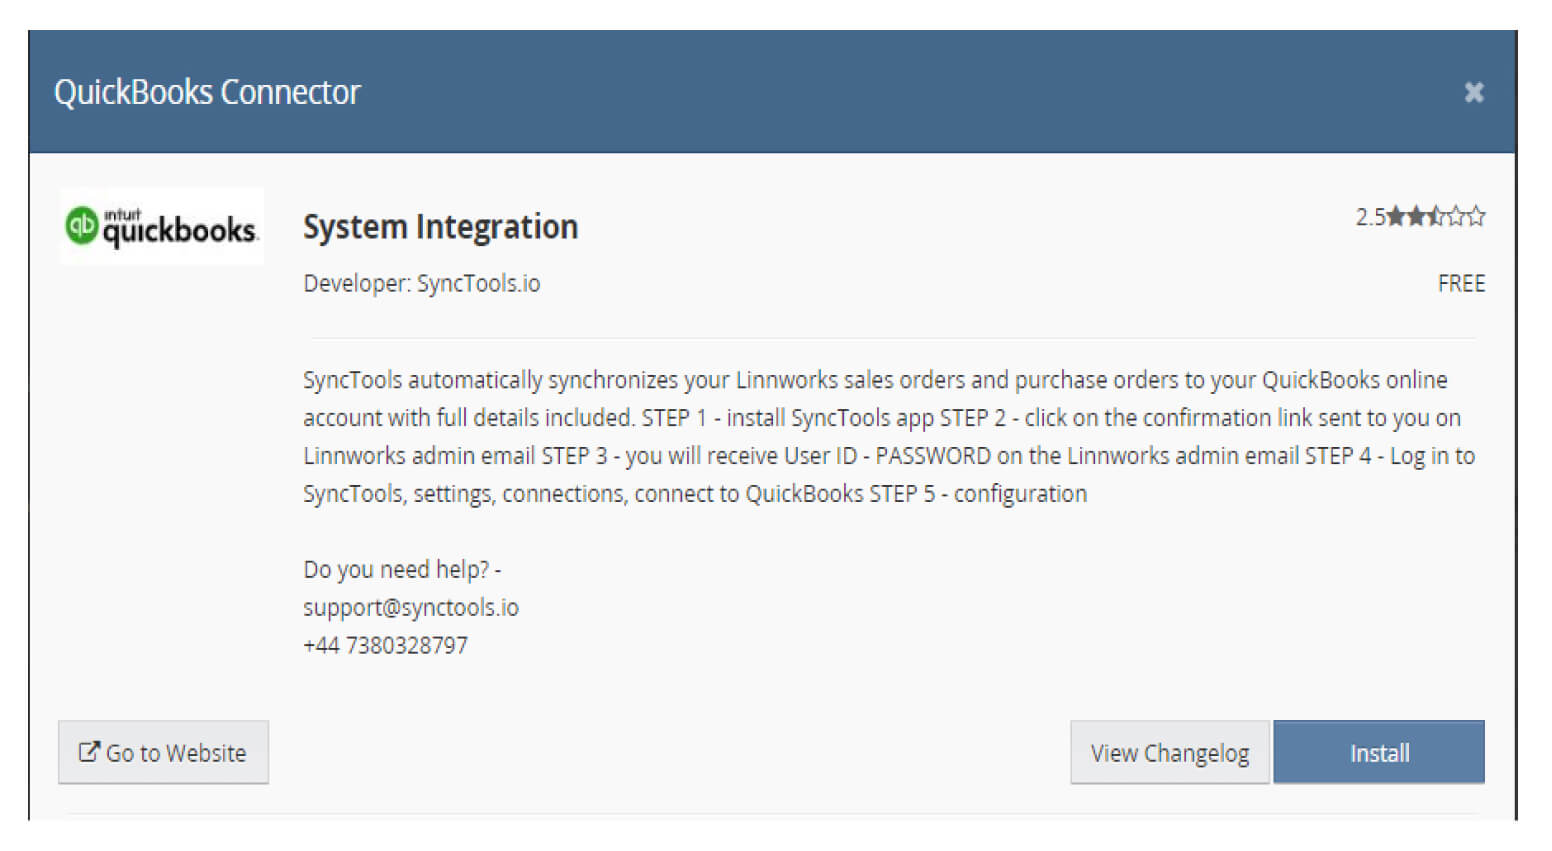
- Accept Third Party Integrations Disclaimer
- Click on the **Next** button
- Click on the **Install** button
- You will get a confirmation email, click on the **confirmation link**
- User Information (Username + Password) will be sent
## Log in to the SyncTools
- Use the credentials sent by SyncTools to Login
- This is the link for SyncTools system: [https://system.synctools.io/](https://system.synctools.io/)
- Or you can go to [ https://synctools.ai](https://synctools.ai) and click on the Login button
---
## Reconcile Payouts
URL: https://synctools.ai/help/shopify-quickbooks-integration/how-to-reconcile-shopify-payouts-with-quickbooks-online
> NULL
## Reconciling Shopify Payouts with Bank Transactions using SyncTools
As an eCommerce business owner, you've likely experienced that end-of-day moment when you need to match what's in your Shopify account with what's actually hit your bank account.
It's a bit like trying to match socks after doing laundry – you know they should pair up, but sometimes it's not as straightforward as it seems!
SyncTools transforms this potentially frustrating process into a smooth, automated journey.
Let's walk through how your Shopify payout data travels from your store to your QuickBooks account, making reconciliation a breeze rather than a burden.**"Before using SyncTools, I spent hours every week manually reconciling Shopify payouts.
Now it takes me less than 5 minutes to match everything perfectly."**– Sarah, Boutique Owner
## How SyncTools Creates Perfect Reconciliation
### Step 1: The Payout Arrives
Your Shopify store has been busy, and a payout has been processed. Shopify has deposited $13.00 into your bank account.
This represents your sales, minus fees, plus shipping, adjusted for discounts – all combined into one deposit.>
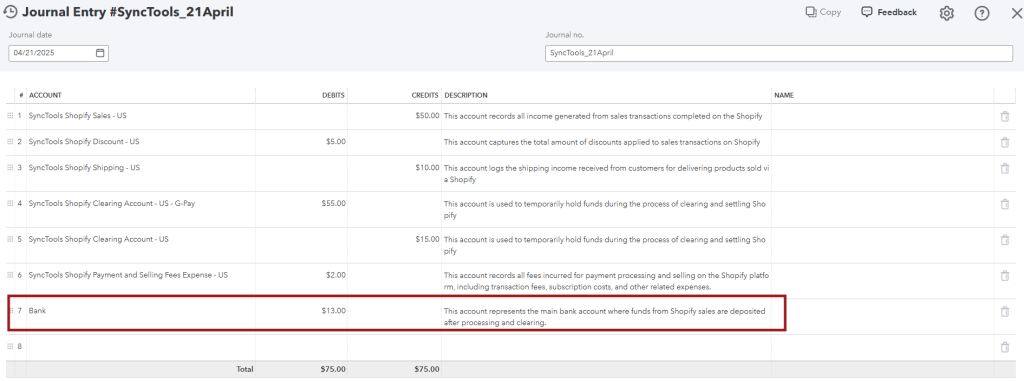**Step 2 : One Click Reconciliation** When you log into QuickBooks and navigate to the "Bank transactions" section, you'll see your $13.00 deposit waiting to be categorized.
But here's where the SyncTools difference becomes clear.
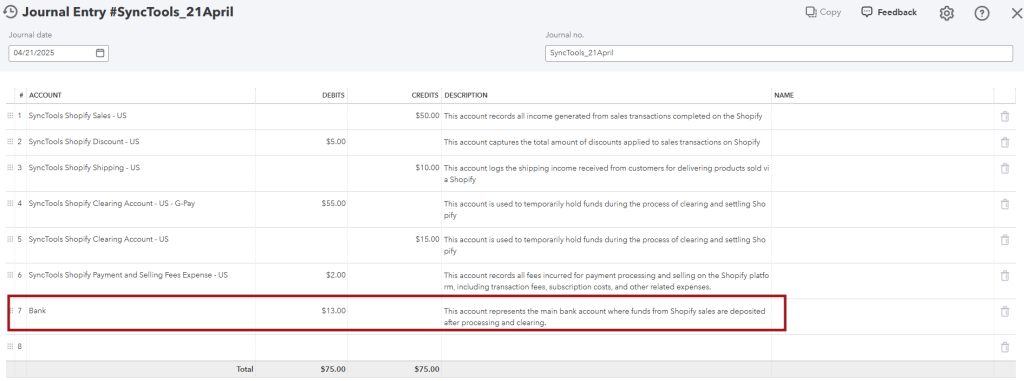
Instead of having to manually allocate this deposit to various income and expense accounts, QuickBooks already shows "1 match found" – linking directly to the SyncTools journal entry!
With a single click on "Match," your reconciliation is complete.
The bank transaction is perfectly matched to your SyncTools journal entry, with all the detailed categorization already done for you.

TIP: This one-click reconciliation eliminates the most time-consuming part of eCommerce bookkeeping, giving you more time to focus on growing your business.
---
## Reconcile Payouts
URL: https://synctools.ai/help/shopify-xero-integration/how-to-reconcile-shopify-payouts-with-xero
> NULL
## Reconciling Shopify Payouts with Bank Transactions using SyncTools
As an eCommerce business owner, you've likely experienced that end-of-day moment when you need to match what's in your Shopify account with what's actually hit your bank account.
It's a bit like trying to match socks after doing laundry – you know they should pair up, but sometimes it's not as straightforward as it seems!
SyncTools transforms this potentially frustrating process into a smooth, automated journey.
Let's walk through how your Shopify payout data travels from your store to your Xero account, making reconciliation a breeze rather than a burden.
>**"Before using SyncTools, I spent hours every week manually reconciling Shopify payouts. Now it takes me less than 5 minutes to match everything perfectly."**– Sarah, Boutique Owner
## How SyncTools Creates Perfect Reconciliation
### Step 1: The Payout Arrives
Your Shopify store has been busy, and a payout has been processed. Shopify has deposited $185.29 into your bank account.
This represents your sales, minus fees, plus shipping, adjusted for discounts – all combined into one deposit.
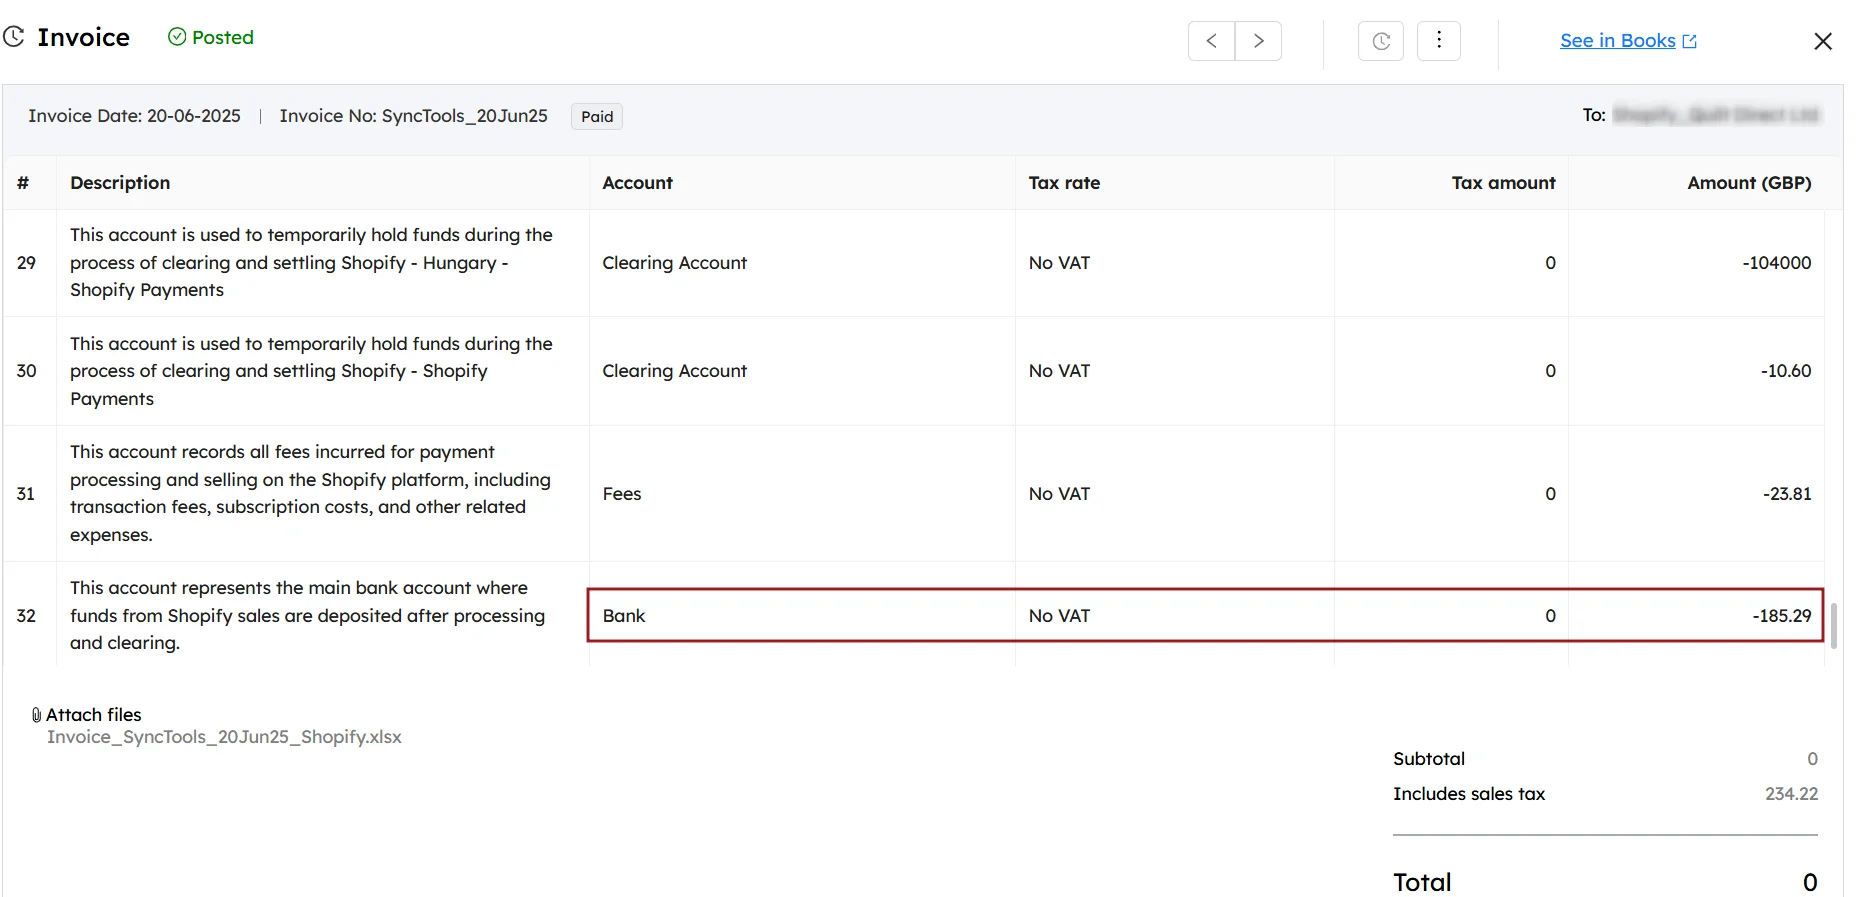
### Step 2 : One Click Reconciliation
When you log into Xero and navigate to the "Bank transactions" section, you'll see your $185.29 deposit waiting to be categorized. But here's where the SyncTools difference becomes clear.
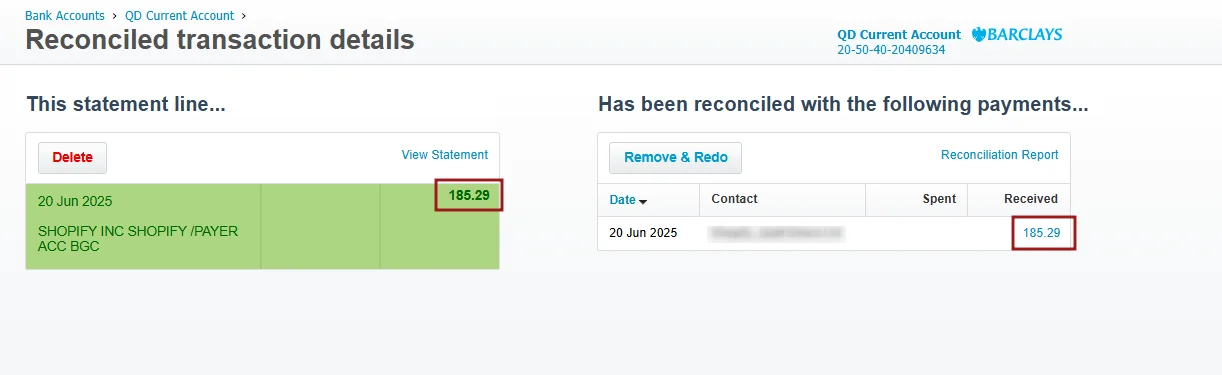
Instead of having to manually allocate this deposit to various income and expense accounts, Xero already shows "1 match found" – linking directly to the SyncTools invoice!
With a single click on **"Match,"** your reconciliation is complete.
The bank transaction is perfectly matched to your SyncTools invoice, with all the detailed categorization already done for you.**TIP:** This one-click reconciliation eliminates the most time-consuming part of eCommerce bookkeeping, giving you more time to focus on growing your business.
---
## Plan Selection & Configuration
URL: https://synctools.ai/help/linnworks-xero-integration/how-to-select-plan-and-configuration-manual-in-linnworks-to-xero
> NULL
Empower your **e-commerce financial management** by seamlessly connecting Linnworks to Xero through precise **plan selection** and**configuration.
## Linnworks to Xero Plan Selection and Setup Guide
This manual provides a step-by-step guide to assist you in choosing the right plan and configuring settings to establish a robust link between these two powerful platforms.
By following these instructions, you'll ensure a smooth and efficient flow of financial data, enabling you to focus on growing your business with confidence.
For a comprehensive overview of plan selection and configuration details, click [here](https://synctoolstorage.blob.core.windows.net/content/SyncTools-Configuration-Manual.pdf)**.
This document provides additional **insights** and **guidance**, allowing you to harness the full potential of the Linnworks-to-Xero integration.
---
## Setup Guide
URL: https://synctools.ai/help/shopify-quickbooks-integration/how-to-setup-shopify-quickbooks-integration
> NULL
## How to Create Your SyncTools Account
- **Start your Free Trial:**
Begin by visiting the Synctools website. On the homepage, locate the **“Free Trial”** button to start the process. Click on the button to initiate the signup process.
- **Choose Your Platform:**
A new window will pop up, asking you to select the e-commerce platform you want to integrate with Synctools. Choose **Shopify** from the available options (Shopify, Linnworks, WooCommerce).
- **Setting Up Your Account :******
After selecting Shopify, you will be redirected to the Synctools **Sign Up** page.
- Enter your email address to begin the sign-up process.
- If you already have an account, click on **“Sign in.”**-**Verify Your Email:**
Once you click **“Continue,”** a verification code will be sent to the email address you provided.
- Check your email inbox, copy the code, and enter it on the Synctools page to verify your account.
- Click **“Verify.”**
### Register Your Account
After verifying your email, complete your registration by providing the following details on the registration page:
- Name, Role (Admin or Accountant), Mobile Number, and Company Name.
- Select your Country, Time Zone, Industry, and Revenue from the dropdown menus.
- Create a strong Password to secure your account.
Review the details for accuracy and click **Sign up** to finish.
### Invite an Accountant or Bookkeeper
- **Decide Whether to Invite:** During registration, you’ll be asked if you have an accountant or bookkeeper. If you want to invite one, select **“Yes.”** If not, choose **“No”** to skip this step.
- If you choose **“Yes,”** you will be prompted to enter the accountant or bookkeeper's details.
- **Send the Invitation:** Enter their **Full Name** and **Email Address** in the respective fields.
- Click **“Invite.”**- Synctools will send an email invitation to the accountant or bookkeeper with instructions on accessing your Synctools account. Make sure you provide the correct email address to avoid any issues.
- **Review the Invitation Status:** After sending the invitation, the accountant or bookkeeper will receive an email, and you can monitor the invitation status on your Synctools dashboard.
- If at any point you decide you don’t need to invite an accountant, simply click **“Skip.”**
### Welcome Screen: Simplifying SyncTools
This screen provides a **quick overview** of how SyncTools works in **three simple steps**:
- Connect your **e-commerce platform**.
- Integrate your **accounting software**.
- Configure your settings for seamless synchronization.
A helpful **video tutorial** is also available to guide you through the setup process step-by-step. Use this screen as your starting point to understand and begin your SyncTools journey effortlessly! ?
## How to Connect Shopify and QuickBooks to SyncTools
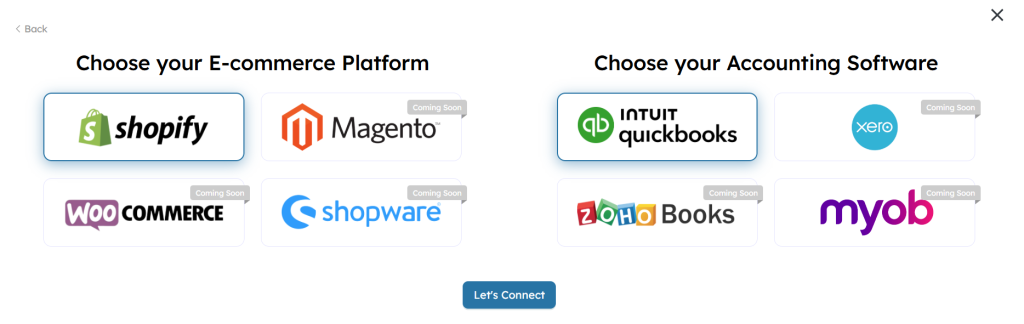
- **Connect Your E-commerce Platform** Select the platform where your store is hosted. This ensures SyncTools can retrieve your orders, payouts, and other financial data for processing.
- **Choose Your Accounting Platform** Select the accounting software where you want to sync your financial data. This step ensures all transactions are accurately recorded and categorized in your books.
Click **“Let’s Connect”** after making your selections to start configuring the synchronization process. SyncTools will guide you through connecting and authorizing your accounts to complete the setup.
### Shopify and QuickBooks Connection Confirmation
This screen confirms that your **Shopify Store** and **QuickBooks Online Account** have been successfully connected. It also displays essential details about each platform for verification and review before proceeding with the synchronization process.
## Configure Shopify to QuickBooks Synchronization Settings
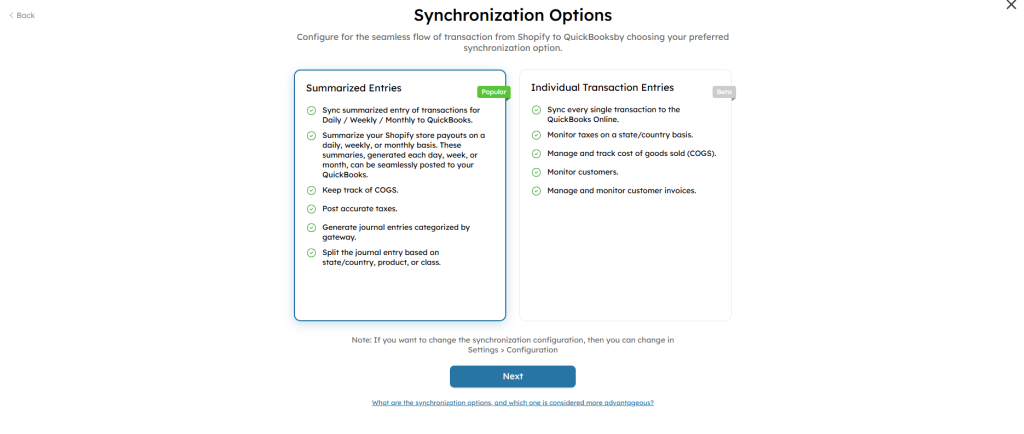
In the settings, you'll find "Configuration" option where you'll see two main choices for how your Shopify sales data gets sent to QuickBooks Online:
#### 1. Synchronization Options
You can choose how the data should be synced to QuickBooks Online based on your business needs:
- **Summarized Entries**(Recommended)
Data from Shopify is summarized (daily, weekly, or monthly) before syncing to QuickBooks Online.
Ideal for businesses managing high transaction volumes to reduce clutter in QuickBooks Online.
- **Individual Transaction Entries** Every single Shopify transaction is synced to QuickBooks Online.
Best for businesses needing detailed visibility into individual orders, taxes, and invoices.
#### 2. Frequency of Journal Entry Creation
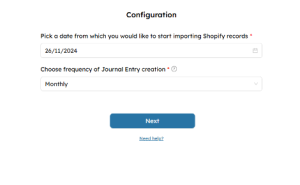
Choose the interval for syncing Shopify data to QuickBooks Online:
- **Daily**: Creates one journal entry per day.**Scenario**: You run an online store that generates 10 orders per day in Shopify.**How it Works**:
- All 10 orders from a single day are **summarized** into one journal entry.
- The journal entry includes the total sales, taxes, shipping income, fees, etc… for that day.
- **Weekly**: Consolidates data into one entry per week.**Scenario**: You choose to sync data weekly to capture a broader view of transactions.**How it Works**:
- Orders from **July 1 to July 7, 2024** are grouped into one journal entry.
- Shopify payouts, taxes, expenses, etc…for the week are **summarized**.
- **Monthly**:**Summarizes** all transactions for the month into a single entry.**Scenario**: You prefer monthly summaries to match Shopify payouts with your bank reconciliation.**How it Works**:
- Orders from **July 1 to July 31, 2024** are grouped into one journal entry.
- Includes a complete **summary** of revenue, taxes, fees, and shipping income for the month.
#### 3. Select Start Date
Pick the date from which Shopify data should start syncing to QuickBooks Online.
- Example: If you choose **01/07/2024**, all orders from this date onward will be included in the sync process.
#### 4. Save Configuration
Once all preferences are set, click **Next** to confirm your choices. The system will begin syncing Shopify data according to the specified settings.

Note: Be sure to select the correct frequency and start date to ensure data accuracy and alignment with your QuickBooks Online setup.
## Configure Countries for Tax and Financial Reporting
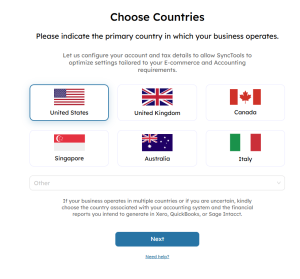
Here SyncTools allows you to specify the **primary country** where your business operates. Selecting the right country helps SyncTools optimize settings for accurate tax and financial reporting tailored to your e-commerce and accounting needs. Also helps to group data by country.**How It Works** Select Your Country:
- Choose from the list of supported countries (e.g.,**United States**,**United Kingdom**,**Canada**, etc.).
- If your country is not listed, select **Other** and enter it manually.**For Businesses Operating in Multiple Countries**- If your business operates across multiple countries, select the **country associated with your accounting system** and the **financial reports you intend to generate**.
- Example:
If your Shopify store operates in the US and UK but your accounting is managed under US standards, select United **States**.
### Next Steps
Once you've selected your country, click **Next** to proceed with configuring tax and regional-specific synchronization rules. SyncTools will ensure your settings are perfectly tailored to your business location! ?
### Choose Additional Countries: Expanding Business Configuration
This configuration allows you to select additional countries where your business is registered. By doing so, SyncTools will activate advanced settings tailored to your financial reporting and tax compliance needs across multiple regions.
## Set Up Bank Accounts for Shopify Payouts
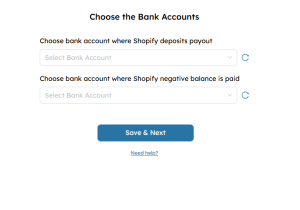
This helps you configure your bank accounts for handling Shopify payouts and any negative balances. Selecting the right accounts ensures smooth financial tracking and reconciliation in QuickBooks.
### Configuration Options
- **Choose Bank Account Where Shopify Deposits Payout**:
Select the account that receives Shopify payouts (e.g., revenue from orders processed).
- This account will be credited with the payout amounts synced from Shopify.
- **Choose Bank Account Where Shopify Negative Balance is Paid**:
Select the account that covers any negative balances (e.g., refunds exceeding payouts, Shopify fees).
- This account will be debited for negative balance settlements.
### Why This Is Important
- **Accurate Reconciliation**:
Ensures all deposits and expenses related to Shopify transactions are recorded in the correct accounts, making bank reconciliations easier.
- **Improved Financial Tracking**:
Separating positive payouts and negative balances helps maintain clarity in financial records.
- **Customized to Your Workflow**:
SyncTools allows you to use different accounts for payouts and negative balances, catering to businesses with complex bank setups.
Refresh the account list (using the **refresh icon**) to ensure all recently added accounts in QuickBooks are available for selection.
### Next Steps
Click **Save & Next** after selecting the appropriate accounts. SyncTools will apply these configurations, ensuring payouts and negative balances are accurately posted to QuickBooks.
## Map Shopify Transactions to QuickBooks Accounts
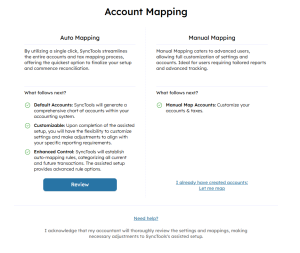
### 1. Auto Mapping ✨
Auto Mapping automates the entire process, offering a quick and efficient way to map your accounts and tax settings.
#### What follows next?
- **Default Accounts****:**- SyncTools automatically generates a comprehensive Chart of Accounts in QuickBooks.
- This includes default mapping for common transaction types like sales, refunds, and expenses.
- **Customizable:**- Once Auto Mapping is complete, you can customize the setup to meet your unique reporting requirements.
- Adjust mapped accounts or tax rules easily after the initial setup
### 2. Manual Mapping
Manual Mapping provides full control over the setup, allowing you to customize accounts and tax mappings to your exact specifications.
#### What follows next?
- **Manual Map Accounts****:**- Select specific accounts and tax rules for every transaction type.
### Mapping Accounts: Manual Mapping vs. Auto Map Feature
This section provides two options for mapping Shopify transactions to QuickBooks accounts:
- **Manual Mapping**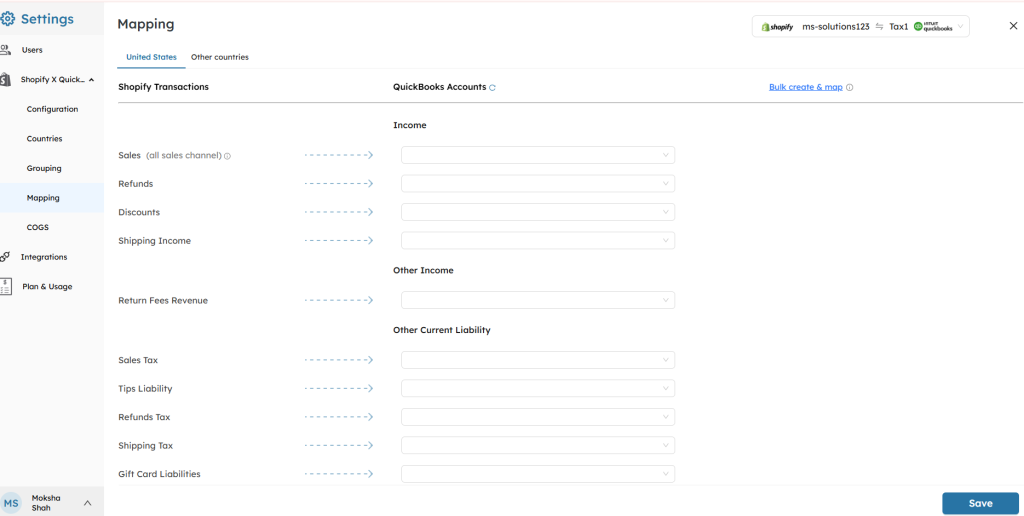
#### How It Works
- Manually map each Shopify transaction type (e.g., Sales, Refunds, Discounts) to the corresponding QuickBooks account.
- You select specific accounts for income, liabilities, and taxes, ensuring precise control over your financial records.
#### When to Use
- Ideal for advanced users or accountants who prefer full customization.
- Suitable for businesses with unique accounting structures or reporting requirements.
#### Steps:
- Choose the transaction type under **Shopify Transactions**(e.g., Sales, Refunds).
- Map it to an appropriate account in QuickBooks under **QuickBooks Accounts**.
- Save your selections to finalize the mapping.

Pro Tip: Use Manual Mapping if your Chart of Accounts in QuickBooks has custom account names or structures.
- **Auto Map Feature**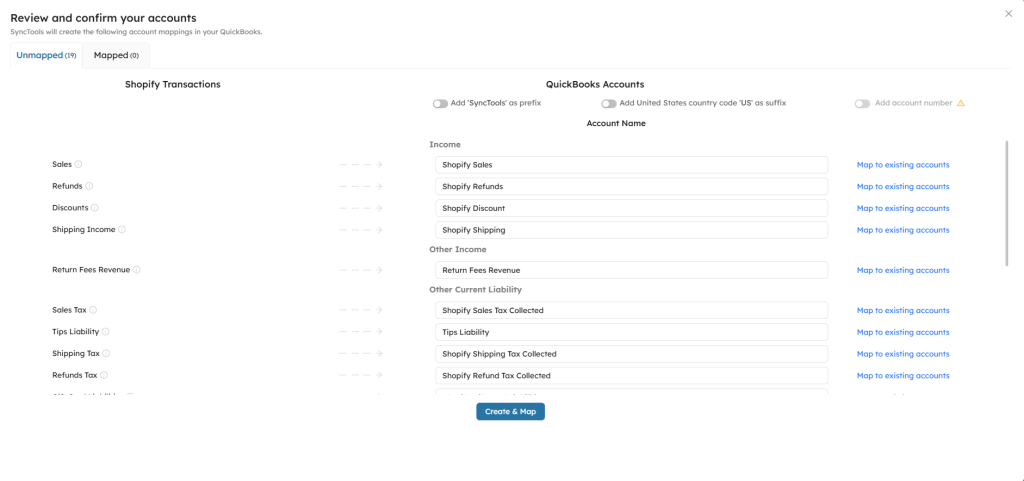
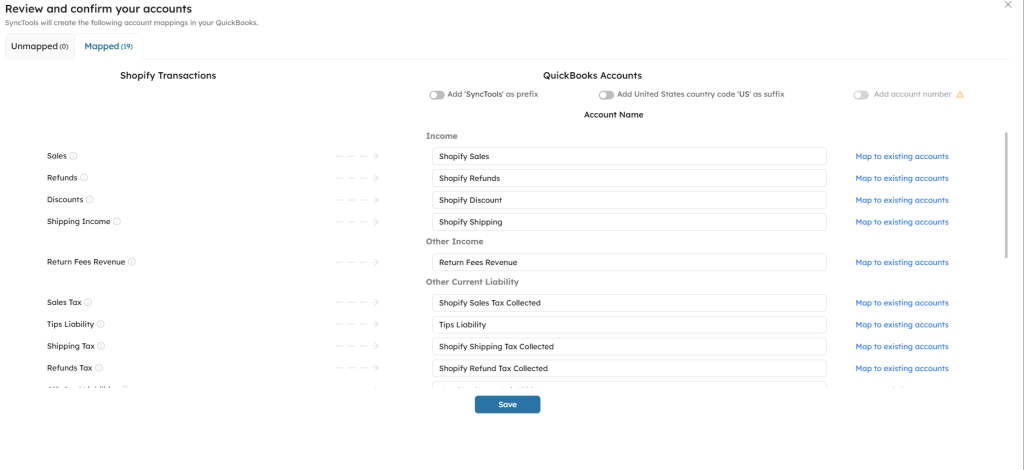
#### How It Works
- Automatically maps Shopify transactions to QuickBooks accounts in bulk.
- SyncTools generates default accounts (e.g., Shopify Sales, Shopify Refunds) and maps them instantly.
- Optional toggles allow customization, like adding prefixes (e.g., "SyncTools") or suffixes (e.g., "US") to account names.
#### When to Use
- Best for users who want to save time and start syncing quickly.
- Ideal for standard Shopify-to-QuickBooks setups.
#### Steps:
- Review the list of unmapped transactions under **Unmapped**.
- Use the **Create & Map** option to auto-generate and map accounts for all Shopify transaction types.
- Review the mapped accounts under the **Mapped** tab for accuracy.
- Customize further by editing account names or selecting existing accounts.
---
## Track Grouped Orders
URL: https://synctools.ai/help/linnworks-xero-integration/how-to-track-orders-in-linnworks-which-are-grouped-under-one-invoice-in-xero-by-synctools
> NULL
Efficient order tracking is crucial for a streamlined **e-commerce operation**.
## How to Track Linnworks Orders Grouped Under One Invoice in Xero
With SyncTools seamlessly connecting **Linnworks** and **Xero**, you can effortlessly track orders grouped under a single invoice in Xero.
This guide provides **step-by-step instructions** to ensure precise tracking, allowing you to maintain visibility and control over your transactions.
Follow these steps to leverage the capabilities of SyncTools for accurate order tracking across platforms.
For an **in-depth exploration of order tracking** within Linnworks and Xero using SyncTools, click [**here**](https://synctoolstorage.blob.core.windows.net/content/SyncTools-Tracking-of-grouped-orders.pdf).
This document provides additional **insights** and **guidance** to help you maximize the efficiency of your order tracking processes.
Experience the ease of order tracking across platforms with SyncTools, ensuring that orders grouped under one invoice in Xero are accurately reflected and monitored in your **Linnworks environment**.
---
## Inventory Item Creation
URL: https://synctools.ai/help/linnworks-xero-integration/inventory-item-creation
> SyncTools now supports automatic creation of inventory items in Xero, streamlining your stock management. Easily sync items from Linnworks with options for non-inventory or inventory creation, ensuring a more robust and efficient integration.
SyncTools now offers a brand-new feature: the ability to **create items as inventory** in Xero! Previously, only non-inventory item creation was available.
With this enhancement, SyncTools will automatically create **inventory items** in Xero when an item doesn’t already exist.
## Sales Configuration’s Modified Version
### Sync Items and Default Inventory Account Selection Option
## Feature Overview: Inventory Item Creation
### When does this feature activate?
By default, this feature will behave as before, creating items as **non-inventory** unless you specify otherwise.
To create items as inventory, you need to click the **"Create as Inventory"** button from the button group:
### Options Available
- **Description Only**-**Create as Non-Inventory**-**Create as Inventory** Once **"Create as Inventory"** is selected, any **new item**(not already in Xero) will be created as an **inventory item**.
## Quantity on Hand – How It's Managed
### API Limitation
Currently, Xero’s API does not provide a way to adjust the **Quantity on Hand** when creating inventory items.
As a result, SyncTools does not modify this field upon item creation.**Note:** You will need to manage this field manually in Xero.
### Automatic Adjustments
The **Quantity on Hand** in Xero updates automatically in the following cases:**Increase:** When you create an approved **Bill**(status: Awaiting Payment or Paid).
- **Decrease:** When you create an approved **Invoice**(status: Awaiting Payment or Paid).
## Scenario: Configuring an Item as Inventory
If you configure an item as inventory and attempt to create an **Invoice** in the **"Awaiting Payment"** status, you may encounter an error like this:**Error: "No item available to sell"****No item available to sell**
### What Does This Error Mean?
This error indicates that there is an inventory item in Xero for the invoice, but the **Quantity on Hand** is set to **zero**.
Xero will not allow you to sell an inventory item if the stock is zero.
### Solution
You can fix this in one of the following ways:
- **Manually adjust the quantity** of the item SKU (as shown in the error message) in Xero.
- **Create a Purchase Order (PO)** in Linnworks and deliver it.
Once delivered, the PO will sync to SyncTools, where you can configure it to create a **Bill in the "Awaiting Payment" status**.
- Once this Bill is created, the **Quantity on Hand** for the item will increase based on the PO amount.
Now, when you create an **Invoice** in Xero, the stock will be available, and the invoice can be uploaded successfully.
### For manually adjusting the quantity in Xero
>**Reference:**[Manually adjust inventory in Xero Inventory Plus](https://central.xero.com/s/article/Manually-adjust-inventory-in-Xero-Inventory-Plus)
## Important Considerations
### Pre-existing Items in Xero
If an item already exists in Xero as a **non-inventory item**, SyncTools will **not update** this item to an inventory item.**Note:** If you wish to change an item from non-inventory to inventory, you must make this change manually in Xero and adjust the **Quantity on Hand** accordingly.
## Conclusion
The new inventory item creation feature streamlines the process of **managing stock in Xero directly from Linnworks**.
However,**managing stock levels** remains a manual task until an **invoice or bill** is processed.
This feature saves time by auto-creating items, but oversight of inventory levels is essential to avoid errors.
With these improvements,**SyncTools** offers a more flexible and **robust integration** for users managing both **non-inventory** and **inventory items**.
---
## Purchase Order Tax Sync
URL: https://synctools.ai/help/linnworks-xero-integration/po-tax-exclusive-sync
> Simplify your purchase order management with Linnworks and Xero's PO Tax Exclusive Sync feature. Ensure consistent tax handling by converting all purchase orders to tax exclusive, reducing manual adjustments, and improving accounting accuracy.
When dealing with tax-inclusive or tax-exclusive pricing, it’s important to know how taxes are applied to the product or service you're purchasing or selling.
## Tax Inclusive
In tax-inclusive pricing, the total price already includes the tax. This means the buyer sees the final amount they need to pay, including tax.
### Example:
- **Unit Cost**: £100
- **Tax Rate**: 20%
The total price for this item will remain £100 because the tax is already included in this price.
- **Tax Portion**= £100 * (20/120) = £16.67
- **Net Price**= £100 - £16.67 = £83.33
So, the unit cost of the item without tax is £83.33, and the tax amount is £16.67.
## Tax Exclusive
In **tax exclusive pricing**, the **total price** does not include the tax.
The tax is calculated and added on top of the unit price at the time of purchase.
### Example
- **Unit Cost**: £100
- **Tax Rate**: 20%
The total price the buyer will pay is the unit cost plus tax.
- **Tax Portion**= £100 * 20% = £20
- **Total Price**= £100 + £20 = £120
So, the buyer will pay £120, with £100 as the unit cost and £20 as the tax.
## Feature Overview: PO Tax Exclusive Sync Purpose
This feature is designed to help businesses streamline how purchase orders (POs) are handled when syncing with Xero.
Whether your POs in Linnworks are set as **tax-inclusive** or **tax-exclusive**, this feature ensures that all POs are treated as **tax-exclusive** when synced to Xero.
### How It Works
When you enable the **PO Tax Exclusive** toggle button, the system will automatically sync all POs as tax exclusive to Xero, regardless of their original tax settings in Linnworks.
### Benefits
- Ensures **consistency** in **tax reporting** and **accounting**.
- Reduces **manual adjustments** when exporting POs to Xero.
- Simplifies **financial records** and improves accuracy.
## Feature Workflow
- **Create PO** in Linnworks (either as tax inclusive or tax exclusive).
- **Turn on** the **PO Tax Exclusive** toggle in SyncTools.
- Upon sync, all POs will be **converted to tax exclusive** in Xero.
In Xero, the tax will be **added separately** to the PO amount, ensuring a clear breakdown of the item cost and tax.
By using this feature, you'll enjoy a more standardized process, ensuring your purchase orders are handled consistently when syncing across systems.
## Testing Scenario: PO Tax Exclusive Feature
Let’s walk through a real-world example to understand the impact of this feature.
### Scenario
- **Inventory Item Created** You created an inventory item with a purchase cost of **£100**.
- **Purchase Order Created** You create a **Purchase Order**(PO29082444535) in Linnworks for **10 units** of this product, with a **20% tax rate**, and you choose the **tax inclusive** format.
This means the unit cost of **£100****includes the tax**. The **line total** will be:**£100 (unit cost) x 10 (quantity) = £1,000**-**Unit Cost Calculation (Tax Exclusive)** If we want to calculate the **tax exclusive** cost, we can use the following formula:
Tax Exclusive Cost = Total Amount / (1 + Tax Rate)
- £100 / (1 + (20 / 100))
- £100 / 1.20 =**£83.33**(approx)
PO29082444535 Delivered Purchase Order.
## Turning the Feature OFF
If the **PO Tax Exclusive** feature is **turned off**, the purchase order will appear as a **Tax Inclusive Purchase Order** in Xero.
- **Total Line Amount:**£1,000
- **Tax Portion**(already included): £166.67
- **Net Price:**£833.33
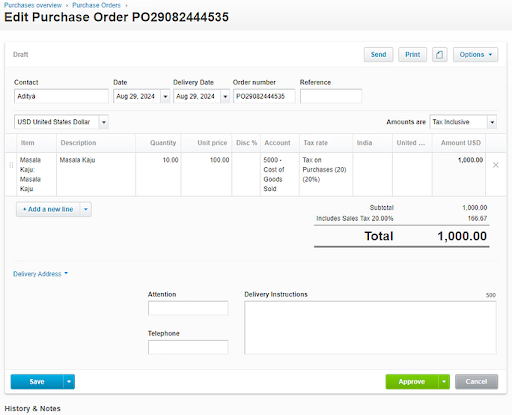
Tax Inclusive Purchase Order.
## Turning the Feature ON
Once the **PO Tax Exclusive** feature is **turned on**, the purchase order will appear as a **Tax Exclusive Purchase Order** in Xero. Here’s what happens:
- The **unit cost** of **£100**(which included tax) will now be considered **tax exclusive**, meaning the tax will be added on top of this amount.
### Tax Exclusive Total:
- **Line Total:**£833.33
- **Tax:**£166.67
- **Total Price:**£1,000 (with tax added separately)
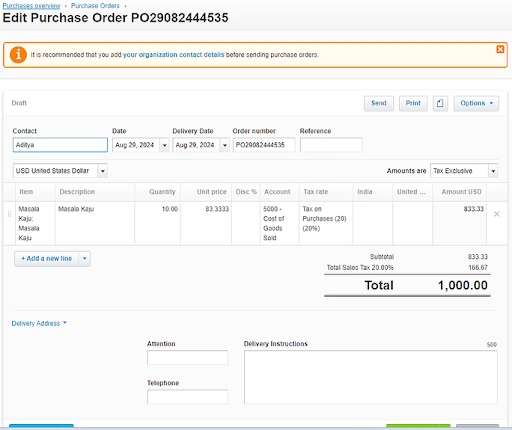
---
## Request Customization
URL: https://synctools.ai/help/linnworks-zohobooks-integration/requesting-customization
> Optimize Linnworks ZohoBooks integration with SyncTools. Request customization for seamless synchronization and boosted efficiency today!
At SyncTools, we understand the importance of **personalized functionality**, especially when it comes to integrating your e-commerce platform with accounting software.
That's why we offer customization requests for the **Linnworks ZohoBooks integration**, exclusively for our esteemed **Gold** and **Platinum** plan subscribers.
## What Can Be Customized in Linnworks Zoho Books Integration?
Customization in integration can range from:
- Tweaking the **data flow** to match your specific **accounting practices**- Adding unique features that cater to your **business requirements**- Enhancing **reporting capabilities**- Modifying **synchronization frequency**- Developing bespoke functionality
Our team is committed to ensuring the **Linnworks ZohoBooks integration** works seamlessly for your business.
## Customization Timeline and Implementation
While we strive to meet every customization request, it's important to note:
- The **timeline for implementation** cannot be guaranteed.
- Projects vary in **complexity and scale**.
- Each requires careful **planning, development,** and **testing** to meet our high standards of quality and reliability.
## How to Request Linnworks Zoho Books Customization
To request a customization for your Linnworks ZohoBooks integration:
- Send an email to [sales@synctools.ai](mailto:sales@synctools.ai)
- Include:
A detailed description of the **desired customization**- How it aligns with your **business processes**- Any relevant information that helps us understand your needs
Our sales team will review your request and get in touch to discuss:
- Feasibility
- Estimated timeline
- Any additional costs involved
## Customization Support for Gold and Platinum Plans
At SyncTools, we're dedicated to empowering your **e-commerce business** with the accounting solutions you need to thrive.
By offering customization for **Linnworks ZohoBooks integration** to our **Gold and Platinum subscribers**, we're taking another step towards delivering the flexibility and efficiency that modern e-commerce businesses demand.
---
## Request Customization
URL: https://synctools.ai/help/linnworks-xero-integration/requesting-customization-for-linnworks-xero-integration
> Optimize Linnworks Xero integration with SyncTools. Request customization for seamless synchronization and boosted efficiency today!
At **SyncTools**, we understand the importance of personalized functionality, especially when it comes to integrating your **e-commerce platform** with **accounting software**.
That's why we offer customization requests for the **Linnworks Xero integration**, exclusively for our esteemed **Gold** and **Platinum** plan subscribers.
## What Can Be Customized in Linnworks Xero Integration?
Customization in integration can range from:
- Tweaking the data flow to match your specific accounting practices
- Adding unique features that cater to your business requirements
Whether it's **enhancing reporting capabilities, modifying synchronization frequency**, or **developing bespoke functionality**, our team is committed to ensuring that the Linnworks Xero integration works seamlessly for your business.
## Customization Timeline and Project Scope
However, it's important to note that while we strive to meet every customization request, the timeline for implementation cannot be guaranteed.
Customization projects vary in complexity and scale, requiring careful planning, development, and testing to ensure they meet our high standards of **quality** and **reliability**.
## How to Request Linnworks Xero Customization
To request a customization for your Linnworks Xero integration, simply send an email to [sales@synctools.ai](mailto:sales@synctools.io).
Please include a detailed description of the desired customization, how it aligns with your business processes, and any relevant information that can help us understand your needs.
Our sales team will review your request and get in touch with you to discuss the **feasibility, estimated timeline**, and any **additional costs** that may be involved.
## Customization Support for Gold and Platinum Plans
At SyncTools, we're dedicated to empowering your e-commerce business with the **accounting solutions** you need to thrive.
By offering **customization** for **Linnworks Xero integration** to our Gold and Platinum subscribers, we're taking another step towards delivering the flexibility and efficiency that modern e-commerce businesses demand.
---
## Returns, Refunds & Fees
URL: https://synctools.ai/help/shopify-quickbooks-integration/shopify-quickbooks-online-advanced-accounting-scenarios-return-refund-return-fees-tax
> NULL
## Advanced Shopify Accounting with SyncTools and QuickBooks
Running an online store on Shopify is exciting, but the accounting side can quickly become overwhelming. Imagine receiving dozens of orders daily, each with products, shipping fees, taxes, and occasional tips or refunds. Now imagine manually entering each of these into QuickBooks-it would be a bookkeeper's nightmare!
That's where SyncTools steps in. We've designed our platform to transform the complex web of Shopify transactions into clean, organized QuickBooks entries that make sense to both business owners and accountants.

TIP: Think of SyncTools as your virtual bookkeeper that works 24/7, never takes a vacation, and follows accounting best practices with perfect consistency.
## How Shopify Transactions Are Recorded in QuickBooks
Let's follow the journey of a typical transaction through your system when using SyncTools:
Meet Sarah, a customer who just discovered your Shopify store. She purchases a makeup kit for $25 and a t-shirt for $10, pays $20 for shipping, gets a $1 discount, and is charged $2.04 in sales tax. Her total comes to $56.04, which she pays through Apple Pay.
In Shopify, this order (#1006) looks straightforward. But behind the scenes, this single transaction needs to be broken down into multiple accounting components.
## How SyncTools Handles Shopify Refunds
A week later, Sarah decides the makeup kit and t-shirt aren't right for her and requests a refund. In Shopify, you process the full refund of $56.04. This is where many e-commerce businesses make accounting mistakes-a refund isn't just "reversing a sale"; it requires proper accounting treatment to maintain accurate records.
SyncTools handles this refund by creating the perfect countering entry:
This entry properly categorizes each component of Sarah's purchase, ensuring your financial reports will accurately reflect your business performance.
## How Shopify Sales Tax Is Managed in QuickBooks
For many online sellers, sales tax can be particularly confusing. You're collecting it from customers in various jurisdictions, but it's not your money-you're essentially acting as an intermediary between your customer and the tax authority.
Let's look at James from California who orders from your store. The 6% state tax on his purchase amounts to $2.04. This is what happens behind the scenes with SyncTools:
SyncTools creates an entry that puts this amount in a liability account, not revenue:
This amount now appears in your liability account, making it easy to see how much tax you've collected and need to remit.
If James gets a refund, SyncTools reduces the tax liability accordingly.
## How SyncTools Records Shopify Tips
For businesses that receive tips through Shopify, proper accounting is essential. Let's see how SyncTools handles this unique type of transaction.
### Understanding Tips as a Liability
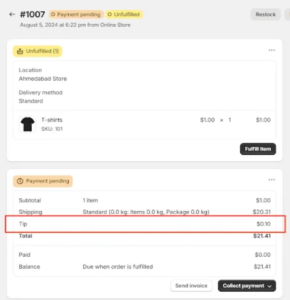
Imagine a customer adds a $0.10 tip to their order. This money isn't your revenue-it belongs to your staff. Until you pay it out, it's a liability on your books.
SyncTools generates an entry that credits the "Tips Liability" account:
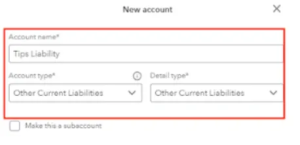
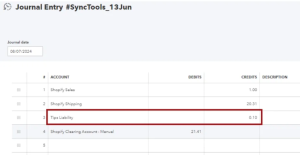
This approach ensures tips are never accidentally counted as business revenue and provides a clean audit trail for tip collection and distribution.
## How Return Fees Are Recorded in QuickBooks
Let's say a customer returns a $9 item but is charged a $1 return shipping fee and a $0.02 restocking fee.
SyncTools handles this complex transaction by:
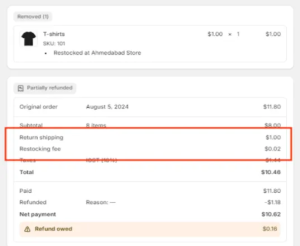
The return fees are treated as new revenue, not as a reduction of the refund.
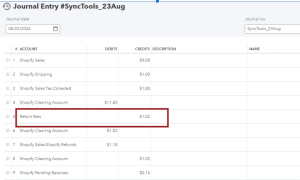
This approach gives you visibility into how much revenue you're generating specifically from return fees.**Still have questions?** Our support team is ready to help at [ support@synctools.ai](mailto:support@synctools.ai), or visit our[ Help Center](https://synctools.com/help) for additional guides.
---
## Summarized Journal Setup
URL: https://synctools.ai/help/shopify-quickbooks-integration/shopify-quickbooks-online-configuration-guide-for-summarized-journal
> NULL
## Shopify + Quickbooks Online Configuration Guide for Summarized Journal
Synctools acts as a bridge between your Shopify store and your QuickBooks Online accounting software. This guide walks you through the setup process so you can automatically sync your sales data and streamline your accounting.
### Login to SyncTools
Welcome to SyncTools! Here's how you can log in:**1️⃣** Enter the email you used during registration.
2️⃣ Provide the password you created. If you can’t remember it, click on **Forgot Password?** to reset it.******? Sign in with Intuit:** Skip entering credentials and use your Intuit account to log in instantly!

Note: Make sure you check the Remember Me option if you’re using your personal device to stay signed in.
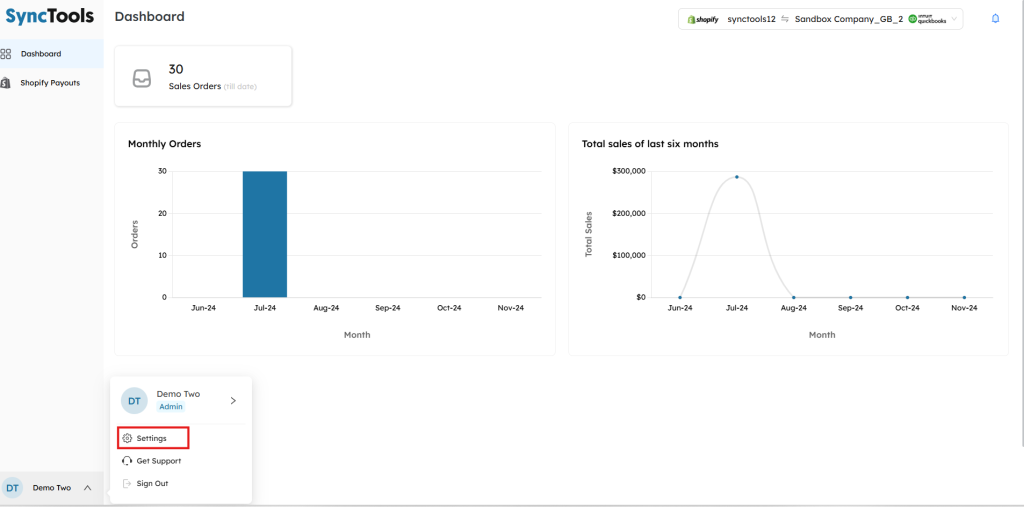
Once you sign in, you’ll land on the **Dashboard**, your control center for SyncTools! Here’s what you can do:
- View your **sales orders** count and graphs showing **Monthly Orders** and **Total Sales of the Last Six Months**. These visuals help you track your business performance at a glance!
Start by clicking **Settings** to configure the integration with Shopify and QuickBooks Online seamlessly. This step is essential for syncing your data! ?
### Choosing How Your Sales Data Syncs
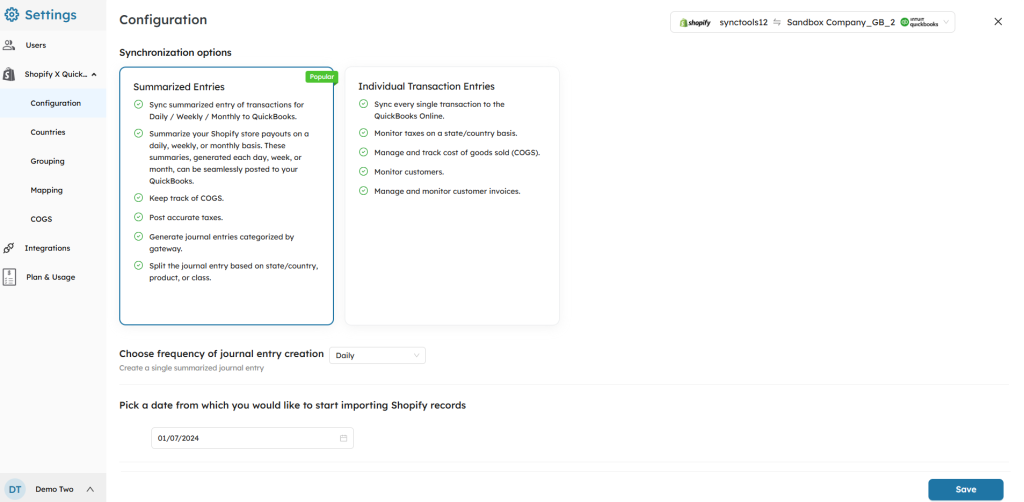
In the settings, you'll find "Configuration" option where you'll see two main choices for how your Shopify sales data gets sent to QuickBooks Online:
###
#### 1. Synchronization Options
You can choose how the data should be synced to QuickBooks Online based on your business needs:
- **Summarized Entries**(Recommended)
Data from Shopify is summarized (daily, weekly, or monthly) before syncing to QuickBooks Online.
Ideal for businesses managing high transaction volumes to reduce clutter in QuickBooks Online.
- **Individual Transaction Entries** Every single Shopify transaction is synced to QuickBooks Online.
Best for businesses needing detailed visibility into individual orders, taxes, and invoices.
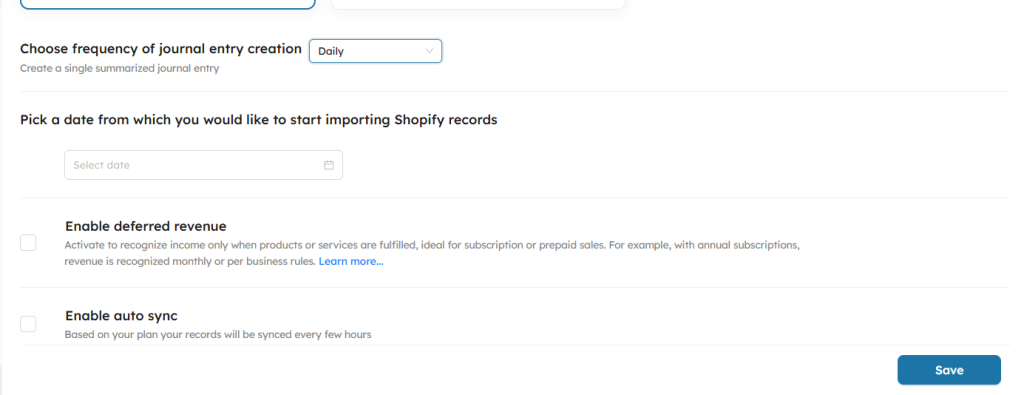
#### 2. Frequency of Journal Entry Creation
Choose the interval for syncing Shopify data to QuickBooks Online:
- **Daily**: Creates one journal entry per day.**Scenario**: You run an online store that generates 10 orders per day in Shopify.******How it Works**:
All 10 orders from a single day are **summarized** into one journal entry.
- The journal entry includes the total sales, taxes, shipping income, fees, etc… for that day.
- **Weekly**: Consolidates data into one entry per week.**Scenario**: You choose to sync data weekly to capture a broader view of transactions **How it Works**:
Orders from **July 1 to July 7, 2024** are grouped into one journal entry.
- Shopify payouts, taxes, expenses, etc…for the week are **summarized**.
- **Monthly**:**Summarizes** all transactions for the month into a single entry.**Scenario**: You prefer monthly summaries to match Shopify payouts with your bank reconciliation.**How it Works**:
Orders from **July 1 to July 31, 2024** are grouped into one journal entry.
- Includes a complete **summary** of revenue, taxes, fees, and shipping income for the month.
#### 3. Select Start Date
Pick the date from which Shopify data should start syncing to QuickBooks Online.
- Example: If you choose **01/07/2024**, all orders from this date onward will be included in the sync process.
#### 4. Save Configuration
Once all preferences are set, click **Save** to confirm your choices. The system will begin syncing Shopify data according to the specified settings.
? Note: Be sure to select the correct frequency and start date to ensure data accuracy and alignment with your QuickBooks Online setup.
### Enabling Auto Sync
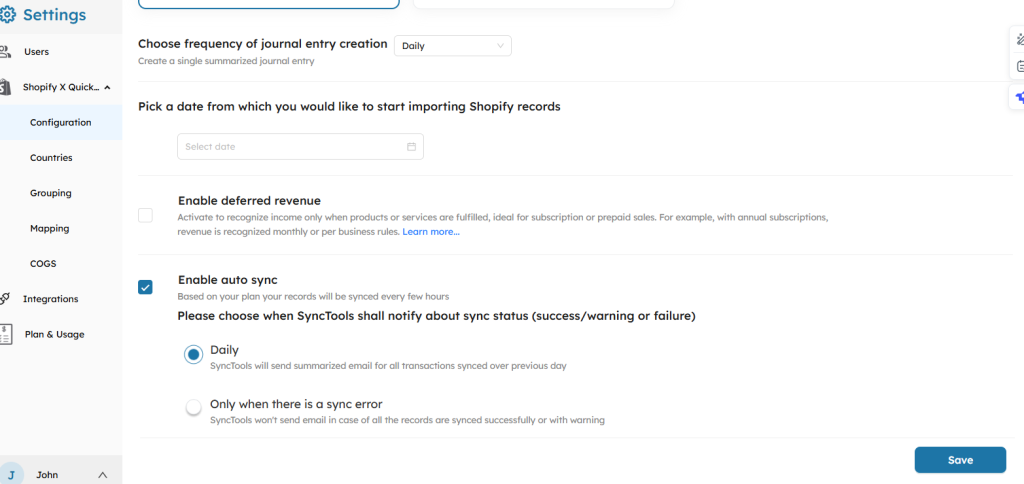
By checking the "Enable auto sync" box, Synctools automates the syncing process for your Shopify data with QuickBooks Online.**How It Works**:
- Once enabled, Synctools will continuously sync data every few hours without requiring manual intervention.
- This ensures your QuickBooks Online stays up to date with Shopify transactions, saving time and reducing the chance of human error.**Benefit**: You can focus on running your business while Synctools handles the data synchronization in the background.**Choose How You Get Updates******Pick how you'd like to stay informed about your data syncs:
- **? Daily Updates** Get a **daily email** showing all transactions synced from the previous day.
- Example:
“Synctools synced 100 orders yesterday without any issues.”
- **⚠️ Only When There's an Error** Synctools will notify you **only if something goes wrong** during the sync.
- Example:
“Sync error: Missing chart of accounts for Product B. Please check your settings."

Note: For a detailed guide on how the **Enable Auto Sync** feature works, check out our documentation here
### Enable Deferred revenue
By activating this option, you configure SyncTools to recognize revenue only when specific conditions are met, aligning with revenue recognition principles. This prevents premature income recognition and ensures compliance with accounting standards like GAAP or IFRS.
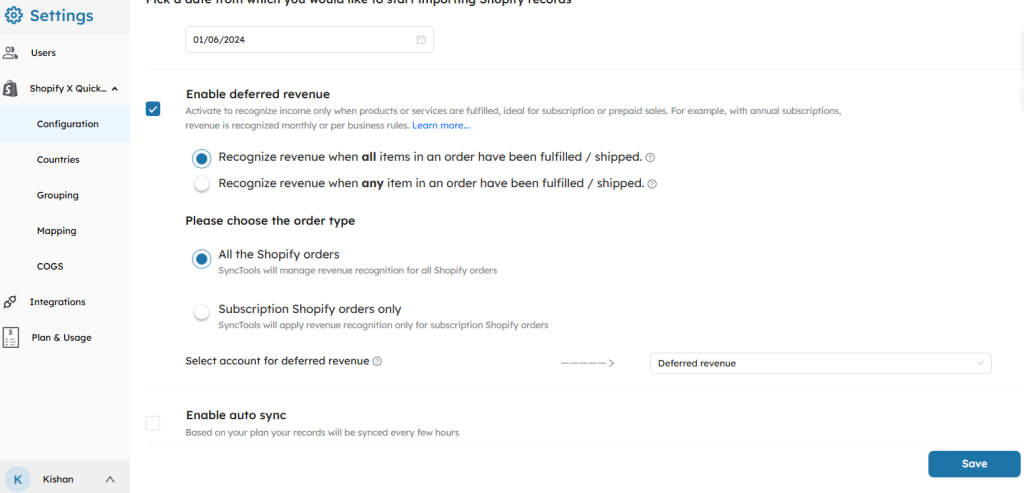
#### Revenue Recognition Rules **You have two options to decide when revenue is recognized:**-**Recognize revenue when all items in an order have been fulfilled/shipped:**-
Use this option if your revenue should be recognized only after every item in the order has been delivered.
Suitable for bulk or complete-order-based businesses.**Scenario:** A customer places an order for 3 items (e.g., a t-shirt, a mug, and a notebook).
- The t-shirt and the mug are shipped immediately, but the notebook is on backorder and shipped a week later.**Accounting Impact:**- Revenue recognition will not occur until all 3 items in the order have been shipped.
- Shopify records show the order as "partially fulfilled" until the last item is shipped.
- Once all items are fulfilled, SyncTools will sync the order as revenue earned in QuickBooks Online, debiting Deferred revenue and crediting Revenue.**Shopify-to-QuickBooks Online Process:**- Until the notebook is shipped, revenue remains in the Deferred Revenue account in QuickBooks Online.
- When the notebook is shipped, the entire order value is moved to Revenue in QuickBooks Online.
- **Recognize revenue when any item in an order has been fulfilled/shipped:**-
Select this if revenue can be recognized partially, as items are fulfilled.
- Ideal for businesses that ship items individually and recognize revenue incrementally.**Scenario:** A customer orders the same **3 items**(t-shirt, mug, notebook).
- The t-shirt and mug are shipped immediately, while the notebook is on backorder.**Accounting Impact:**- Revenue is recognized for the items that are shipped.
- For example:
T-shirt: Recognized immediately when shipped.
- Mug: Recognized immediately when shipped.
- Notebook: Deferred until it ships.
- The total revenue for the order is recorded incrementally over time.**Shopify-to-QuickBooks Online Process:**- T-shirt and mug amounts are synced to **Revenue** in QuickBooks Online upon fulfillment.
- The notebook amount stays in the **Deferred Revenue account** until shipped, at which point it is moved to **Revenue**.
- **Choose the Order Type**-******All the Shopify Orders:**-
SyncTools will manage revenue recognition for all orders, ensuring a comprehensive and automated process.
- Use this option if deferred revenue is applicable across your entire Shopify catalog.**Scenario:** You sell a combination of subscription products (e.g., monthly coffee subscriptions) and regular products (e.g., mugs, t-shirts).
- **Example Order 1**: A customer buys a subscription coffee plan (billed monthly) and a one-time purchase of a mug.
- **Example Order 2**: Another customer buys a single t-shirt.****-**Subscription Shopify Orders Only:**-
Revenue recognition will apply only to subscription-based orders.
- Perfect for businesses with recurring billing models, like subscription boxes or memberships.**Scenario:** You sell only subscription-based products, such as a monthly skincare kit or a magazine subscription.
- **Example Order**: A customer subscribes to a skincare kit, billed annually, but kits are delivered monthly.
- **Select Account for Deferred Revenue**-
Assign the appropriate Deferred Revenue account in your Chart of Accounts.
- This account temporarily holds the revenue until it’s ready to be recognized.
- **Why it’s important:**-
Deferred revenue accounts are liabilities until the service or product is delivered.
- Correctly allocating this ensures compliance with accounting rules and an accurate representation of financial metrics.

Note: For a detailed step-by-step explanation of the **Enable Deferred Revenue feature**, including examples and advanced configurations, refer to our comprehensive guide here.
#### Related Resources ?**For the information on the configuration of Automapping feature, check out the following guide:** Shopify + Quickbooks Online Transaction Categorization using Auto Mapping
---
## Deferred Revenue Setup
URL: https://synctools.ai/help/shopify-quickbooks-integration/shopify-quickbooks-online-deferred-revenue-setup
> NULL
### Managing Deferred Revenue in SyncTools: Step-by-Step Guide
The **Deferred Revenue** feature helps e-commerce businesses properly recognize revenue according to accounting standards. When you sell products or services that are paid for before delivery (such as pre-orders or subscriptions), accounting principles require you to defer revenue recognition until the goods or services are delivered.
With SyncTools, you can automatically manage this process, ensuring your QuickBooks accounting reflects proper revenue recognition practices while syncing with your Shopify store.**Who should use this feature:**- Businesses selling subscription-based products
- Companies offering pre-orders
- E-commerce stores with delayed fulfillment
- Accountants seeking to comply with proper revenue recognition standards
### ⚙️ Setting Up Deferred Revenue
### Step 1: Create a Deferred Revenue Account in QuickBooks
Before configuring SyncTools, you need to set up a Deferred Revenue account in QuickBooks:
- Log into your QuickBooks account. Navigate to the **Chart of accounts** section.
- Create the new account named “Deferred Revenue” having account type “Current Liabilities”.
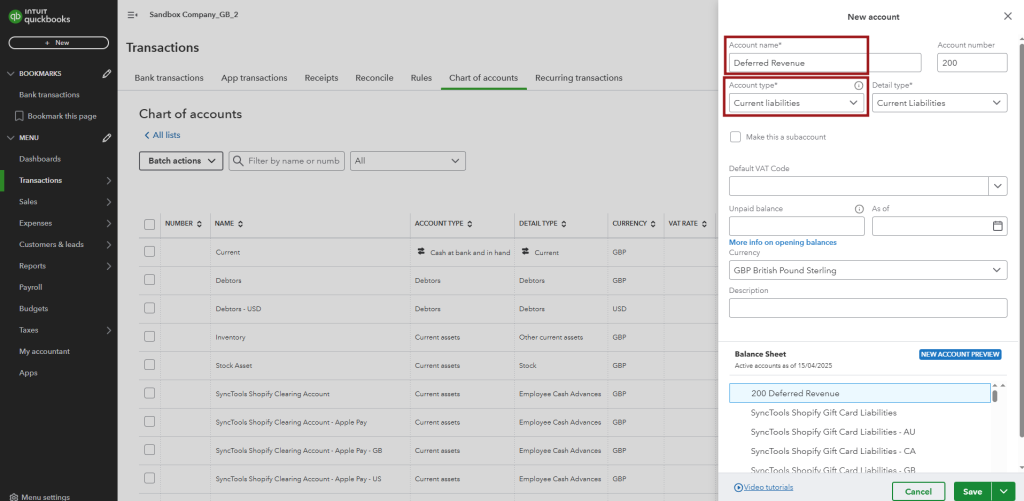
### Step 2: Configure Deferred Revenue in SyncTools
- In SyncTools, Navigate to **Settings**→**Configuration.**- Under Synchronization options, locate the Enable deferred revenue option
- Check the box to activate the deferred revenue feature.
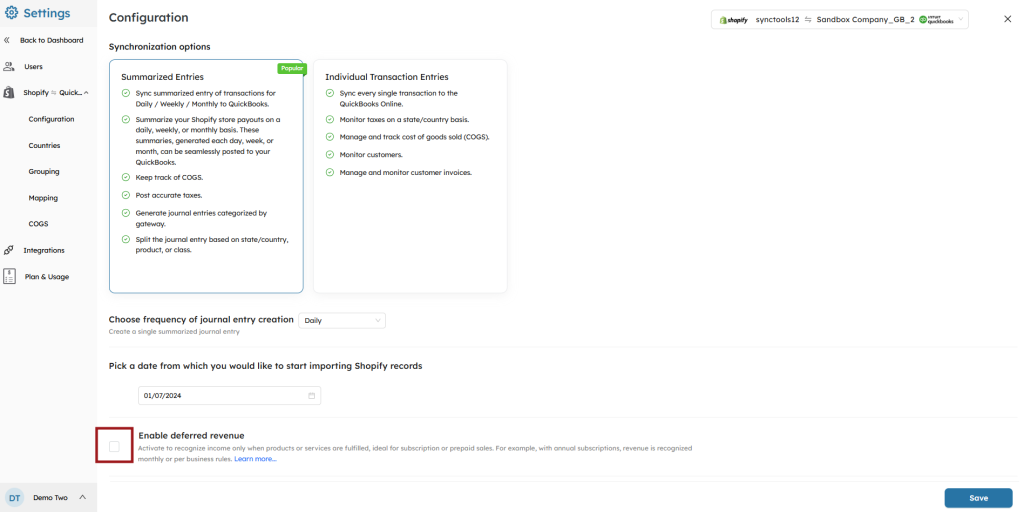
### Step 3: Configure Revenue Recognition Rules
After enabling the feature, you need to specify when and how revenue should be recognized:
Select your preferred revenue recognition method:
- **Recognize revenue when all items in an order have been fulfilled/shipped**: With this option selected, revenue will only be recognized when an order is completely fulfilled. If an order remains unfulfilled in Shopify, it will be recorded in the deferred revenue account in SyncTools. For partially fulfilled orders, the entire amount will remain in deferred revenue until all items are fulfilled.
- **Recognize revenue when any item in an order have been fulfilled/shipped**: This option will recognize revenue proportionally as individual items are fulfilled.
Choose which order types to apply deferred revenue handling to:
- **All the Shopify orders**: When this option is selected, all orders from your Shopify store will be subject to deferred revenue treatment based on their fulfillment status.
- **Subscription Shopify orders only**: If you select this option, only subscription-based products will be processed through the deferred revenue account. All other non-subscription products will bypass the deferred revenue process and be recorded directly as normal sales in your sales chart of account.
Select the QuickBooks account for deferred revenue:
- From the dropdown menu, select the Deferred Revenue account you created in QuickBooks.
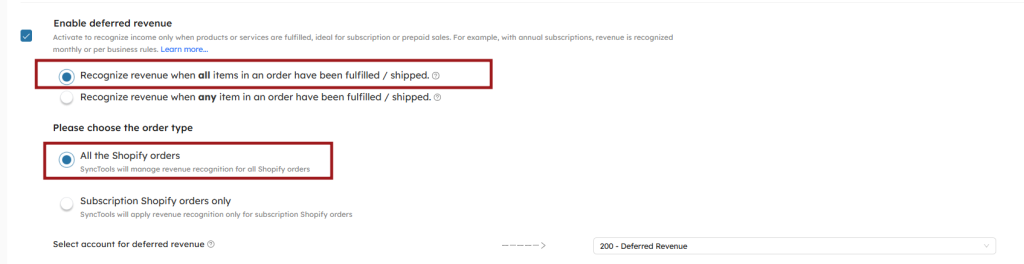
## ? How Deferred Revenue Works
###**The Revenue Recognition Process****Order Placed**: When a customer places an order in Shopify and makes payment, the funds are received but the revenue is not yet recognized.**Deferred Stage**: SyncTools creates a journal entry in QuickBooks that:
- Debits your clearing account (showing funds received), Credits your Deferred Revenue account (indicating revenue not yet earned)**Fulfillment**: When you fulfill the order in Shopify (marking items as shipped/fulfilled), SyncTools recognizes this event.**Revenue Recognition**: Upon fulfillment, SyncTools automatically creates another journal entry that:
- Debits the Deferred Revenue account (reducing the liability), Credits your Revenue/Sales account (recognizing the earned revenue)
This process ensures that your accounting accurately reflects when revenue is actually earned according to accounting standards.
## ? Order Fulfillment Process
###**Step 1: View Unfulfilled Orders in Shopify**- In your Shopify admin, locate orders marked as **Unfulfilled**- These orders will have payments received but be awaiting fulfillment
- Until fulfillment, these will be recorded in your Deferred Revenue account
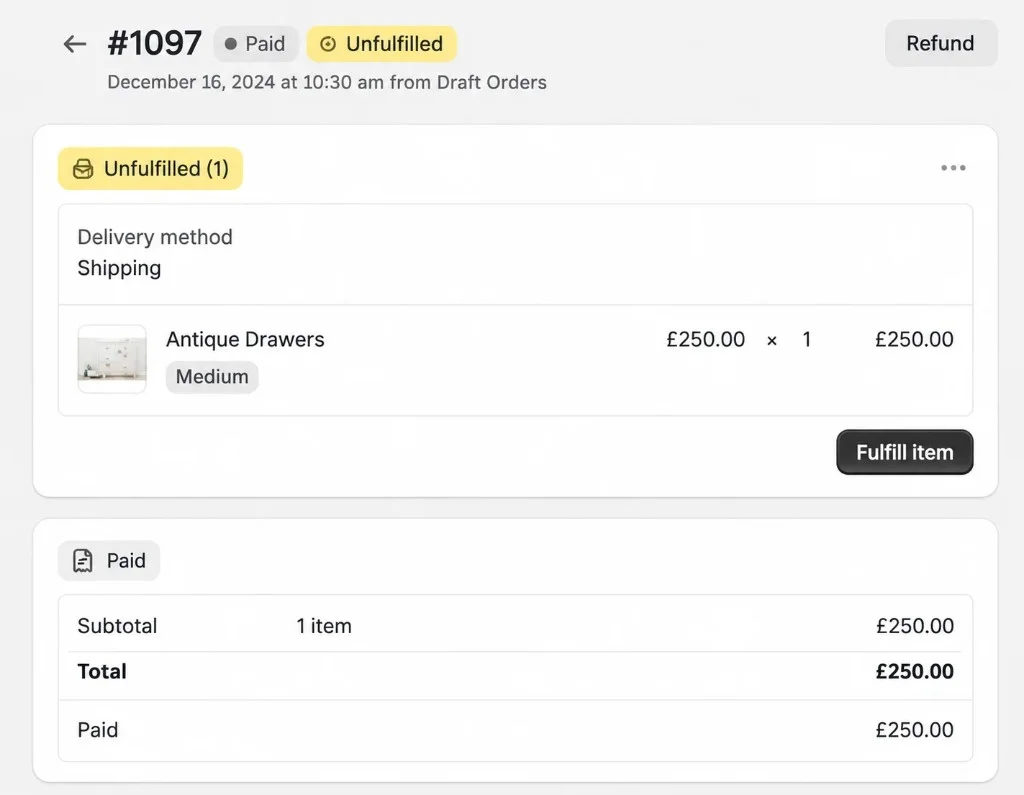
SyncTools automatically detects the fulfillment status change
- The system generates the appropriate journal entry in QuickBooks
- The transaction moves the amount to Deferred Revenue
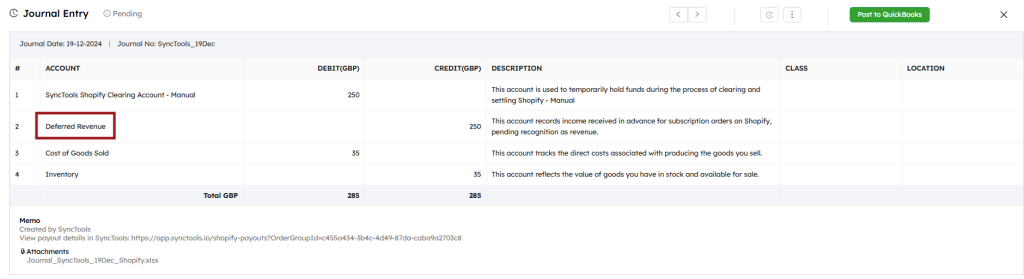
### Step 2: Fulfill the Order
- Process the order by preparing and shipping the products
- Complete the fulfillment process according to your standard procedures
- Confirm the order status has changed from **Unfulfilled** to **Fulfilled**
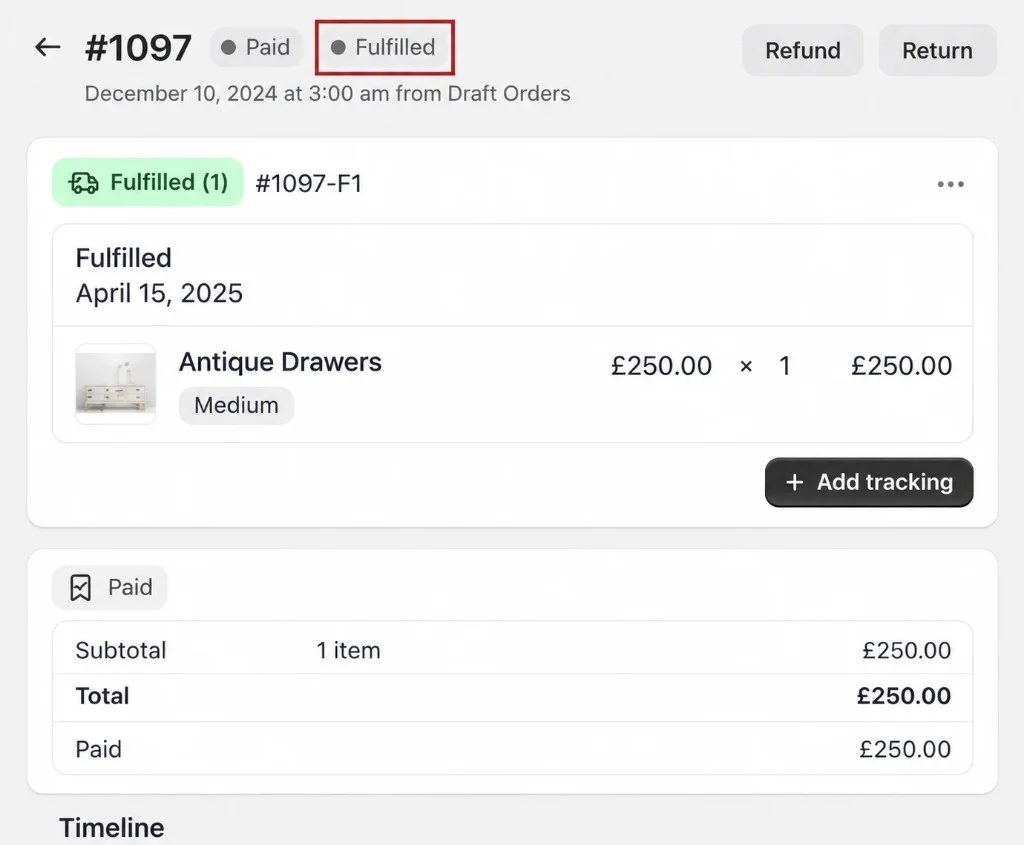
### Step 3: Automatic Revenue Recognition
Once the order is fulfilled in Shopify:
- SyncTools automatically detects the fulfillment status change
- The system generates the appropriate journal entry in QuickBooks
- The transaction moves the amount from Deferred Revenue to your sales accounts
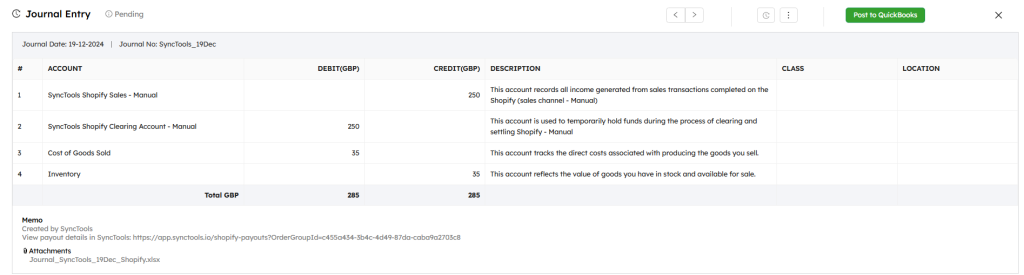
---
## Group by Channel, Gateway & Country
URL: https://synctools.ai/help/shopify-quickbooks-integration/shopify-quickbooks-online-grouping-by-sales-channel-gateway-country
> NULL
**Overview**- The "Group by Country" feature in SyncTools allows you to configure your chart of accounts and tax details based on the primary country in which your business operates.
- This feature enables SyncTools to optimize settings and financial reporting tailored to the specific requirements of your e-commerce and accounting needs for that country.**Step 1 : Login in and Accessing Settings**
Once you log into Synctools, you'll land on your Dashboard, which gives you a quick snapshot of your synced orders. To start setting things up, look at the profile name on the left and click on "Settings."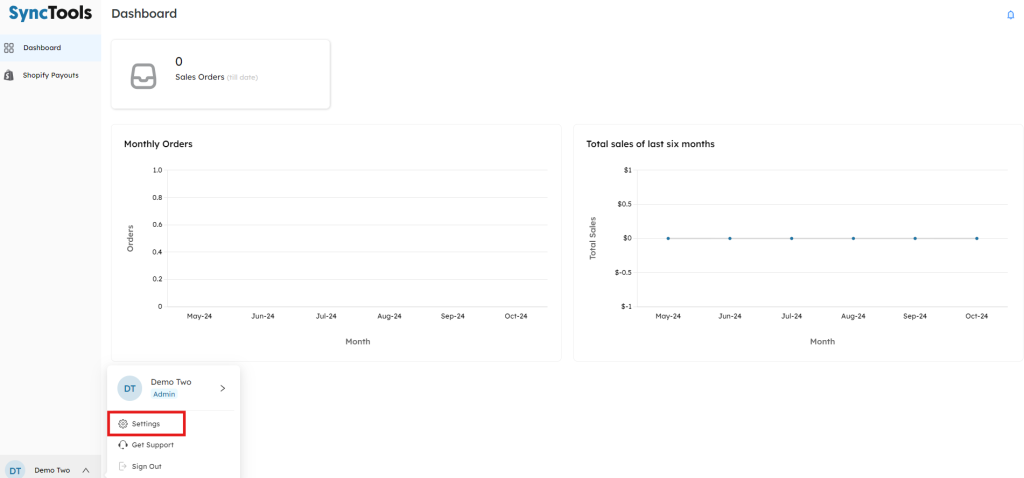**Step 2 : Choosing your Country of Operations:****Selecting the Primary Country of Operation**- Under the "Business Operates" section, click on the country flag icon to select the primary country in which your business operates.
The available options include the United States, United Kingdom, Canada, Singapore, Australia, and when you click on **“Others”** you will get options of several other countries.
- Kindly choose additional countries in which your business is registered.
- This selection will enable SyncTools to activate advanced settings tailored to your business and financial reporting requirements. Select additional countries in which your business is registered."**Group by Country Feature:**
This screen allows you to configure how Shopify sales are grouped by SyncTools for journal creation in QuickBooks. The **Default Grouping** option categorizes transactions based on the country, ensuring accurate and region-specific financial reporting.
## Key Features of Shopify Sales Grouping
####**Default Grouping: Group by Country**- SyncTools automatically groups Shopify transactions by the **registered operating country**.
- In this example, transactions are grouped under **United States**.
## Why Group Shopify Sales by Country?
- Automatically segregate sales, refunds, and taxes by country for compliance with regional tax laws (e.g., VAT, GST, Sales Tax).
### Benefits for the User
- Transactions are automatically categorized by region, reducing manual effort.
- No need for manual categorization of transactions by country-SyncTools does it for you.
## How to Configure Sales Grouping in SyncTools
- Check the box for **Group by Country** to enable regional grouping.
- The selected country (e.g., United States) will determine the grouping criteria.
- Click **Save** to apply the configuration.
- SyncTools will now post Shopify transactions to QuickBooks accounts based on the selected country.
## How Grouped Shopify Sales Appear in QuickBooks
**Example**:
A Shopify store operates in **two countries**: the **United States** and the **United Kingdom**. The store syncs its transactions to QuickBooks using SyncTools, with **Group by Country** enabled.
#### In Shopify
- US Sales: $5,000 (with $300 in Sales Tax).
- UK Sales: £4,000 (with £800 in VAT).
#### In QuickBooks
- US transactions are grouped under accounts like SyncTools Shopify Sales - US and SyncTools Shopify Sales Tax - US.
- UK transactions are grouped under accounts like SyncTools Shopify Sales - UK and SyncTools Shopify VAT - UK.**Group by Gateway :****Purpose:**- Allows grouping of transactions based on different payment gateways available in Shopify
- Helps track sales by payment method **How to Configure:**- Navigate to Settings > Grouping
- Under "Default Grouping," locate "Group by Gateway"
- Check the checkbox to enable gateway-based grouping
- Select the payment gateways you want to track:
Manual
- Gift card
- Apple pay
- G-pay
- Shopify payments
- Bogus (if applicable)**How It Works:**- Each payment gateway is automatically grouped into its respective category, such as Shopify Payments or Gift Cards.
- SyncTools maps transactions to separate accounts in QuickBooks for better tracking and reconciliation.**Why Use Grouping by Gateway?**- Payment gateways often charge specific fees (e.g., processing fees). By grouping transactions, these fees are easier to track and reconcile.
- Provides visibility into how much revenue is generated through each gateway.
## How Grouped Shopify Sales Appear in QuickBooks
When Group by Gateway is enabled in SyncTools, Shopify transactions are mapped and reflected in QuickBooks under clearing accounts for each payment gateway. This setup provides clear visibility into the funds received and pending for each payment method.**Example :**
#### Shopify Transactions:
- Total Sales via Shopify Payments: $3,000
- Total Sales via Apple Pay: $1,000
#### In QuickBooks:
- Shopify Payments Sales: $3,000 (deposited into Shopify clearing account).
- Apple Pay Sales **:**$1,000 (deposited into Apple Pay account).
- Processing fees for each gateway are recorded separately, simplifying reconciliation.**Advanced Grouping: Group by Channel for Sales Transactions**
With this option enabled, SyncTools groups sales, refunds, and other transactions based on the specific sales channels used in Shopify. Examples of sales channels include: Facebook & Instagram, Online Store, etc.
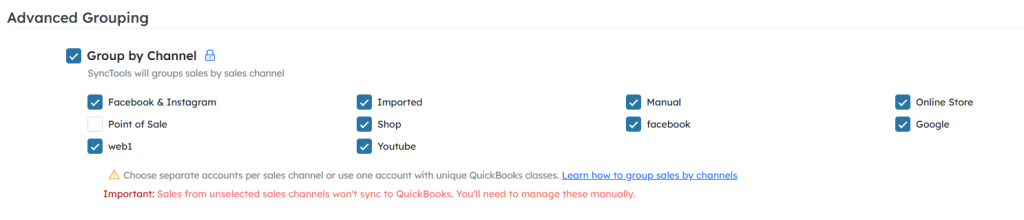**Purpose**- Enables organization of sales data by specific sales channels in Shopify
- Provides better visibility into performance across different sales channels.**How to Configure:**- Navigate to Settings > Grouping
- Scroll to the "Advanced Grouping" section
- Locate "Group by Channel"
- Check the checkbox to enable channel-based grouping **How it Works:**- Choose the sales channels relevant to your business.
- Transactions from selected channels are mapped to separate accounts in QuickBooks.
- Sales from unselected channels won’t sync and must be managed manually.**Why Use Group by Channel?**- Provides a clear breakdown of revenue by channel.
- Each channel is mapped to its own account in QuickBooks, ensuring clean and structured financial reporting.**How it Reflects in QuickBooks**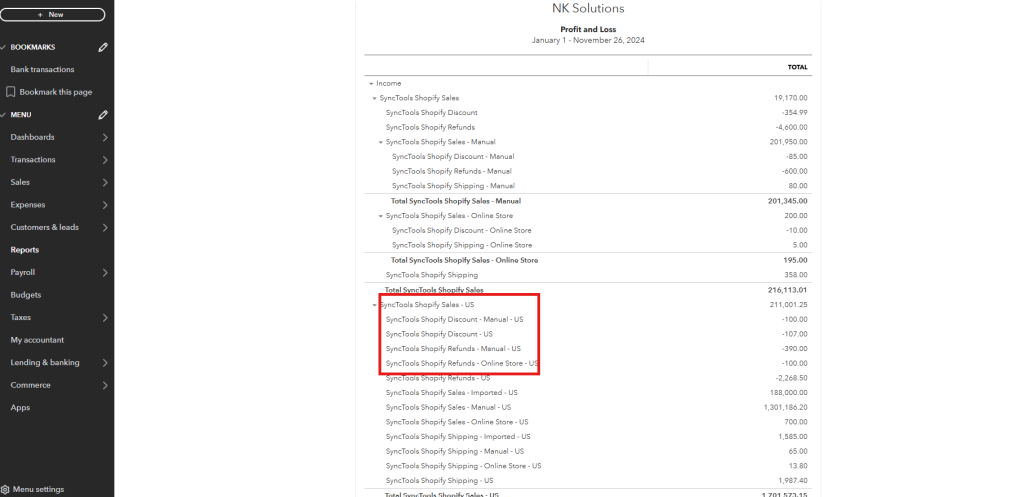
The **Profit and Loss Report** in QuickBooks shows a detailed breakdown of sales, discounts, and refunds grouped by **sales channels**, providing valuable insights into financial performance.**Example**:
#### Shopify Transactions:
- Online Store: $10,000
- Facebook & Instagram: $4,000
- Point of Sale (POS): $3,000
#### In QuickBooks:
- SyncTools Online Store Sales: $10,000
- SyncTools Facebook & Instagram Sales: $4,000
- SyncTools POS Sales: $3,000
---
## Tax Threshold Limits
URL: https://synctools.ai/help/shopify-quickbooks-integration/shopify-quickbooks-online-setup-tax-threshold-limits
> NULL
### Managing Sales Threshold Limits in SyncTools
_
As your eCommerce business grows, staying on top of your tax obligations becomes increasingly important. SyncTools' Threshold Limit feature is designed to help Shopify merchants like you avoid unexpected tax liabilities by proactively alerting you when your sales reach important thresholds in different countries or states.
The first time I crossed a sales threshold in California without realizing it, I ended up with unexpected tax obligations. SyncTools' notifications would have saved me hours of accounting headaches!_
## _Why Threshold Limits Matter_
_When selling across multiple states or countries, each jurisdiction has different rules about when you need to register for tax collection. SyncTools helps you:_
- _Stay ahead of tax compliance requirements_
- _Avoid unexpected tax penalties_
- _Make informed decisions about where to expand your business_
- _Manage your accounting workflow more efficiently_
__
## _Setting Up Country-Based Threshold Limits_
- Navigate to the **Settings** section in your SyncTools dashboard
- Click on **Countries** under the Configuration section
_
TIP: Set up your operating countries before configuring threshold limits to ensure all relevant jurisdictions are covered.

Note: The countries you select here will determine which threshold limits you can configure in the next steps.
Once you've selected your operating countries, you can set specific threshold limits:_
- _Click the _ **_Set threshold limit_** _ button located in the upper right corner_
- _Select the country tab you wish to configure (e.g., United Kingdom or United States)_
__

PRO TIP: Research current tax nexus thresholds for each state before setting your limits. Economic nexus thresholds change periodically, so check with your accountant for the most current information.
## How Notifications Work
Once your threshold limits are configured, SyncTools will monitor your Shopify sales data as it's synchronized with QuickBooks. When your sales in a particular region approach or exceed your set threshold:
- You'll receive an email notification alerting you to the threshold crossing
- The notification will specify which country/state threshold has been reached
- You can then consult with your tax professional about any required filings

IMPORTANT: Threshold notifications are informational only. Always consult with a tax professional about your specific tax obligations.
---
## Auto Mapping & Categorization
URL: https://synctools.ai/help/shopify-quickbooks-integration/shopify-quickbooks-online-transaction-categorization-using-auto-mapping
> NULL
## Setting Up Your Mapping Rules
### Understanding Account Mapping
When connecting your Shopify store to QuickBooks, it's essential to tell SyncTools how to categorize your transactions. The Mapping section is where you'll create these connections, ensuring your sales, refunds, and other transactions appear in the right accounts in QuickBooks.
### Creating Basic Transaction Mappings
To get started:
- Navigate to Settings → Mapping
- You'll see Shopify transaction types on the left and QuickBooks accounts on the right
- For each transaction type, select the appropriate QuickBooks account from the dropdown menu
For example:
- Map your Shopify sales to a "SyncTools Shopify Sales" account in QuickBooks
- Map refunds to a "SyncTools Shopify Refunds" account
- Continue mapping shipping, discounts, and other transaction types as needed for your business
### Quick Setup with Bulk Create & Map **If you're just getting started, SyncTools can set up your accounts automatically:**- Click the "Bulk create & map" button (highlighted in the interface)
- SyncTools will suggest appropriate accounts and create them in QuickBooks
- Review the suggested mappings to ensure they meet your needs
**Want to use your existing accounts instead? Simply click "Map to existing accounts" to select accounts you've already created in QuickBooks.**

TIP: Use the "Auto map" button to quickly match transaction types to similar existing accounts, saving you time and reducing duplicate accounts.
Once you've reviewed your mappings and are satisfied with the connections, click Save. Your mappings will be listed under "Mapped Accounts," and future journal entries will follow these rules.
Now the journal entries will be based on the mapping done.

Important Note: We recommend consulting with your accounting professional about your mapping structure to ensure it aligns with your financial reporting needs.
For additional assistance, our support team is available at support@synctools.ai
---
## Returns, Refunds & Fees
URL: https://synctools.ai/help/shopify-xero-integration/shopify-xero-advanced-accounting-scenarios
> NULL
## Advanced Accounting with SyncTools: Managing Shopify Transactions in Xero
Running an online store on Shopify is exciting, but the accounting side can quickly become overwhelming. Imagine receiving dozens of orders daily, each with products, shipping fees, taxes, and occasional tips or refunds.
Now imagine manually entering each of these into Xero-it would be a bookkeeper's nightmare!
That's where SyncTools steps in. We've designed our platform to transform the complex web of Shopify transactions into clean, organized Xero entries that make sense to both business owners and accountants.
? TIP: Think of SyncTools as your virtual bookkeeper that works 24/7, never takes a vacation, and follows accounting best practices with perfect consistency.
## The Journey of a Transaction: From Checkout to Financial Statements
Let's follow the journey of a typical transaction through your system when using SyncTools:
Meet Sarah, a customer who just discovered your Shopify store. She purchases a makeup kit for $25 and a t-shirt for $10, pays $20 for shipping, gets a $1 discount, and is charged $2.04 in sales tax. Her total comes to $56.04, which she pays through Apple Pay.
In Shopify, this order (#1006) looks straightforward. But behind the scenes, this single transaction needs to be broken down into multiple accounting components.
### When Refunds Happen
A week later, Sarah decides the makeup kit and t-shirt aren't right for her and requests a refund.
In Shopify, you process the full refund of $56.04. This is where many e-commerce businesses make accounting mistakes-a refund isn't just "reversing a sale"; it requires proper accounting treatment to maintain accurate records.
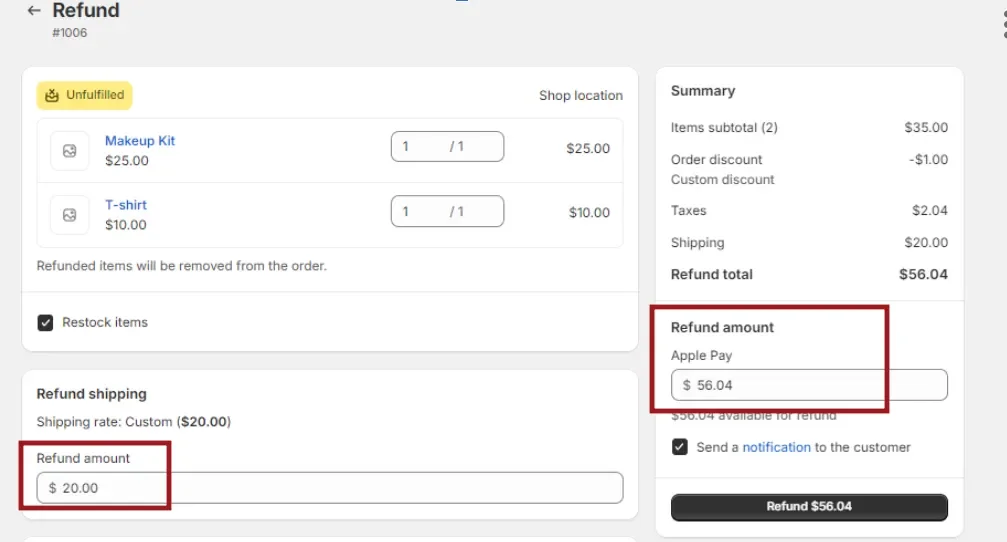
SyncTools handles this refund by creating the perfect countering entry:
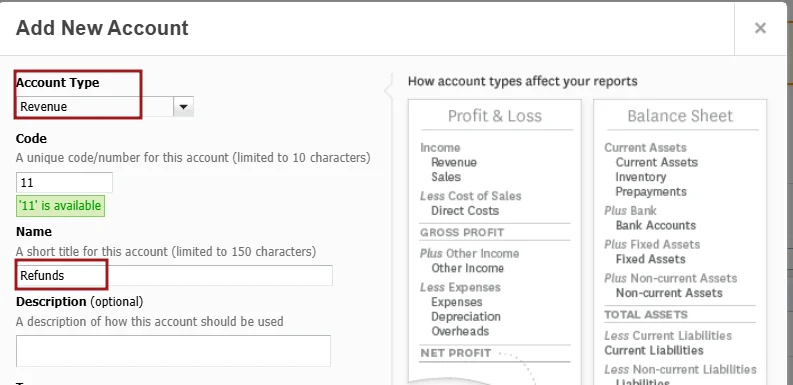
This entry properly categorizes each component of Sarah's purchase, ensuring your financial reports will accurately reflect your business performance.
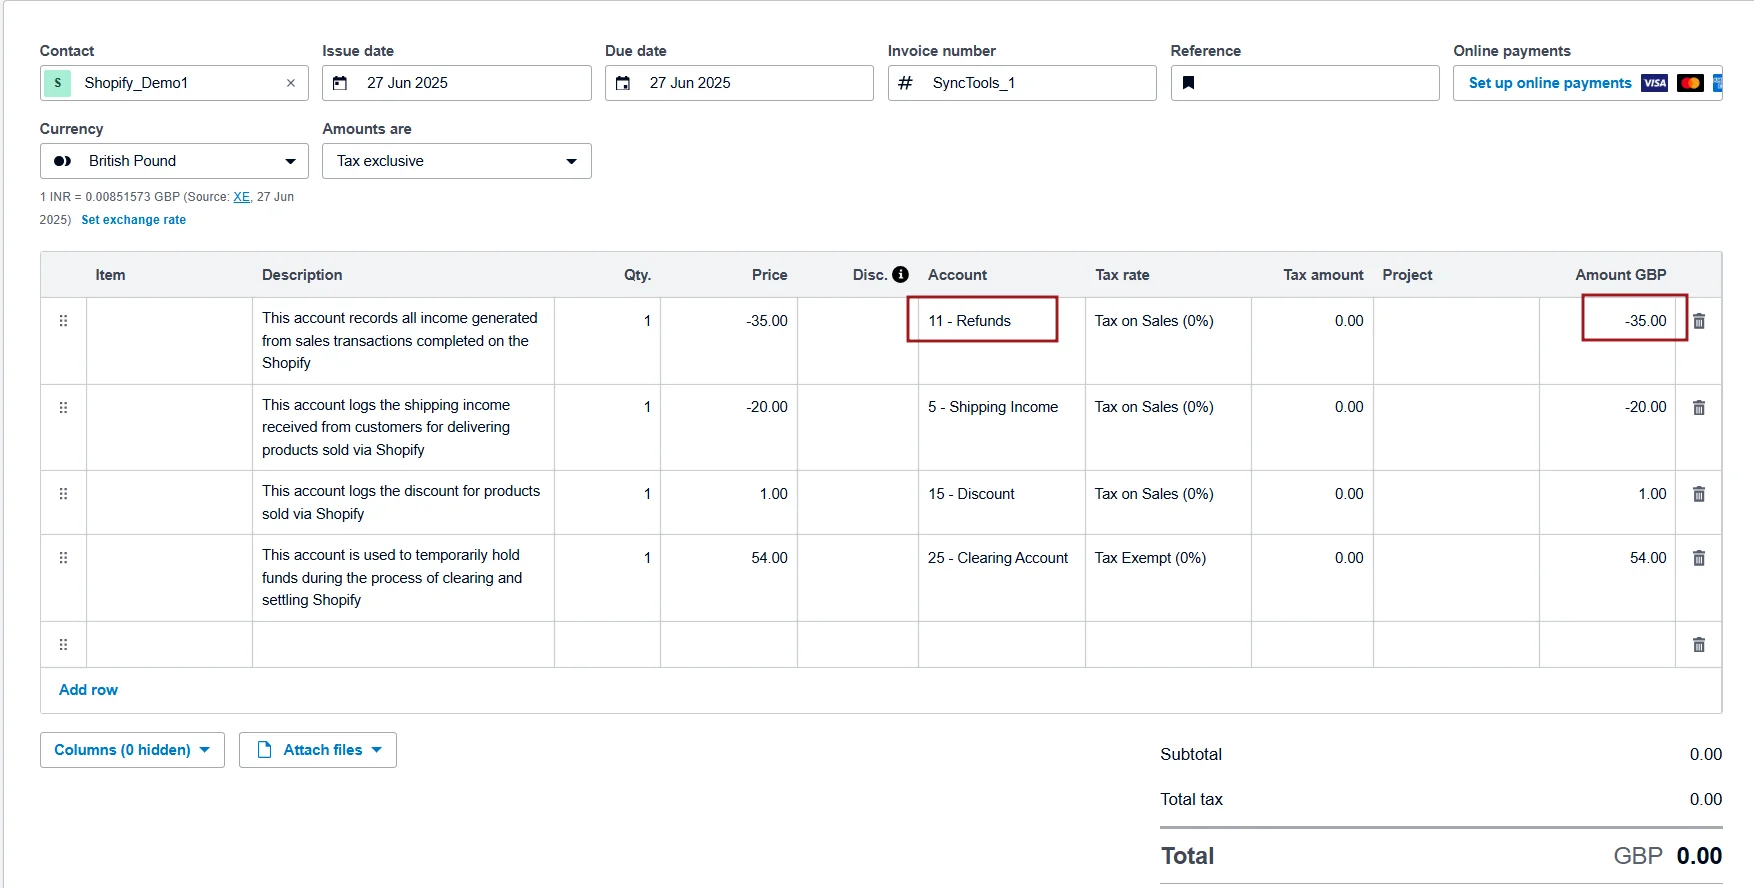
### How Sales Tax is managed
For many online sellers, sales tax can be particularly confusing. You're collecting it from customers in various jurisdictions, but it's not your money-you're essentially acting as an intermediary between your customer and the tax authority.
Let's look at James from California who orders from your store. The 6% state tax on his purchase amounts to $2.04. This is what happens behind the scenes with SyncTools:
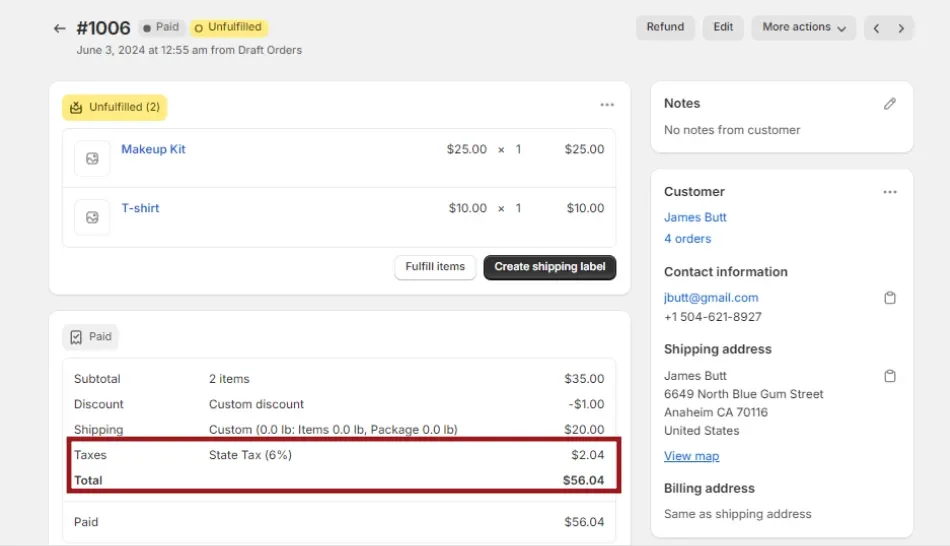
SyncTools creates an entry that puts this amount in a tax liability account, not revenue:
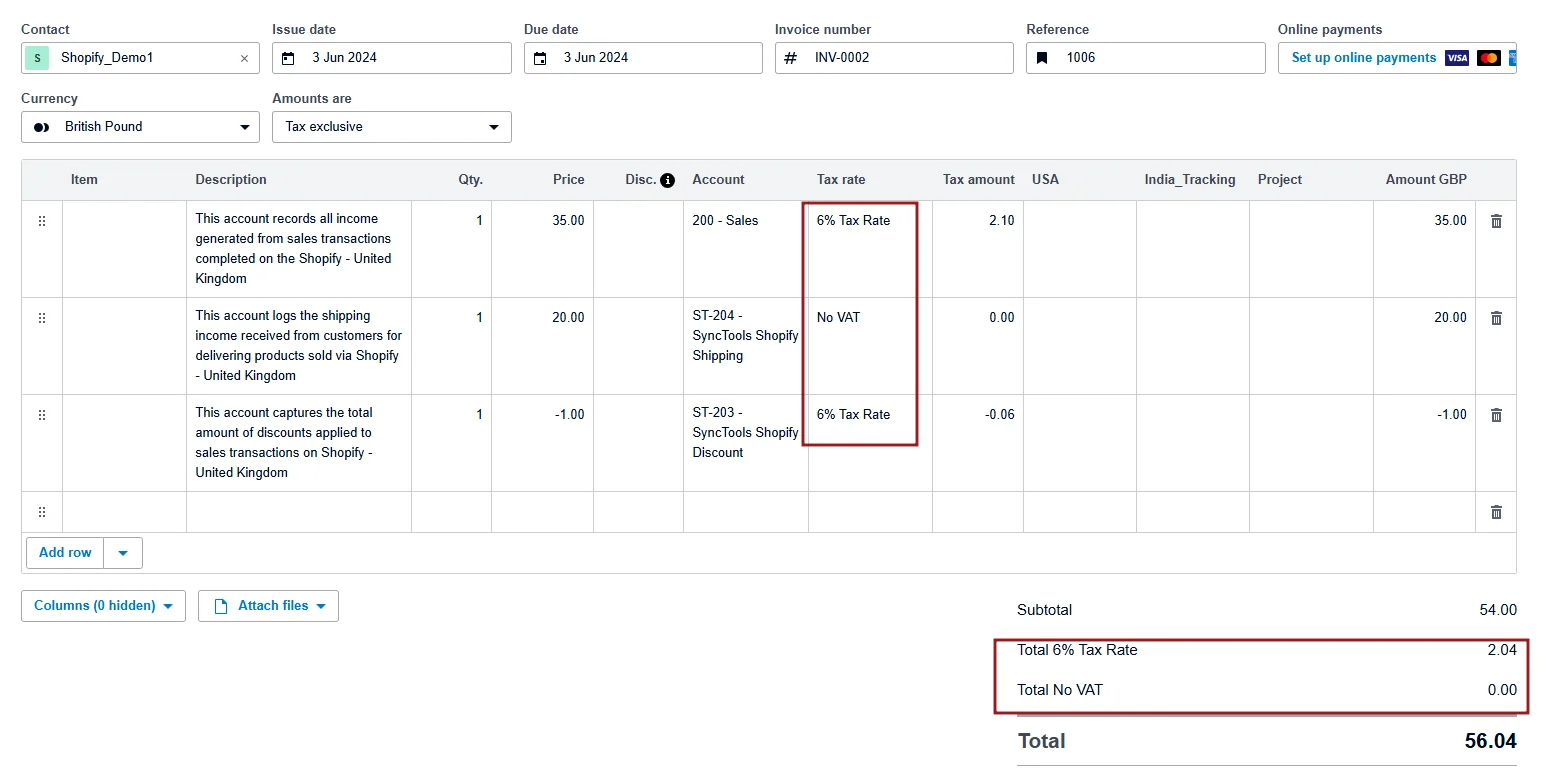
This amount now appears in your liability account, making it easy to see how much tax you've collected and need to remit.
If James gets a refund, SyncTools reduces the tax liability accordingly.
## Tracking Tips
For businesses that receive tips through Shopify, proper accounting is essential. Let's see how SyncTools handles this unique type of transaction.
### Understanding Tips as a Liability
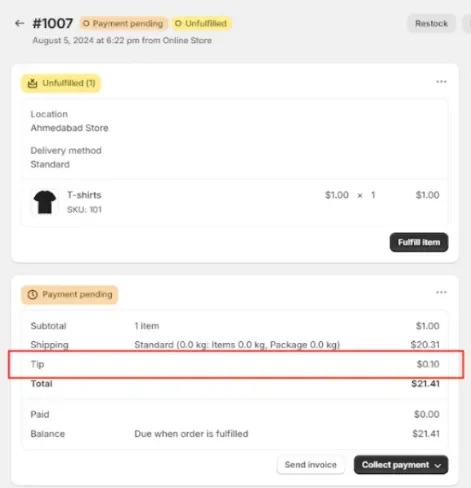
Imagine a customer adds a $0.10 tip to their order. This money isn't your revenue-it belongs to your staff. Until you pay it out, it's a liability on your books.
SyncTools generates an entry that credits the "Tips Liability" account:
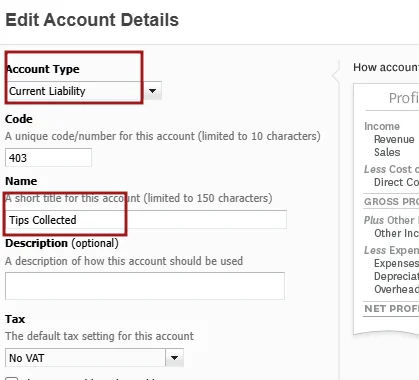
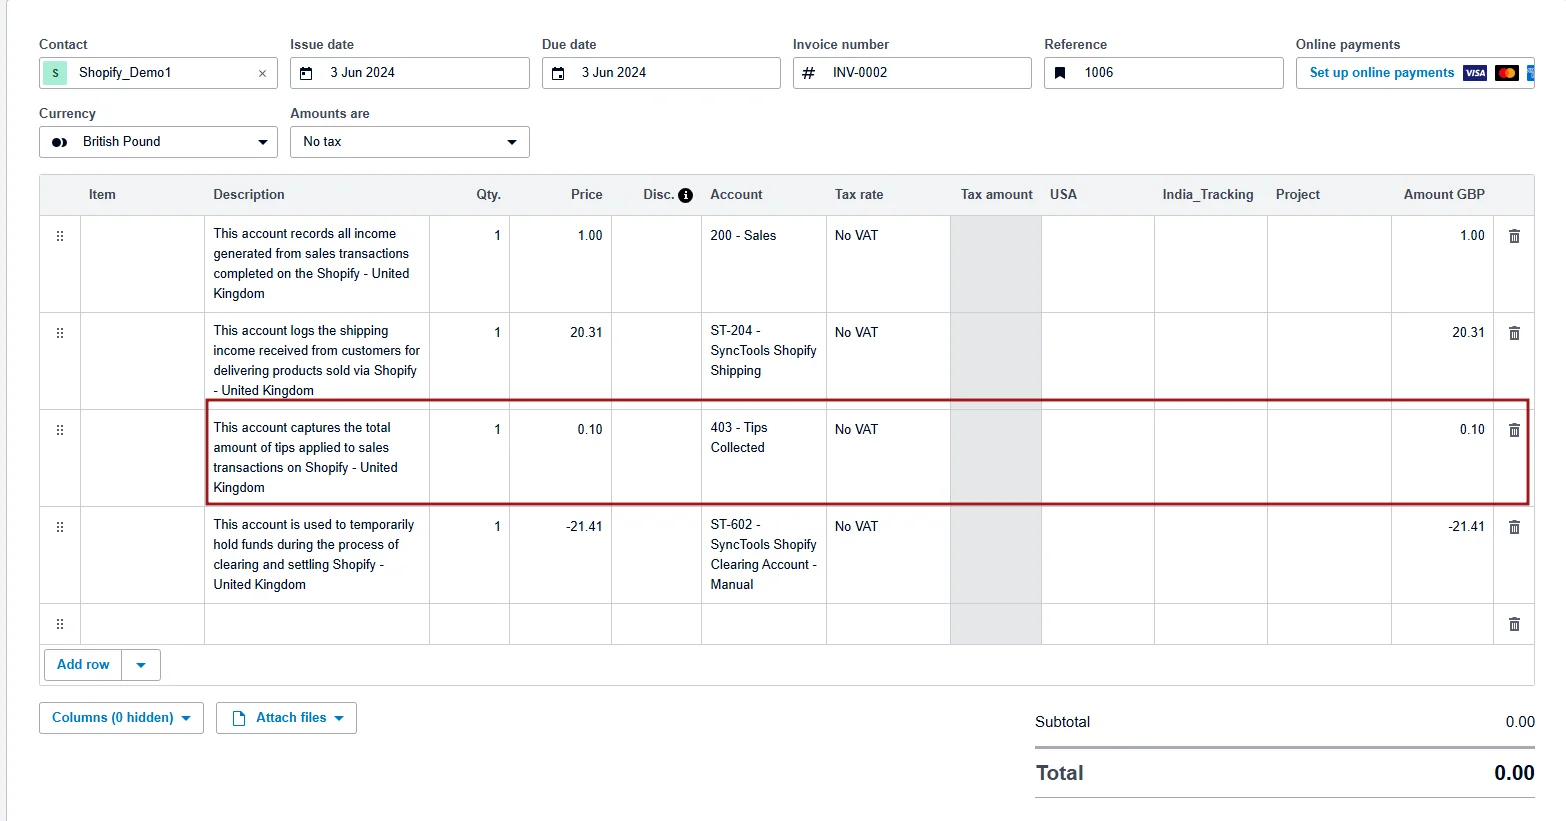
This approach ensures tips are never accidentally counted as business revenue and provides a clean audit trail for tip collection and distribution.
## Return Fees: Turning Returns into Revenue Opportunities
Let's say a customer returns a $9 item but is charged a $1 return shipping fee and a $0.02 restocking fee.
SyncTools handles this complex transaction by:
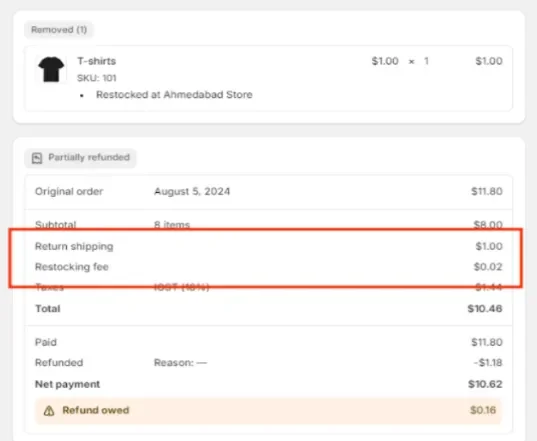
The return fees are treated as new revenue, not as a reduction of the refund.
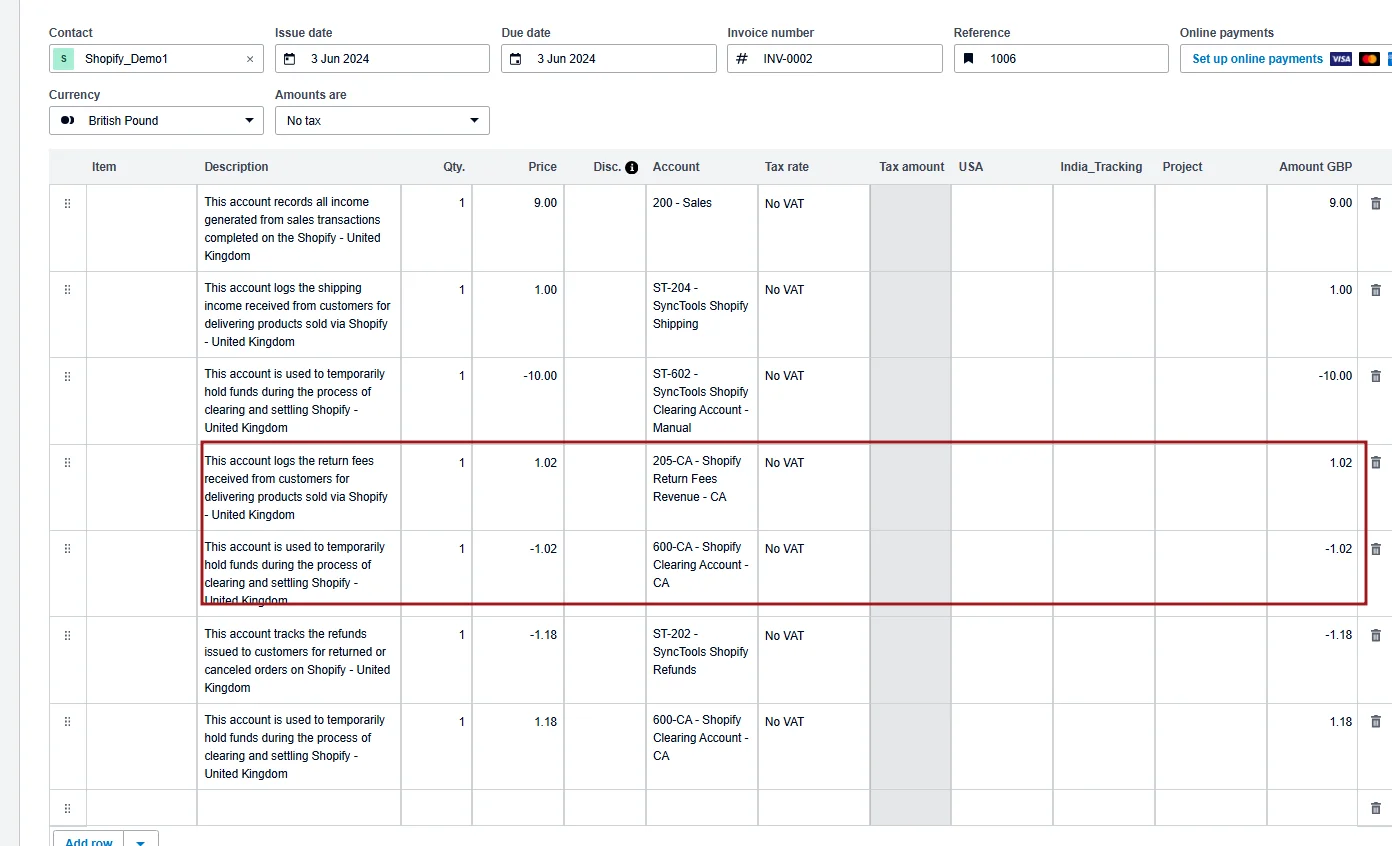
This approach gives you visibility into how much revenue you're generating specifically from return fees.**Still have questions?** Our support team is ready to help at support@synctools.ai , or visit our Help Center for additional guides.
---
## Foreign Currency Conversion
URL: https://synctools.ai/help/shopify-xero-integration/how-synctools-converts-foreign-currency-to-your-home-currency-for-accurate-reconciliation
> NULL
Before SyncTools can properly convert foreign currencies from your Shopify store to your home currency in Xero, you need to enable and configure multicurrency features in Xero.
This guide walks you through the necessary steps to prepare your Xero account for seamless integration with SyncTools.
Please Note: The conversion to your home currency happens in your accounting software.
## Step 1: Access Settings
- Log in to your Xero account
In the top right corner, click on company name
Click on your company name and then choose 'Settings'
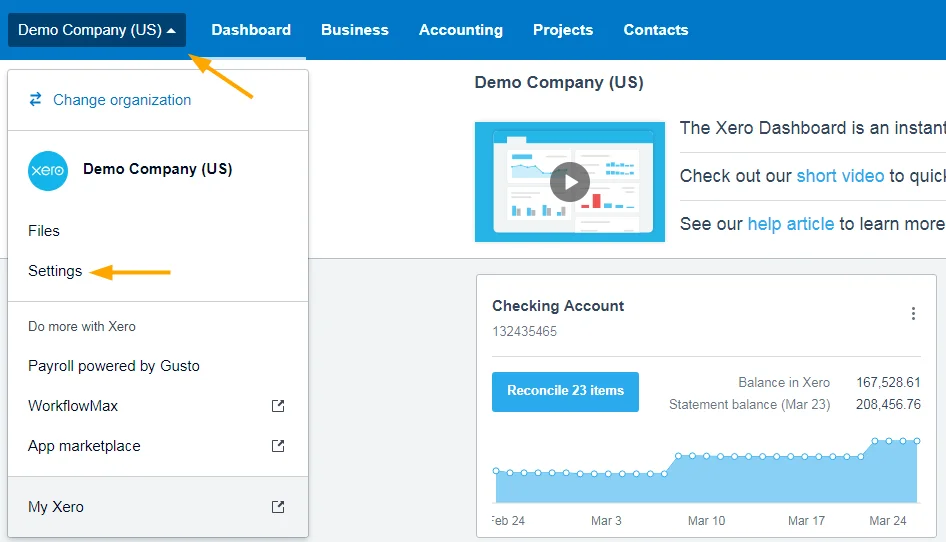
## Step 2: Navigate to Currencies in Settings
On the settings screen, click on 'Currencies' in the General section
Then click on 'Add Currency'
### Example: How Currency Conversion Works
Let's say you sell a product for €100 EUR, and your home currency is USD:
- Shopify processes the payment and converts it to $110 USD
- SyncTools retrieves both the original amount (€100) and the converted amount ($110)
- SyncTools creates an entry in QuickBooks showing:
Revenue of $110 USD
---
## Group by Channel, Gateway & Country
URL: https://synctools.ai/help/shopify-xero-integration/shopify-xero-grouping-by-sales-channel-gateway-country
> NULL
## Overview
The **"Group by Country"** feature in SyncTools allows you to configure your chart of accounts and tax details based on the primary country in which your business operates.
This feature enables SyncTools to optimize settings and financial reporting tailored to the specific requirements of your e-commerce and accounting needs for that country.
## Step 1: Login in and Accessing Settings
Once you log into SyncTools, you'll land on your Dashboard, which gives you a quick snapshot of your synced orders. To start setting things up, look at the profile name on the left and click on **"Settings."**
## Step 2: Choosing your Country of Operations
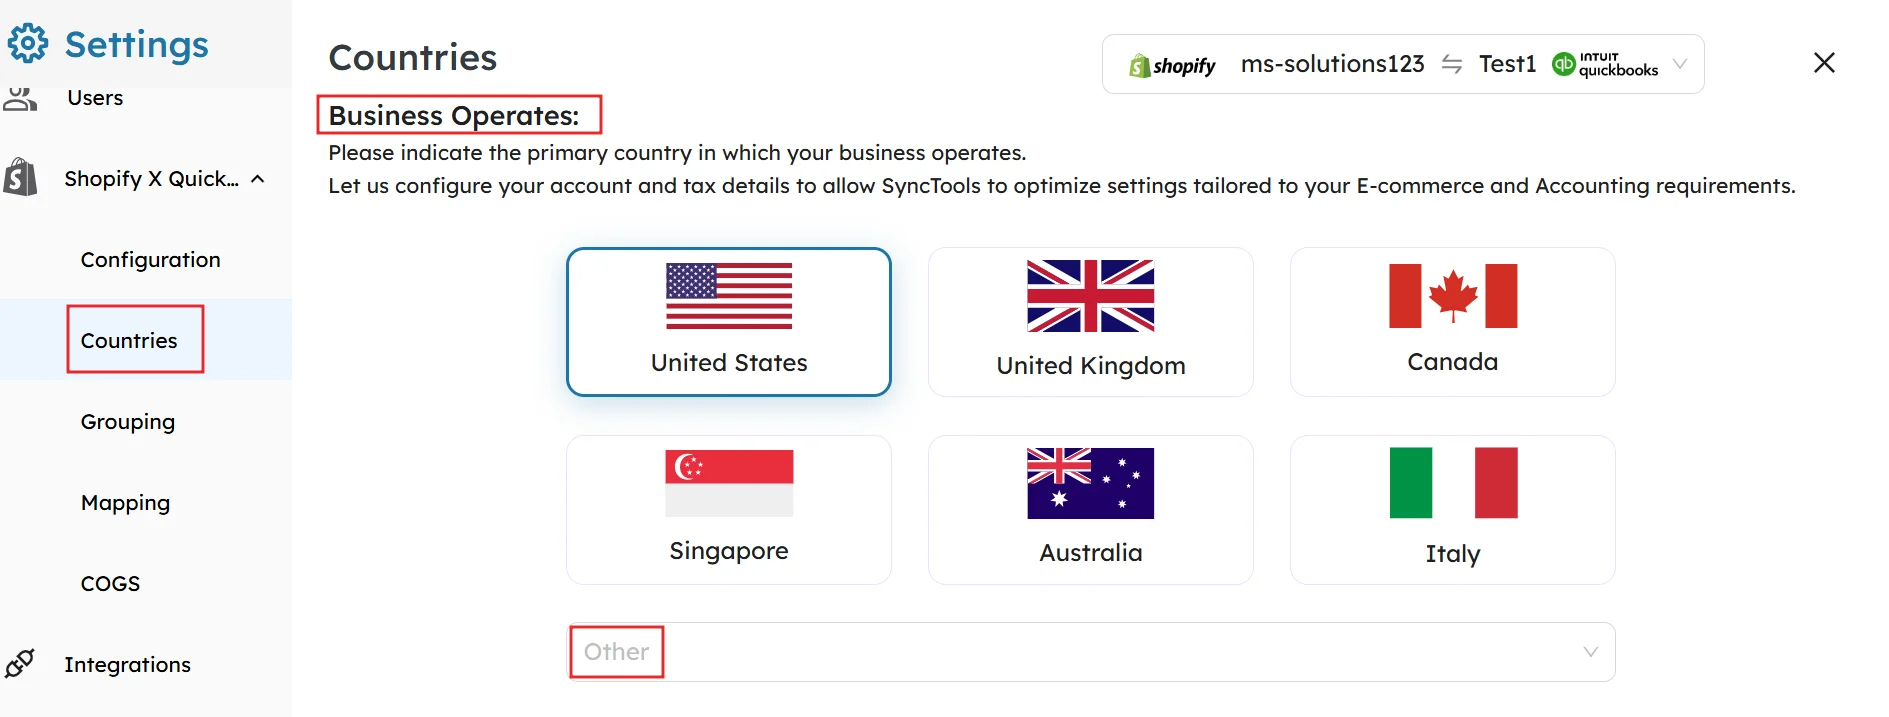
### Selecting the Primary Country of Operation
Under the **"Business Operates"** section, click on the country flag icon to select the primary country in which your business operates.
The available options include the United States, United Kingdom, Canada, Singapore, Australia, and when you click on **“Others”** you will get options of several other countries.
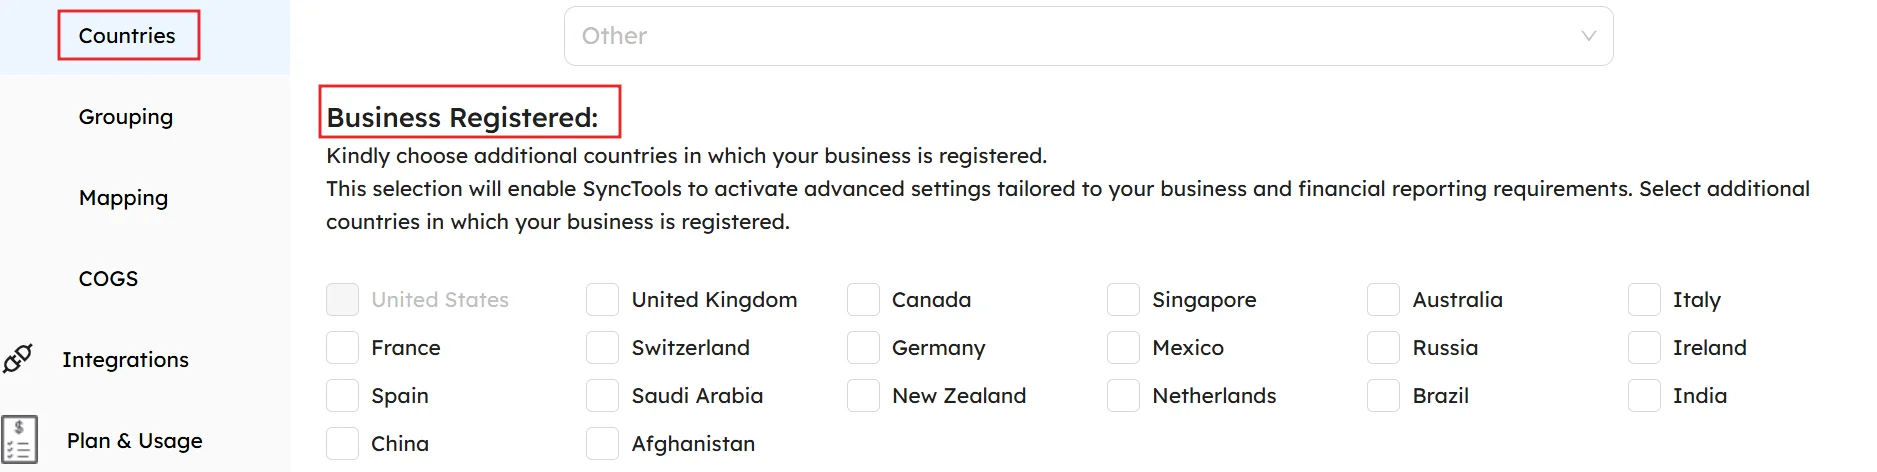
Kindly choose additional countries in which your business is registered.
This selection will enable SyncTools to activate advanced settings tailored to your business and financial reporting requirements. Select additional countries in which your business is registered."
### Group by Country Feature

This screen allows you to configure how Shopify sales are grouped by SyncTools for Invoice creation in Xero.
The **Default Grouping** option categorizes transactions based on the country, ensuring accurate and region-specific financial reporting.
## Key Features
### Default Grouping: Group by Country
- SyncTools automatically groups Shopify transactions by the **registered operating country.**- In this example, transactions are grouped under **United States.**### Why Use Grouping by Country?
- Automatically segregate sales, refunds, and taxes by country for compliance with regional tax laws (e.g., VAT, GST, Sales Tax).
### Benefits for the User
- Transactions are automatically categorized by region, reducing manual effort.
- No need for manual categorization of transactions by country-SyncTools does it for you.
### How to Configure
- Check the box for **Group by Country** to enable regional grouping.
- The selected country (e.g., United States) will determine the grouping criteria.
- Click **Save** to apply the configuration.
- SyncTools will now post Shopify transactions to Xero accounts based on the selected country.
### How It Reflects in Xero
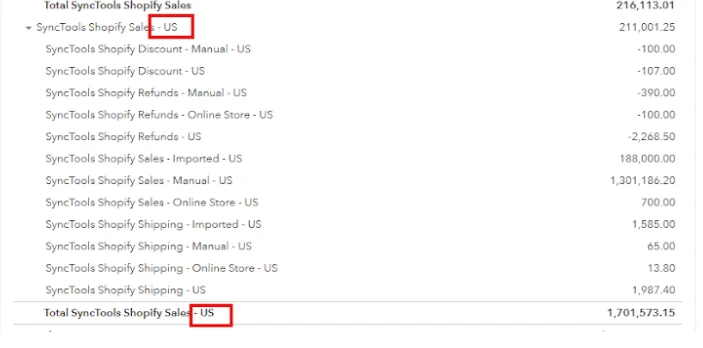**Example:** A Shopify store operates in two countries: the United States and the United Kingdom.
The store syncs its transactions to Xero using SyncTools, with Group by Country enabled.
#### In Shopify
- US Sales: $5,000 (with $300 in Sales Tax).
- UK Sales: £4,000 (with £800 in VAT).
#### In Xero
US transactions are grouped under accounts like **SyncTools Shopify Sales - US** and **SyncTools Shopify Sales Tax - US**.
UK transactions are grouped under accounts like **SyncTools Shopify Sales - UK** and **SyncTools Shopify VAT - UK**.
## Group by Gateway

### Purpose
- Allows grouping of transactions based on different payment gateways available in Shopify
- Helps track sales by payment method
### How to Configure
- Navigate to **Settings > Grouping**- Under **"Default Grouping,"** locate **"Group by Gateway"**- Check the checkbox to enable gateway-based grouping
- Select the payment gateways you want to track:
Manual
- Gift card
- Apple pay
- G-pay
- Shopify payments
- Bogus (if applicable)
### How It Works
- Each payment gateway is automatically grouped into its respective category, such as Shopify Payments or Gift Cards.
- SyncTools maps transactions to separate accounts in Xero for better tracking and reconciliation.
### Why Use Grouping by Gateway?
- Payment gateways often charge specific fees (e.g., processing fees). By grouping transactions, these fees are easier to track and reconcile.
- Provides visibility into how much revenue is generated through each gateway.
### How It Reflects in Xero
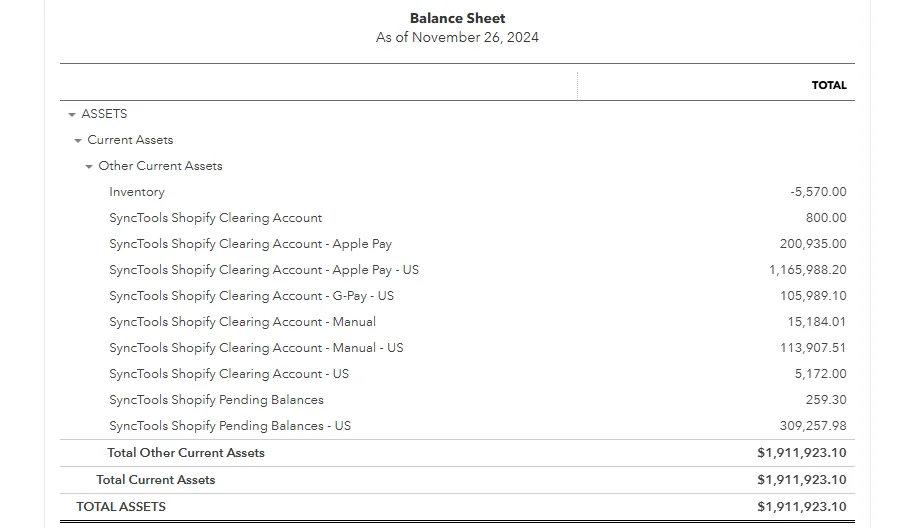
When Group by Gateway is enabled in SyncTools, Shopify transactions are mapped and reflected in Xero under clearing accounts for each payment gateway.
This setup provides clear visibility into the funds received and pending for each payment method.**Example**### Shopify Transactions:
- Total Sales via Shopify Payments: $3,000
- Total Sales via Apple Pay: $1,000
### In Xero:
- Shopify Payments Sales: $3,000 (deposited into Shopify clearing account).
- Apple Pay Sales: $1,000 (deposited into Apple Pay account).
- Processing fees for each gateway are recorded separately, simplifying reconciliation
## Advanced Grouping: Group by Channel for Sales Transactions
With this option enabled, SyncTools groups sales, refunds, and other transactions based on the specific sales channels used in Shopify. Examples of sales channels include: Facebook & Instagram, Online Store, etc.

### Purpose
- Enables organization of sales data by specific sales channels in Shopify
- Provides better visibility into performance across different sales channels
### How to Configure
- Navigate to **Settings > Grouping**- Scroll to the **"Advanced Grouping"** section
- Locate **"Group by Channel"**- Check the checkbox to enable channel-based grouping
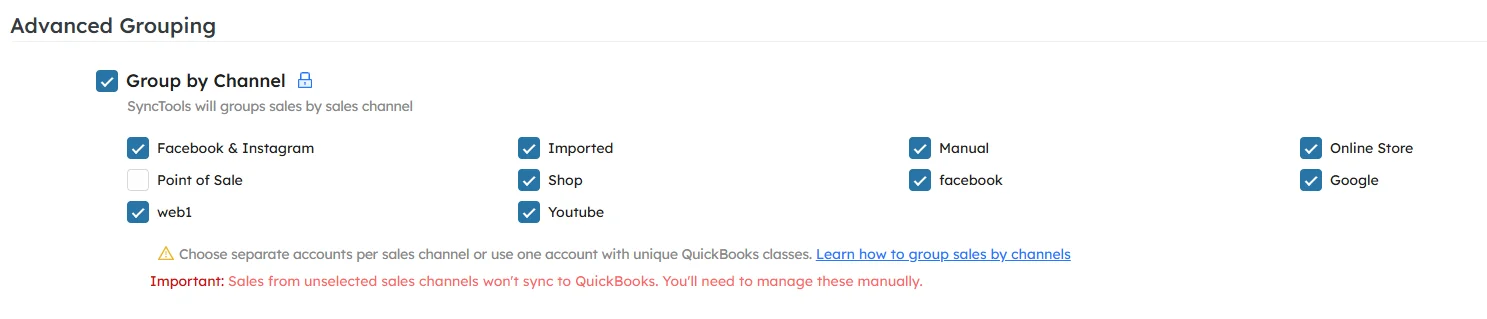
### How it Works
- Choose the sales channels relevant to your business.
- Transactions from selected channels are mapped to separate accounts in Xero.
- Sales from unselected channels won’t sync and must be managed manually.
### Why Use Group by Channel?
- Provides a clear breakdown of revenue by channel.
- Each channel is mapped to its own account in Xero, ensuring clean and structured financial reporting.
### How it Reflects in Xero
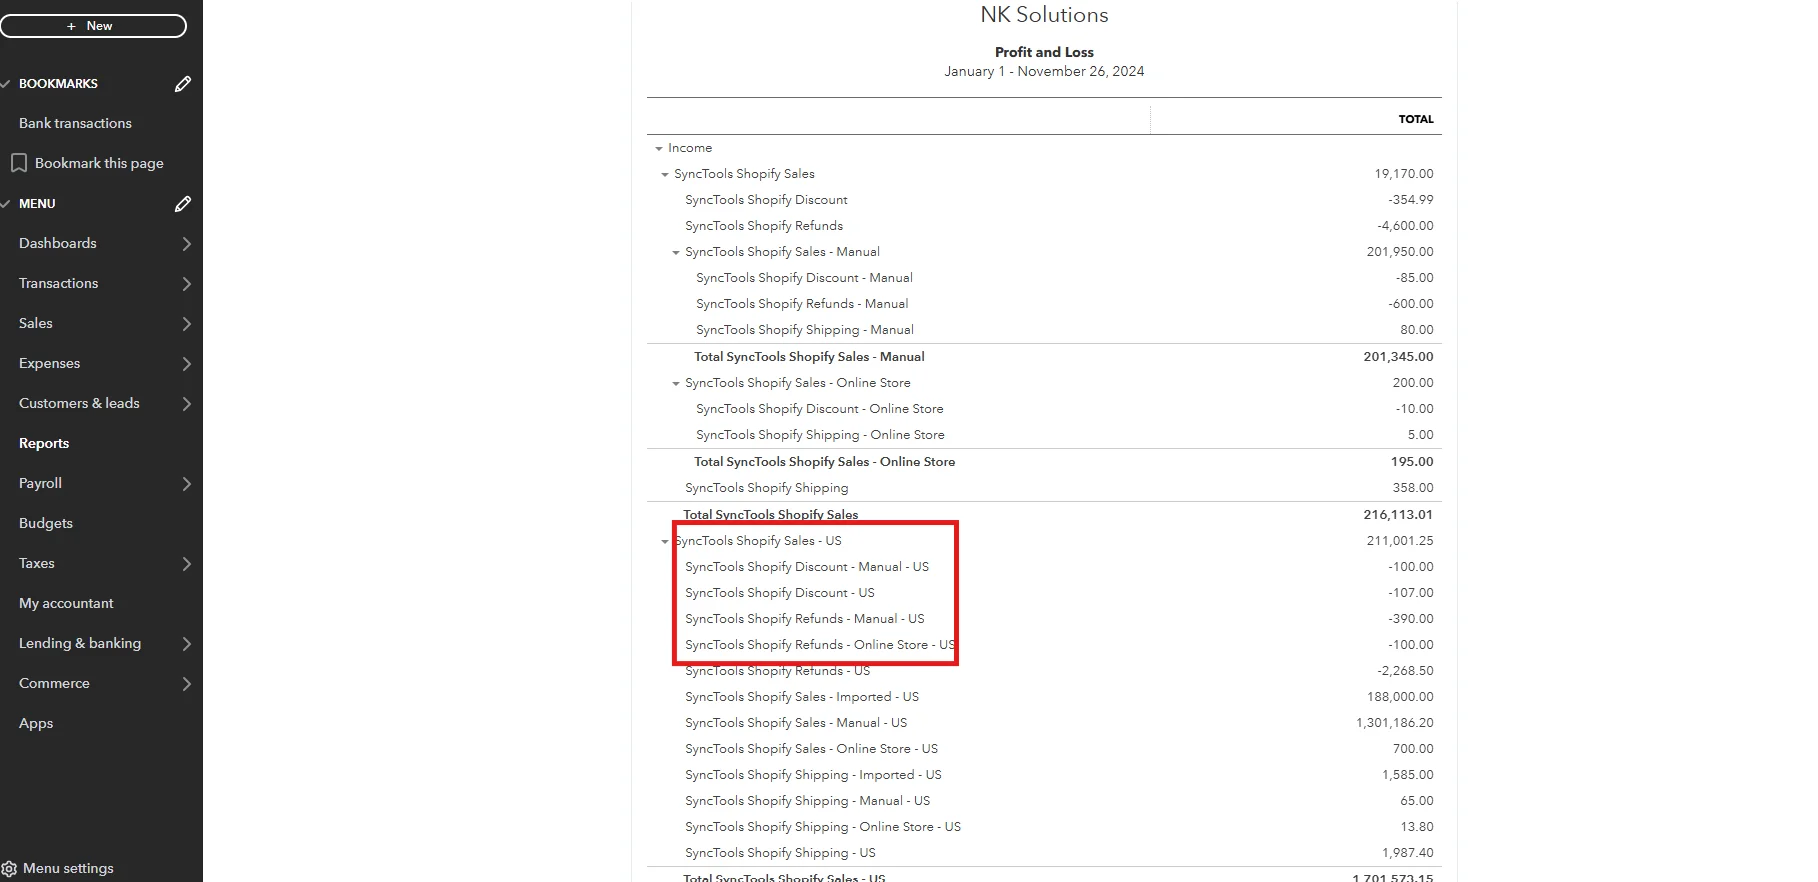
The Profit and Loss Report in Xero shows a detailed breakdown of sales, discounts, and refunds grouped by sales channels, providing valuable insights into financial performance.**Example:**#### Shopify Transactions:
- Online Store: $10,000
- Facebook & Instagram: $4,000
- Point of Sale (POS): $3,000
---
## COGS Setup
URL: https://synctools.ai/help/shopify-xero-integration/shopify-xero-online-cogs-setup
> NULL
## Understanding Cost of Goods Sold (COGS)
**Cost of Goods Sold (COGS)** refers to the direct costs associated with manufacturing and the cost of the goods sold by a company. This includes the cost of materials and labor directly used to create the product. It's a crucial metric for businesses as it directly impacts profitability.
COGS is calculated using the following formula:**COGS for the period = Beginning Inventory - Ending Inventory + Any additional inventory purchased and sold within the period** By tracking COGS, businesses can:
- Determine the true profitability of their products
- Make informed pricing decisions
- Identify areas for cost reduction
- Accurately know the gross profit
### COGS Impact on Xero Financial Statements
SyncTools syncs COGS data into summarized entries in invoices in Xero. Here's how it impacts key financial statements:
### 2.1 Summarized COGS Entry as in the Invoice
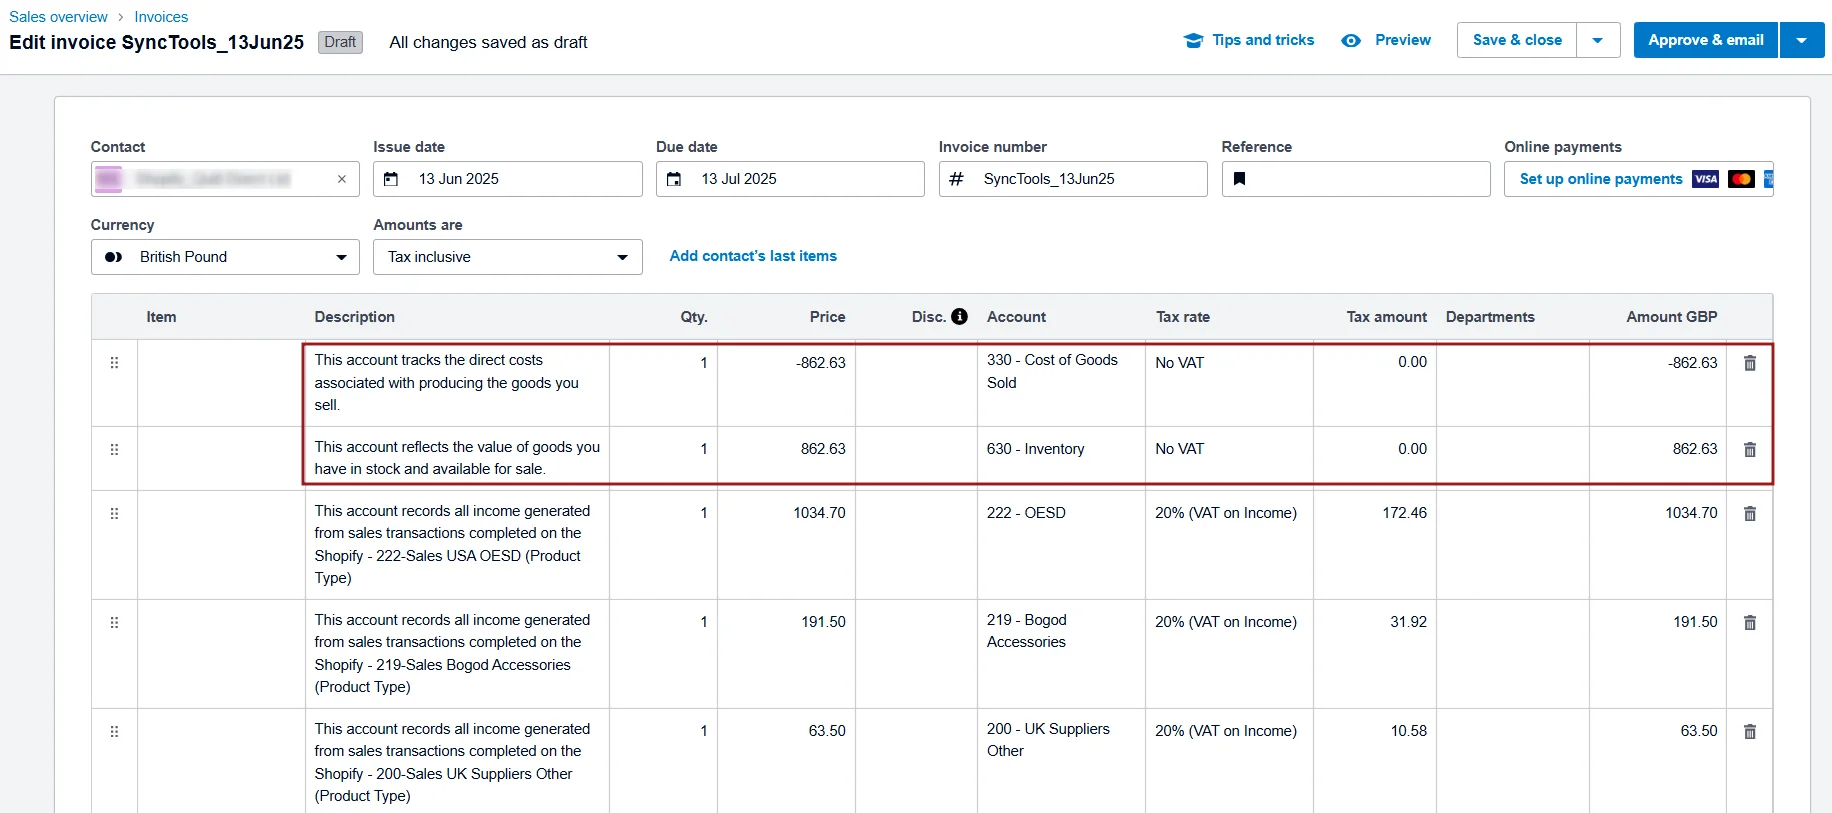
For each sync period (daily or monthly), SyncTools creates a summarized invoice in Xero for the COGS associated with that period. This invoice:
- Reduces inventory and records the cost as an expense.
- Allows businesses to track overall COGS for a given period, instead of breaking down each transaction individually.
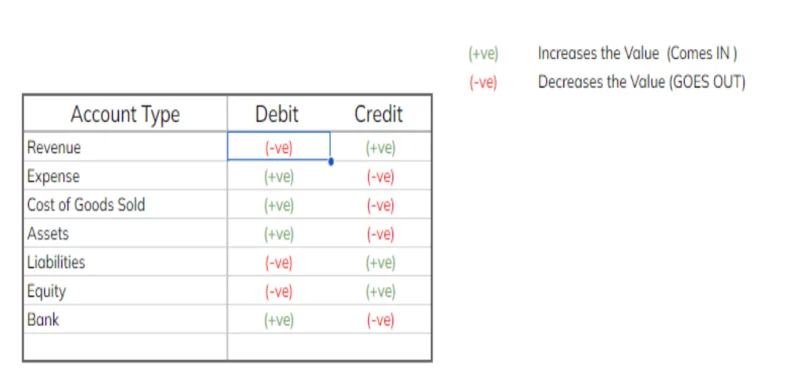
### 2.2 Profit and Loss Statement (Income Statement)
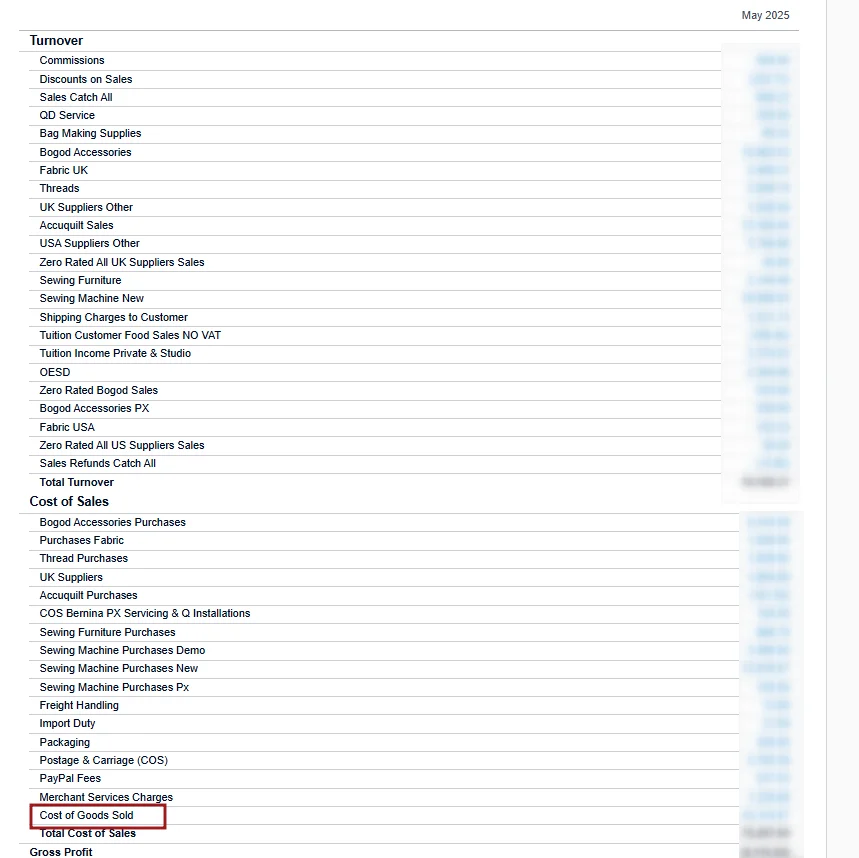
The COGS appears on the Profit and Loss statement, below the Sales or Revenue line. This helps businesses calculate their gross profit and gross profit margin, which are key indicators of profitability.
### 2.3 Balance Sheet
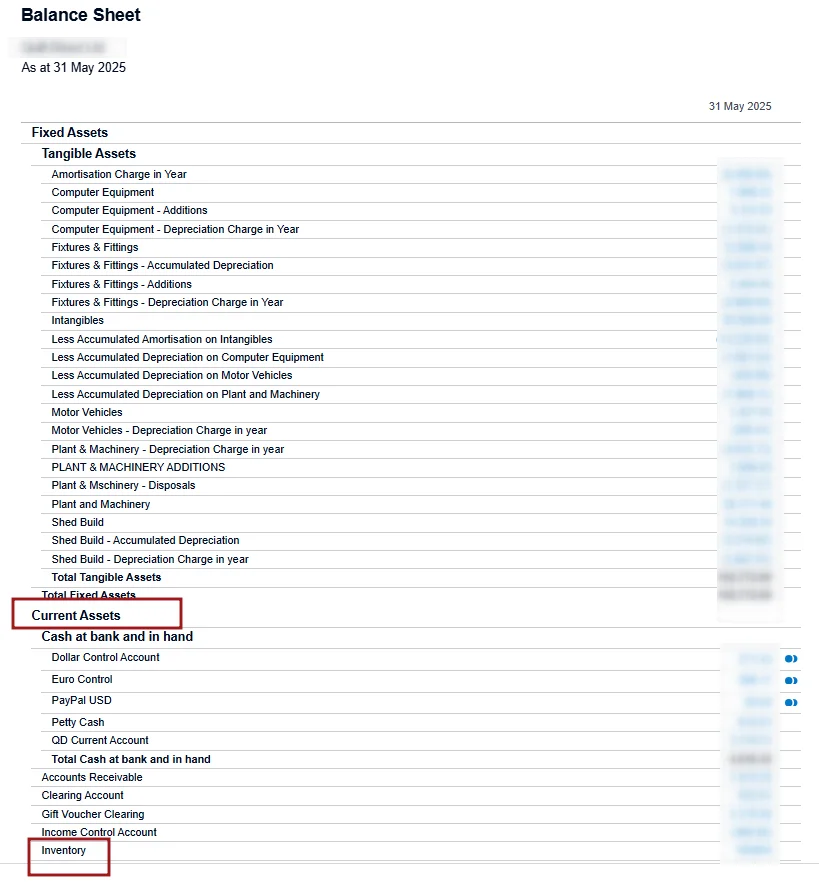
COGS affects the Balance Sheet in the following ways:
- **Inventory Account:** The inventory balance is reduced as goods are sold and synced to Xero.
- **Equity:** The Net Income (from the Profit and Loss statement) is adjusted by the COGS expense, which directly impacts the company’s equity.
## Enabling COGS Functionality
The COGS feature in SyncTools allows you to automatically track the costs of items sold during each payout period and post them as Invoice directly into your Xero. To enable this feature:
- In the SyncTools dashboard, click on the **Settings** menu located in the left sidebar.
- Click on **COGS** under the Shopify → Xero section.
- Click on the **Enable Cost of Goods Sold** button to activate the feature.
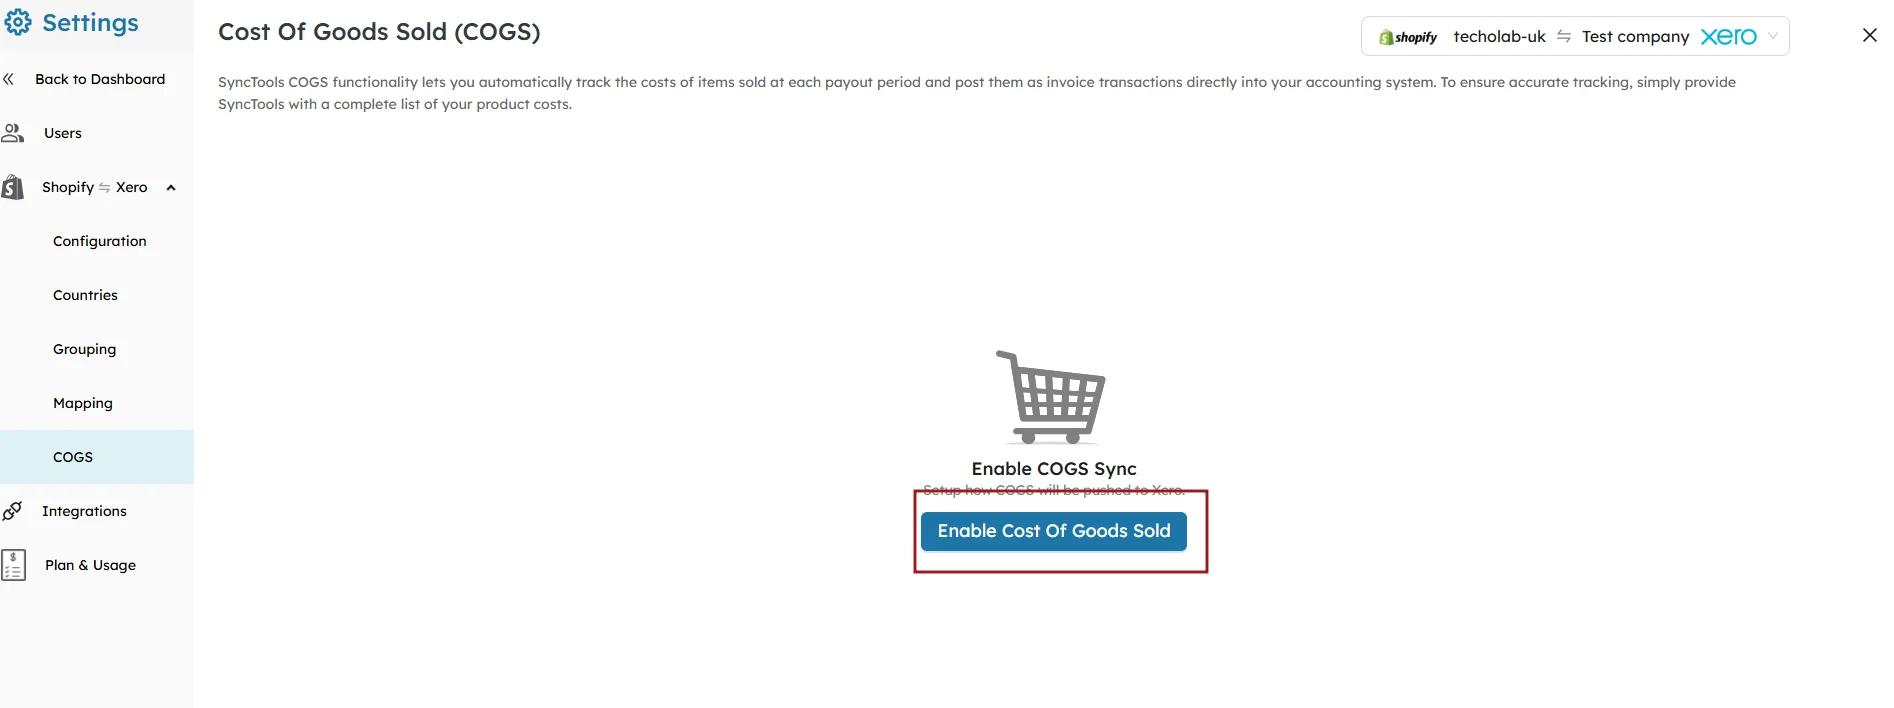
Once COGS is enabled, you’ll need to configure the settings to sync summarized COGS data to Xero:
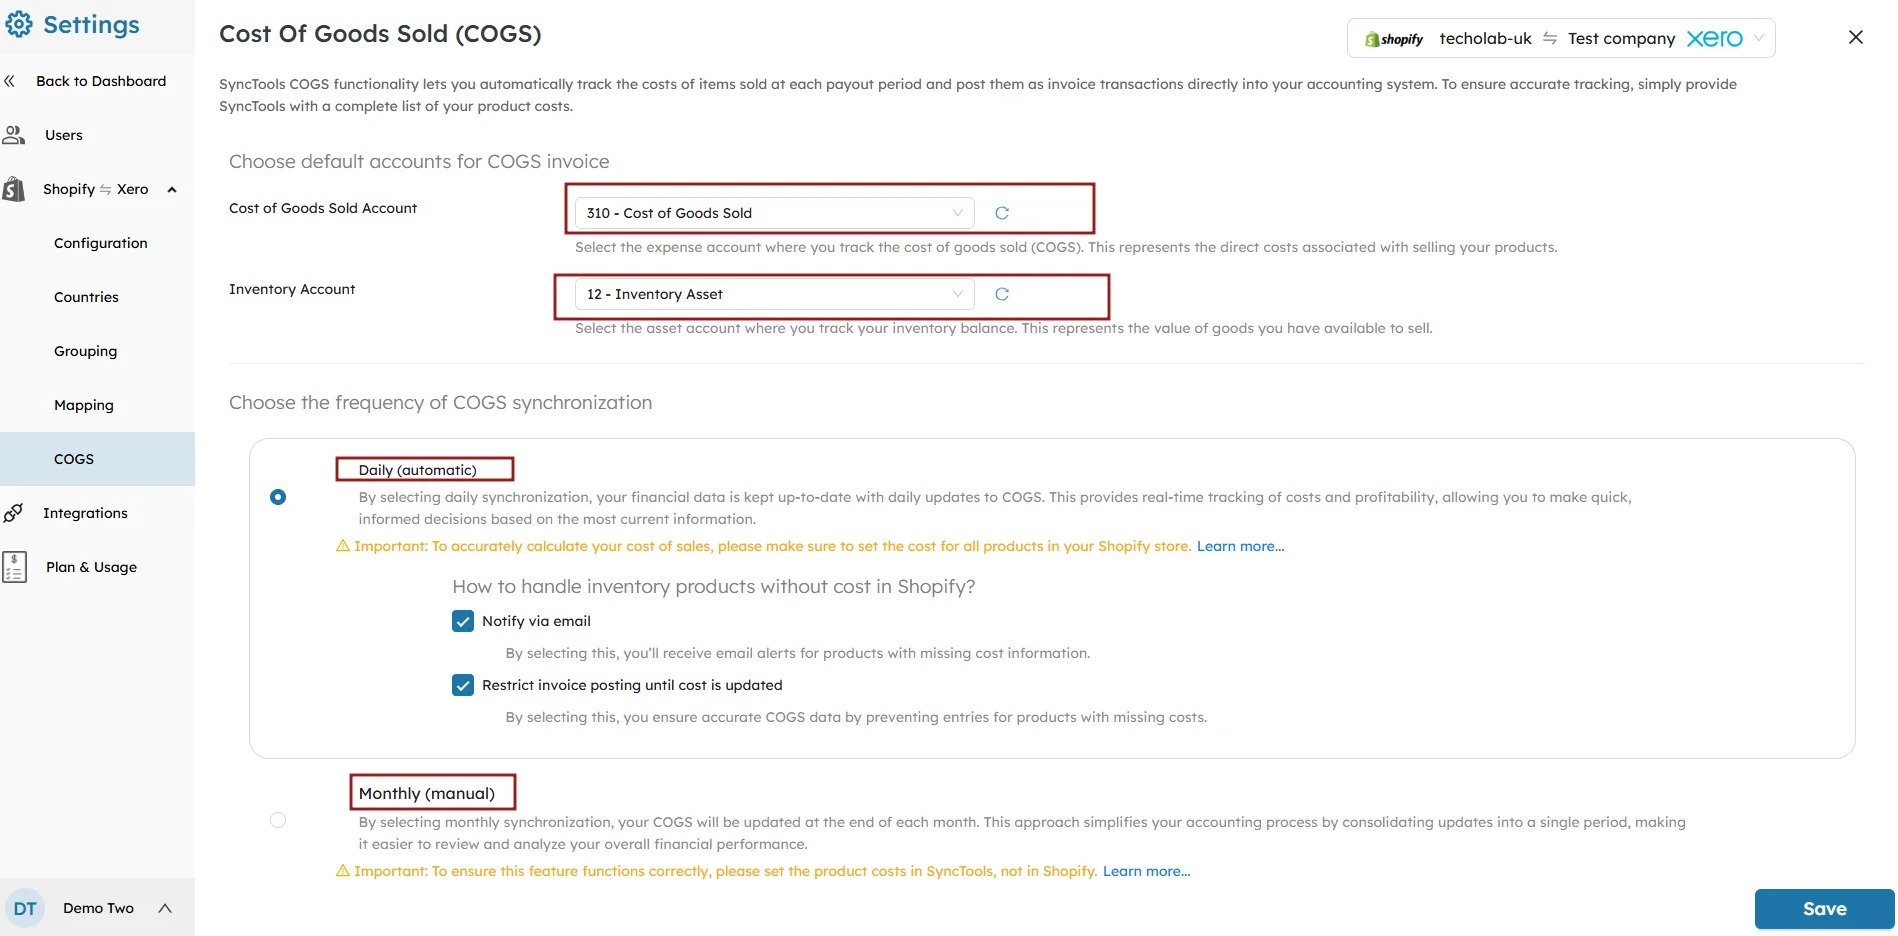
### Choose Default Accounts for COGS Journal Entries:
- **Cost of Goods Sold Account:** Select the expense account in Xero where the cost of goods sold (COGS) will be recorded.
- **Inventory Account:** Select the asset account in Xero where your inventory balance will be tracked.
### Select the Frequency of COGS Synchronization
- **Daily:** When using Daily Sync (Automatic), the data for each transaction is captured daily, and the COGS associated with each sale is updated in Xero immediately. This ensures that your records are current without any manual intervention..
- **Monthly:** If the Monthly Sync (Manual) option is selected, a summary is created at the end of each month, consolidating the COGS for that period. This approach is ideal for businesses that prefer periodic updates rather than daily syncs.**Tip:** Select Daily for more frequent updates and real-time tracking of your financial performance.
## Daily Sync of COGS
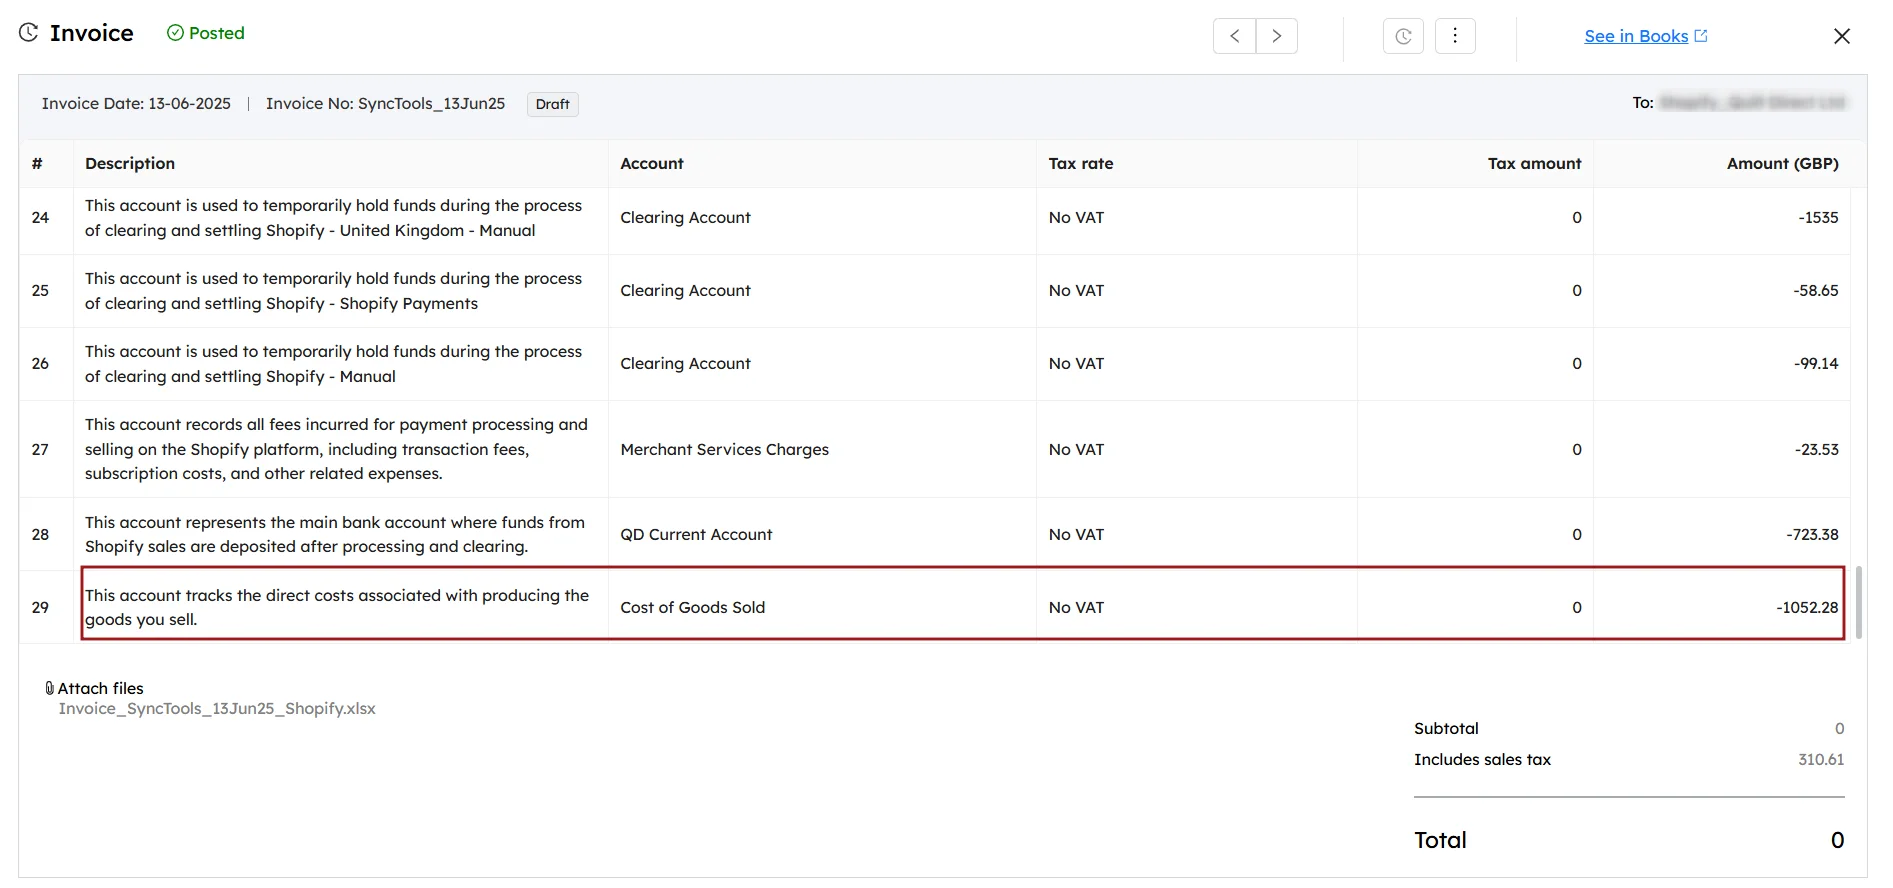
When Daily Sync is selected, the cost of goods sold is updated on a daily basis as part of the Sales Sync. This means that the total COGS for the day is recorded and posted to Xero in the same journal entry, alongside the daily sales transactions.
This ensures that your Xero account is updated immediately after every sale, reflecting the cost of goods sold, inventory updates, and the corresponding sales revenue for that day.
## Financial Summary
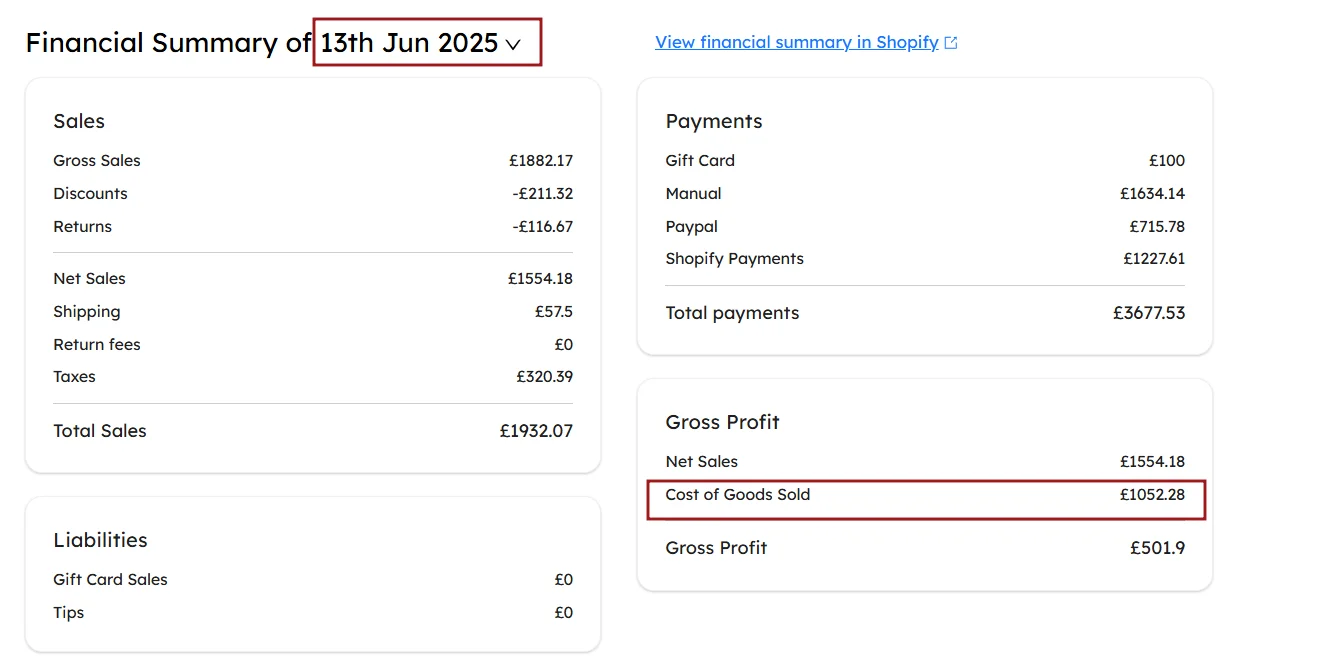
The Financial Summary in SyncTools provides a detailed view of all COGS transactions for the day. This summary includes the total cost of goods sold, taking into account any products that were sold on that specific day.
However, if a product’s cost is missing from Shopify, it won’t be included in the daily COGS summary or journal entry. This ensures accuracy and prevents incomplete financial reporting.
In the example above, the Cost of Goods Sold for June 13, 2025 is listed as £1052.28. This figure is derived from all products sold that day, but if a product does not have a cost associated with it in Shopify, it will be excluded from this report.
### Managing Missing Product Costs
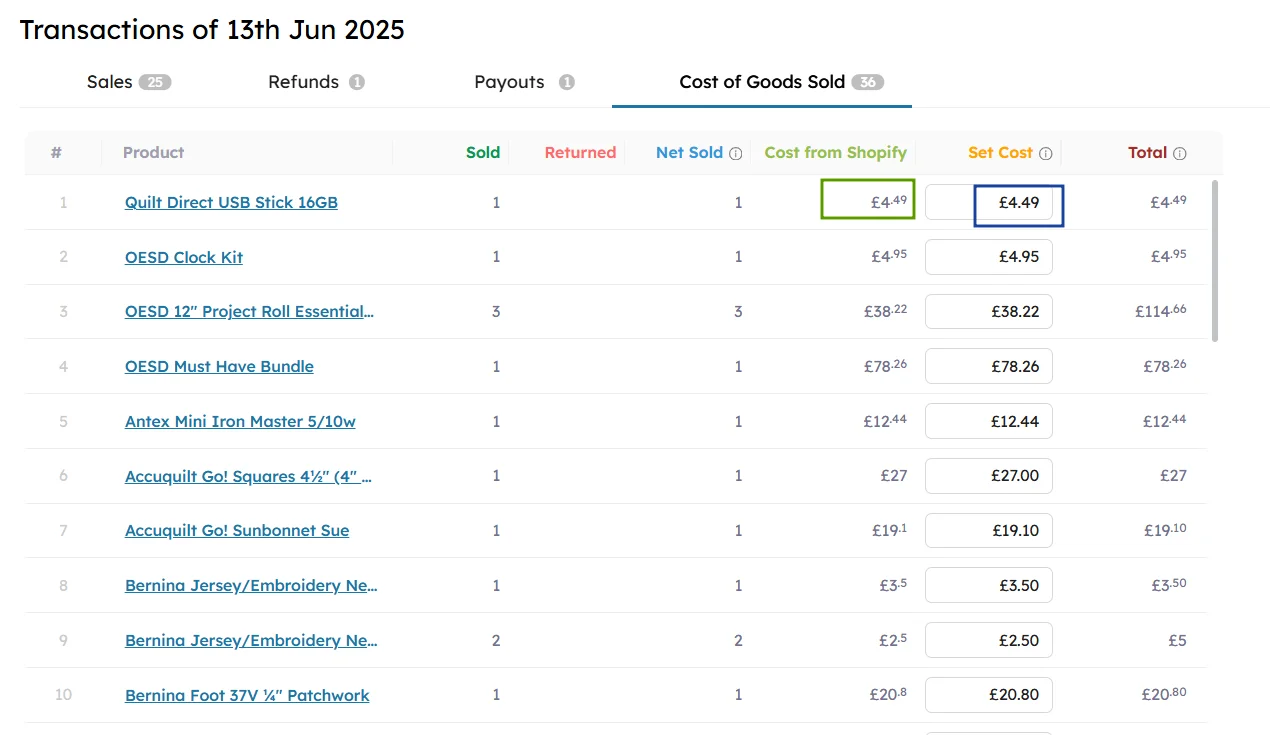
If a product’s cost is missing, you can manually add the set cost for that product directly in SyncTools.
Once the cost is updated, the new cost will be reflected in the financial summary and journal entry for the same day.
This ensures that the cost of goods sold is accurately calculated, even for products that initially lacked cost data.
After updating the cost, the set cost will be automatically reflected in both the Financial Summary and the journal entry.**Important Note:** If you add or modify product costs, the financial summary of the cost of goods sold might not match the daily journal entry, since the updated costs may only appear in SyncTools after manual adjustments.
## Monthly Sync of COGS
If you prefer to review your COGS on a monthly basis, you can opt for monthly sync. This method is manual and will update the COGS values at the end of each month, summarizing all sales and costs for the month.
The total cost of goods sold is calculated for the entire month based on the sales transactions for that period.
If any sales are made but the cost is missing, the missing costs can be manually added in the **Set Cost** field.
For products without a cost in Shopify, you can set the cost in the **Set Cost** field and click Update to reflect this in the month-end summary.**Note:** Similar to the daily sync, if a product's cost is missing, you can manually add it.
---
## Tax Threshold Limits
URL: https://synctools.ai/help/shopify-xero-integration/shopify-xero-setup-tax-threshold-limits
> NULL
## Managing Sales Threshold Limits in SyncTools
As your eCommerce business grows, staying on top of your tax obligations becomes increasingly important.
SyncTools' Threshold Limit feature is designed to help Shopify merchants like you avoid unexpected tax liabilities by proactively alerting you when your sales reach important thresholds in different countries or states.
The first time I crossed a sales threshold in California without realizing it, I ended up with unexpected tax obligations.
SyncTools' notifications would have saved me hours of accounting headaches!
## Why Threshold Limits Matter
When selling across multiple states or countries, each jurisdiction has different rules about when you need to register for tax collection. SyncTools helps you:
- Stay ahead of tax compliance requirements
- Avoid unexpected tax penalties
- Make informed decisions about where to expand your business
- Manage your accounting workflow more efficiently
## Setting Up Country-Based Threshold Limits
- Navigate to the **Settings** section in your SyncTools dashboard
- Click on **Countries** under the Configuration section
?**TIP:** Set up your operating countries before configuring threshold limits to ensure all relevant jurisdictions are covered.
?**NOTE:** The countries you select here will determine which threshold limits you can configure in the next steps.
Once you've selected your operating countries, you can set specific threshold limits:
- Click the **Set threshold limit** button located in the upper right corner
- Select the country tab you wish to configure (e.g., United Kingdom or United States)
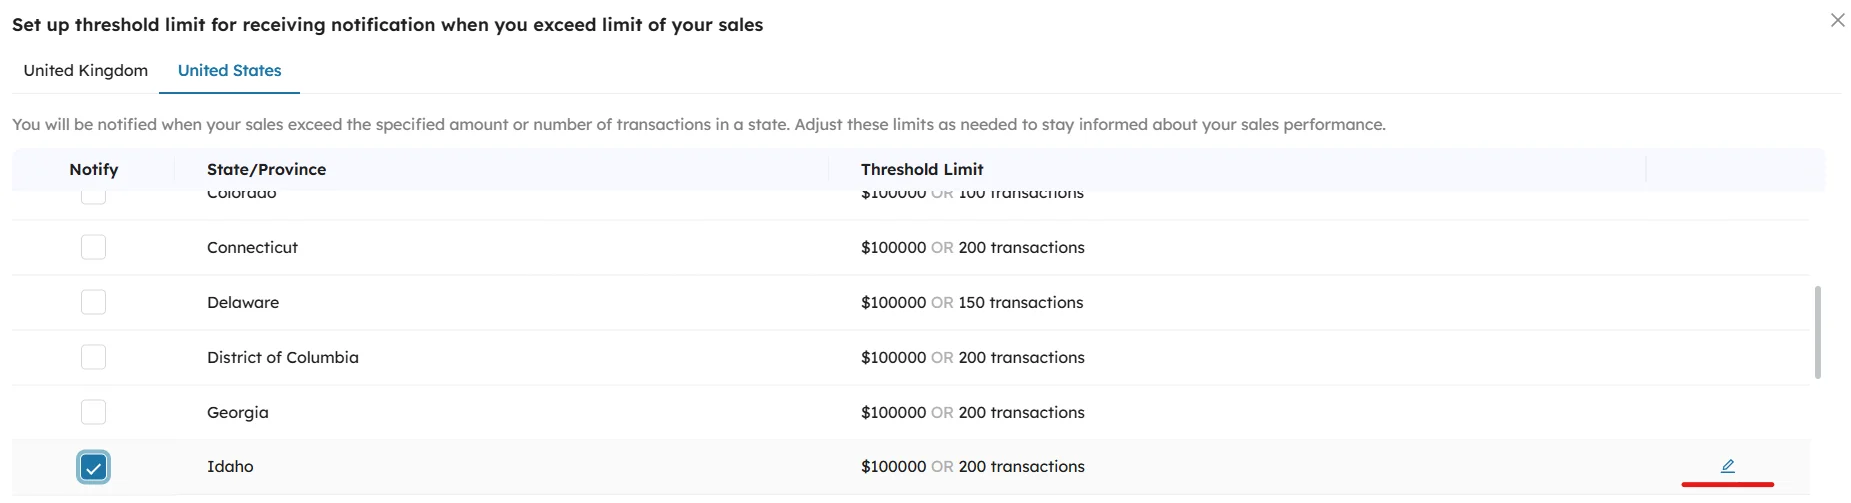
?**PRO TIP:** Research current tax nexus thresholds for each state before setting your limits. Economic nexus thresholds change periodically, so check with your accountant for the most current information.
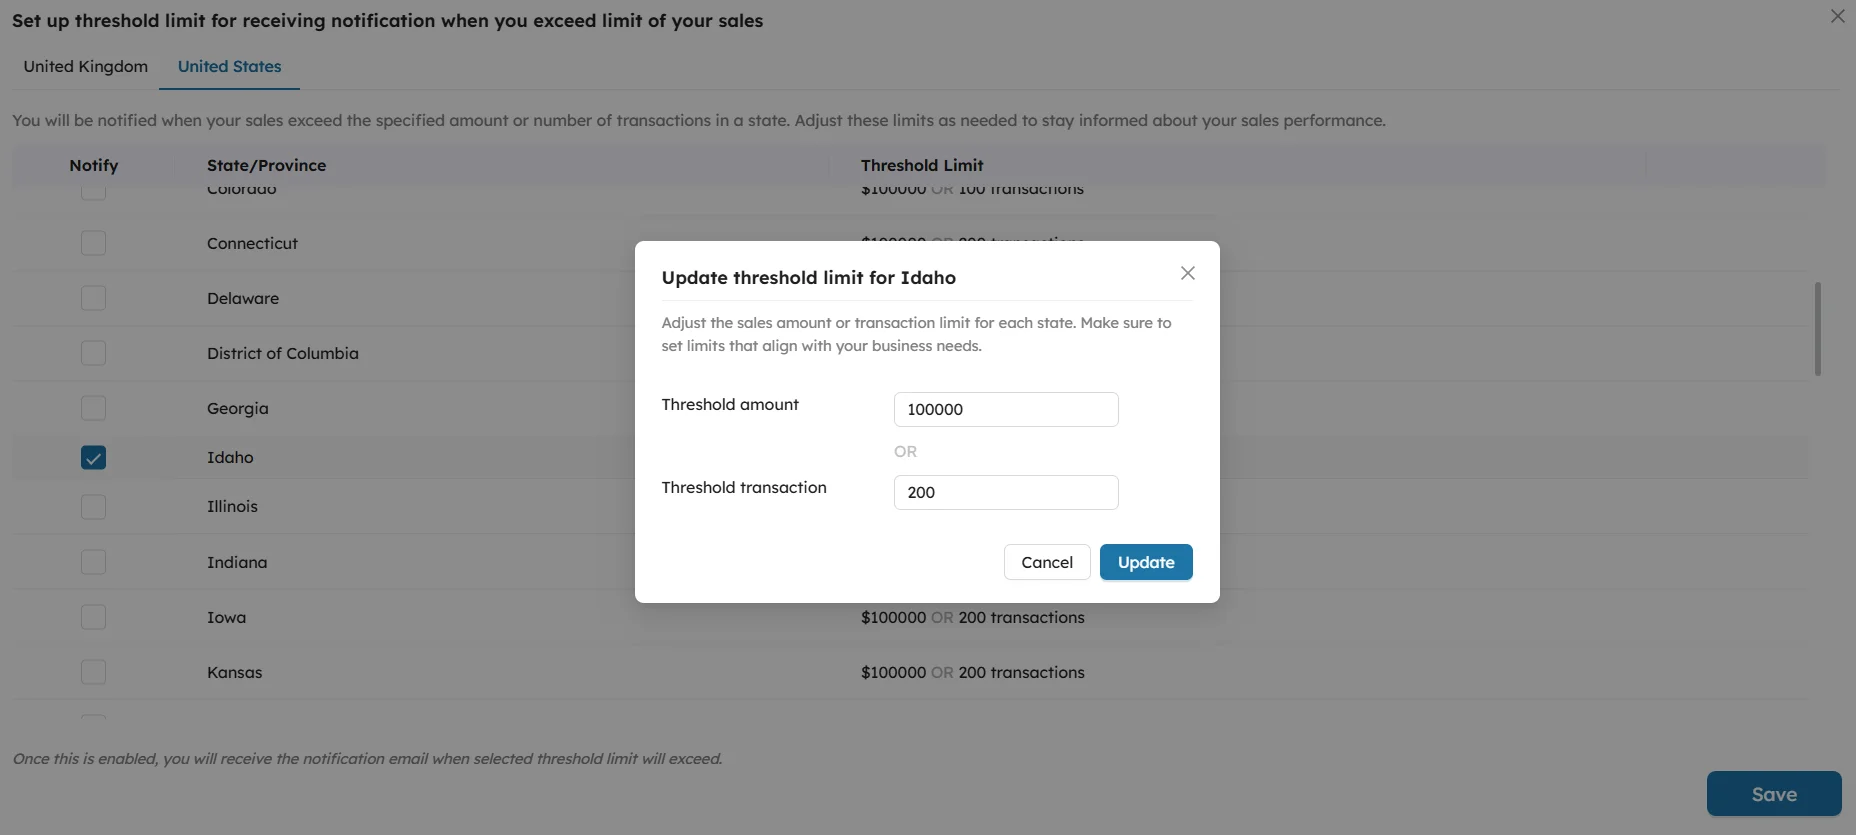
## How Notifications Work
Once your threshold limits are configured, SyncTools will monitor your Shopify sales data as it's synchronized with Xero. When your sales in a particular region approach or exceed your set threshold:
- You'll receive an email notification alerting you to the threshold crossing
- The notification will specify which country/state threshold has been reached
- You can then consult with your tax professional about any required filings
⚠️**IMPORTANT:** Threshold notifications are informational only. Always consult with a tax professional about your specific tax obligations.
---
## Auto Mapping & Categorization
URL: https://synctools.ai/help/shopify-xero-integration/shopify-xero-transaction-categorization-using-auto-mapping
> NULL
## Setting Up Your Mapping Rules
### Understanding Account Mapping
When connecting your Shopify store to Xero, it's essential to tell SyncTools how to categorize your transactions. The Mapping section is where you'll create these connections, ensuring your sales, refunds, and other transactions appear in the right accounts in Xero.
## Creating Basic Transaction Mappings
### To get started:
- Navigate to **Settings → Mapping**- You’ll see Shopify transaction types on the left and Xero accounts on the right
- For each transaction type, select the appropriate Xero account from the dropdown menu
### For example:
- Map your Shopify sales to a **"SyncTools Shopify Sales"** account in Xero
- Map refunds to a **"SyncTools Shopify Refunds"** account
- Continue mapping shipping, discounts, and other transaction types as needed for your business
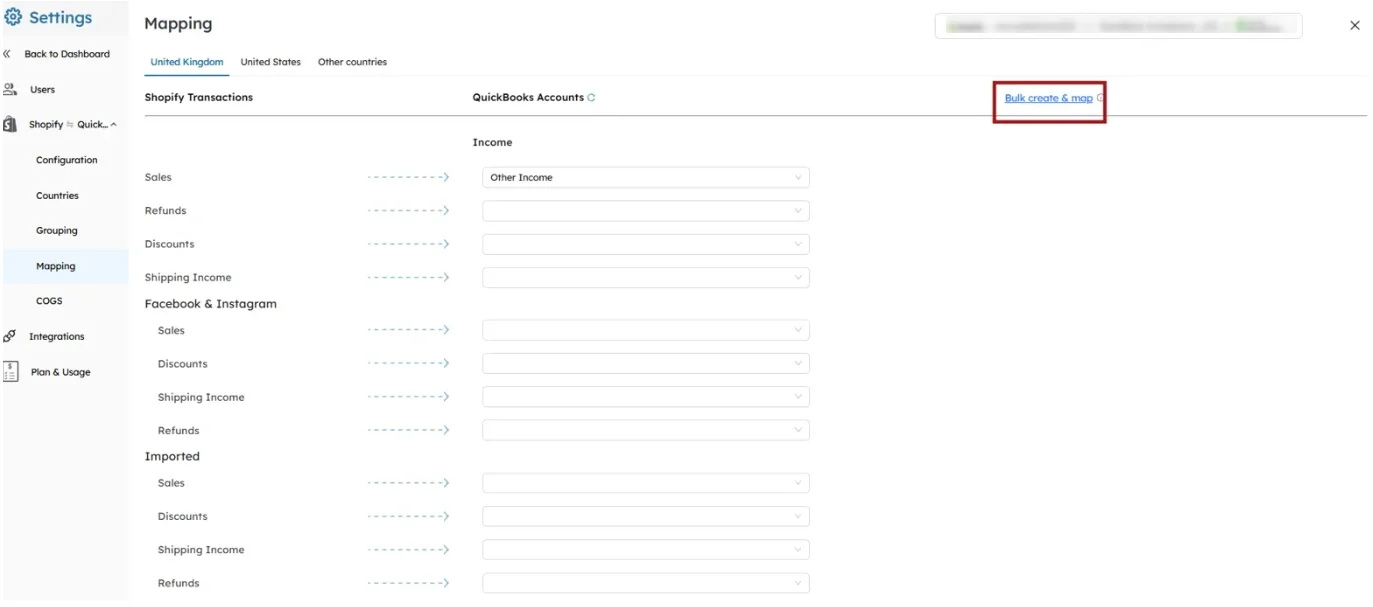
## Quick Setup with Bulk Create & Map
If you're just getting started, SyncTools can set up your accounts automatically:
- Click the **"Bulk create & map"** button (highlighted in the interface)
- SyncTools will suggest appropriate accounts and create them in Xero
- Review the suggested mappings to ensure they meet your needs

Want to use your existing accounts instead? Simply click **"Map to existing accounts"** to select accounts you've already created in Xero.
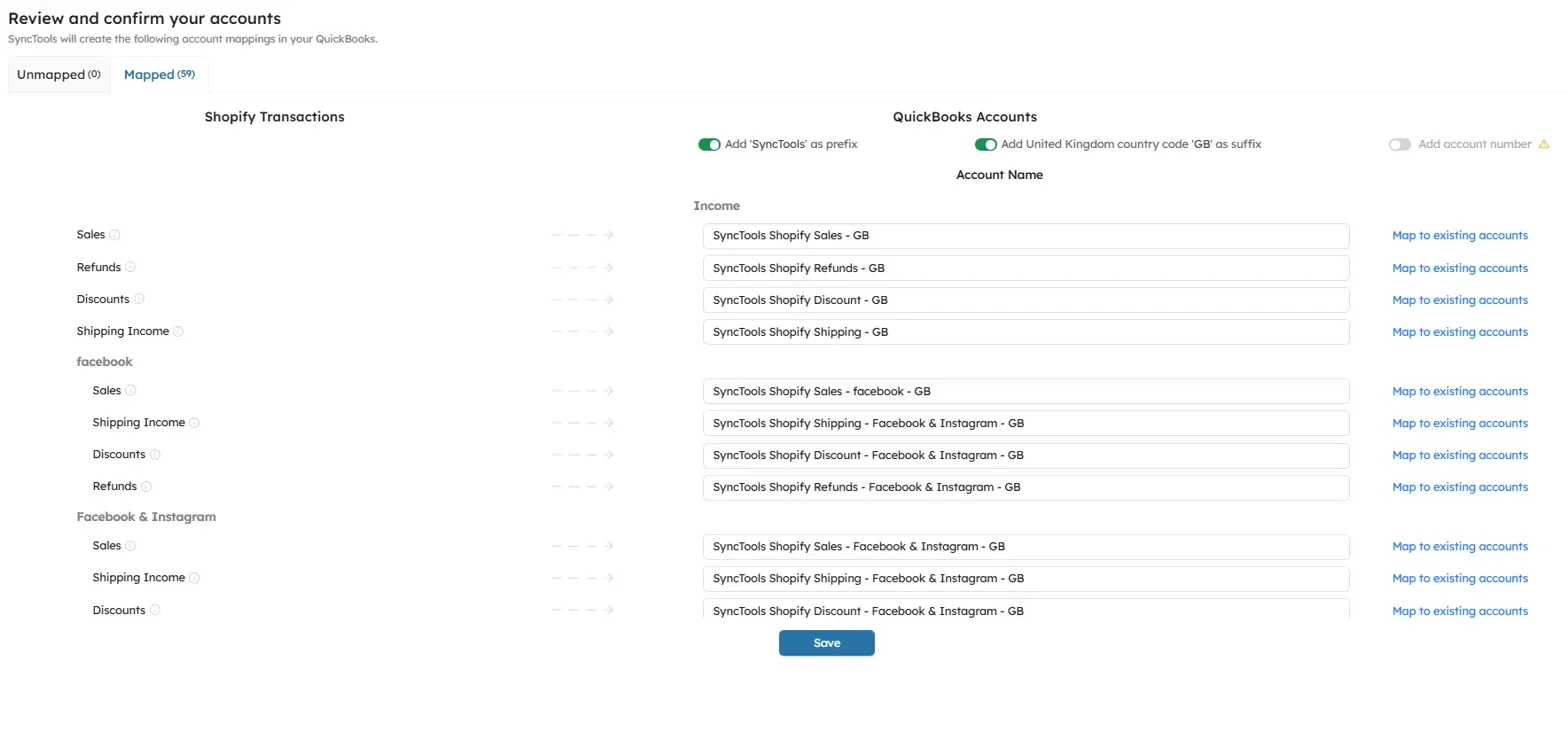
?**Tip:** Use the **"Auto map"** button to quickly match transaction types to similar existing accounts, saving you time and reducing duplicate accounts.
Once you've reviewed your mappings and are satisfied with the connections, click **Save**. Your mappings will be listed under **"Mapped Accounts,"** and future invoices will follow these rules.
Now the invoices will be based on the mapping done.
⚠️**Important Note:** We recommend consulting with your accounting professional about your mapping structure to ensure it aligns with your financial reporting needs.
For additional assistance, our support team is available at [support@synctools.ai](mailto:support@synctools.ai)
---
## User Guide
URL: https://synctools.ai/help/linnworks-zohobooks-integration/simple-user-guide
> NULL
## SyncTools
Direct Sign up from the website is not available. So the user must install it from the Linnworks app store.
All the emails (Confirmation + User information) will be sent to the **email which is registered in the Linnworks account.** If the Linnworks email is of another team member, you will need them to forward two emails to you.
Please select the **Linnworks account from which** you want to sync the orders.
## Steps to install SyncTools app - (You can refer to this [ Video](https://www.youtube.com/watch?v=MSZPtVEswzI&t=58s&ab_channel=SyncTools))
Open and Log in to Linnworks
- Click on Application > Application store
- Search for ZohoBooks connector
- Click on the Read More button of ZohoBooks connector tool
- Make sure the developer name is **SyncTools.ai** and click on install button
- Accept Third Party Integrations Disclaimer
- Click on the **Next** button
- Click on the **Install** button
- You will get a confirmation email, click on the **confirmation link**
- User Information (Username + Password) will be sent
## Log in to the SyncTools
- Use the credentials sent by SyncTools to Login
- This is the link for SyncTools system: [https://system.synctools.io/](https://system.synctools.io/)
- Or you can go to [ https://synctools.ai](https://synctools.ai) and click on Login button
## Configuration and Setting Up the SyncTools Account
If any support is needed, you can send an email to [support@SyncTools.io](mailto:support@SyncTools.io) or
you can call us on [ +1 323 6723738](tel:+1 323 6723738) and [ +44 7380328797.](tel:+44 7380328797)
## Steps: Configure linnworks to ZohoBooks integration
- Select the plan as per order volume
- Set up the profile so that SyncTools team can reach to you faster
- Click on **Settings > Connections**- Click on the ZohoBooks icon and connect your ZohoBooks account by selecting the domain you are having for ZohoBooks.
- Make sure the button on the rightest side is at OFF. (It is for automatic sync)
- First You should test a few orders manually so that we can prevent back and forth.
- Click on the Configuration button
### Module 1 - Tax & Account configuration
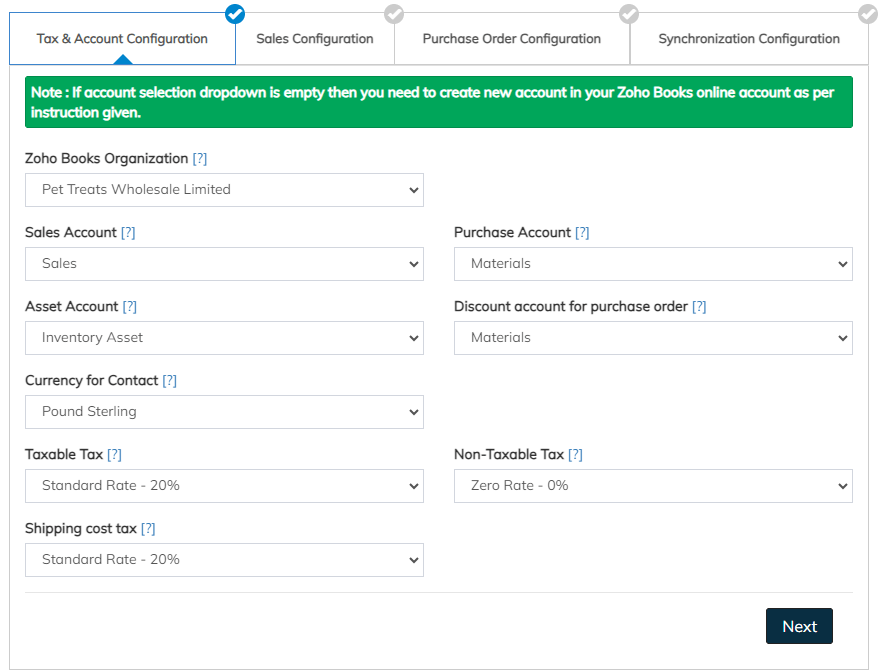
(Tax and account configuration for ZohoBooks organization.)
- **Zoho Books Organization:** Here, you can choose the Zoho Books organization to which you want to sync Linnworks data. Depending on the selected Zoho Books organization, we will retrieve your organization's data and populate the dropdown menus for chart of accounts and tax rates that need to be configured.
- **Sales Account:** Choose the default sales account to be used for creating items in Zoho Books when a matching item by SKU is not found in Zoho Books.
- **Purchase Account:** Choose the default purchase account to be used for creating items in Zoho Books when a matching item by SKU is not found in Zoho Books.
- **Asset Account:** Choose the default asset account to be used for creating items in Zoho Books when a matching item by SKU is not found in Zoho Books.
- **Discount Account for purchase order:** Choose the default discount account to be used for creating purchase orders in Zoho Books. When discount is applied on linnworks Purchase order then we will be syncing this account in ZohoBooks.
- **Currency for contact:** Choose the default currency which will be used in creating contact when no currency is found from Linnworks.
- **Taxable Tax:** Choose the default taxable tax which will be used in creating invoice in ZohoBooks when Linnworks order item is found taxable.
- **Non Taxable Tax:** Choose the default non taxable tax which will be used in creating invoice in ZohoBooks when Linnworks order item is found not taxable.
- **Shipping cost tax:** Choose the default shipping(postage) tax which will be used in creating invoice in ZohoBooks when Linnworks order contains the shipping amount we will be creating shipping service line time with this selected tax.
### Module 2 - Sales configuration
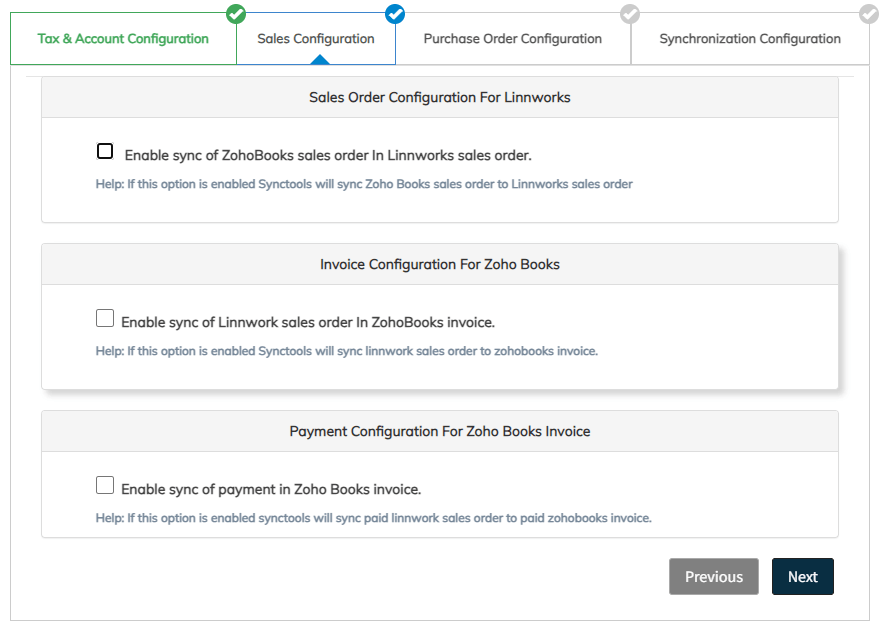
(Sales configuration for ZohoBooks organization)
#### Enable sync of ZohoBooks sales order For Linnworks sales order:
#### Retrieve ZohoBook Sales orders following status.
This configuration is used to download only selected ZohoBooks sales orders and display them in the sync log page of SyncTools.
There are three different statuses which we can download in SyncTools.
- **Draft:** If only this option is checked then SyncTools will retrieve only Draft status orders of the ZohoBooks.
- **UnPaid:** If only this option is checked then SyncTools will retrieve only UnPaid status orders of the ZohoBooks.
- **Paid:** If only this option is checked then SyncTools will retrieve only Paid status orders of the ZohoBooks.
If all three statuses are checked, then SyncTools will download any sales order that has any of these three statuses.
#### How would you like to record the sales order in linnworks?
This configuration is used to choose the two different options for uploading the ZohoBooks sales order in Linnworks with selected status.
There are two options for selecting the status for upload in Linnwork.
- **Dropdown option:** Here you can choose that you need to sync ZohoBooks sales order as linnworks **Open** sales order **or** linnworks **Processed** sales order
- **Radio option:** Here, you can choose whether the Linnworks order is created as **paid** or **unpaid.**#### Where would you like to record the sales order in linnworks?
This configuration is used for choose the **warehouse location** for the creating linnworks sales order.
#### Enable sync of Linnworks sales order For ZohoBooks Invoice:
(Enable sync of Linnworks sales order For ZohoBooks Invoice configuration screen.)
#### Retrieve Linnwork Sales orders with following status
This configuration is used for choose the two different options for downloading the Linnworks sales order in SyncTools with selected status.
There are two options for selecting the status for downloading Linnwork orders.
- **Droupdown option:** Here you can choose that you need to download Linnworks sales order as in **Open** status **or** in **Processed** status
- **Radio option:** Here, you can choose whether the Linnworks order is downloaded as **paid** or **unpaid.**#### How would you like to record the invoice in ZohoBooks?
This configuration is used to select the status of the ZohoBooks invoice that will be created in ZohoBooks from Linnworks.
There are three options for selecting the status for upload in ZohoBooks Invoice.
- **Draft:** linnworks sales orders will be created in ZohoBooks Invoice as Draft.
- **Sent:** linnworks sales orders will be created in ZohoBooks Invoice as Sent. And if the email is present in contact then email will be sended to the customer.
- **Paid:** linnworks sales orders will be created in ZohoBooks Invoice as Paid. And the payment for that particular order has been created in ZohoBooks.
#### How do I set my invoice due date ‘Payment Terms’?
Here this configuration represents the **Invoice Due Date.** You can configure the **payment terms** in ZohoBooks Invoice based on this configuration.
#### How do I set my invoice Number?
Here this configuration is provided for **ZohoBooks Invoice number should be?** There are two options you can configure:Either it will be **Linnworks sales order number** or it will be an auto **generated** invoice number of the ZohoBooks.
#### How do I set my invoice Amounts?
There are two types of how you can **display your invoice amounts** in ZohoBooks one is **amounts****are included with tax** and second is amounts on the invoice can be displayed as tax exclusive **amounts.** So, you can configure this by checking your choice of selection of the radio buttons.**Payment Configuration For Zoho Books Invoice :**
(Enabled sync of payment in Zoho Books invoice.)
#### Enabled sync of payment in Zoho Books invoice.
Here you can configure the linnworks payment methods with ZohoBooks bank accounts. You can see all the linnworks payment methods with a dropdown option of zoho books bank
account. So, you can configure the right bank account of ZohoBooks based on the payment method.
### Module 3 - Purchase configuration
#### Would you like to sync the purchase order?
This configuration will sync the linnworks purchase order to ZohoBooks purchase order.
By enabling (checking this configuration) you will find some configuration which will help you to configure the right purchase order to be synced in ZohoBooks.
(Showing enabled would you like to sync purchase order? configuration.)
#### Sync Purchase Orders from linnworks based on following status.
- **Partial**: Enabling this configuration will sync the partial purchase orders from linnworks.
- **Delivered**: Enabling this configuration will sync the delivered purchase orders from linnworks.
#### Select mapping field for ‘Reference’ field in ‘ZohoBooks’ purchase order.
- **PO#**: Selecting this option the linnworks purchase order number will be mapped to the reference# field of ZohoBooks
- **Supplier Ref:** Selecting this option the linnworks supplier ref number will be mapped to the ZohoBooks reference# field of ZohoBooks.
#### Select ZohoBooks purchase order status.
- **Draft:** Selecting this option purchase order will be synced in “Draft” status of ZohoBooks.
- **Issued**: Selecting this option purchase order will be synced in “Issued” status of ZohoBooks.
#### Set shipping address same as billing address in ZohoBooks vendor.
This configuration is used for **mapping the shipping address same as the billing address** while creating a vendor in ZohoBooks
#### Do you want to apply advance tax settings on purchase order?
This configuration is provided to **make sure you are aware about the advance tax** configuration.
At **advance tax configuration you need to set some rules** like country and
region wise tax mapping, linnworks tax rate wise tax mapping, source subsource wise tax mapping, etc.
#### Would you like to override the item account in purchase order?
This configuration is provided for using the same COGS account that has been present in your existing items.
SyncTools provides an option to select a default COGS account, but this default may not be applicable for all purchase orders.
Depending on the line items being mapped in Zoho Books, each purchase order item might have a different COGS account associated with it.
So, SyncTools will not map default COGS accounts and it will directly **override default COGS** with the **product selected COGS account.**#### Would you like to add a customer note in ZohoBooks purchase order?
This option will be provided to **add some default customer note** for purchase orders that have been synced through SyncTools.
### Module 4 - Synchronization configuration
(Showing start from date in Synchronization configuration.)
- Pick a date from which you would like to start sync (Start From)
SyncTools will download all the orders from the Linnworks by the selected date in start from.
- Save **Note :***Configuration settings will be saved only if the Save button of Module 4 is clicked before closing the pop up.
#### Testing of few orders
- Make sure the button on the rightest side is at OFF. (It is for automatic sync)
- First You should test a few orders manually so that we can prevent back and forth.
- Go to Sync Log.
- Click on the Download button
- Select Sales so that sales order can be downloaded
- Once orders are downloaded, click on the Show button under the Sync History column.
- Click on Retry Upload.
- Order will be Uploaded and you will get the link of created ZohoBooks invoice under #ToRecord Column, click on that.
- Review the Invoice and compare with Linnworks order.
- If everything looks fine, Please go to settings > Connections and click ON the automatic sync button.
- Automatic sync will start in a few minutes.
- If any problem or doubt occurs, please contact the SyncTools support team.
#### Sync Report Email
- Everyday you will receive a sync report email which will include
Total orders downloaded
- Total orders uploaded
- Total orders not uploaded (If any) - with error description
- If you want to receive such email on any other email address than the registered email address Please go to settings > Email notification and add the email address.
## Data flow diagram
| Linnworks Sales order | | ZohoBooks Invoice |
| --- | --- | --- |
| Order no. | | Invoice no. |
| Reference no. | | Invoice reference no. in Zaho |
| Shipping/ Billing address | | Contact info |
| Customer information | | Contact info |
| Line items | | Line items |
| Unit price | | Unit price |
| Tax rate | | Tax rate |
| Shipping total | | Lineitem - shipping as service |
| Total amount | | [Subtotal + Total Vat] = total amount |
| Order payment status paid | | Invoice payment status paid |
| Order payment status unpaid | | Invoice payment status - [Draft / Sent / Paid ] |
| SKU codes of products | | SKU codes of Line Item (* If needed) |
#### Leave a review
Once you have used system for a month or two, please leave a review for us in Linnworks,
- Linnworks > Apps > Application store > Search ZohoBooks Connector > Click on the manage button of our ZohoBooks connector > Scroll down and you'll see the review section
## FAQs
Do you sync inventory?
SyncTools helps with Sales orders and Purchase orders. We do not specifically sync inventory as and when it changes.
How do you manage Resends/ Refund?
Yes, SyncTools handles refunds from Linnworks, automatically synchronizes them and creates a Credit Note in ZohoBooks.
How Long Does It Take To Get Setup & To Start Syncing?
The Full Process Normally Takes 15-30 Minutes In Order To Get Your Account Syncing.
Do You charge for onboarding?
On-boarding is totally free for SyncTools.ai
Do You Store My Credit Card Information?
Absolutely Not! Your credit card information is stored on our service providers (Authorize.Net) server which is tested hourly for possible breaches. Also your information is ALWAYS in compliance with PCI.
Is There A Contract With SyncTools?
No. You can cancel and restart your plan as many times as you wish by simply logging into your system portal and canceling or subscribing to a plan.
Once My Account Is Setup; How Long Does It Take For My Data To Transfer? (i.e. Sales Orders, Purchase Orders)
We normally suggest giving the system 1 hour to sync 10,000 items. However, in most cases, it will be complete within 15 minutes. This time may also be affected during our peak times on the server.
---
## Summarized Sync Configuration
URL: https://synctools.ai/help/shopify-xero-integration/synctools-shopify-to-xero-integration-guide-configuring-summarized-sync
> NULL
This guide will walk you through the configuration process for syncing summarized entries from your Shopify store to Xero using SyncTools. By the end of this guide, you'll be able to easily set up summarized sync for your store's financial data, ensuring automated accounting and easy reconciliation.
## Step 1: Sign In to Your SyncTools Account
_
- Visit the **SyncTools login page** and enter your registered email and password to sign in.
- If you're a new user, you can sign up for an account by clicking on **Sign up today**.
## Step 2: Navigate to the SyncTools Dashboard
- Once logged in, you'll be directed to your SyncTools Dashboard where you can view your Shopify store data and Xero account details.
- You’ll see key metrics such as monthly orders and sales totals.
## Step 3: Go To Settings
- In the bottom left corner, click on your profile (e.g., John S) to open the user menu.
- From the dropdown, select **Settings**.
## Step 4: Choose Synchronization Options
### Select Summarized Entries
- In the Configuration section, you will be prompted to choose between Summarized Entries and Individual Transaction Entries.
- Select Summarized Entries for the streamlined syncing of Shopify data on a daily, weekly, or monthly basis.**What is Summarized Sync?** This option allows you to group your Shopify store payouts into a single summary entry for each day, week, or month, reducing the volume of individual transaction entries._
### Choose Invoice Creation Frequency
- Under the Choose frequency of invoice creation section, select how often you want to create summarized invoices. Lets say, choose daily if you want your summarised entries to sync on a daily basis.
### Pick the start date for sync
- Choose the date from which you want to start importing Shopify records. This will define when SyncTools begins syncing your transactions to Xero.
### Choose Invoice Status how you want it in Xero
Select the Invoice Status that suits your accounting workflow:
- Draft: Draft invoices will be created in Xero.
- Submitted for Approval: The invoice will be submitted for approval in Xero.
- Approved: Automatically approve the invoice in Xero.
### Select whether you want Tax inclusive or Exclusive invoices
- Determine whether the invoices should be Tax Inclusive or Exclusive.
## Step 5: Select Your Operating and Registered Countries
_
- Choose the operating country and any additional registered countries.
## Step 6: Set Up Grouping Preferences
- **Default Grouping:** Group by country or gateway.
- **Advanced Grouping:** Group by sales channel, product category, etc.**Tip:** Use Advanced Grouping for more granular financial reporting.**Note:** For a detailed guide on the Grouping Feature, check out our documentation.
## Step 7: Map Your Shopify Data to Xero Accounts
- Map your Shopify transactions (sales, refunds, shipping income, etc.) to the corresponding Xero accounts.
- Use the **Bulk Create & Map** button to map multiple transactions at once.
## Step 8: Review and Confirm Mappings
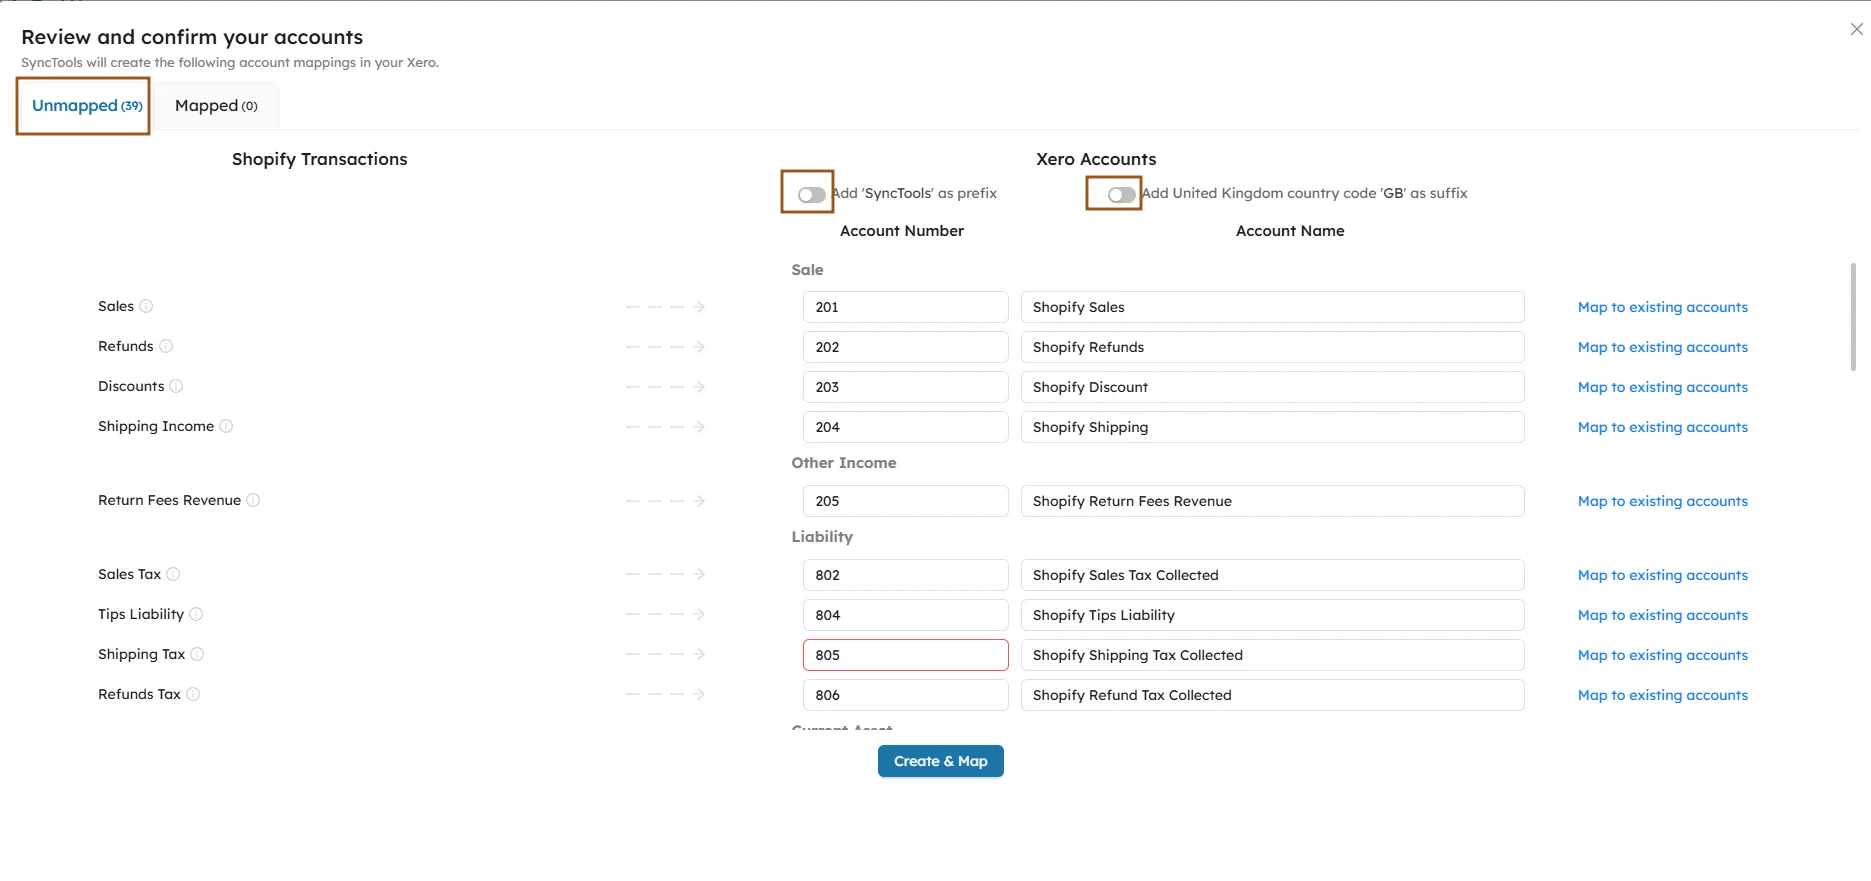
- Review and confirm your mappings to ensure correctness.
- Double-check for any unmapped transactions to avoid errors.
- Repeat this for each enabled country.
## Step 9: Enable and Configure Cost of Goods Sold (COGS)

- **Enable COGS Sync:** Click the button to activate and post itemized costs.
- **Choose Default Accounts:** Select the COGS and Inventory accounts.
- **Set Synchronization Frequency:** Choose between Daily (automatic) or Monthly (manual) updates.
### Enable COGS Sync
To automatically track the cost of products sold at each payout period, enable COGS Sync. This feature will post itemized costs as invoice transactions into your accounting system.
- This ensures accurate tracking of inventory and profitability for each sale.
Click the Enable Cost of Goods Sold button to activate the COGS sync.
### Choose Default Accounts for COGS
Don't forget to select the notification settings, such as Notify via email for inventory products without costs or Restrict invoice posting until the cost is updated._
## Step 10: Review the Shopify Payouts and Sync in Xero
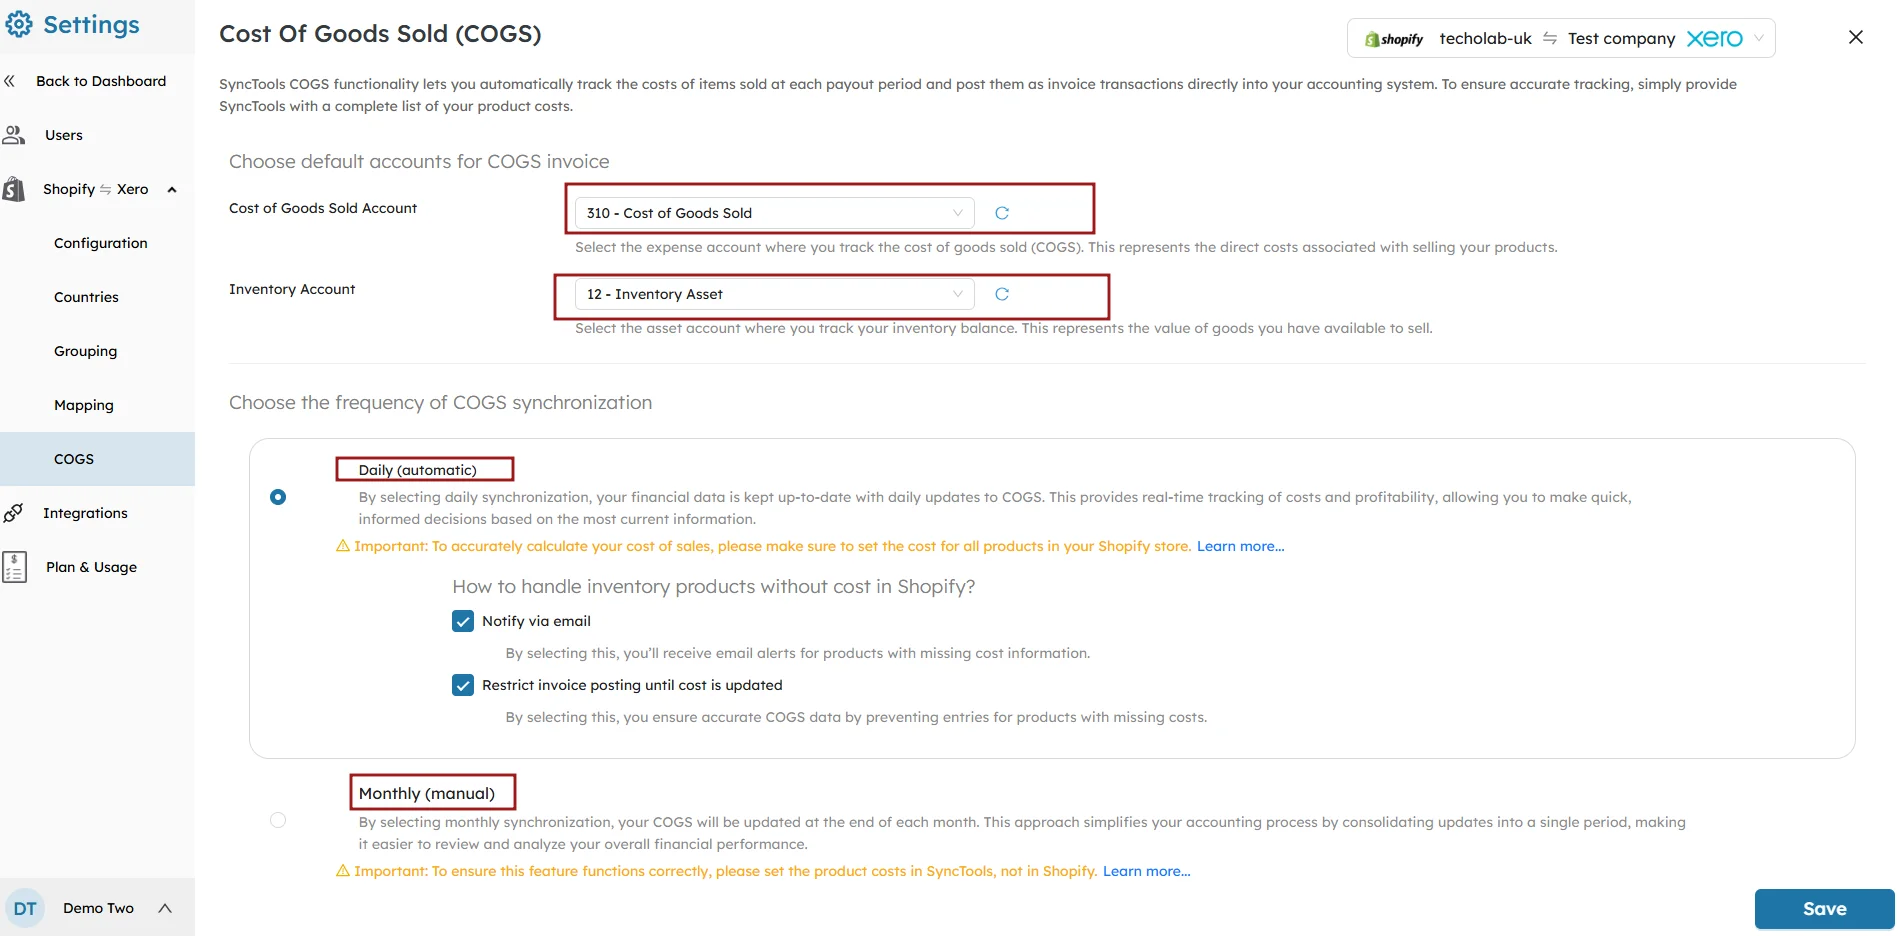
Select the Cost of Goods Sold account and the Inventory account that SyncTools will use to track and sync product costs to Xero.
- Track the monthly breakdown of Shopify payouts.
- Ensure all transactions are posted correctly to Xero.
- If needed, select and post transactions to Xero manually.
## Related Resources ?
- **Cost of Goods Sold Setup Guide**
---
## Setup Guide
URL: https://synctools.ai/help/shopify-xero-integration/synctools-shopify-to-xero-integration-setup-guide
> NULL
## Welcome to the **SyncTools** integration setup guide.
In this article, you will learn how to easily connect your **Shopify store** to **Xero** using **SyncTools**. This guide will walk you through each step to get your accounting automation up and running quickly.
## Step 1: Start your **Free Trial**
- Begin by visiting the **Synctools website**.
- On the homepage, locate the “**Free Trial**” button to start the process.
- Click on the button to initiate the signup process.**Tip:** Starting your trial gives you full access to the integration features without any obligation.
## Step 2: Choose Your **Platform**
- After signing up, you’ll be prompted to choose your **eCommerce platform**.
- Select **Shopify** from the list of available platforms.
This will enable **SyncTools** to connect directly with your **Shopify store**.**Tip:** Make sure you have **admin access** to your Shopify store before proceeding with the integration.
## Step 3: Enter your **Email Address**
- After selecting Shopify, you will be redirected to the **Synctools Sign Up** page.
- Enter your **email address** to begin the sign-up process.
- After entering your email, click **Continue**.
- If you already have an account, click on “**Sign in**.”
## Step 4:**Verify** the email address
- **SyncTools** will send a **verification code** to the email you provided.
- Enter the code on the SyncTools website to verify your email address and proceed with the setup.**Tip:** Check your **spam folder** if you don't see the email in your inbox.
## Step 5: Select Your **Role**
- **SyncTools** will ask you to select your role.
- Choose **E-commerce Merchant** if you own a Shopify store
- Choose **Accountant/Bookkeeper** if you’re handling multiple clients or businesses.
This helps **SyncTools** tailor the integration process for your needs.**Note:** If you're an accountant or bookkeeper, you can manage **multiple businesses** under one SyncTools account.
## Step 6: Complete Your **Registration**
- Provide your personal details, including your **name** and a **password** for your account.
- Once completed, click **Sign Up** to finalize your registration.
## Step 7: Invite an **Admin**(Optional)
- If you’re working with a team or another business owner, you can **invite** them to manage the integration by entering their email address.
- If you’re the sole user, you can **skip** this step.
## Step 8: Welcome to **SyncTools**!
**You’re Almost There!** Now that your account is set up, you’ll be guided through the next steps:
- Connect your **Shopify store**- Link your **Xero account**- Configure **SyncTools** for seamless transaction syncing
Click on **Let’s Get Started** to move on.
## Step 9: Connect **Shopify** and **Xero** to SyncTools
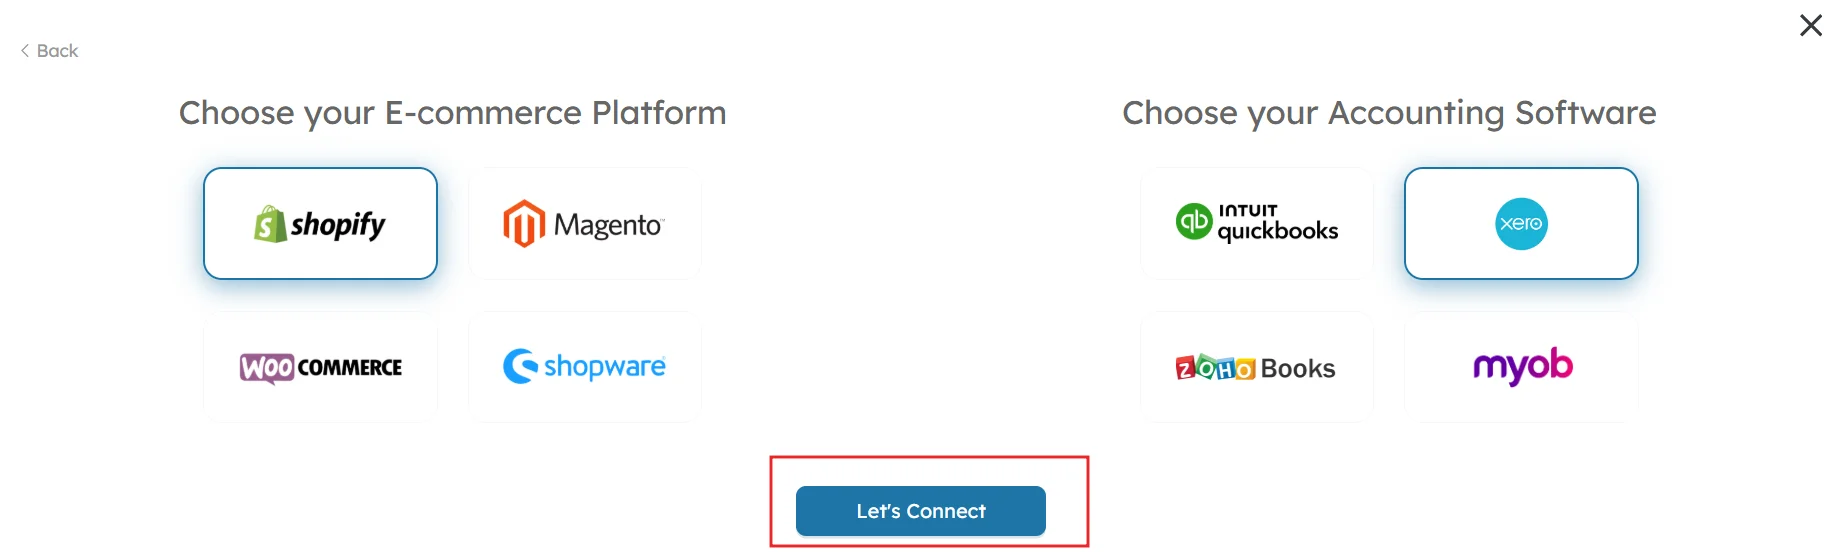
- On the integration page, select **Shopify** as your eCommerce platform and **Xero** as your accounting software.
- Click **Let’s Connect** to finalize the integration.
- **SyncTools** will automatically sync your Shopify sales data to Xero based on the configuration, simplifying your accounting.
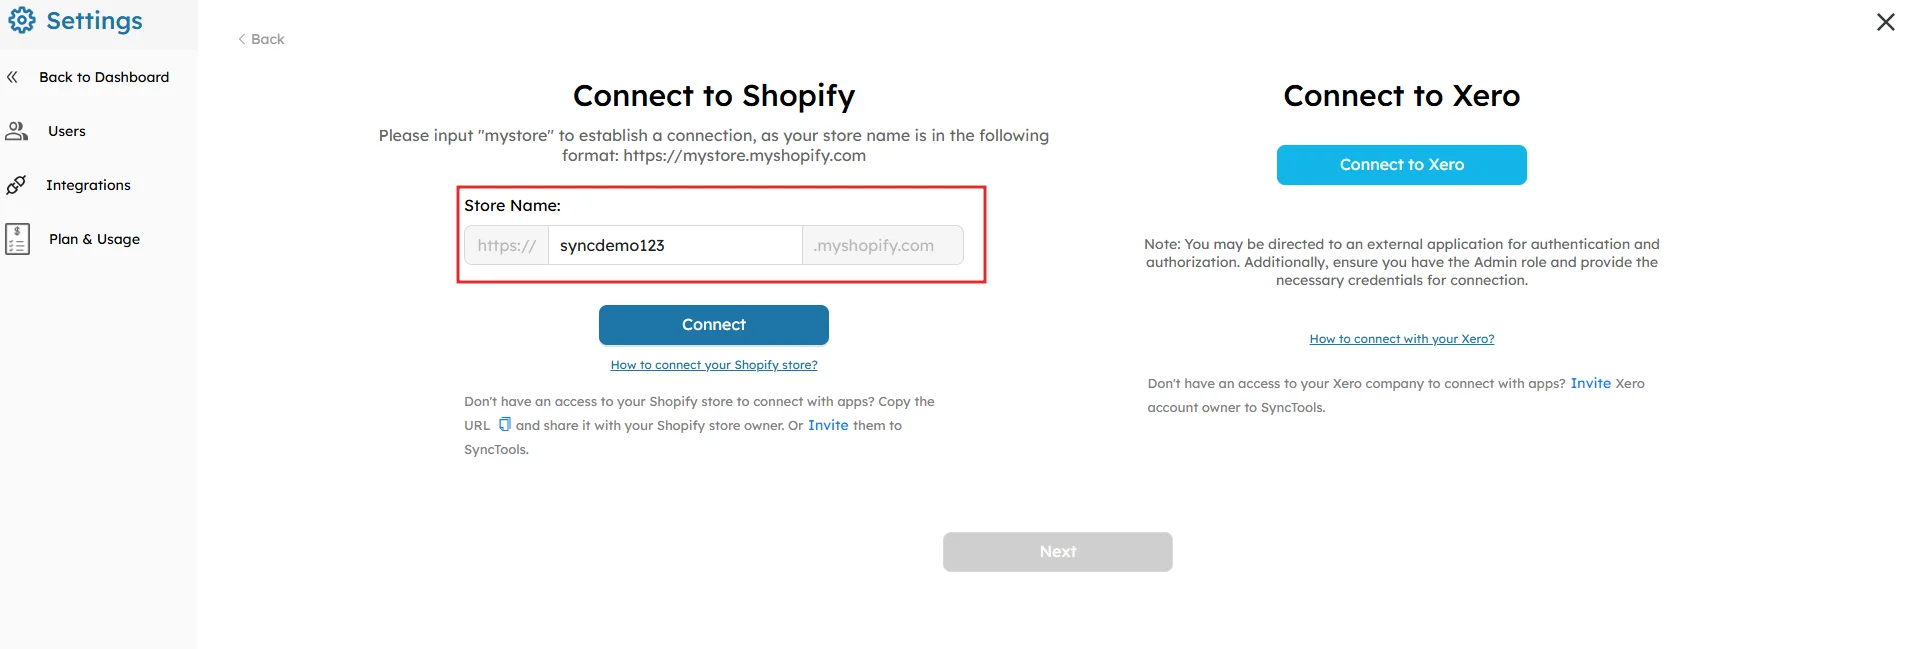
- In the **Connect to Shopify** section Enter your Shopify store URL (e.g., _https://yourstore.myshopify.com_).
- Click **Connect** once you've entered the correct URL to establish the connection between Shopify and SyncTools.
- You will be redirected to **Shopify’s app page** to install SyncTools.
- Click **Install** to grant SyncTools the necessary permissions to access your Shopify store data.
- After connecting to Shopify, you’ll be prompted to **connect to Xero**.
- Click **Connect to Xero** and log in to your Xero account if prompted.
- You will need to **select the Xero organization** to sync with.
- Once you select the organization, grant **SyncTools** access to your Xero account by clicking **Allow Access**.
- This allows SyncTools to **sync your financial data** from Shopify directly into Xero.
- After completing the Xero connection, SyncTools will show a **confirmation page** that both Shopify and Xero are now connected.
- Click **Next** to move forward and begin with configuration.**Note:** You can connect **multiple Shopify stores** or **Xero companies** if needed.
## Related Resources ?
For the information on the , check out the following guide:
- **SyncTools Shopify to Xero Integration Guide: Configuring Summarized Sync**
---
## Complete User Guide
URL: https://synctools.ai/help/shopify-quickbooks-integration/user-guide
> Streamline Your Business: Discover How to Seamlessly Integrate Shopify with QuickBooks with This Comprehensive User Guide- SyncTools
## Create an Account for Shopify QuickBooks Integration:
- Go to the SyncTools site: [https://app.synctools.io/sign-in](https://app.synctools.io/sign-in)
- Click on "Sign up today!" if you're a new user or click on “Sign-in” after filling up the details if you’re an existing user.
## “Sign up today!” flow :
You'll be prompted to enter your email address. Type in your email address.
- After entering your email address, click on the **"Continue"** button.
- Upon completing the registration using your email, you'll be prompted to input a six-digit code sent to the email address you provided.
- After entering the code, click on **“Verify”**.
- You will be redirected to the **“Register your Account”** page where you will be able to enter all details and set up your password for your account. Remember to use a strong and unique password for your account to ensure its security.
- Enable the “By creating an account, you agree to the Terms of Service and Privacy Policy” checkbox and click on **Sign up** button.
## Invite an Accountant/Book-keeper to SyncTools
To invite an accountant or bookkeeper to your SyncTools account:
- You'll be prompted to enter the email address of the accountant or bookkeeper you wish to invite.
- After entering their email address, click on **"Invite".**- Once the invitation is sent, the accountant or bookkeeper will receive an email with instructions on how to access your SyncTools account. Make sure you have their correct email address to ensure they receive the invitation.
- Or **Skip** this step if it is not required.
## How do I Connect Shopify Store?
- Navigate to Integrations. This is typically found in the settings section of your SyncTools account.
- Once you're in the Integrations section, find and select Shopify & QuickBooks from the list of available E-commerce and accounting platforms.
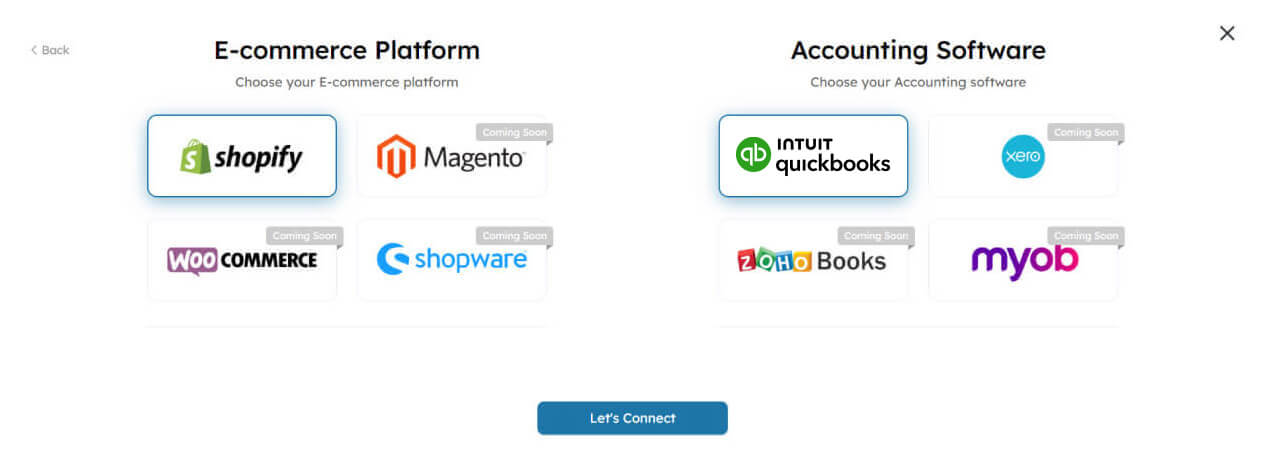
Enter **Shopify Store Name** in the requested field and click on **“Connect”.**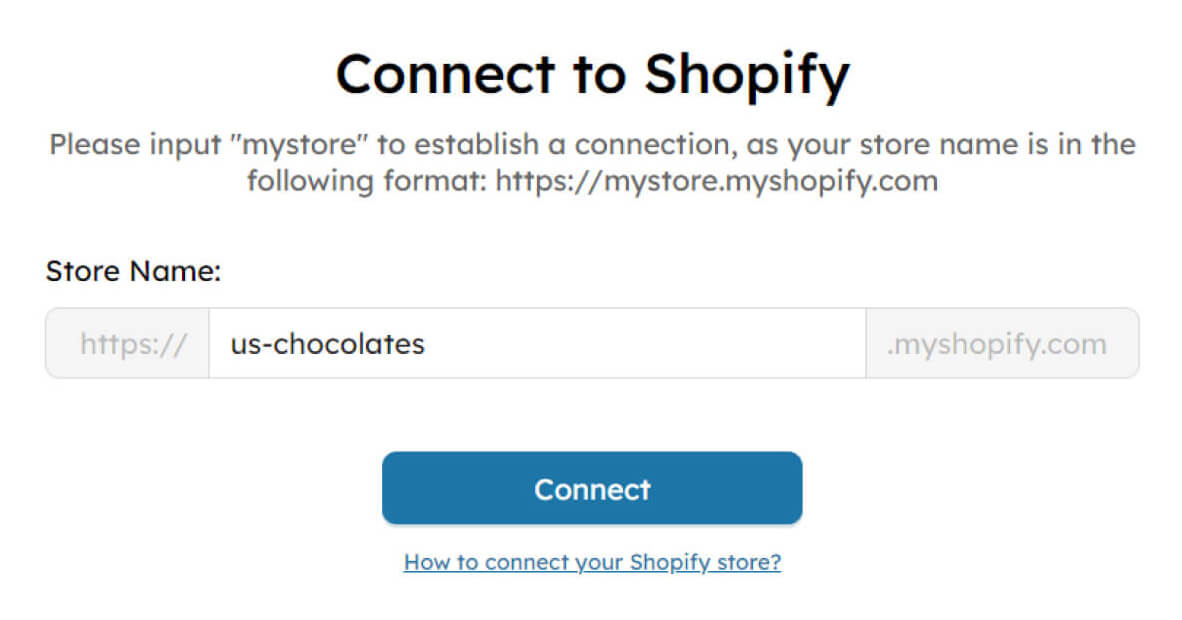
You'll likely be prompted to authorize SyncTools to access your Shopify store data. Kindly follow the on-screen instructions to grant access.
- After clicking the Connect, a new window will pop up, typically displaying the Shopify login page.
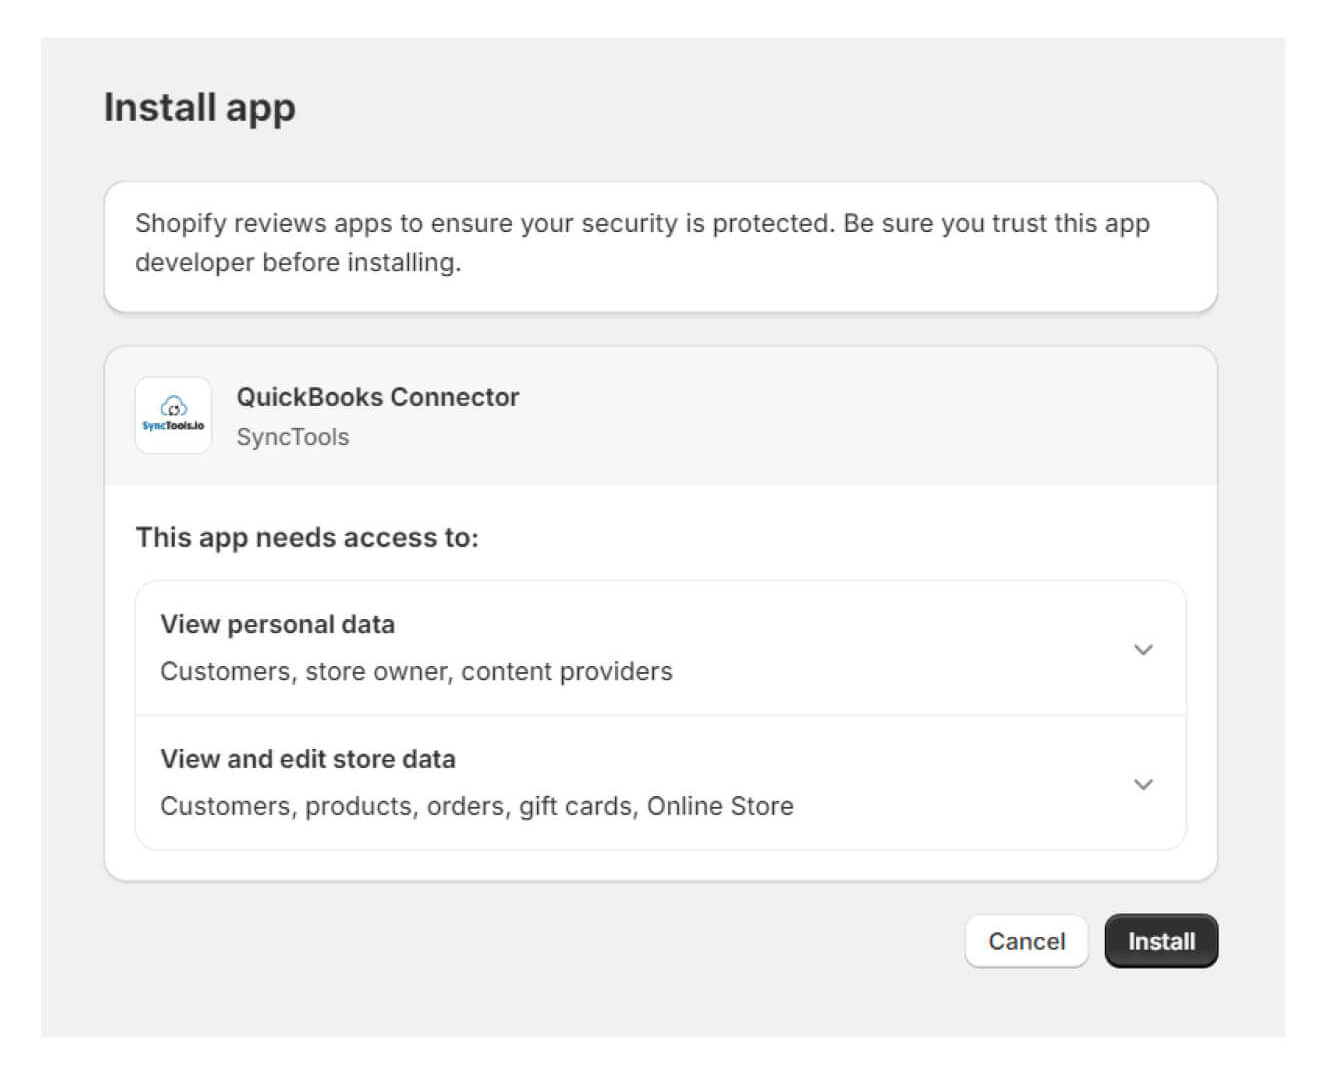
- Enter your Shopify login credentials (username and password) into the fields provided in the new window and **install** the application\
- After authorizing access and providing any necessary information, complete the connection process. SyncTools should now be connected to your Shopify store.
## How do I Connect QuickBooks?
To connect your QuickBooks Online with SyncTools, please follow the similar steps as done while connecting your Shopify and it should be connected successfully with SyncTools.
After clicking the "Connect to QuickBooks" button, a new window will indeed open, prompting you to log into your QuickBooks Online account. Here's what you should do next:
- Navigate to the Integrations section in SyncTools and select QuickBooks App if not selected earlier. Once, QuickBooks is selected. connect to QuickBooks and click on the "Connect to QuickBooks" button.

Note: Kindly, ensure you have the Admin role and provide the necessary credentials for connection.
- After clicking the button, a new window will pop up, typically displaying the QuickBooks login page.
- Enter your QuickBooks Online login credentials (username and password) into the fields provided in this new window.
- Once logged in, QuickBooks will ask you to authorize SyncTools to access your QuickBooks Online account. Select the preferred QuickBooks Company and Review the permissions requested and click on the "Allow" button to grant SyncTools access.
- After authorizing access, the new window will likely close automatically, and you'll be redirected back to SyncTools..
- You will receive a confirmation message within SyncTools indicating that the connection to QuickBooks was successful.
Once Shopify & QuickBooks is connected successfully with SyncTools, you’re good to go ahead with the configuration & setting up your system and to do so, click on “**Next**”.
## Synchronization Options
### What are the synchronization options and which one is considered more advantageous?
- SyncTools offers two synchronization options: Summarized Entries and Individual Transaction Entries. Users can configure their preferred synchronization method based on their business needs.
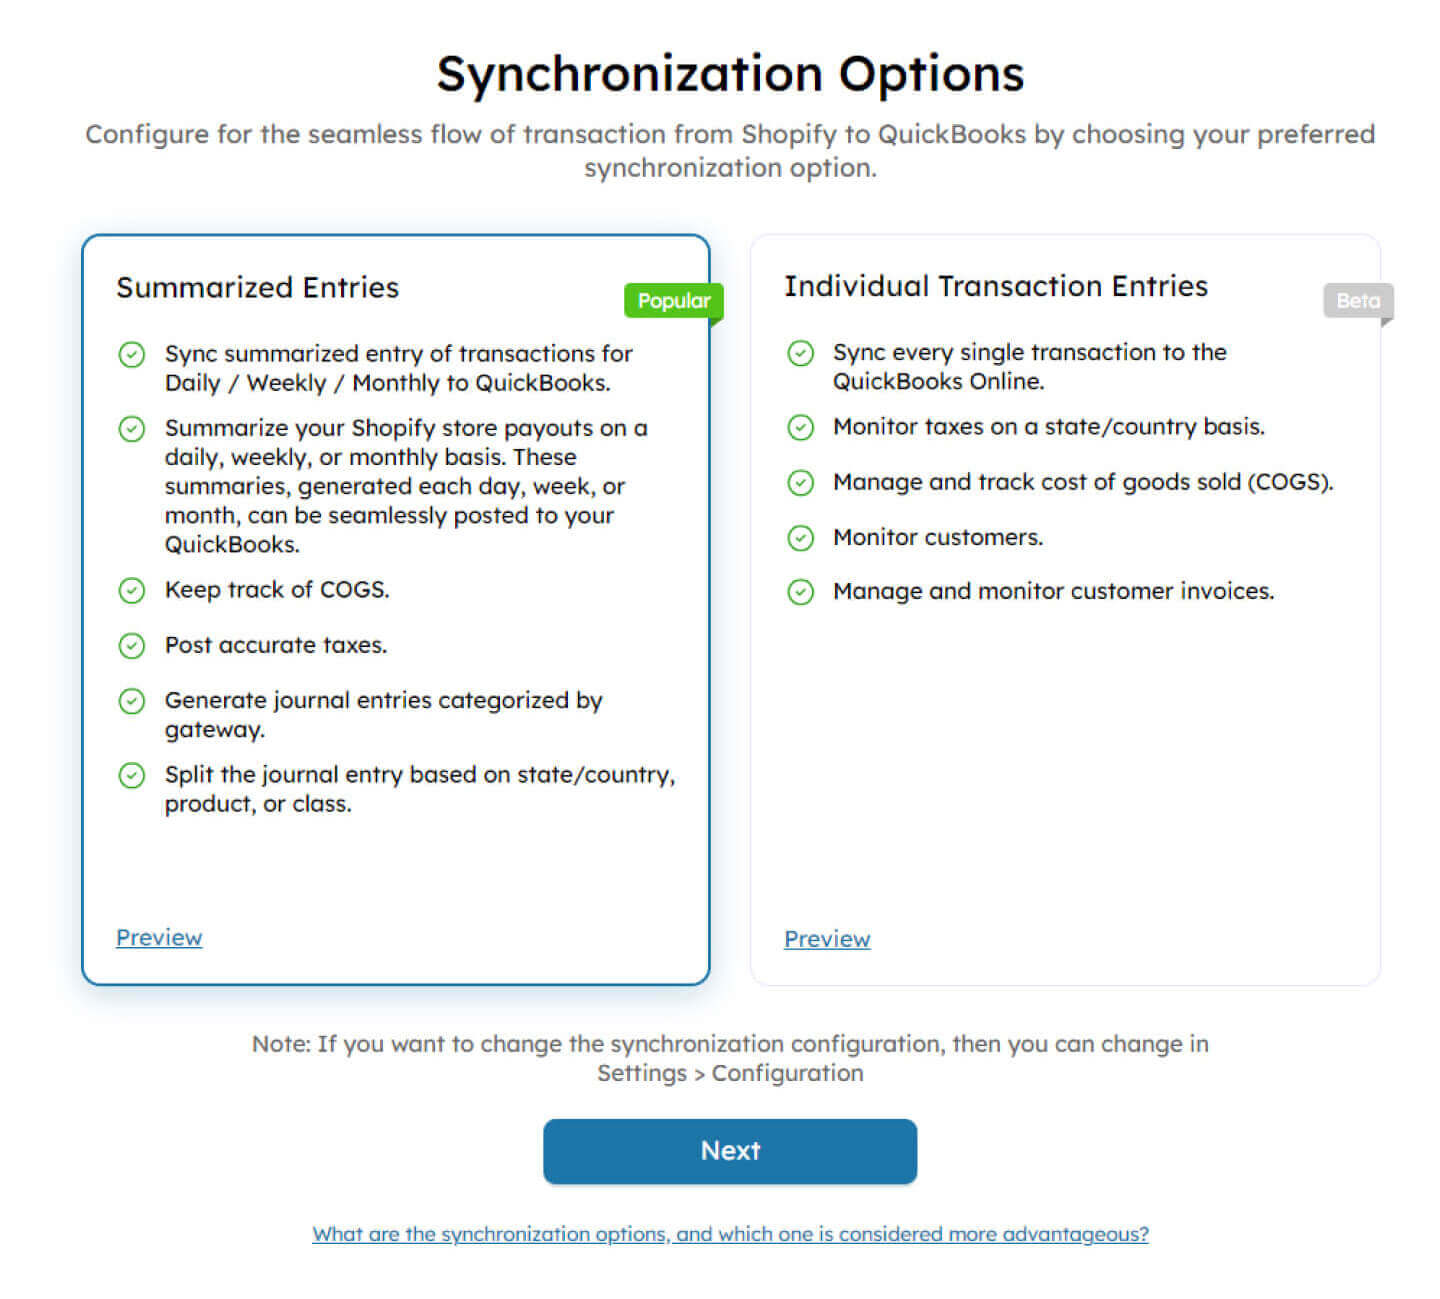
- SyncTools strongly recommends using Summarized Entries for synchronization.

Note: Selection of synchronization option solely depends on you specific to your business needs. SyncTools doesn’t mandate users to opt for Summarized entries.
- Summarized Entries consolidate multiple transactions into a single Journal Entry in QuickBooks.
- The consolidation process is based on the selected time period frequency and configuration mapping within SyncTools.
- Summarized Entries simplify financial records, making reporting more concise and easier to understand.
- This approach saves time and effort during reconciliation and analysis processes.
- SyncTools also provides early access to the Individual Transaction Entries feature for beta users.
- Users interested in exploring this functionality before its official release can request access from the Sales team at [sales@synctools.io](mailto:sales@synctools.io)
## How to choose frequency of Journal Entry creation in Shopify to QuickBooks?
Choosing Frequency of Journal Entry Creation in SyncTools for Shopify QuickBooks Integration:
SyncTools offers flexibility in determining the frequency of Journal Entry creation, allowing you to tailor the synchronization process according to your business needs. You can select from three options:**Daily, Weekly, or Monthly.** Follow these steps to choose your preferred frequency:
After selecting Shopify order data importing date and sync frequency, click on **“Next”** and you would be required to select countries in which your business operates.
## Why to choose countries?
Click on **“Next”** once the countries are selected and you will be redirected to **Tax Preferences** You can either opt for tax preferences if your business is already registered for taxation purpose and engaged in the collection or remittance of sales tax or hit **“No”** if this doesn’t doesn’t sound relevant to you.
## Why configure tax preferences?
After selecting Tax Preferences, you would be required to choose the countries where your business is registered.
## Country and Payment Gateways
In SyncTools, there is a feature that allows you to synchronize Shopify payouts by grouping them according to **Country and Payment Gateways.** These registered countries will be considered for the grouping.
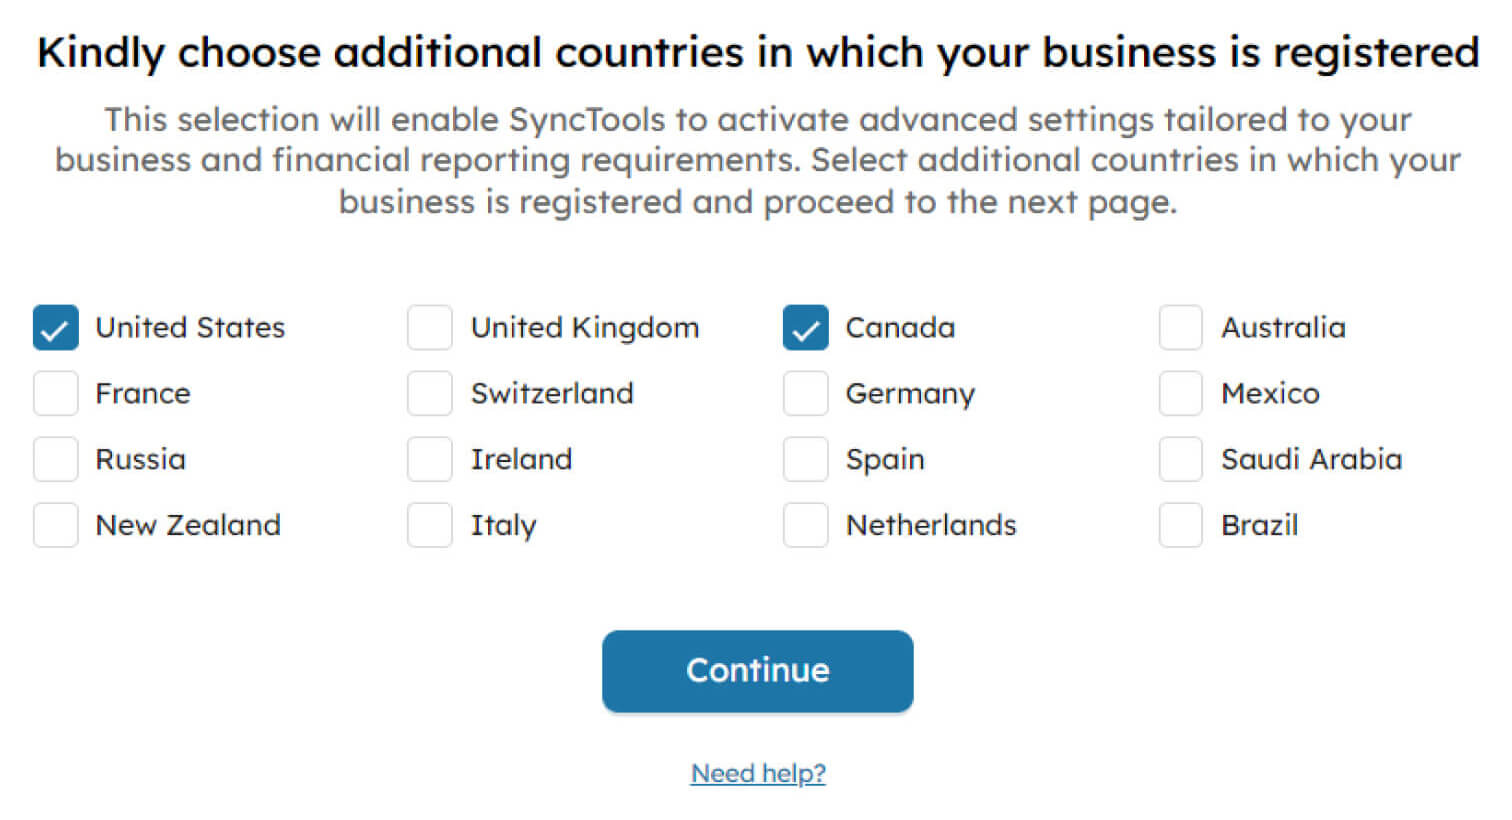
## Account mapping
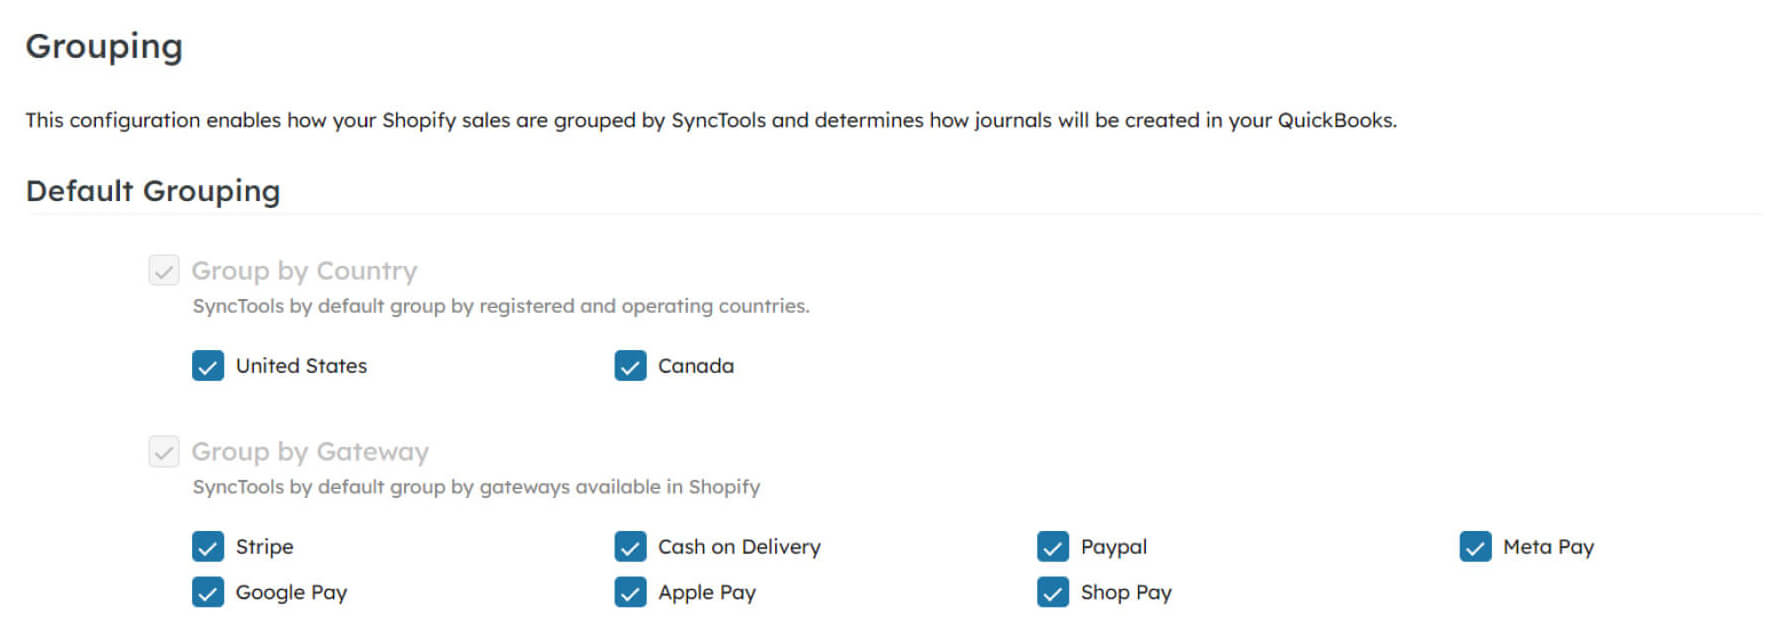
After setup of grouping, you can also **enable QuickBooks’ class and location mapping with Shopify payouts.**
Once all the grouping settings are configured, you can proceed to map the QuickBooks chart of accounts with Shopify transaction types under **“Mapping”** in the left navigation pane.
This mapping process ensures that transactions from Shopify are correctly categorized and recorded in QuickBooks according to your desired account structure.
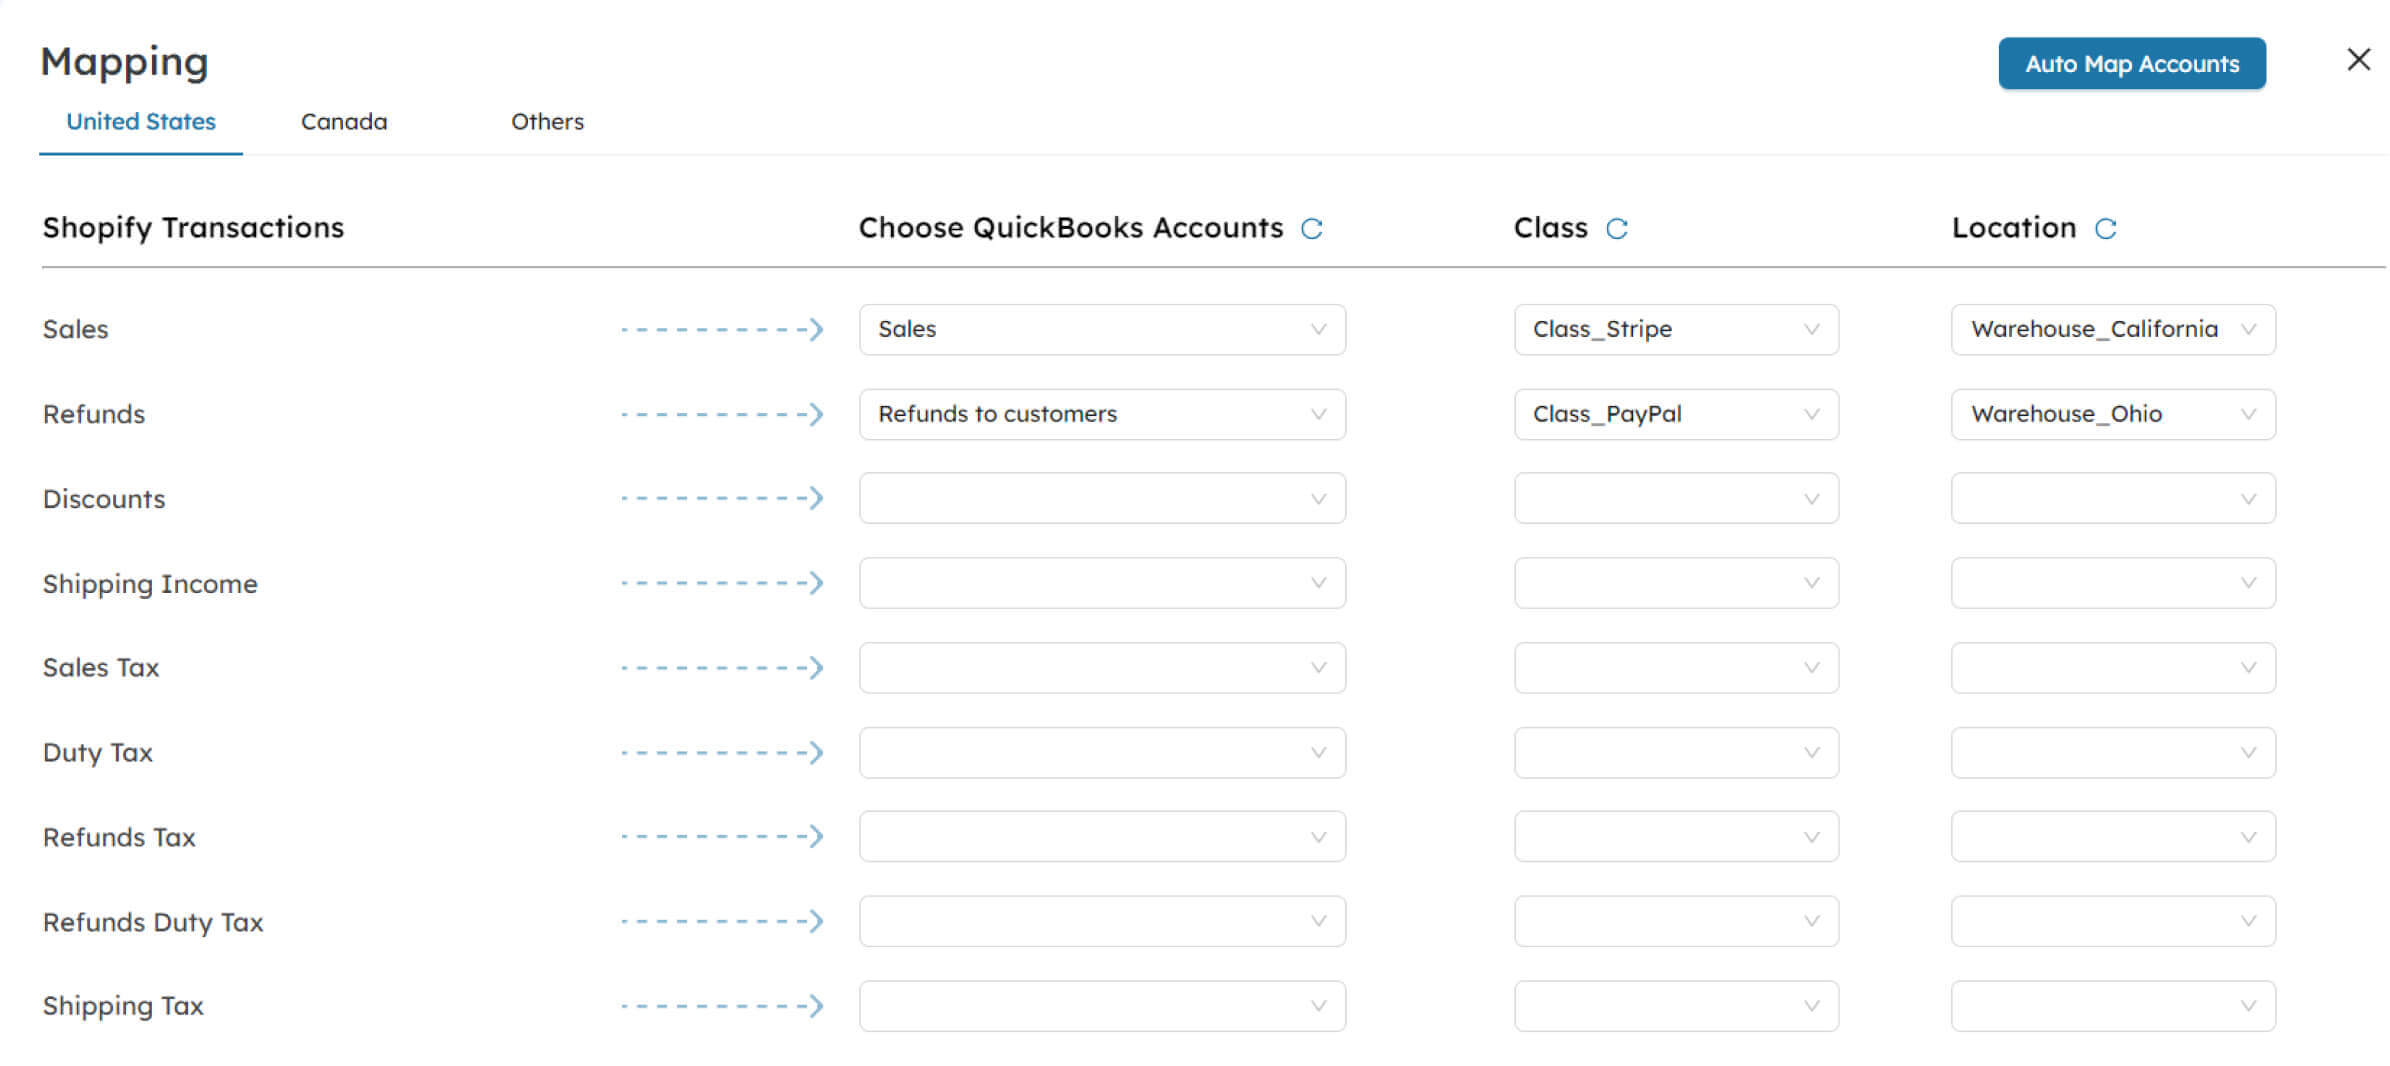
- Additionally, SyncTools offers an “Auto Map Accounts” to enable Shopify users to auto create and map charts of accounts automatically for Shopify transactions in QuickBooks Online.
- This functionality automates the mapping process between QuickBooks charts of accounts and Shopify transaction types.
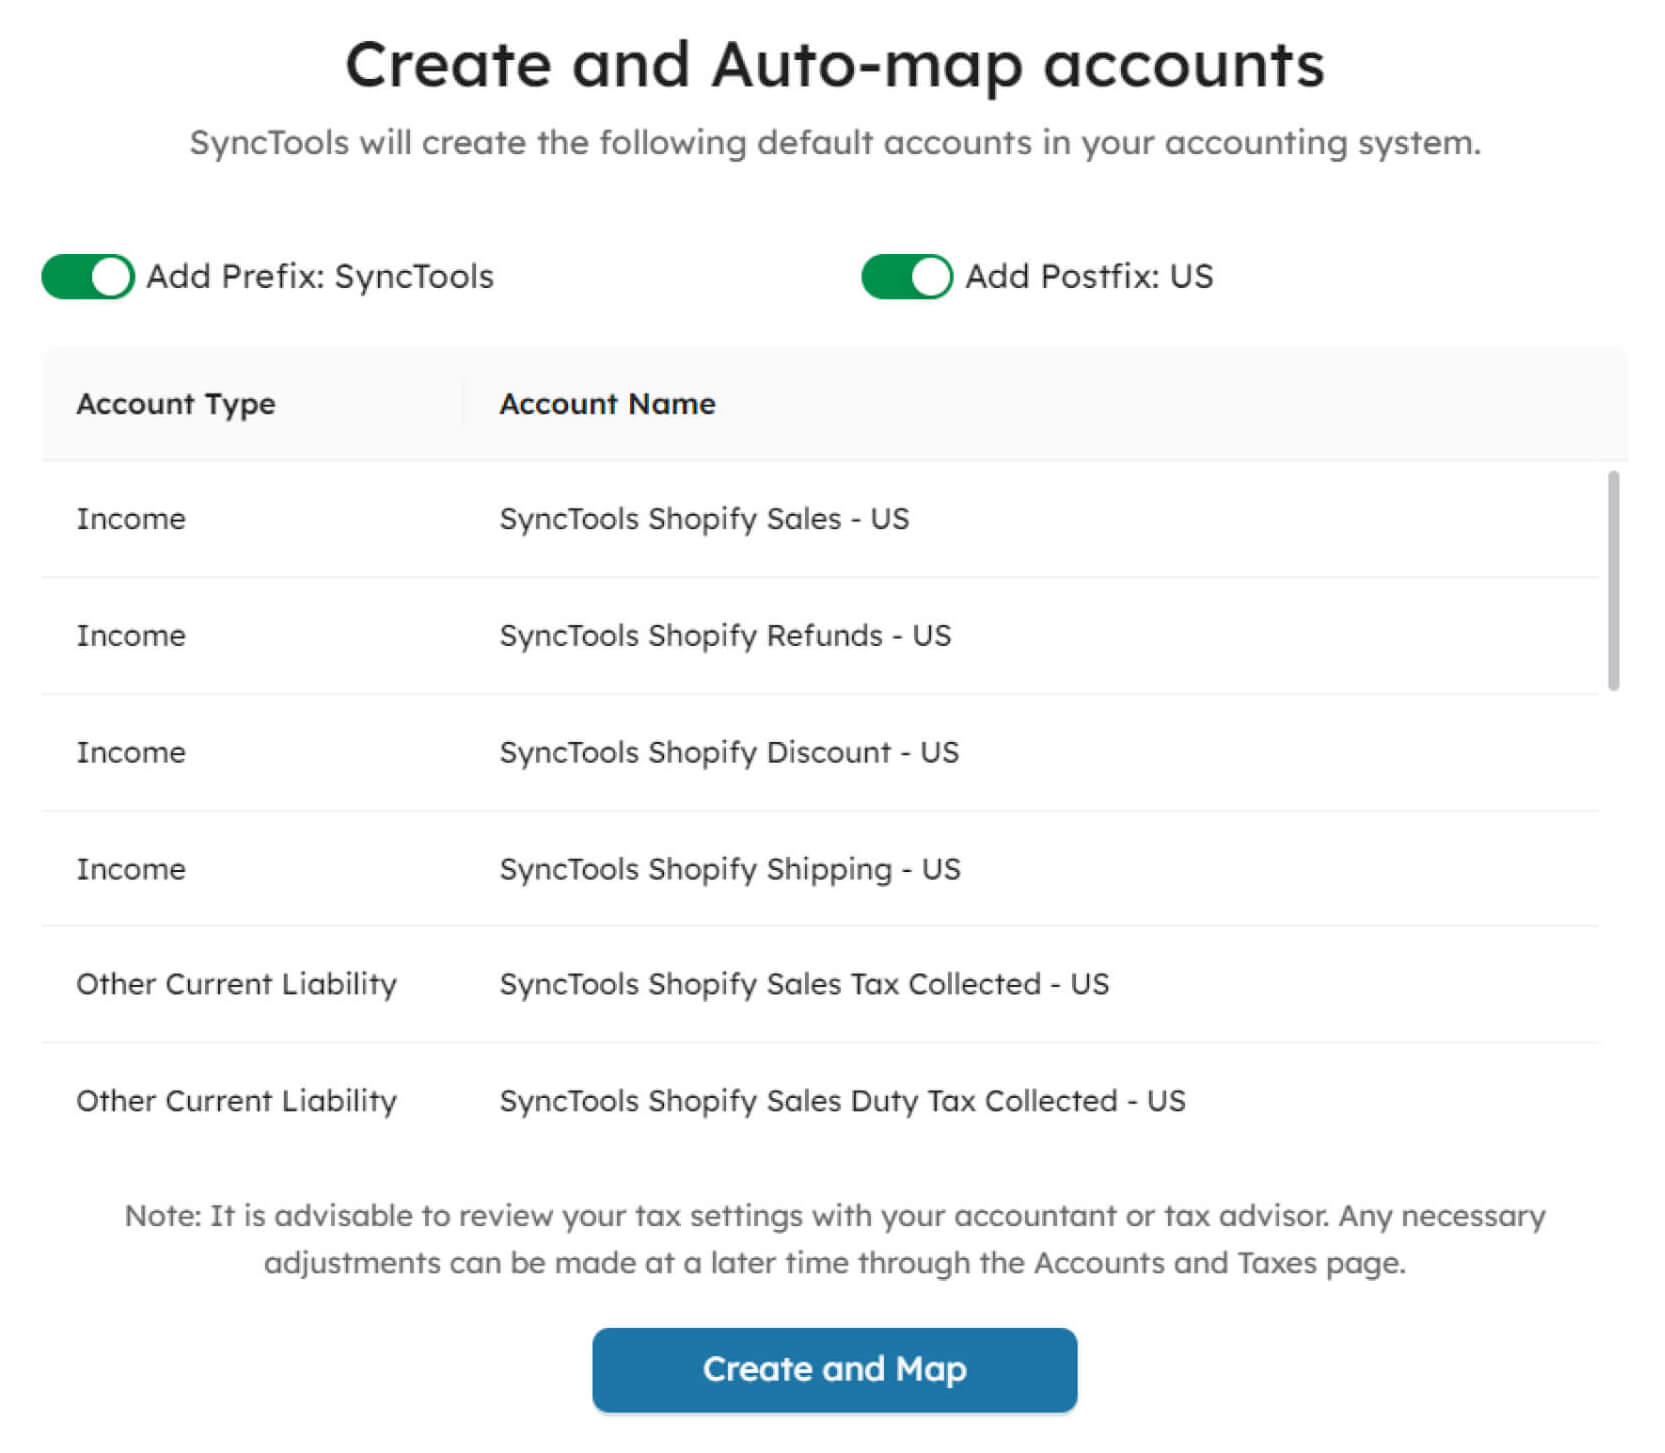
- By leveraging SyncTools' automation capabilities, users can save time, reduce errors, and ensure accurate synchronization of financial data between QuickBooks and Shopify.
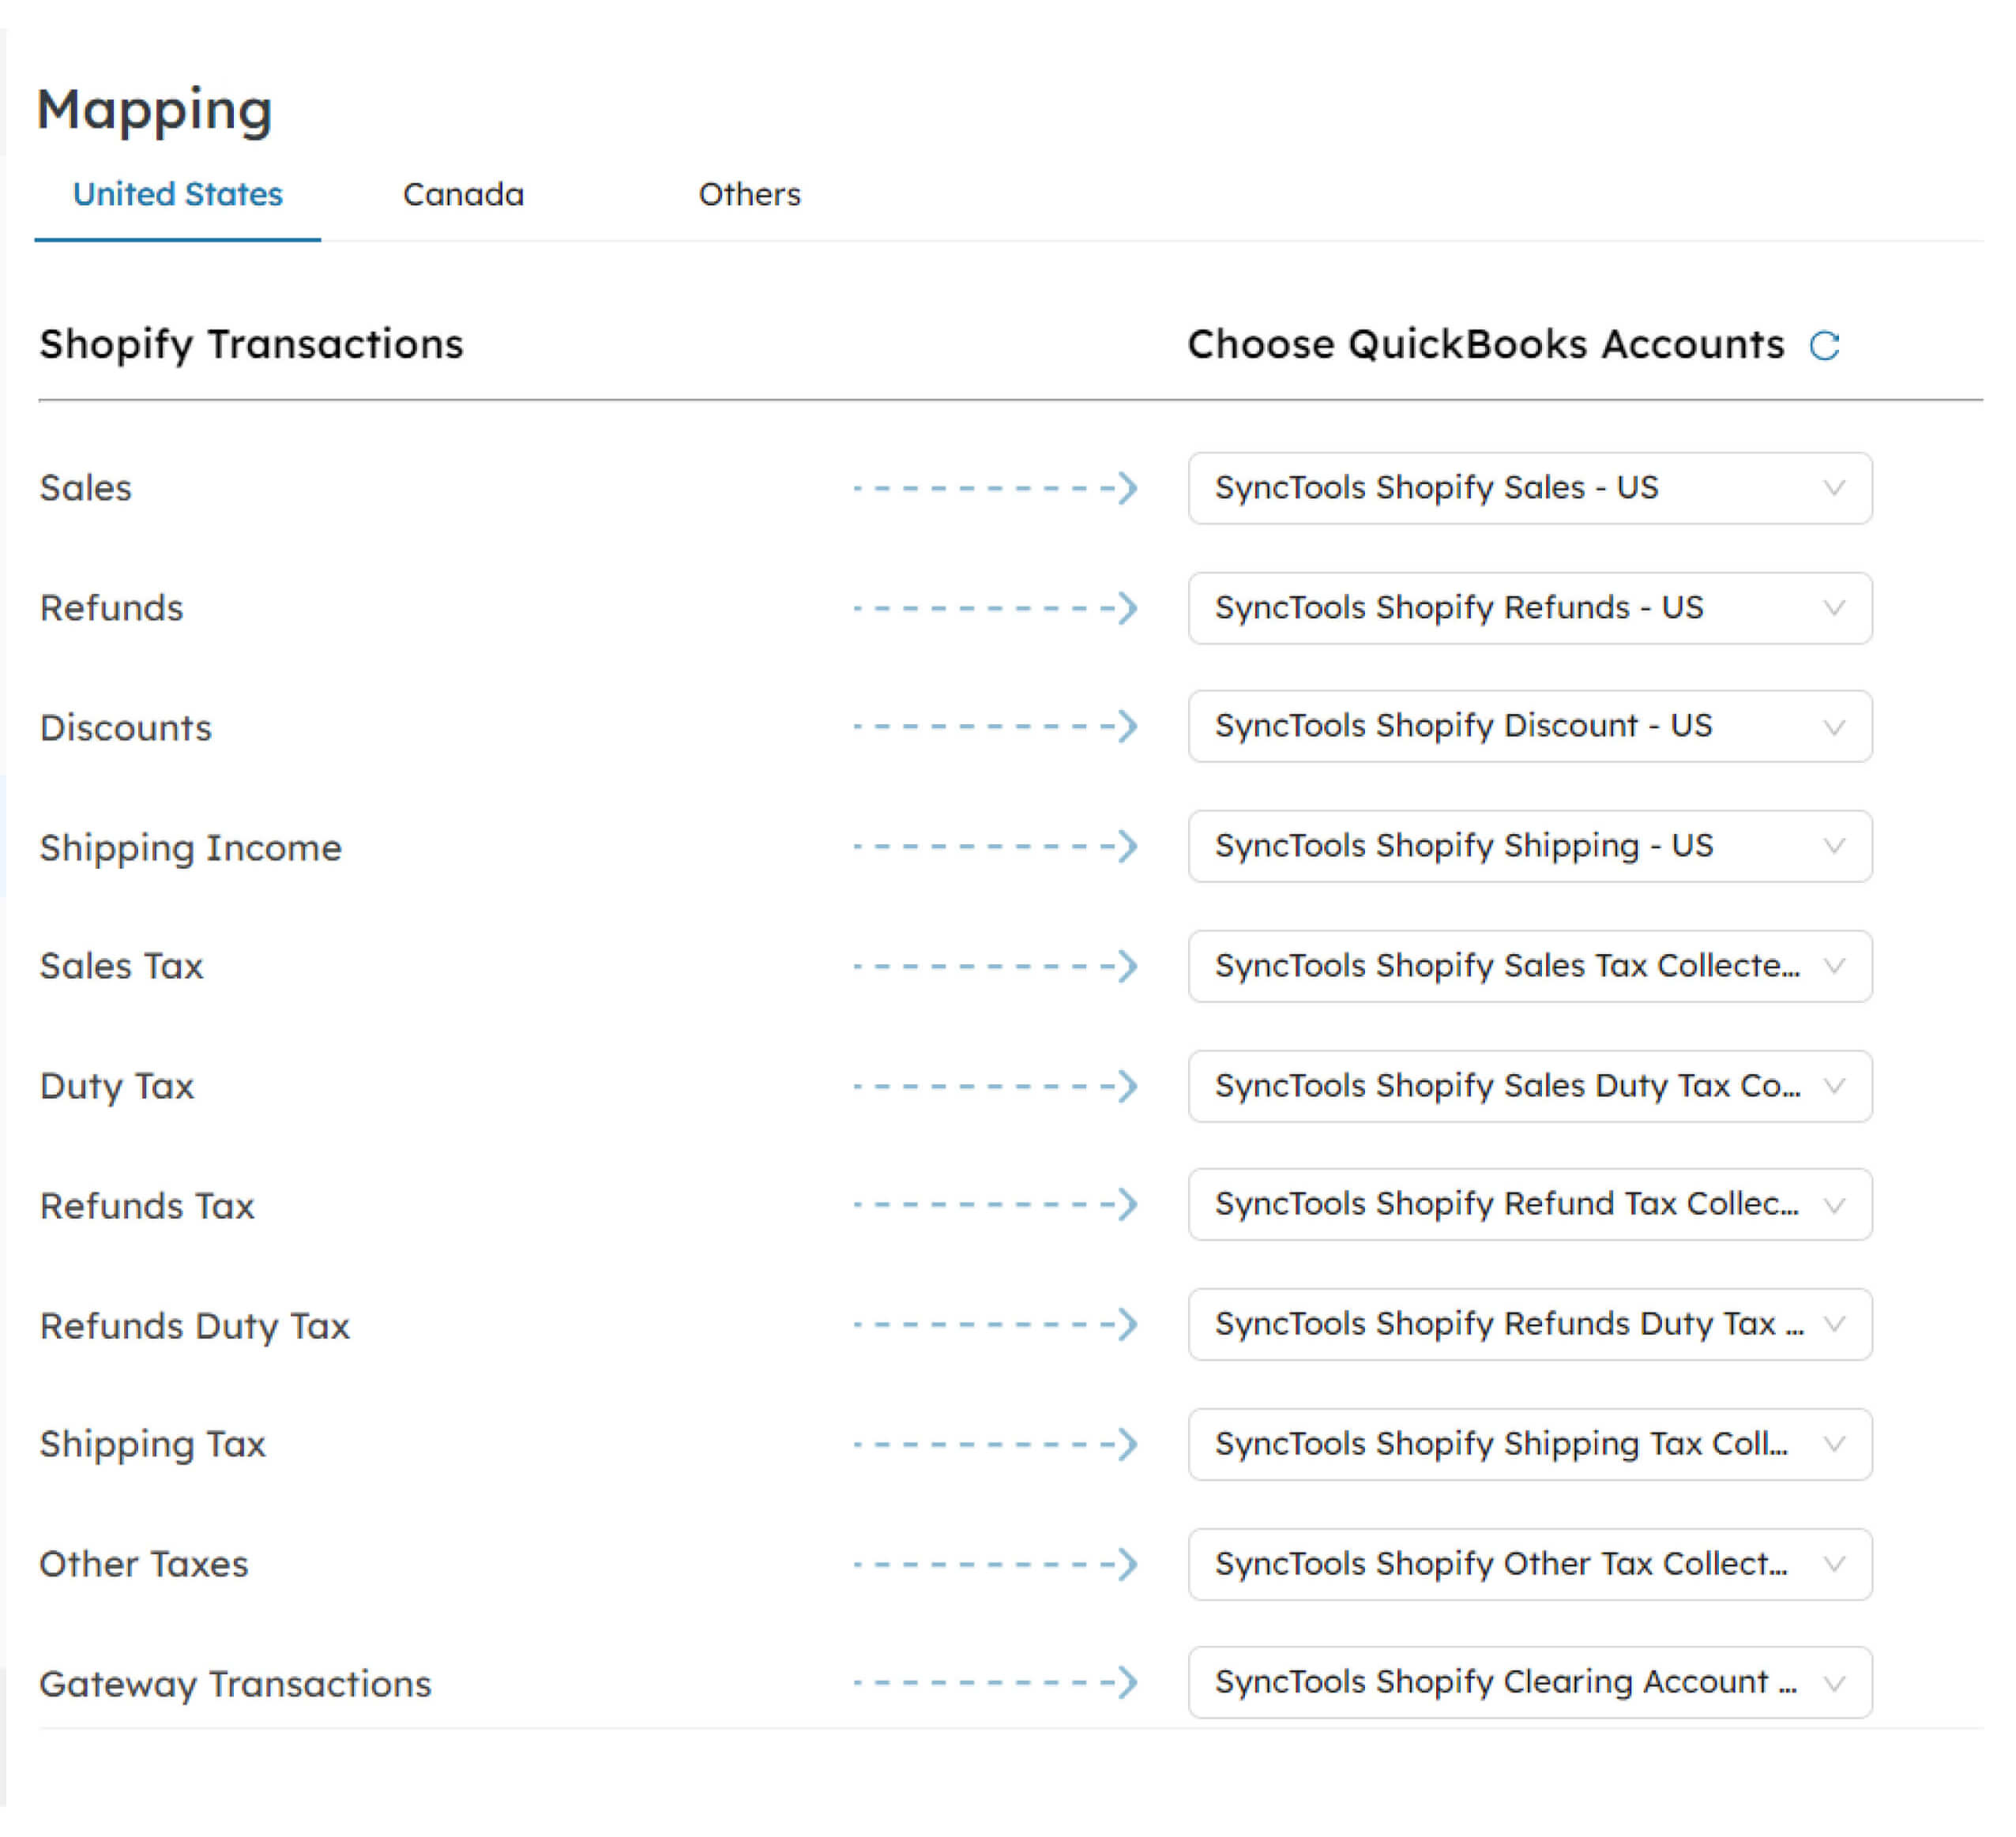
- Utilize the "Others" mapping tab in account configuration to manage transactions from other countries or orders with different shipping countries.
- This tab enables specific mappings for transactions outside primary mappings for individual countries.
- Configuring accounts in the "Others" mapping tab ensures accurate categorization and recording of diverse region transactions, maintaining consistency in financial reporting across different geographical regions and order scenarios.
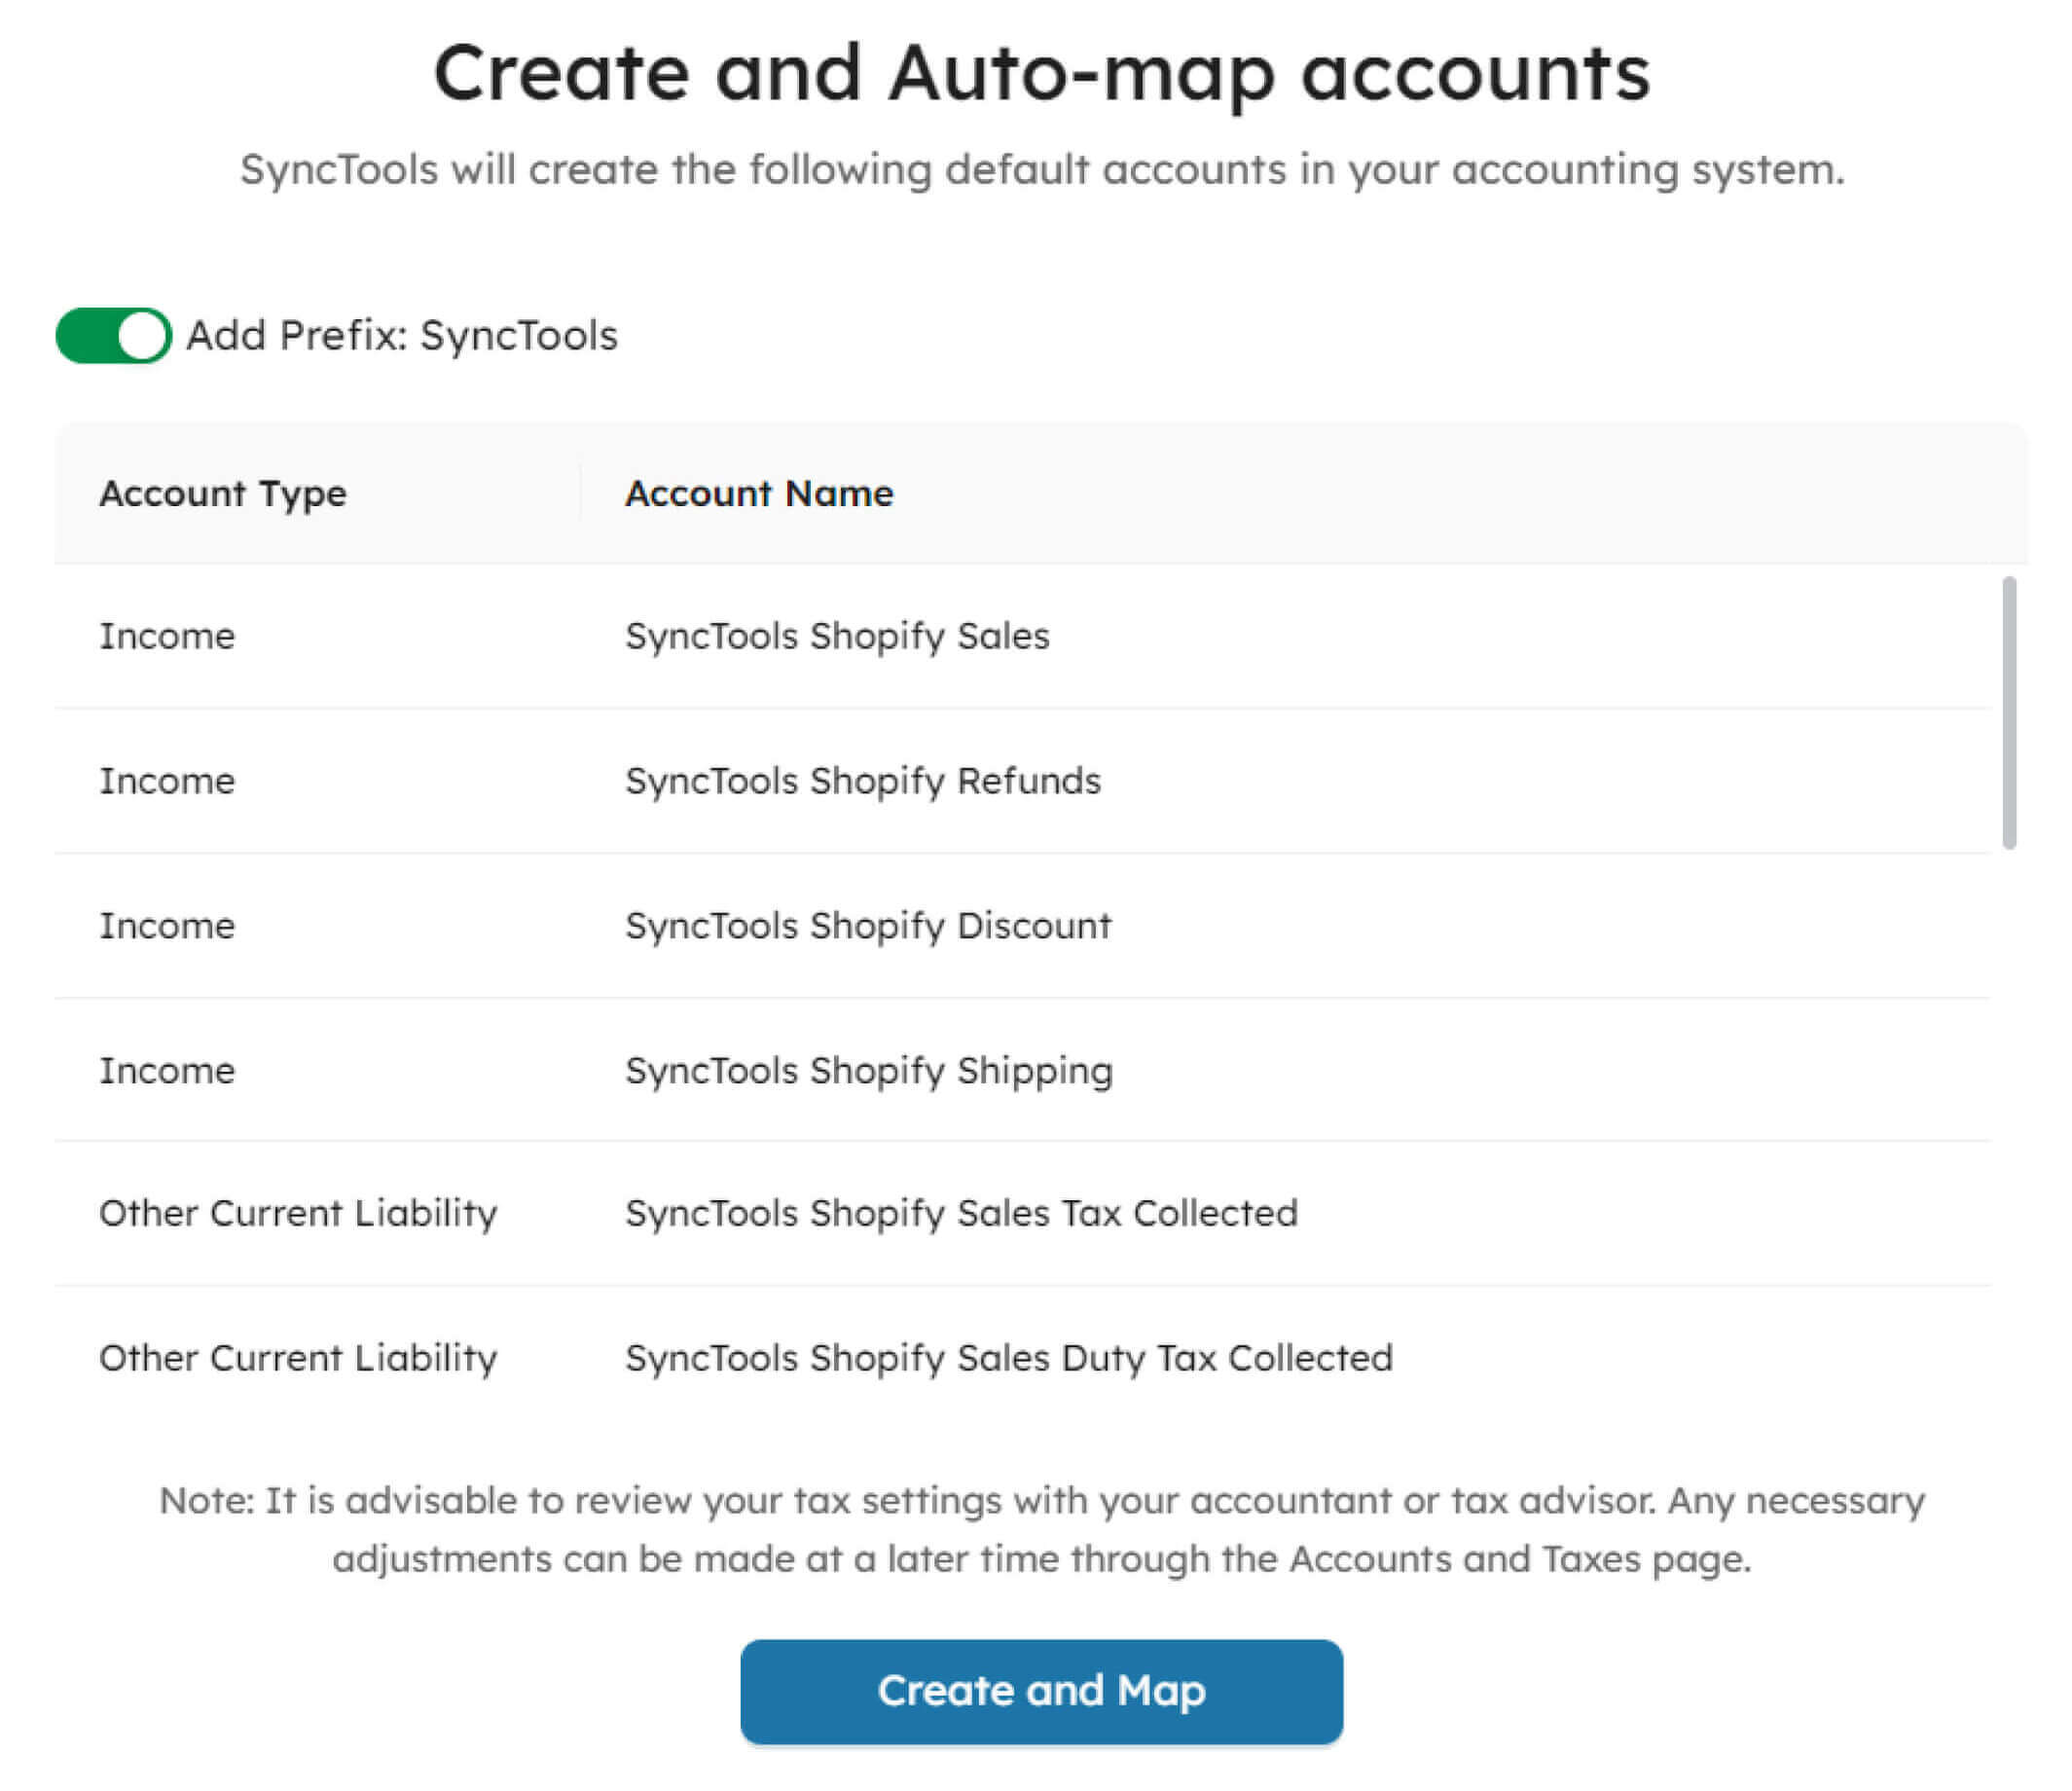
## Enable Auto-Sync
- After completing setup tasks such as mapping charts of accounts and configuring settings for different countries and scenarios, you can activate Auto Sync by opting for “Enable auto-sync”
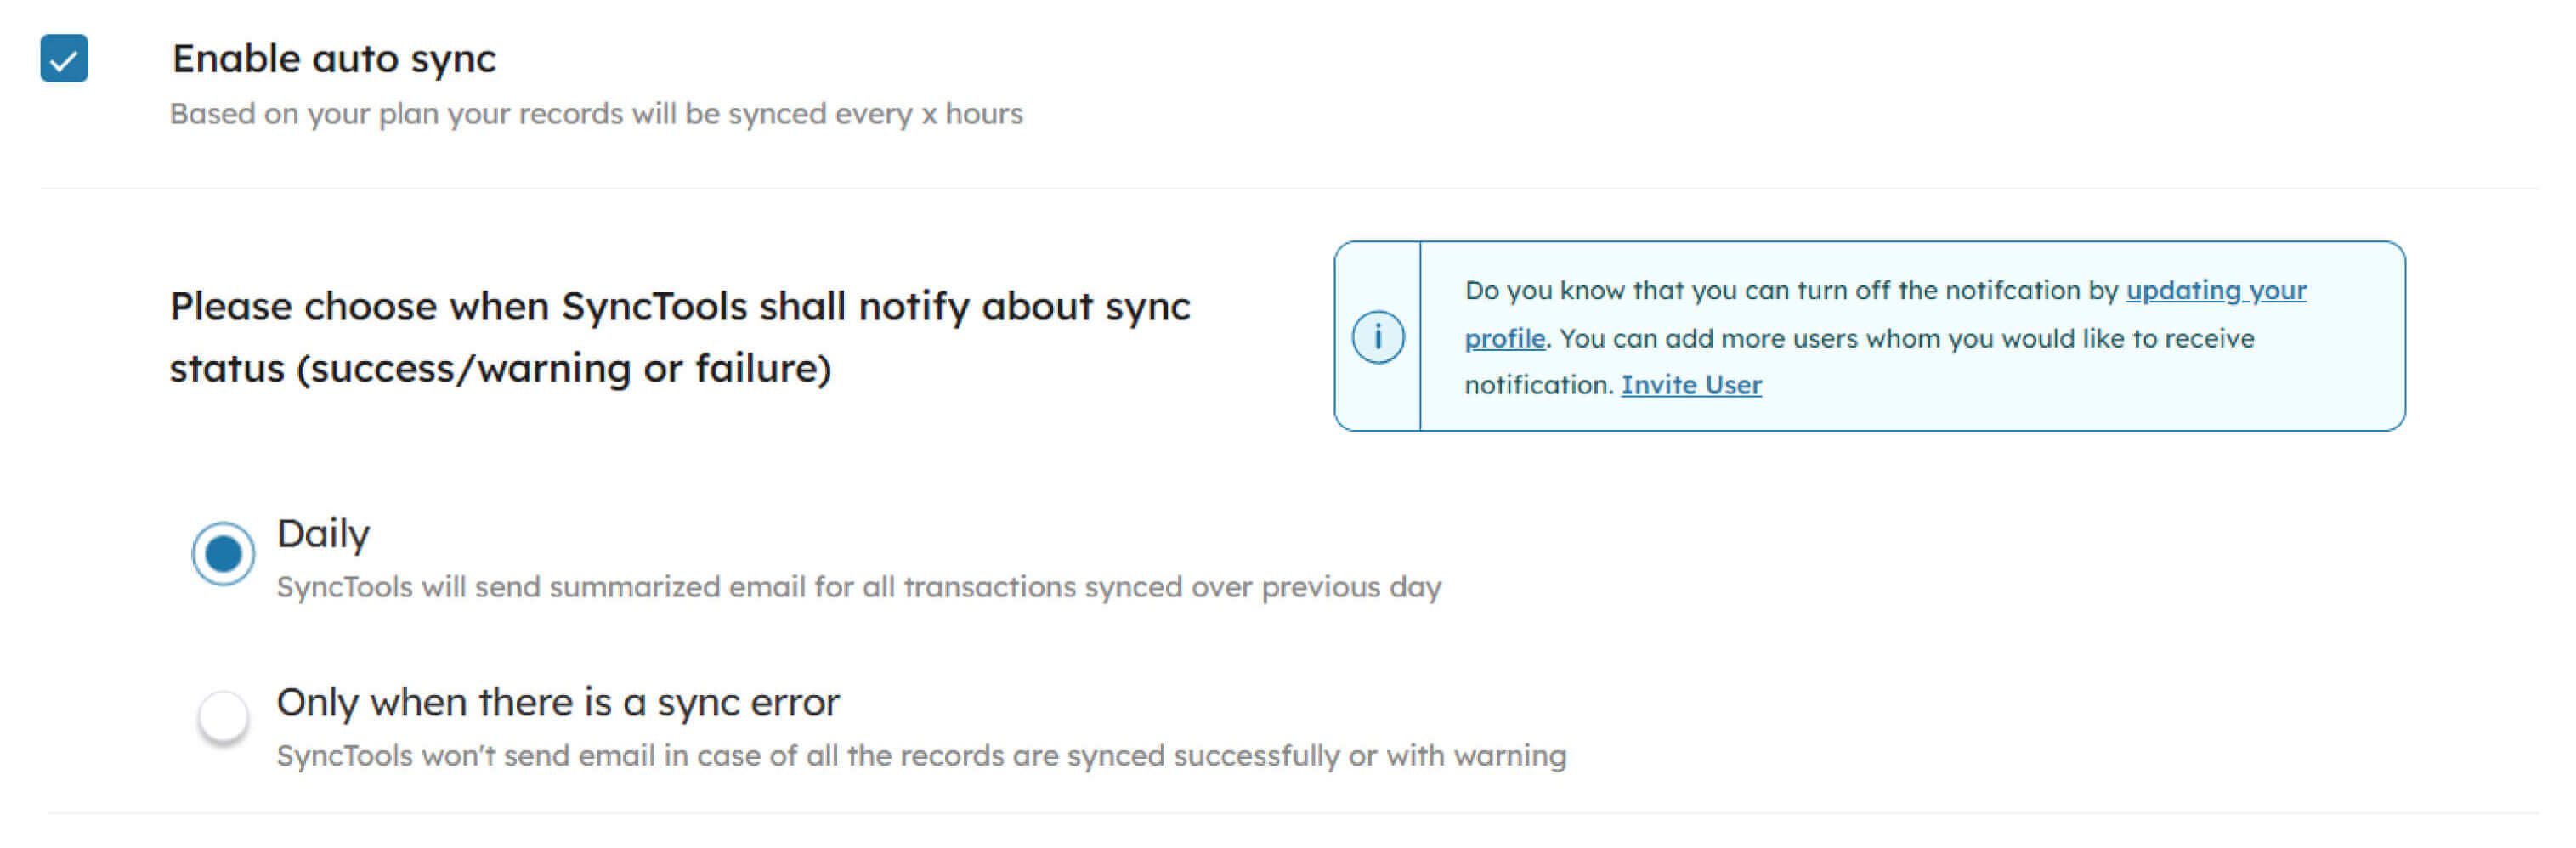
- Auto Sync automates the process of posting Shopify payouts in QuickBooks at regular intervals.
- This automation saves time, reduces errors, and ensures up-to-date and accurate financial records by synchronizing data between Shopify and QuickBooks automatically, eliminating the need for manual intervention.
## Bank Account Configuration
Under this configuration, users can choose the bank account where all the Shopify deposits payout needs to be recorded and choose one account where any Shopify negative balance is to be recorded in QuickBooks as shown below:

### Download Shopify orders in SyncTools
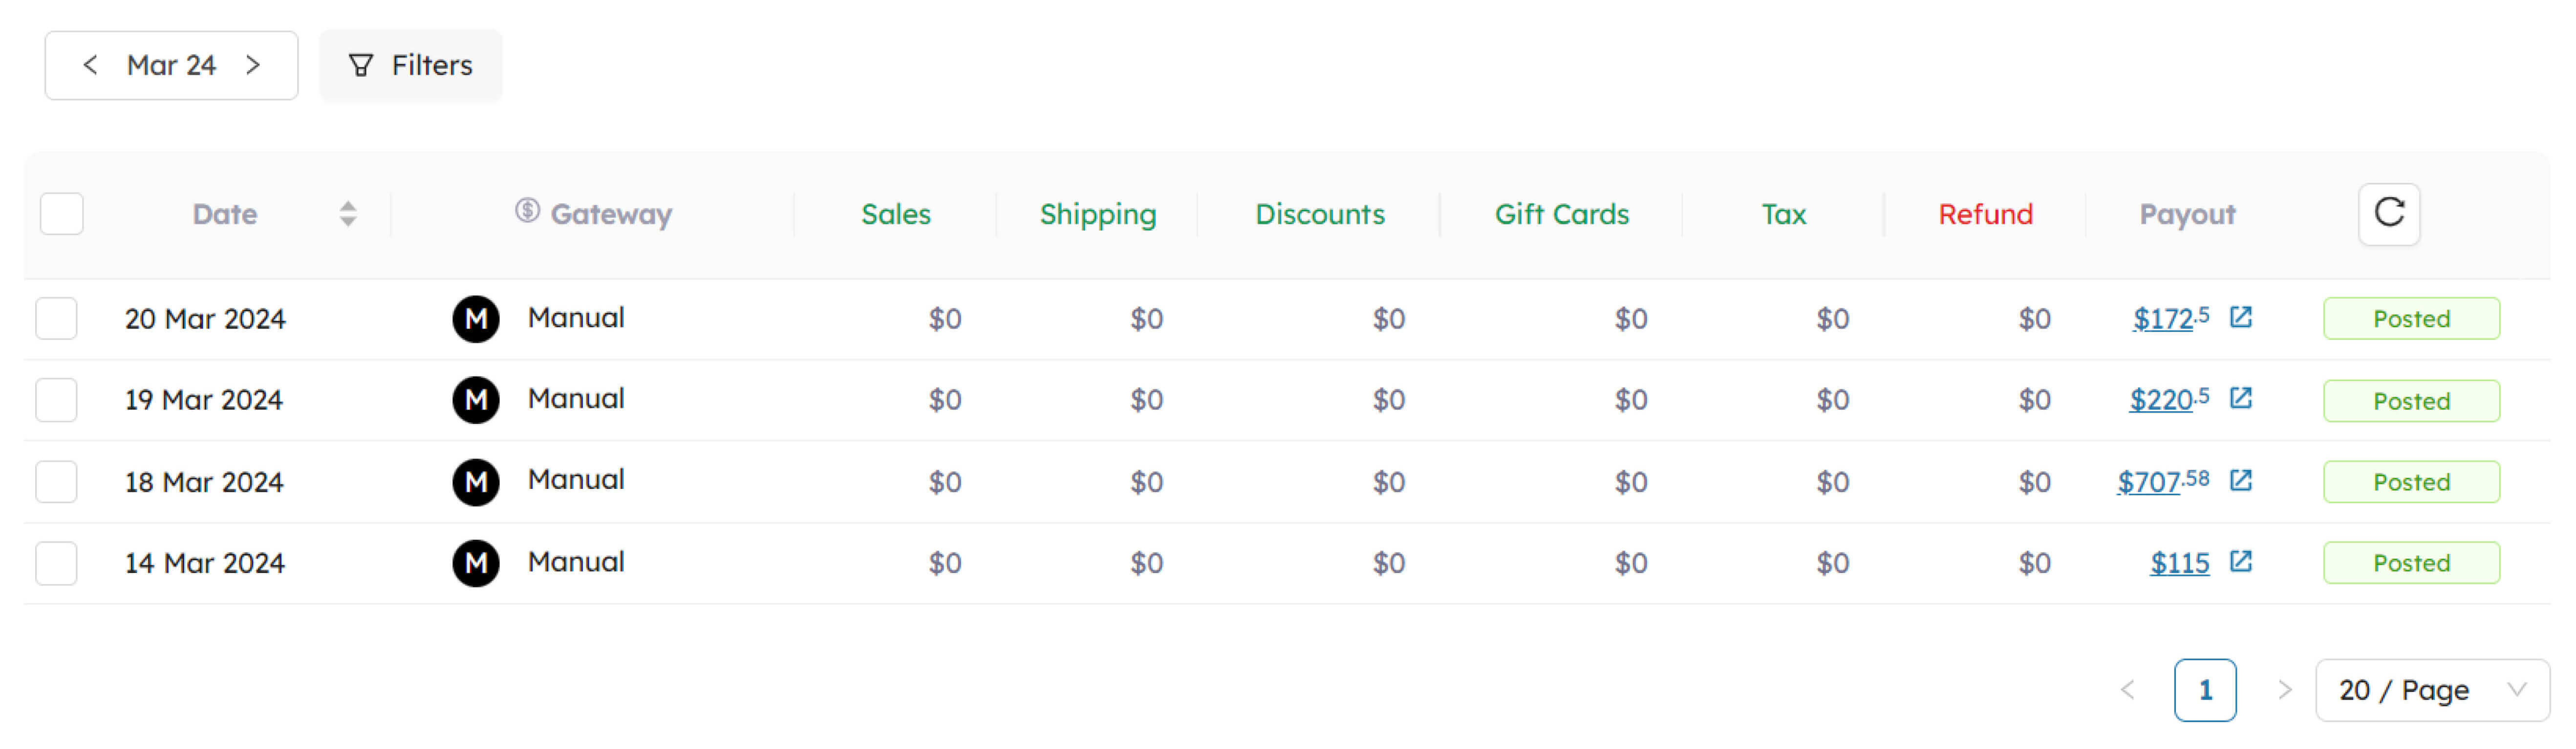
- Begin by accessing the Shopify orders downloaded in SyncTools.
- Review the Shopify Payout details alongside a QuickBooks preview for the specific payout.
- Once satisfied with the accuracy, proceed to successfully post it into your QuickBooks account by clicking on Post to QuickBooks.And, it will turn the payout status as “Posted” in SyncTools.
## Shopify Payout details:
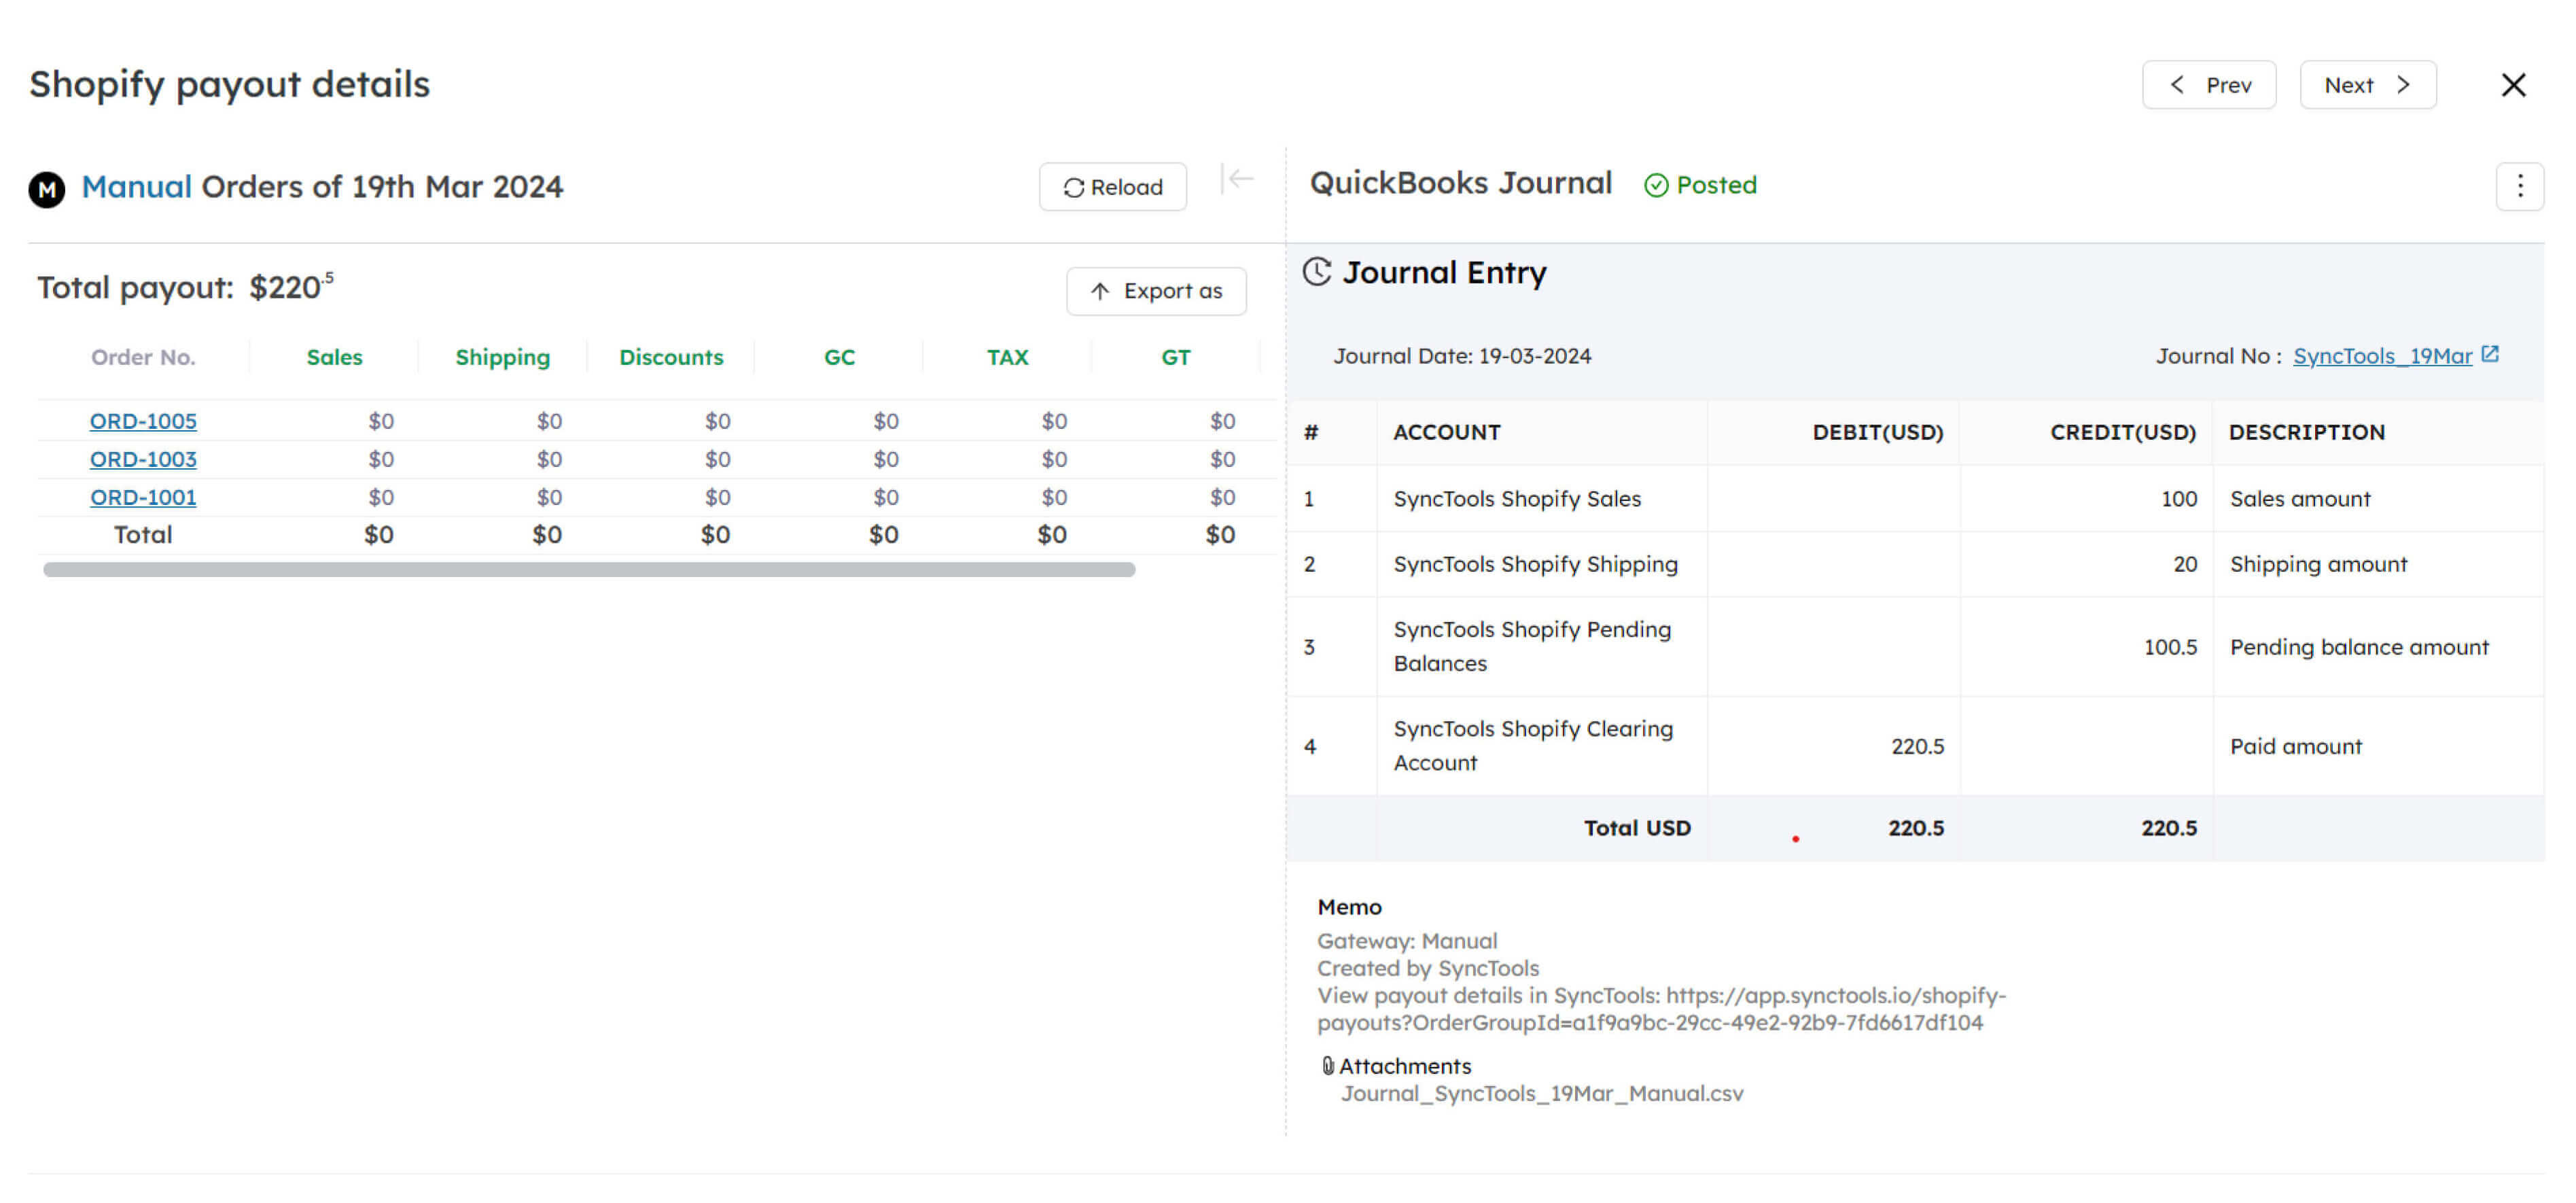
The posted Shopify Payout creates a Journal Entry in QuickBooks Online with details in the “Memo” field and CSV attachment of all the Shopify transactions posted in that particular Journal Entry.
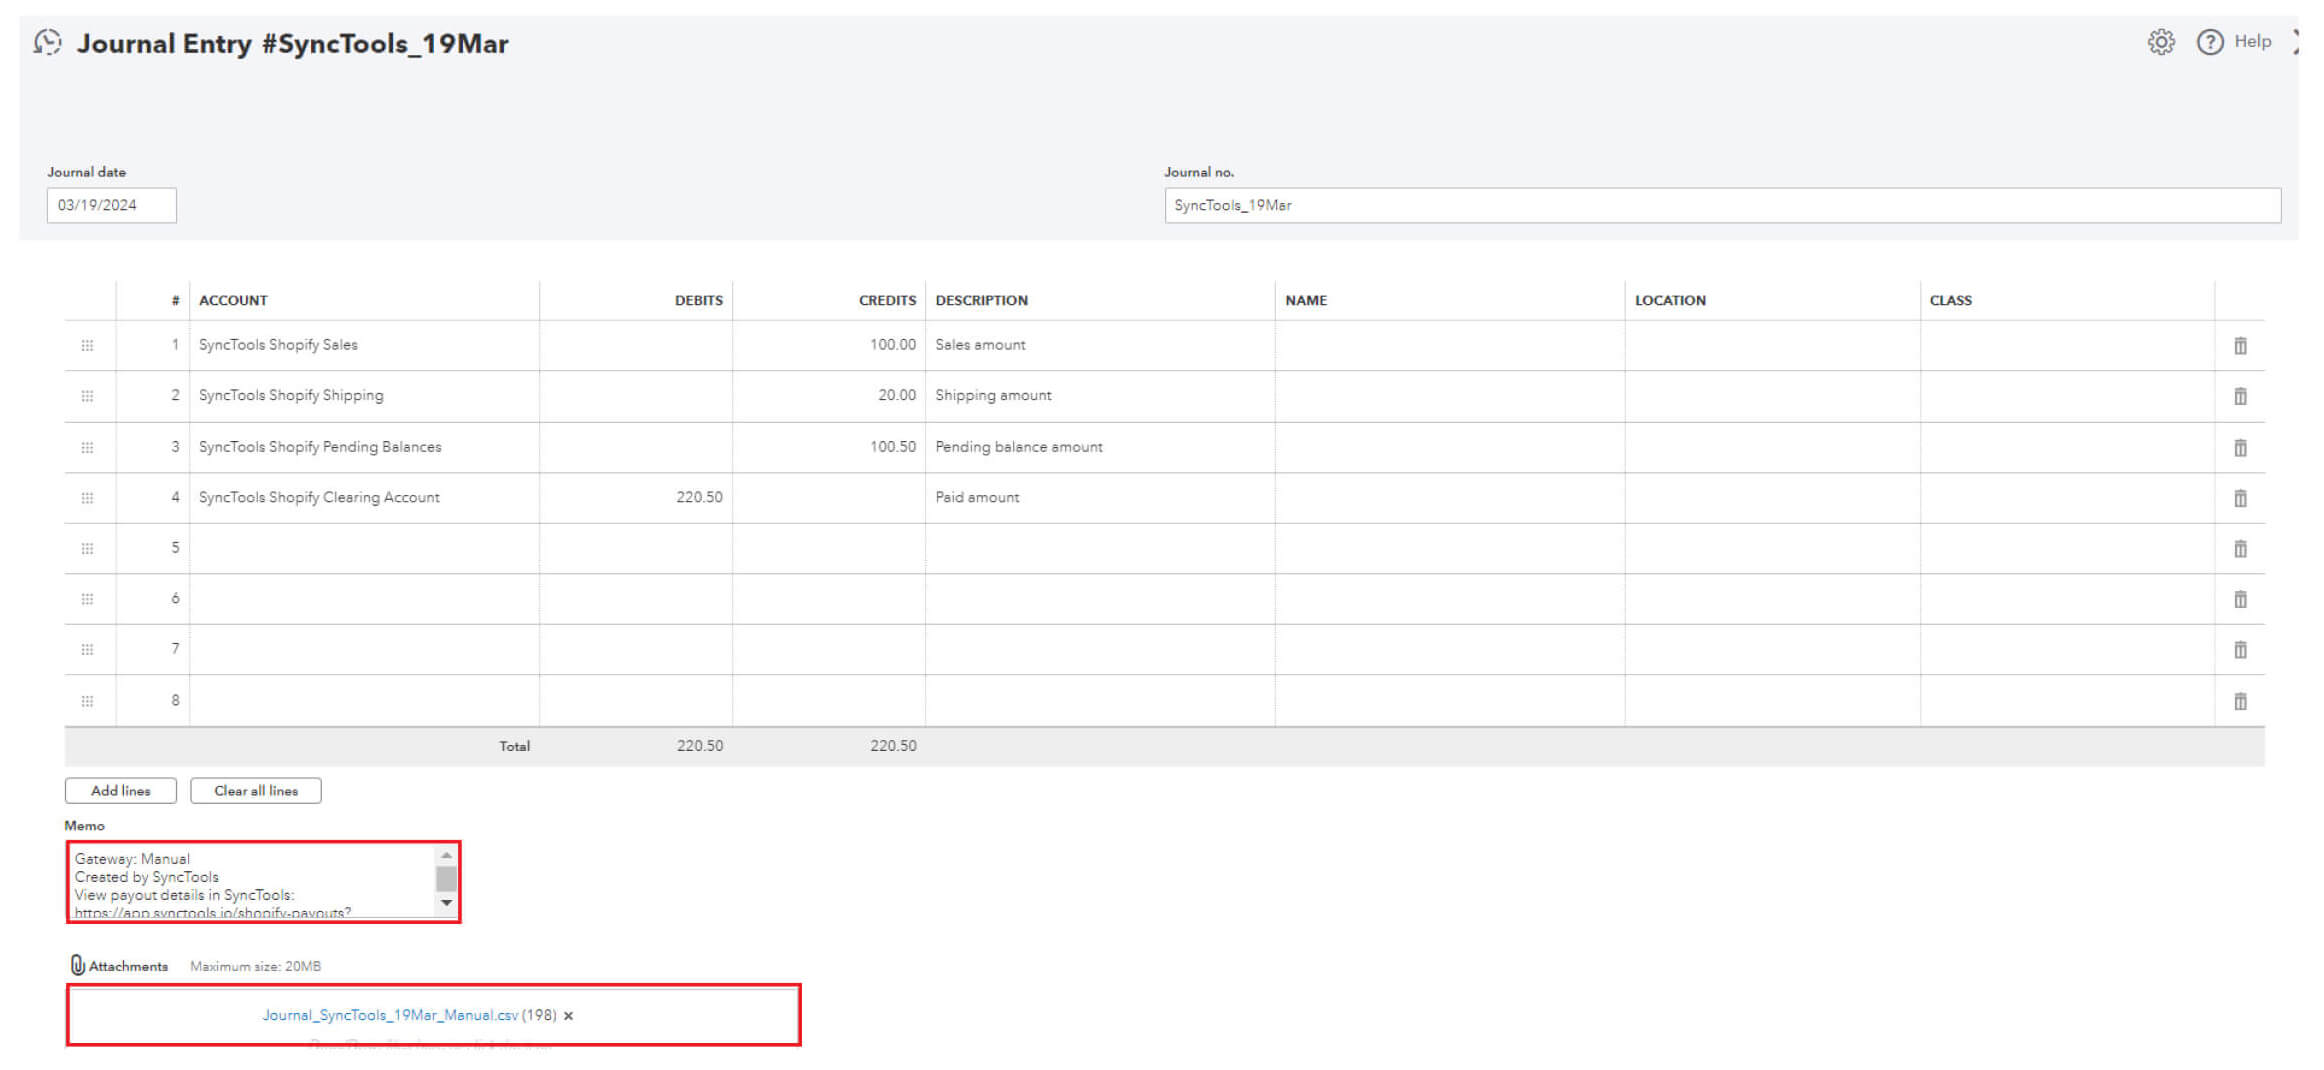
## Sync History
- Access to sync history is crucial for transparency and troubleshooting in managing Shopify payouts.
- Sync history enables tracking of synchronization processes over time.
- It includes details like sync dates, times, transaction statuses, encountered errors, and actions taken.
## Contact to Support Team
- Access to a dedicated support team is essential for assistance and queries related to setup and ongoing operation of synchronization processes.
- Support extends to clarifying setup instructions and offering general assistance to enhance the user experience.
- You can reach out to us at any time for any kind of support!
Feel free to contact us through the following channels in case of any queries or concerns:
Email: [sales@synctools.ai](mailto:sales@synctools.ai)
Telephone: [+44 7380328797](tel:+447380328797)
USA number: [+1 323 672 3738](tel:+13236723738)
---
## Why Shopify Finance Reports May Not Match Xero Reports After Syncing with SyncTools.
URL: https://synctools.ai/help/financial-reporting-differences-reconciliation/why-shopify-finance-reports-may-not-match-xero-reports-after-syncing-with-synctools
> Learn why Shopify Finance Summary and Xero Profit & Loss reports can show different refund and discount lines after SyncTools sync, and how to reconcile them correctly.
When reviewing **financial data**, it is common for users to compare **Shopify Finance Summary reports** with the **Profit & Loss report in Xero** after data has been synced using SyncTools.
In most cases, the **overall figures** reconcile correctly.
However, there are specific scenarios where **individual line items** particularly **refunds and discounts** may appear different between Shopify and Xero.
This article explains one of the most **common** and **expected reasons** for this difference and helps you understand **why the numbers look different even though the accounting is correct.**
## How Shopify Reports Refunds and Discounts
Shopify's reporting is designed primarily from a **sales and customer experience perspective**, not from a strict accounting classification perspective.
When an order includes a discount and that order is later refunded, Shopify often handles the reporting in the following way:
- The refunded discount amount is included inside the **"Refunds"** value
- The original **Discounts** line is not adjusted downward
- As a result, Shopify's **"Refunds"** total represents:
- Refunded product value
- Plus refunded discount value
From Shopify's point of view, this reflects the total amount returned to the customer.
However, from an accounting perspective, this approach merges **two conceptually different values** refunds and discounts into a single line.
## How SyncTools Processes the Same Data
SyncTools follows an **accounting-first approach**, designed to create clean, auditable entries in accounting systems such as Xero.
When SyncTools syncs Shopify data:
- **Sales** are posted to **sales accounts**
- **Discounts** are always **reported and posted separately**, based on your **mapping configuration**
- **Refunds** represent the **reversal of sales amounts only**
- **Discount values** are **never absorbed into refunds**, even when **Shopify** does so in its **reports**
This behaviour is intentional and aligned with standard accounting practices, where:
- **Discounts** are tracked independently for **margin analysis**
- **Refunds** represent **returned revenue**
- Each **financial component** remains **transparent**
## Why the Difference Appears in Xero After Syncing
When the data synced by SyncTools is posted into Xero, the Profit & Loss report reflects this accounting-accurate classification.
As a result:
- **Discounts** appear clearly under a **Discount account**
- **Refunds** appear under a **Refund account**
- **Shopify's** combined **"refund including discount"** figure is now **split across two lines**
This creates a visible difference when users directly compare:
- **Shopify's** **Refunds** line versus
- **Xero's** **Refunds** line alone
The difference amount is usually equal to the refunded discount value.
## Example Explained Using the Report Comparison
In the illustrated example:
### In Shopify Finance Summary
- **Discounts** are shown as a **negative value**
- **Refunds** include both **refunded sales** and **refunded discounts**
- **Net sales** are calculated **accordingly**
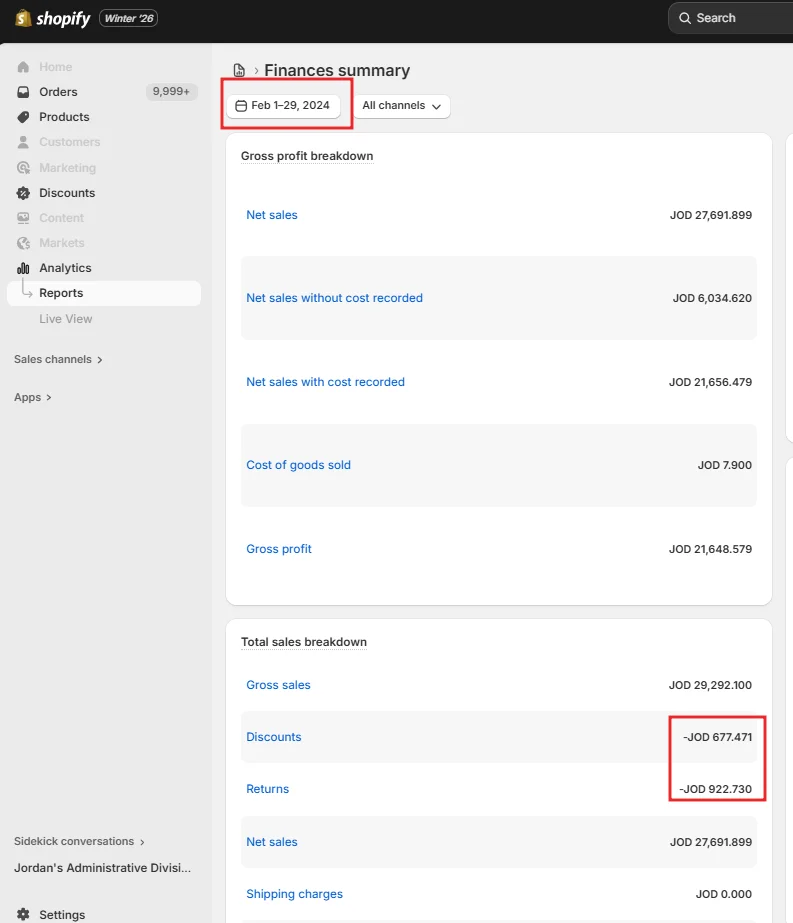
### In Xero Profit & Loss (via SyncTools)
- **Discounts** are shown **separately** under a **discount account**
- **Refunds** reflect only **refunded sales amounts**
- **Sales, discounts**, and refunds are each clearly classified
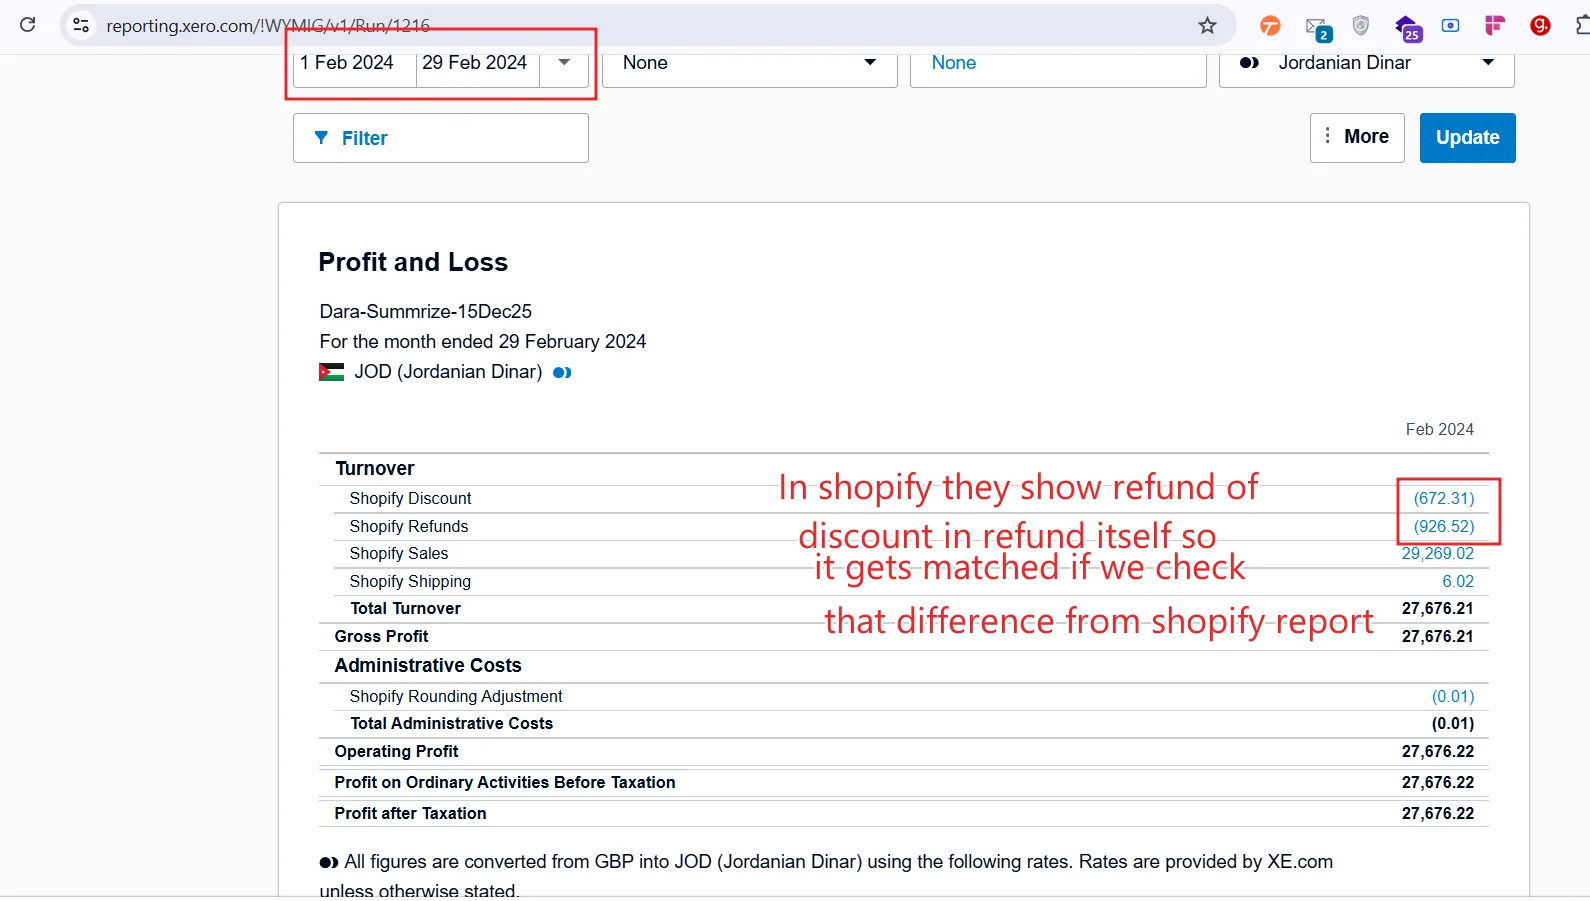
When comparing totals:
- The **refund line alone** does **not match**
- The **combined impact** of **refunds + discounts** **does match**
- **Net sales** and **overall turnover** reconcile **correctly**
This confirms that the sync is accurate and complete.
## Why SyncTools Uses This Classification
SyncTools is designed to:
- **Respect** the **account** and **tax mappings** you configure
- Produce **accounting entries** that make sense to **accountants** and **auditors**
- **Avoid hiding discounts** inside **refund values**
- **Preserve clarity** in **Profit & Loss reporting**
By keeping discounts and refunds separate:
- **Gross revenue**, **discounts given**, and **refunds issued** remain **visible**
- **Profitability analysis** is more **accurate**
- **Xero reports** remain **consistent** and **auditable**
This approach ensures long-term reporting accuracy, even if it differs from Shopify's presentation.
## How to Correctly Reconcile Shopify and Xero Reports
When reviewing reports after syncing with SyncTools:
1. **Do not compare refunds** in **isolation**
2. Always consider **refunds** and **discounts** **together**
3. Focus on **net sales** or **total turnover**, not **individual rows**
4. Ensure the **date range** matches **exactly** in **both systems**
Once discounts are included in the comparison, the apparent mismatch disappears.
---
# Integration Pages
The Refund Configuration settings allow you to control how eBay refunds are synchronized and recorded in QuickBooks.
Enable **Refund Sync** to automatically sync refund transactions from eBay into QuickBooks Online.
Choose how each refund should be created in QuickBooks by selecting one of these options:
- **Create Refund Receipt**
- **Create Credit Memo**
- **Void Original Invoice and Payment**
Pick the method that matches how your business manages refunds and accounting records.
You can further customize refund synchronization with these settings:
- **Refund Transaction Reference** — sets the reference value (such as the invoice number) used on refund transactions in QuickBooks.
- **Service Item for Non-product Refunds** — records manual adjustments, goodwill refunds, and other charges that are not tied to a specific product.
- **Refund date** — choose whether QuickBooks should use the refund date or the order date so financial reporting stays consistent.
## How to Sync eBay Return Fees to QuickBooks Online
If your business needs to account for marketplace return charges, enable **Sync Return Fees** to synchronize return-related fees along with the refund transaction.
Configuring these settings ensures refund transactions are accurately reflected in QuickBooks while staying consistent with your eBay records and accounting practices.
---
## Getting Started
URL: https://synctools.ai/help/linnworks-quickbooks-integration/how-do-i-get-started-with-synctools-setup-login
> NULL
## Getting Started with SyncTools for Linnworks & QuickBooks Integration
SyncTools is your all-in-one solution to seamlessly **connect Linnworks with QuickBooks** for automated accounting.
SyncTools simplifies your workflow and secures your financial data.
### ? Your Data is Protected
SyncTools values your privacy. We host our services on **Google Cloud**, following rigorous data security and compliance standards, ensuring **encrypted and secure storage** for all your business data.
## Step-by-Step Guide to Get Started
### 1. Visit the SyncTools Website
- Go to [**https://synctools.ai**](https://synctools.ai)
- Click on the **"Free Trial"** button on the homepage.

### 2. Select Your Integration Channel
Choose **Linnworks** as your starting channel. SyncTools also supports platforms like Shopify, WooCommerce, Magento, and others.

### 3. Choose How to Sign Up
You have two simple options:
#### Sign Up with Xero
Already using Xero? Click on **“Sign Up with Xero”**.

Don’t have a Xero account? You can easily create one during this step.

#### Manual Sign-Up
Prefer not to use Xero? Simply fill in your business and contact details on the **SyncTools registration form**.
Click **Register** to create your account.

### Log in to SyncTools
- After registration, click on **Login**. (Make sure, that you have verified the account from the inbox)
- You can log in using:
- Your registered email and password
- Your Xero or QuickBooks credentials

---
## Foreign Currency Conversion
URL: https://synctools.ai/help/shopify-quickbooks-integration/how-synctools-converts-foreign-currency-to-your-home-currency-for-accurate-reconciliation
> NULL
Before SyncTools can properly convert foreign currencies from your Shopify store to your home currency in QuickBooks, you need to enable and configure multicurrency features in QuickBooks Online. This guide walks you through the necessary steps to prepare your QuickBooks account for seamless integration with SyncTools.

IMPORTANT: Once multicurrency is enabled in QuickBooks, it cannot be turned off. Please read through this entire guide before proceeding.
## How to Enable Multicurrency in QuickBooks Online
### Step 1: Access Account and Settings
- Log in to your QuickBooks Online account
- Click on the gear icon (⚙️) in the top right corner to open the settings menu
- Select "Account and settings" from the YOUR COMPANY column

### Step 2: Navigate to Currency Settings
- In Account and settings, click on the "Advanced" tab on the left sidebar
- Scroll down to find the "Currency" section

### Step 3: Enable Multicurrency
- In the Currency section, you'll see your Home Currency already set (e.g., United States Dollar)
- Next to "Multicurrency," click the checkbox to enable this feature

- Click on the "Manage Currencies" link
- On the Currencies page, you'll see your home currency listed
- Click the "Add currency" button in the top right
- From the dropdown menu, select the currency you want to add (e.g., AUD - Australian Dollar)
- Click "Add" to confirm

## How SyncTools Converts Foreign Currency for Accurate Reconciliation
Let's say you sell a product for €100 EUR, and your home currency is USD:
- Shopify processes the payment and converts it to $110 USD
- SyncTools retrieves both the original amount (€100) and the converted amount ($110)
- SyncTools creates an entry in QuickBooks showing:
- Revenue of $110 USD
---
## Install Connector
URL: https://synctools.ai/help/linnworks-quickbooks-integration/how-to-install
> Learn how to integrate QuickBooks with Linnworks using SyncTools seamlessly. Follow our detailed instructions for installing the QuickBooks Connector app from the Linnworks app store and setting it up hassle-free. Get your orders synced effortlessly and efficiently.
All the emails (Confirmation + User information) will be sent to the email that **is registered in the Linnworks account.** If the Linnworks email is of another team member, you will need them to forward two emails to you.**Note:** Direct Sign-up from the website is not available. So the user must install it from the Linnworks app store.

- Please select the **Linnworks account from which** you want to sync the orders.
## Steps to install SyncTools app
Open and Log in to Linnworks
- Click on **Application > Application store**
- Search for QuickBooks connector

- Click on the Read More button of QuickBooks connector tool

- Make sure the developer name is **SyncTools.io** and click on install button

- Accept Third Party Integrations Disclaimer

- Click on the **Next** button
- Click on the **Install** button
- You will get a confirmation email, click on the **confirmation link**
- User Information (Username + Password) will be sent

## Log in to the SyncTools
- Use the credentials sent by SyncTools to Login
- This is the link for SyncTools system: [https://system.synctools.io/](https://system.synctools.io/)
- Or you can go to [ https://synctools.ai](https://synctools.ai) and click on the Login button
---
## Reconcile Payouts
URL: https://synctools.ai/help/shopify-quickbooks-integration/how-to-reconcile-shopify-payouts-with-quickbooks-online
> NULL
## Reconciling Shopify Payouts with Bank Transactions using SyncTools
As an eCommerce business owner, you've likely experienced that end-of-day moment when you need to match what's in your Shopify account with what's actually hit your bank account.
It's a bit like trying to match socks after doing laundry – you know they should pair up, but sometimes it's not as straightforward as it seems!
SyncTools transforms this potentially frustrating process into a smooth, automated journey.
Let's walk through how your Shopify payout data travels from your store to your QuickBooks account, making reconciliation a breeze rather than a burden.**"Before using SyncTools, I spent hours every week manually reconciling Shopify payouts.
Now it takes me less than 5 minutes to match everything perfectly."**– Sarah, Boutique Owner
## How SyncTools Creates Perfect Reconciliation
### Step 1: The Payout Arrives
Your Shopify store has been busy, and a payout has been processed. Shopify has deposited $13.00 into your bank account.
This represents your sales, minus fees, plus shipping, adjusted for discounts – all combined into one deposit.>
**Step 2 : One Click Reconciliation** When you log into QuickBooks and navigate to the "Bank transactions" section, you'll see your $13.00 deposit waiting to be categorized.
But here's where the SyncTools difference becomes clear.

Instead of having to manually allocate this deposit to various income and expense accounts, QuickBooks already shows "1 match found" – linking directly to the SyncTools journal entry!
With a single click on "Match," your reconciliation is complete.
The bank transaction is perfectly matched to your SyncTools journal entry, with all the detailed categorization already done for you.

TIP: This one-click reconciliation eliminates the most time-consuming part of eCommerce bookkeeping, giving you more time to focus on growing your business.
---
## Reconcile Payouts
URL: https://synctools.ai/help/shopify-xero-integration/how-to-reconcile-shopify-payouts-with-xero
> NULL
## Reconciling Shopify Payouts with Bank Transactions using SyncTools
As an eCommerce business owner, you've likely experienced that end-of-day moment when you need to match what's in your Shopify account with what's actually hit your bank account.
It's a bit like trying to match socks after doing laundry – you know they should pair up, but sometimes it's not as straightforward as it seems!
SyncTools transforms this potentially frustrating process into a smooth, automated journey.
Let's walk through how your Shopify payout data travels from your store to your Xero account, making reconciliation a breeze rather than a burden.
>**"Before using SyncTools, I spent hours every week manually reconciling Shopify payouts. Now it takes me less than 5 minutes to match everything perfectly."**– Sarah, Boutique Owner
## How SyncTools Creates Perfect Reconciliation
### Step 1: The Payout Arrives
Your Shopify store has been busy, and a payout has been processed. Shopify has deposited $185.29 into your bank account.
This represents your sales, minus fees, plus shipping, adjusted for discounts – all combined into one deposit.

### Step 2 : One Click Reconciliation
When you log into Xero and navigate to the "Bank transactions" section, you'll see your $185.29 deposit waiting to be categorized. But here's where the SyncTools difference becomes clear.

Instead of having to manually allocate this deposit to various income and expense accounts, Xero already shows "1 match found" – linking directly to the SyncTools invoice!
With a single click on **"Match,"** your reconciliation is complete.
The bank transaction is perfectly matched to your SyncTools invoice, with all the detailed categorization already done for you.**TIP:** This one-click reconciliation eliminates the most time-consuming part of eCommerce bookkeeping, giving you more time to focus on growing your business.
---
## Plan Selection & Configuration
URL: https://synctools.ai/help/linnworks-xero-integration/how-to-select-plan-and-configuration-manual-in-linnworks-to-xero
> NULL
Empower your **e-commerce financial management** by seamlessly connecting Linnworks to Xero through precise **plan selection** and**configuration.
## Linnworks to Xero Plan Selection and Setup Guide
This manual provides a step-by-step guide to assist you in choosing the right plan and configuring settings to establish a robust link between these two powerful platforms.
By following these instructions, you'll ensure a smooth and efficient flow of financial data, enabling you to focus on growing your business with confidence.
For a comprehensive overview of plan selection and configuration details, click [here](https://synctoolstorage.blob.core.windows.net/content/SyncTools-Configuration-Manual.pdf)**.
This document provides additional **insights** and **guidance**, allowing you to harness the full potential of the Linnworks-to-Xero integration.
---
## Setup Guide
URL: https://synctools.ai/help/shopify-quickbooks-integration/how-to-setup-shopify-quickbooks-integration
> NULL
## How to Create Your SyncTools Account
- **Start your Free Trial:**
Begin by visiting the Synctools website. On the homepage, locate the **“Free Trial”** button to start the process. Click on the button to initiate the signup process.
- **Choose Your Platform:**
A new window will pop up, asking you to select the e-commerce platform you want to integrate with Synctools. Choose **Shopify** from the available options (Shopify, Linnworks, WooCommerce).
- **Setting Up Your Account :******
After selecting Shopify, you will be redirected to the Synctools **Sign Up** page.
- Enter your email address to begin the sign-up process.
- If you already have an account, click on **“Sign in.”**-**Verify Your Email:**
Once you click **“Continue,”** a verification code will be sent to the email address you provided.
- Check your email inbox, copy the code, and enter it on the Synctools page to verify your account.
- Click **“Verify.”**
### Register Your Account

After verifying your email, complete your registration by providing the following details on the registration page:
- Name, Role (Admin or Accountant), Mobile Number, and Company Name.
- Select your Country, Time Zone, Industry, and Revenue from the dropdown menus.
- Create a strong Password to secure your account.
Review the details for accuracy and click **Sign up** to finish.
### Invite an Accountant or Bookkeeper

- **Decide Whether to Invite:** During registration, you’ll be asked if you have an accountant or bookkeeper. If you want to invite one, select **“Yes.”** If not, choose **“No”** to skip this step.
- If you choose **“Yes,”** you will be prompted to enter the accountant or bookkeeper's details.
- **Send the Invitation:** Enter their **Full Name** and **Email Address** in the respective fields.
- Click **“Invite.”**- Synctools will send an email invitation to the accountant or bookkeeper with instructions on accessing your Synctools account. Make sure you provide the correct email address to avoid any issues.
- **Review the Invitation Status:** After sending the invitation, the accountant or bookkeeper will receive an email, and you can monitor the invitation status on your Synctools dashboard.
- If at any point you decide you don’t need to invite an accountant, simply click **“Skip.”**
### Welcome Screen: Simplifying SyncTools

This screen provides a **quick overview** of how SyncTools works in **three simple steps**:
- Connect your **e-commerce platform**.
- Integrate your **accounting software**.
- Configure your settings for seamless synchronization.
A helpful **video tutorial** is also available to guide you through the setup process step-by-step. Use this screen as your starting point to understand and begin your SyncTools journey effortlessly! ?
## How to Connect Shopify and QuickBooks to SyncTools

- **Connect Your E-commerce Platform** Select the platform where your store is hosted. This ensures SyncTools can retrieve your orders, payouts, and other financial data for processing.
- **Choose Your Accounting Platform** Select the accounting software where you want to sync your financial data. This step ensures all transactions are accurately recorded and categorized in your books.
Click **“Let’s Connect”** after making your selections to start configuring the synchronization process. SyncTools will guide you through connecting and authorizing your accounts to complete the setup.
### Shopify and QuickBooks Connection Confirmation

This screen confirms that your **Shopify Store** and **QuickBooks Online Account** have been successfully connected. It also displays essential details about each platform for verification and review before proceeding with the synchronization process.
## Configure Shopify to QuickBooks Synchronization Settings

In the settings, you'll find "Configuration" option where you'll see two main choices for how your Shopify sales data gets sent to QuickBooks Online:
#### 1. Synchronization Options
You can choose how the data should be synced to QuickBooks Online based on your business needs:
- **Summarized Entries**(Recommended)
Data from Shopify is summarized (daily, weekly, or monthly) before syncing to QuickBooks Online.
Ideal for businesses managing high transaction volumes to reduce clutter in QuickBooks Online.
- **Individual Transaction Entries** Every single Shopify transaction is synced to QuickBooks Online.
Best for businesses needing detailed visibility into individual orders, taxes, and invoices.
#### 2. Frequency of Journal Entry Creation

Choose the interval for syncing Shopify data to QuickBooks Online:
- **Daily**: Creates one journal entry per day.**Scenario**: You run an online store that generates 10 orders per day in Shopify.**How it Works**:
- All 10 orders from a single day are **summarized** into one journal entry.
- The journal entry includes the total sales, taxes, shipping income, fees, etc… for that day.
- **Weekly**: Consolidates data into one entry per week.**Scenario**: You choose to sync data weekly to capture a broader view of transactions.**How it Works**:
- Orders from **July 1 to July 7, 2024** are grouped into one journal entry.
- Shopify payouts, taxes, expenses, etc…for the week are **summarized**.
- **Monthly**:**Summarizes** all transactions for the month into a single entry.**Scenario**: You prefer monthly summaries to match Shopify payouts with your bank reconciliation.**How it Works**:
- Orders from **July 1 to July 31, 2024** are grouped into one journal entry.
- Includes a complete **summary** of revenue, taxes, fees, and shipping income for the month.
#### 3. Select Start Date
Pick the date from which Shopify data should start syncing to QuickBooks Online.
- Example: If you choose **01/07/2024**, all orders from this date onward will be included in the sync process.
#### 4. Save Configuration
Once all preferences are set, click **Next** to confirm your choices. The system will begin syncing Shopify data according to the specified settings.

Note: Be sure to select the correct frequency and start date to ensure data accuracy and alignment with your QuickBooks Online setup.
## Configure Countries for Tax and Financial Reporting

Here SyncTools allows you to specify the **primary country** where your business operates. Selecting the right country helps SyncTools optimize settings for accurate tax and financial reporting tailored to your e-commerce and accounting needs. Also helps to group data by country.**How It Works** Select Your Country:
- Choose from the list of supported countries (e.g.,**United States**,**United Kingdom**,**Canada**, etc.).
- If your country is not listed, select **Other** and enter it manually.**For Businesses Operating in Multiple Countries**- If your business operates across multiple countries, select the **country associated with your accounting system** and the **financial reports you intend to generate**.
- Example:
If your Shopify store operates in the US and UK but your accounting is managed under US standards, select United **States**.
### Next Steps
Once you've selected your country, click **Next** to proceed with configuring tax and regional-specific synchronization rules. SyncTools will ensure your settings are perfectly tailored to your business location! ?
### Choose Additional Countries: Expanding Business Configuration

This configuration allows you to select additional countries where your business is registered. By doing so, SyncTools will activate advanced settings tailored to your financial reporting and tax compliance needs across multiple regions.
## Set Up Bank Accounts for Shopify Payouts

This helps you configure your bank accounts for handling Shopify payouts and any negative balances. Selecting the right accounts ensures smooth financial tracking and reconciliation in QuickBooks.
### Configuration Options
- **Choose Bank Account Where Shopify Deposits Payout**:
Select the account that receives Shopify payouts (e.g., revenue from orders processed).
- This account will be credited with the payout amounts synced from Shopify.
- **Choose Bank Account Where Shopify Negative Balance is Paid**:
Select the account that covers any negative balances (e.g., refunds exceeding payouts, Shopify fees).
- This account will be debited for negative balance settlements.
### Why This Is Important
- **Accurate Reconciliation**:
Ensures all deposits and expenses related to Shopify transactions are recorded in the correct accounts, making bank reconciliations easier.
- **Improved Financial Tracking**:
Separating positive payouts and negative balances helps maintain clarity in financial records.
- **Customized to Your Workflow**:
SyncTools allows you to use different accounts for payouts and negative balances, catering to businesses with complex bank setups.
Refresh the account list (using the **refresh icon**) to ensure all recently added accounts in QuickBooks are available for selection.
### Next Steps
Click **Save & Next** after selecting the appropriate accounts. SyncTools will apply these configurations, ensuring payouts and negative balances are accurately posted to QuickBooks.
## Map Shopify Transactions to QuickBooks Accounts

### 1. Auto Mapping ✨
Auto Mapping automates the entire process, offering a quick and efficient way to map your accounts and tax settings.
#### What follows next?
- **Default Accounts****:**- SyncTools automatically generates a comprehensive Chart of Accounts in QuickBooks.
- This includes default mapping for common transaction types like sales, refunds, and expenses.
- **Customizable:**- Once Auto Mapping is complete, you can customize the setup to meet your unique reporting requirements.
- Adjust mapped accounts or tax rules easily after the initial setup
### 2. Manual Mapping
Manual Mapping provides full control over the setup, allowing you to customize accounts and tax mappings to your exact specifications.
#### What follows next?
- **Manual Map Accounts****:**- Select specific accounts and tax rules for every transaction type.
### Mapping Accounts: Manual Mapping vs. Auto Map Feature
This section provides two options for mapping Shopify transactions to QuickBooks accounts:
- **Manual Mapping**
#### How It Works
- Manually map each Shopify transaction type (e.g., Sales, Refunds, Discounts) to the corresponding QuickBooks account.
- You select specific accounts for income, liabilities, and taxes, ensuring precise control over your financial records.
#### When to Use
- Ideal for advanced users or accountants who prefer full customization.
- Suitable for businesses with unique accounting structures or reporting requirements.
#### Steps:
- Choose the transaction type under **Shopify Transactions**(e.g., Sales, Refunds).
- Map it to an appropriate account in QuickBooks under **QuickBooks Accounts**.
- Save your selections to finalize the mapping.

Pro Tip: Use Manual Mapping if your Chart of Accounts in QuickBooks has custom account names or structures.
- **Auto Map Feature**

#### How It Works
- Automatically maps Shopify transactions to QuickBooks accounts in bulk.
- SyncTools generates default accounts (e.g., Shopify Sales, Shopify Refunds) and maps them instantly.
- Optional toggles allow customization, like adding prefixes (e.g., "SyncTools") or suffixes (e.g., "US") to account names.
#### When to Use
- Best for users who want to save time and start syncing quickly.
- Ideal for standard Shopify-to-QuickBooks setups.
#### Steps:
- Review the list of unmapped transactions under **Unmapped**.
- Use the **Create & Map** option to auto-generate and map accounts for all Shopify transaction types.
- Review the mapped accounts under the **Mapped** tab for accuracy.
- Customize further by editing account names or selecting existing accounts.
---
## Track Grouped Orders
URL: https://synctools.ai/help/linnworks-xero-integration/how-to-track-orders-in-linnworks-which-are-grouped-under-one-invoice-in-xero-by-synctools
> NULL
Efficient order tracking is crucial for a streamlined **e-commerce operation**.
## How to Track Linnworks Orders Grouped Under One Invoice in Xero
With SyncTools seamlessly connecting **Linnworks** and **Xero**, you can effortlessly track orders grouped under a single invoice in Xero.
This guide provides **step-by-step instructions** to ensure precise tracking, allowing you to maintain visibility and control over your transactions.
Follow these steps to leverage the capabilities of SyncTools for accurate order tracking across platforms.
For an **in-depth exploration of order tracking** within Linnworks and Xero using SyncTools, click [**here**](https://synctoolstorage.blob.core.windows.net/content/SyncTools-Tracking-of-grouped-orders.pdf).
This document provides additional **insights** and **guidance** to help you maximize the efficiency of your order tracking processes.
Experience the ease of order tracking across platforms with SyncTools, ensuring that orders grouped under one invoice in Xero are accurately reflected and monitored in your **Linnworks environment**.
---
## Inventory Item Creation
URL: https://synctools.ai/help/linnworks-xero-integration/inventory-item-creation
> SyncTools now supports automatic creation of inventory items in Xero, streamlining your stock management. Easily sync items from Linnworks with options for non-inventory or inventory creation, ensuring a more robust and efficient integration.
SyncTools now offers a brand-new feature: the ability to **create items as inventory** in Xero! Previously, only non-inventory item creation was available.
With this enhancement, SyncTools will automatically create **inventory items** in Xero when an item doesn’t already exist.
## Sales Configuration’s Modified Version

### Sync Items and Default Inventory Account Selection Option

## Feature Overview: Inventory Item Creation
### When does this feature activate?
By default, this feature will behave as before, creating items as **non-inventory** unless you specify otherwise.
To create items as inventory, you need to click the **"Create as Inventory"** button from the button group:
### Options Available
- **Description Only**-**Create as Non-Inventory**-**Create as Inventory** Once **"Create as Inventory"** is selected, any **new item**(not already in Xero) will be created as an **inventory item**.
## Quantity on Hand – How It's Managed
### API Limitation
Currently, Xero’s API does not provide a way to adjust the **Quantity on Hand** when creating inventory items.
As a result, SyncTools does not modify this field upon item creation.**Note:** You will need to manage this field manually in Xero.
### Automatic Adjustments
The **Quantity on Hand** in Xero updates automatically in the following cases:**Increase:** When you create an approved **Bill**(status: Awaiting Payment or Paid).
- **Decrease:** When you create an approved **Invoice**(status: Awaiting Payment or Paid).
## Scenario: Configuring an Item as Inventory
If you configure an item as inventory and attempt to create an **Invoice** in the **"Awaiting Payment"** status, you may encounter an error like this:**Error: "No item available to sell"****No item available to sell**
### What Does This Error Mean?
This error indicates that there is an inventory item in Xero for the invoice, but the **Quantity on Hand** is set to **zero**.
Xero will not allow you to sell an inventory item if the stock is zero.
### Solution
You can fix this in one of the following ways:
- **Manually adjust the quantity** of the item SKU (as shown in the error message) in Xero.
- **Create a Purchase Order (PO)** in Linnworks and deliver it.
Once delivered, the PO will sync to SyncTools, where you can configure it to create a **Bill in the "Awaiting Payment" status**.
- Once this Bill is created, the **Quantity on Hand** for the item will increase based on the PO amount.
Now, when you create an **Invoice** in Xero, the stock will be available, and the invoice can be uploaded successfully.
### For manually adjusting the quantity in Xero
>**Reference:**[Manually adjust inventory in Xero Inventory Plus](https://central.xero.com/s/article/Manually-adjust-inventory-in-Xero-Inventory-Plus)
## Important Considerations
### Pre-existing Items in Xero
If an item already exists in Xero as a **non-inventory item**, SyncTools will **not update** this item to an inventory item.**Note:** If you wish to change an item from non-inventory to inventory, you must make this change manually in Xero and adjust the **Quantity on Hand** accordingly.
## Conclusion
The new inventory item creation feature streamlines the process of **managing stock in Xero directly from Linnworks**.
However,**managing stock levels** remains a manual task until an **invoice or bill** is processed.
This feature saves time by auto-creating items, but oversight of inventory levels is essential to avoid errors.
With these improvements,**SyncTools** offers a more flexible and **robust integration** for users managing both **non-inventory** and **inventory items**.
---
## Purchase Order Tax Sync
URL: https://synctools.ai/help/linnworks-xero-integration/po-tax-exclusive-sync
> Simplify your purchase order management with Linnworks and Xero's PO Tax Exclusive Sync feature. Ensure consistent tax handling by converting all purchase orders to tax exclusive, reducing manual adjustments, and improving accounting accuracy.
When dealing with tax-inclusive or tax-exclusive pricing, it’s important to know how taxes are applied to the product or service you're purchasing or selling.
## Tax Inclusive
In tax-inclusive pricing, the total price already includes the tax. This means the buyer sees the final amount they need to pay, including tax.
### Example:
- **Unit Cost**: £100
- **Tax Rate**: 20%
The total price for this item will remain £100 because the tax is already included in this price.
- **Tax Portion**= £100 * (20/120) = £16.67
- **Net Price**= £100 - £16.67 = £83.33
So, the unit cost of the item without tax is £83.33, and the tax amount is £16.67.
## Tax Exclusive
In **tax exclusive pricing**, the **total price** does not include the tax.
The tax is calculated and added on top of the unit price at the time of purchase.
### Example
- **Unit Cost**: £100
- **Tax Rate**: 20%
The total price the buyer will pay is the unit cost plus tax.
- **Tax Portion**= £100 * 20% = £20
- **Total Price**= £100 + £20 = £120
So, the buyer will pay £120, with £100 as the unit cost and £20 as the tax.

## Feature Overview: PO Tax Exclusive Sync Purpose
This feature is designed to help businesses streamline how purchase orders (POs) are handled when syncing with Xero.
Whether your POs in Linnworks are set as **tax-inclusive** or **tax-exclusive**, this feature ensures that all POs are treated as **tax-exclusive** when synced to Xero.
### How It Works
When you enable the **PO Tax Exclusive** toggle button, the system will automatically sync all POs as tax exclusive to Xero, regardless of their original tax settings in Linnworks.
### Benefits
- Ensures **consistency** in **tax reporting** and **accounting**.
- Reduces **manual adjustments** when exporting POs to Xero.
- Simplifies **financial records** and improves accuracy.
## Feature Workflow
- **Create PO** in Linnworks (either as tax inclusive or tax exclusive).
- **Turn on** the **PO Tax Exclusive** toggle in SyncTools.
- Upon sync, all POs will be **converted to tax exclusive** in Xero.
In Xero, the tax will be **added separately** to the PO amount, ensuring a clear breakdown of the item cost and tax.
By using this feature, you'll enjoy a more standardized process, ensuring your purchase orders are handled consistently when syncing across systems.
## Testing Scenario: PO Tax Exclusive Feature
Let’s walk through a real-world example to understand the impact of this feature.
### Scenario
- **Inventory Item Created** You created an inventory item with a purchase cost of **£100**.
- **Purchase Order Created** You create a **Purchase Order**(PO29082444535) in Linnworks for **10 units** of this product, with a **20% tax rate**, and you choose the **tax inclusive** format.
This means the unit cost of **£100****includes the tax**. The **line total** will be:**£100 (unit cost) x 10 (quantity) = £1,000**-**Unit Cost Calculation (Tax Exclusive)** If we want to calculate the **tax exclusive** cost, we can use the following formula:
Tax Exclusive Cost = Total Amount / (1 + Tax Rate)
- £100 / (1 + (20 / 100))
- £100 / 1.20 =**£83.33**(approx)

PO29082444535 Delivered Purchase Order.
## Turning the Feature OFF
If the **PO Tax Exclusive** feature is **turned off**, the purchase order will appear as a **Tax Inclusive Purchase Order** in Xero.
- **Total Line Amount:**£1,000
- **Tax Portion**(already included): £166.67
- **Net Price:**£833.33

Tax Inclusive Purchase Order.
## Turning the Feature ON
Once the **PO Tax Exclusive** feature is **turned on**, the purchase order will appear as a **Tax Exclusive Purchase Order** in Xero. Here’s what happens:
- The **unit cost** of **£100**(which included tax) will now be considered **tax exclusive**, meaning the tax will be added on top of this amount.
### Tax Exclusive Total:
- **Line Total:**£833.33
- **Tax:**£166.67
- **Total Price:**£1,000 (with tax added separately)

---
## Request Customization
URL: https://synctools.ai/help/linnworks-zohobooks-integration/requesting-customization
> Optimize Linnworks ZohoBooks integration with SyncTools. Request customization for seamless synchronization and boosted efficiency today!
At SyncTools, we understand the importance of **personalized functionality**, especially when it comes to integrating your e-commerce platform with accounting software.
That's why we offer customization requests for the **Linnworks ZohoBooks integration**, exclusively for our esteemed **Gold** and **Platinum** plan subscribers.
## What Can Be Customized in Linnworks Zoho Books Integration?
Customization in integration can range from:
- Tweaking the **data flow** to match your specific **accounting practices**- Adding unique features that cater to your **business requirements**- Enhancing **reporting capabilities**- Modifying **synchronization frequency**- Developing bespoke functionality
Our team is committed to ensuring the **Linnworks ZohoBooks integration** works seamlessly for your business.
## Customization Timeline and Implementation
While we strive to meet every customization request, it's important to note:
- The **timeline for implementation** cannot be guaranteed.
- Projects vary in **complexity and scale**.
- Each requires careful **planning, development,** and **testing** to meet our high standards of quality and reliability.
## How to Request Linnworks Zoho Books Customization
To request a customization for your Linnworks ZohoBooks integration:
- Send an email to [sales@synctools.ai](mailto:sales@synctools.ai)
- Include:
A detailed description of the **desired customization**- How it aligns with your **business processes**- Any relevant information that helps us understand your needs
Our sales team will review your request and get in touch to discuss:
- Feasibility
- Estimated timeline
- Any additional costs involved
## Customization Support for Gold and Platinum Plans
At SyncTools, we're dedicated to empowering your **e-commerce business** with the accounting solutions you need to thrive.
By offering customization for **Linnworks ZohoBooks integration** to our **Gold and Platinum subscribers**, we're taking another step towards delivering the flexibility and efficiency that modern e-commerce businesses demand.
---
## Request Customization
URL: https://synctools.ai/help/linnworks-xero-integration/requesting-customization-for-linnworks-xero-integration
> Optimize Linnworks Xero integration with SyncTools. Request customization for seamless synchronization and boosted efficiency today!
At **SyncTools**, we understand the importance of personalized functionality, especially when it comes to integrating your **e-commerce platform** with **accounting software**.
That's why we offer customization requests for the **Linnworks Xero integration**, exclusively for our esteemed **Gold** and **Platinum** plan subscribers.
## What Can Be Customized in Linnworks Xero Integration?
Customization in integration can range from:
- Tweaking the data flow to match your specific accounting practices
- Adding unique features that cater to your business requirements
Whether it's **enhancing reporting capabilities, modifying synchronization frequency**, or **developing bespoke functionality**, our team is committed to ensuring that the Linnworks Xero integration works seamlessly for your business.
## Customization Timeline and Project Scope
However, it's important to note that while we strive to meet every customization request, the timeline for implementation cannot be guaranteed.
Customization projects vary in complexity and scale, requiring careful planning, development, and testing to ensure they meet our high standards of **quality** and **reliability**.
## How to Request Linnworks Xero Customization
To request a customization for your Linnworks Xero integration, simply send an email to [sales@synctools.ai](mailto:sales@synctools.io).
Please include a detailed description of the desired customization, how it aligns with your business processes, and any relevant information that can help us understand your needs.
Our sales team will review your request and get in touch with you to discuss the **feasibility, estimated timeline**, and any **additional costs** that may be involved.
## Customization Support for Gold and Platinum Plans
At SyncTools, we're dedicated to empowering your e-commerce business with the **accounting solutions** you need to thrive.
By offering **customization** for **Linnworks Xero integration** to our Gold and Platinum subscribers, we're taking another step towards delivering the flexibility and efficiency that modern e-commerce businesses demand.
---
## Returns, Refunds & Fees
URL: https://synctools.ai/help/shopify-quickbooks-integration/shopify-quickbooks-online-advanced-accounting-scenarios-return-refund-return-fees-tax
> NULL
## Advanced Shopify Accounting with SyncTools and QuickBooks
Running an online store on Shopify is exciting, but the accounting side can quickly become overwhelming. Imagine receiving dozens of orders daily, each with products, shipping fees, taxes, and occasional tips or refunds. Now imagine manually entering each of these into QuickBooks-it would be a bookkeeper's nightmare!
That's where SyncTools steps in. We've designed our platform to transform the complex web of Shopify transactions into clean, organized QuickBooks entries that make sense to both business owners and accountants.

TIP: Think of SyncTools as your virtual bookkeeper that works 24/7, never takes a vacation, and follows accounting best practices with perfect consistency.
## How Shopify Transactions Are Recorded in QuickBooks
Let's follow the journey of a typical transaction through your system when using SyncTools:
Meet Sarah, a customer who just discovered your Shopify store. She purchases a makeup kit for $25 and a t-shirt for $10, pays $20 for shipping, gets a $1 discount, and is charged $2.04 in sales tax. Her total comes to $56.04, which she pays through Apple Pay.
In Shopify, this order (#1006) looks straightforward. But behind the scenes, this single transaction needs to be broken down into multiple accounting components.
## How SyncTools Handles Shopify Refunds
A week later, Sarah decides the makeup kit and t-shirt aren't right for her and requests a refund. In Shopify, you process the full refund of $56.04. This is where many e-commerce businesses make accounting mistakes-a refund isn't just "reversing a sale"; it requires proper accounting treatment to maintain accurate records.

SyncTools handles this refund by creating the perfect countering entry:

This entry properly categorizes each component of Sarah's purchase, ensuring your financial reports will accurately reflect your business performance.

## How Shopify Sales Tax Is Managed in QuickBooks
For many online sellers, sales tax can be particularly confusing. You're collecting it from customers in various jurisdictions, but it's not your money-you're essentially acting as an intermediary between your customer and the tax authority.
Let's look at James from California who orders from your store. The 6% state tax on his purchase amounts to $2.04. This is what happens behind the scenes with SyncTools:

SyncTools creates an entry that puts this amount in a liability account, not revenue:

This amount now appears in your liability account, making it easy to see how much tax you've collected and need to remit.

If James gets a refund, SyncTools reduces the tax liability accordingly.
## How SyncTools Records Shopify Tips
For businesses that receive tips through Shopify, proper accounting is essential. Let's see how SyncTools handles this unique type of transaction.
### Understanding Tips as a Liability

Imagine a customer adds a $0.10 tip to their order. This money isn't your revenue-it belongs to your staff. Until you pay it out, it's a liability on your books.
SyncTools generates an entry that credits the "Tips Liability" account:


This approach ensures tips are never accidentally counted as business revenue and provides a clean audit trail for tip collection and distribution.
## How Return Fees Are Recorded in QuickBooks
Let's say a customer returns a $9 item but is charged a $1 return shipping fee and a $0.02 restocking fee.
SyncTools handles this complex transaction by:

The return fees are treated as new revenue, not as a reduction of the refund.

This approach gives you visibility into how much revenue you're generating specifically from return fees.**Still have questions?** Our support team is ready to help at [ support@synctools.ai](mailto:support@synctools.ai), or visit our[ Help Center](https://synctools.com/help) for additional guides.
---
## Summarized Journal Setup
URL: https://synctools.ai/help/shopify-quickbooks-integration/shopify-quickbooks-online-configuration-guide-for-summarized-journal
> NULL
## Shopify + Quickbooks Online Configuration Guide for Summarized Journal
Synctools acts as a bridge between your Shopify store and your QuickBooks Online accounting software. This guide walks you through the setup process so you can automatically sync your sales data and streamline your accounting.
### Login to SyncTools

Welcome to SyncTools! Here's how you can log in:**1️⃣** Enter the email you used during registration.
2️⃣ Provide the password you created. If you can’t remember it, click on **Forgot Password?** to reset it.******? Sign in with Intuit:** Skip entering credentials and use your Intuit account to log in instantly!

Note: Make sure you check the Remember Me option if you’re using your personal device to stay signed in.

Once you sign in, you’ll land on the **Dashboard**, your control center for SyncTools! Here’s what you can do:
- View your **sales orders** count and graphs showing **Monthly Orders** and **Total Sales of the Last Six Months**. These visuals help you track your business performance at a glance!
Start by clicking **Settings** to configure the integration with Shopify and QuickBooks Online seamlessly. This step is essential for syncing your data! ?
### Choosing How Your Sales Data Syncs

In the settings, you'll find "Configuration" option where you'll see two main choices for how your Shopify sales data gets sent to QuickBooks Online:
###
#### 1. Synchronization Options
You can choose how the data should be synced to QuickBooks Online based on your business needs:
- **Summarized Entries**(Recommended)
Data from Shopify is summarized (daily, weekly, or monthly) before syncing to QuickBooks Online.
Ideal for businesses managing high transaction volumes to reduce clutter in QuickBooks Online.
- **Individual Transaction Entries** Every single Shopify transaction is synced to QuickBooks Online.
Best for businesses needing detailed visibility into individual orders, taxes, and invoices.

#### 2. Frequency of Journal Entry Creation
Choose the interval for syncing Shopify data to QuickBooks Online:
- **Daily**: Creates one journal entry per day.**Scenario**: You run an online store that generates 10 orders per day in Shopify.******How it Works**:
All 10 orders from a single day are **summarized** into one journal entry.
- The journal entry includes the total sales, taxes, shipping income, fees, etc… for that day.
- **Weekly**: Consolidates data into one entry per week.**Scenario**: You choose to sync data weekly to capture a broader view of transactions **How it Works**:
Orders from **July 1 to July 7, 2024** are grouped into one journal entry.
- Shopify payouts, taxes, expenses, etc…for the week are **summarized**.
- **Monthly**:**Summarizes** all transactions for the month into a single entry.**Scenario**: You prefer monthly summaries to match Shopify payouts with your bank reconciliation.**How it Works**:
Orders from **July 1 to July 31, 2024** are grouped into one journal entry.
- Includes a complete **summary** of revenue, taxes, fees, and shipping income for the month.
#### 3. Select Start Date
Pick the date from which Shopify data should start syncing to QuickBooks Online.
- Example: If you choose **01/07/2024**, all orders from this date onward will be included in the sync process.
#### 4. Save Configuration
Once all preferences are set, click **Save** to confirm your choices. The system will begin syncing Shopify data according to the specified settings.
? Note: Be sure to select the correct frequency and start date to ensure data accuracy and alignment with your QuickBooks Online setup.
### Enabling Auto Sync

By checking the "Enable auto sync" box, Synctools automates the syncing process for your Shopify data with QuickBooks Online.**How It Works**:
- Once enabled, Synctools will continuously sync data every few hours without requiring manual intervention.
- This ensures your QuickBooks Online stays up to date with Shopify transactions, saving time and reducing the chance of human error.**Benefit**: You can focus on running your business while Synctools handles the data synchronization in the background.**Choose How You Get Updates******Pick how you'd like to stay informed about your data syncs:
- **? Daily Updates** Get a **daily email** showing all transactions synced from the previous day.
- Example:
“Synctools synced 100 orders yesterday without any issues.”
- **⚠️ Only When There's an Error** Synctools will notify you **only if something goes wrong** during the sync.
- Example:
“Sync error: Missing chart of accounts for Product B. Please check your settings."

Note: For a detailed guide on how the **Enable Auto Sync** feature works, check out our documentation here
### Enable Deferred revenue
By activating this option, you configure SyncTools to recognize revenue only when specific conditions are met, aligning with revenue recognition principles. This prevents premature income recognition and ensures compliance with accounting standards like GAAP or IFRS.

#### Revenue Recognition Rules **You have two options to decide when revenue is recognized:**-**Recognize revenue when all items in an order have been fulfilled/shipped:**-
Use this option if your revenue should be recognized only after every item in the order has been delivered.
Suitable for bulk or complete-order-based businesses.**Scenario:** A customer places an order for 3 items (e.g., a t-shirt, a mug, and a notebook).
- The t-shirt and the mug are shipped immediately, but the notebook is on backorder and shipped a week later.**Accounting Impact:**- Revenue recognition will not occur until all 3 items in the order have been shipped.
- Shopify records show the order as "partially fulfilled" until the last item is shipped.
- Once all items are fulfilled, SyncTools will sync the order as revenue earned in QuickBooks Online, debiting Deferred revenue and crediting Revenue.**Shopify-to-QuickBooks Online Process:**- Until the notebook is shipped, revenue remains in the Deferred Revenue account in QuickBooks Online.
- When the notebook is shipped, the entire order value is moved to Revenue in QuickBooks Online.
- **Recognize revenue when any item in an order has been fulfilled/shipped:**-
Select this if revenue can be recognized partially, as items are fulfilled.
- Ideal for businesses that ship items individually and recognize revenue incrementally.**Scenario:** A customer orders the same **3 items**(t-shirt, mug, notebook).
- The t-shirt and mug are shipped immediately, while the notebook is on backorder.**Accounting Impact:**- Revenue is recognized for the items that are shipped.
- For example:
T-shirt: Recognized immediately when shipped.
- Mug: Recognized immediately when shipped.
- Notebook: Deferred until it ships.
- The total revenue for the order is recorded incrementally over time.**Shopify-to-QuickBooks Online Process:**- T-shirt and mug amounts are synced to **Revenue** in QuickBooks Online upon fulfillment.
- The notebook amount stays in the **Deferred Revenue account** until shipped, at which point it is moved to **Revenue**.
- **Choose the Order Type**-******All the Shopify Orders:**-
SyncTools will manage revenue recognition for all orders, ensuring a comprehensive and automated process.
- Use this option if deferred revenue is applicable across your entire Shopify catalog.**Scenario:** You sell a combination of subscription products (e.g., monthly coffee subscriptions) and regular products (e.g., mugs, t-shirts).
- **Example Order 1**: A customer buys a subscription coffee plan (billed monthly) and a one-time purchase of a mug.
- **Example Order 2**: Another customer buys a single t-shirt.****-**Subscription Shopify Orders Only:**-
Revenue recognition will apply only to subscription-based orders.
- Perfect for businesses with recurring billing models, like subscription boxes or memberships.**Scenario:** You sell only subscription-based products, such as a monthly skincare kit or a magazine subscription.
- **Example Order**: A customer subscribes to a skincare kit, billed annually, but kits are delivered monthly.
- **Select Account for Deferred Revenue**-
Assign the appropriate Deferred Revenue account in your Chart of Accounts.
- This account temporarily holds the revenue until it’s ready to be recognized.
- **Why it’s important:**-
Deferred revenue accounts are liabilities until the service or product is delivered.
- Correctly allocating this ensures compliance with accounting rules and an accurate representation of financial metrics.

Note: For a detailed step-by-step explanation of the **Enable Deferred Revenue feature**, including examples and advanced configurations, refer to our comprehensive guide here.
#### Related Resources ?**For the information on the configuration of Automapping feature, check out the following guide:** Shopify + Quickbooks Online Transaction Categorization using Auto Mapping
---
## Deferred Revenue Setup
URL: https://synctools.ai/help/shopify-quickbooks-integration/shopify-quickbooks-online-deferred-revenue-setup
> NULL
### Managing Deferred Revenue in SyncTools: Step-by-Step Guide
The **Deferred Revenue** feature helps e-commerce businesses properly recognize revenue according to accounting standards. When you sell products or services that are paid for before delivery (such as pre-orders or subscriptions), accounting principles require you to defer revenue recognition until the goods or services are delivered.
With SyncTools, you can automatically manage this process, ensuring your QuickBooks accounting reflects proper revenue recognition practices while syncing with your Shopify store.**Who should use this feature:**- Businesses selling subscription-based products
- Companies offering pre-orders
- E-commerce stores with delayed fulfillment
- Accountants seeking to comply with proper revenue recognition standards
### ⚙️ Setting Up Deferred Revenue
### Step 1: Create a Deferred Revenue Account in QuickBooks
Before configuring SyncTools, you need to set up a Deferred Revenue account in QuickBooks:
- Log into your QuickBooks account. Navigate to the **Chart of accounts** section.
- Create the new account named “Deferred Revenue” having account type “Current Liabilities”.

### Step 2: Configure Deferred Revenue in SyncTools
- In SyncTools, Navigate to **Settings**→**Configuration.**- Under Synchronization options, locate the Enable deferred revenue option
- Check the box to activate the deferred revenue feature.

### Step 3: Configure Revenue Recognition Rules
After enabling the feature, you need to specify when and how revenue should be recognized:
Select your preferred revenue recognition method:
- **Recognize revenue when all items in an order have been fulfilled/shipped**: With this option selected, revenue will only be recognized when an order is completely fulfilled. If an order remains unfulfilled in Shopify, it will be recorded in the deferred revenue account in SyncTools. For partially fulfilled orders, the entire amount will remain in deferred revenue until all items are fulfilled.
- **Recognize revenue when any item in an order have been fulfilled/shipped**: This option will recognize revenue proportionally as individual items are fulfilled.
Choose which order types to apply deferred revenue handling to:
- **All the Shopify orders**: When this option is selected, all orders from your Shopify store will be subject to deferred revenue treatment based on their fulfillment status.
- **Subscription Shopify orders only**: If you select this option, only subscription-based products will be processed through the deferred revenue account. All other non-subscription products will bypass the deferred revenue process and be recorded directly as normal sales in your sales chart of account.
Select the QuickBooks account for deferred revenue:
- From the dropdown menu, select the Deferred Revenue account you created in QuickBooks.

## ? How Deferred Revenue Works
###**The Revenue Recognition Process****Order Placed**: When a customer places an order in Shopify and makes payment, the funds are received but the revenue is not yet recognized.**Deferred Stage**: SyncTools creates a journal entry in QuickBooks that:
- Debits your clearing account (showing funds received), Credits your Deferred Revenue account (indicating revenue not yet earned)**Fulfillment**: When you fulfill the order in Shopify (marking items as shipped/fulfilled), SyncTools recognizes this event.**Revenue Recognition**: Upon fulfillment, SyncTools automatically creates another journal entry that:
- Debits the Deferred Revenue account (reducing the liability), Credits your Revenue/Sales account (recognizing the earned revenue)
This process ensures that your accounting accurately reflects when revenue is actually earned according to accounting standards.
## ? Order Fulfillment Process
###**Step 1: View Unfulfilled Orders in Shopify**- In your Shopify admin, locate orders marked as **Unfulfilled**- These orders will have payments received but be awaiting fulfillment
- Until fulfillment, these will be recorded in your Deferred Revenue account

SyncTools automatically detects the fulfillment status change
- The system generates the appropriate journal entry in QuickBooks
- The transaction moves the amount to Deferred Revenue

### Step 2: Fulfill the Order
- Process the order by preparing and shipping the products
- Complete the fulfillment process according to your standard procedures
- Confirm the order status has changed from **Unfulfilled** to **Fulfilled**

### Step 3: Automatic Revenue Recognition
Once the order is fulfilled in Shopify:
- SyncTools automatically detects the fulfillment status change
- The system generates the appropriate journal entry in QuickBooks
- The transaction moves the amount from Deferred Revenue to your sales accounts

---
## Group by Channel, Gateway & Country
URL: https://synctools.ai/help/shopify-quickbooks-integration/shopify-quickbooks-online-grouping-by-sales-channel-gateway-country
> NULL
**Overview**- The "Group by Country" feature in SyncTools allows you to configure your chart of accounts and tax details based on the primary country in which your business operates.
- This feature enables SyncTools to optimize settings and financial reporting tailored to the specific requirements of your e-commerce and accounting needs for that country.**Step 1 : Login in and Accessing Settings**
Once you log into Synctools, you'll land on your Dashboard, which gives you a quick snapshot of your synced orders. To start setting things up, look at the profile name on the left and click on "Settings."**Step 2 : Choosing your Country of Operations:****Selecting the Primary Country of Operation**- Under the "Business Operates" section, click on the country flag icon to select the primary country in which your business operates.
The available options include the United States, United Kingdom, Canada, Singapore, Australia, and when you click on **“Others”** you will get options of several other countries.

- Kindly choose additional countries in which your business is registered.
- This selection will enable SyncTools to activate advanced settings tailored to your business and financial reporting requirements. Select additional countries in which your business is registered."**Group by Country Feature:**
This screen allows you to configure how Shopify sales are grouped by SyncTools for journal creation in QuickBooks. The **Default Grouping** option categorizes transactions based on the country, ensuring accurate and region-specific financial reporting.
## Key Features of Shopify Sales Grouping
####**Default Grouping: Group by Country**- SyncTools automatically groups Shopify transactions by the **registered operating country**.
- In this example, transactions are grouped under **United States**.
## Why Group Shopify Sales by Country?
- Automatically segregate sales, refunds, and taxes by country for compliance with regional tax laws (e.g., VAT, GST, Sales Tax).
### Benefits for the User
- Transactions are automatically categorized by region, reducing manual effort.
- No need for manual categorization of transactions by country-SyncTools does it for you.
## How to Configure Sales Grouping in SyncTools
- Check the box for **Group by Country** to enable regional grouping.
- The selected country (e.g., United States) will determine the grouping criteria.
- Click **Save** to apply the configuration.
- SyncTools will now post Shopify transactions to QuickBooks accounts based on the selected country.
## How Grouped Shopify Sales Appear in QuickBooks
**Example**:
A Shopify store operates in **two countries**: the **United States** and the **United Kingdom**. The store syncs its transactions to QuickBooks using SyncTools, with **Group by Country** enabled.
#### In Shopify
- US Sales: $5,000 (with $300 in Sales Tax).
- UK Sales: £4,000 (with £800 in VAT).
#### In QuickBooks
- US transactions are grouped under accounts like SyncTools Shopify Sales - US and SyncTools Shopify Sales Tax - US.
- UK transactions are grouped under accounts like SyncTools Shopify Sales - UK and SyncTools Shopify VAT - UK.**Group by Gateway :****Purpose:**- Allows grouping of transactions based on different payment gateways available in Shopify
- Helps track sales by payment method **How to Configure:**- Navigate to Settings > Grouping
- Under "Default Grouping," locate "Group by Gateway"
- Check the checkbox to enable gateway-based grouping
- Select the payment gateways you want to track:
Manual
- Gift card
- Apple pay
- G-pay
- Shopify payments
- Bogus (if applicable)**How It Works:**- Each payment gateway is automatically grouped into its respective category, such as Shopify Payments or Gift Cards.
- SyncTools maps transactions to separate accounts in QuickBooks for better tracking and reconciliation.**Why Use Grouping by Gateway?**- Payment gateways often charge specific fees (e.g., processing fees). By grouping transactions, these fees are easier to track and reconcile.
- Provides visibility into how much revenue is generated through each gateway.
## How Grouped Shopify Sales Appear in QuickBooks

When Group by Gateway is enabled in SyncTools, Shopify transactions are mapped and reflected in QuickBooks under clearing accounts for each payment gateway. This setup provides clear visibility into the funds received and pending for each payment method.**Example :**
#### Shopify Transactions:
- Total Sales via Shopify Payments: $3,000
- Total Sales via Apple Pay: $1,000
#### In QuickBooks:
- Shopify Payments Sales: $3,000 (deposited into Shopify clearing account).
- Apple Pay Sales **:**$1,000 (deposited into Apple Pay account).
- Processing fees for each gateway are recorded separately, simplifying reconciliation.**Advanced Grouping: Group by Channel for Sales Transactions**
With this option enabled, SyncTools groups sales, refunds, and other transactions based on the specific sales channels used in Shopify. Examples of sales channels include: Facebook & Instagram, Online Store, etc.
**Purpose**- Enables organization of sales data by specific sales channels in Shopify
- Provides better visibility into performance across different sales channels.**How to Configure:**- Navigate to Settings > Grouping
- Scroll to the "Advanced Grouping" section
- Locate "Group by Channel"
- Check the checkbox to enable channel-based grouping **How it Works:**- Choose the sales channels relevant to your business.
- Transactions from selected channels are mapped to separate accounts in QuickBooks.
- Sales from unselected channels won’t sync and must be managed manually.**Why Use Group by Channel?**- Provides a clear breakdown of revenue by channel.
- Each channel is mapped to its own account in QuickBooks, ensuring clean and structured financial reporting.**How it Reflects in QuickBooks**
The **Profit and Loss Report** in QuickBooks shows a detailed breakdown of sales, discounts, and refunds grouped by **sales channels**, providing valuable insights into financial performance.**Example**:
#### Shopify Transactions:
- Online Store: $10,000
- Facebook & Instagram: $4,000
- Point of Sale (POS): $3,000
#### In QuickBooks:
- SyncTools Online Store Sales: $10,000
- SyncTools Facebook & Instagram Sales: $4,000
- SyncTools POS Sales: $3,000
---
## Tax Threshold Limits
URL: https://synctools.ai/help/shopify-quickbooks-integration/shopify-quickbooks-online-setup-tax-threshold-limits
> NULL
### Managing Sales Threshold Limits in SyncTools
_
As your eCommerce business grows, staying on top of your tax obligations becomes increasingly important. SyncTools' Threshold Limit feature is designed to help Shopify merchants like you avoid unexpected tax liabilities by proactively alerting you when your sales reach important thresholds in different countries or states.
The first time I crossed a sales threshold in California without realizing it, I ended up with unexpected tax obligations. SyncTools' notifications would have saved me hours of accounting headaches!_
## _Why Threshold Limits Matter_
_When selling across multiple states or countries, each jurisdiction has different rules about when you need to register for tax collection. SyncTools helps you:_
- _Stay ahead of tax compliance requirements_
- _Avoid unexpected tax penalties_
- _Make informed decisions about where to expand your business_
- _Manage your accounting workflow more efficiently_
__
## _Setting Up Country-Based Threshold Limits_
- Navigate to the **Settings** section in your SyncTools dashboard
- Click on **Countries** under the Configuration section
_
TIP: Set up your operating countries before configuring threshold limits to ensure all relevant jurisdictions are covered.

Note: The countries you select here will determine which threshold limits you can configure in the next steps.
Once you've selected your operating countries, you can set specific threshold limits:_
- _Click the _ **_Set threshold limit_** _ button located in the upper right corner_
- _Select the country tab you wish to configure (e.g., United Kingdom or United States)_
__


PRO TIP: Research current tax nexus thresholds for each state before setting your limits. Economic nexus thresholds change periodically, so check with your accountant for the most current information.

## How Notifications Work
Once your threshold limits are configured, SyncTools will monitor your Shopify sales data as it's synchronized with QuickBooks. When your sales in a particular region approach or exceed your set threshold:
- You'll receive an email notification alerting you to the threshold crossing
- The notification will specify which country/state threshold has been reached
- You can then consult with your tax professional about any required filings

IMPORTANT: Threshold notifications are informational only. Always consult with a tax professional about your specific tax obligations.
---
## Auto Mapping & Categorization
URL: https://synctools.ai/help/shopify-quickbooks-integration/shopify-quickbooks-online-transaction-categorization-using-auto-mapping
> NULL
## Setting Up Your Mapping Rules
### Understanding Account Mapping
When connecting your Shopify store to QuickBooks, it's essential to tell SyncTools how to categorize your transactions. The Mapping section is where you'll create these connections, ensuring your sales, refunds, and other transactions appear in the right accounts in QuickBooks.
### Creating Basic Transaction Mappings
To get started:
- Navigate to Settings → Mapping
- You'll see Shopify transaction types on the left and QuickBooks accounts on the right
- For each transaction type, select the appropriate QuickBooks account from the dropdown menu
For example:
- Map your Shopify sales to a "SyncTools Shopify Sales" account in QuickBooks
- Map refunds to a "SyncTools Shopify Refunds" account
- Continue mapping shipping, discounts, and other transaction types as needed for your business

### Quick Setup with Bulk Create & Map **If you're just getting started, SyncTools can set up your accounts automatically:**- Click the "Bulk create & map" button (highlighted in the interface)
- SyncTools will suggest appropriate accounts and create them in QuickBooks
- Review the suggested mappings to ensure they meet your needs
**Want to use your existing accounts instead? Simply click "Map to existing accounts" to select accounts you've already created in QuickBooks.**


TIP: Use the "Auto map" button to quickly match transaction types to similar existing accounts, saving you time and reducing duplicate accounts.
Once you've reviewed your mappings and are satisfied with the connections, click Save. Your mappings will be listed under "Mapped Accounts," and future journal entries will follow these rules.
Now the journal entries will be based on the mapping done.

Important Note: We recommend consulting with your accounting professional about your mapping structure to ensure it aligns with your financial reporting needs.
For additional assistance, our support team is available at support@synctools.ai
---
## Returns, Refunds & Fees
URL: https://synctools.ai/help/shopify-xero-integration/shopify-xero-advanced-accounting-scenarios
> NULL
## Advanced Accounting with SyncTools: Managing Shopify Transactions in Xero
Running an online store on Shopify is exciting, but the accounting side can quickly become overwhelming. Imagine receiving dozens of orders daily, each with products, shipping fees, taxes, and occasional tips or refunds.
Now imagine manually entering each of these into Xero-it would be a bookkeeper's nightmare!
That's where SyncTools steps in. We've designed our platform to transform the complex web of Shopify transactions into clean, organized Xero entries that make sense to both business owners and accountants.
? TIP: Think of SyncTools as your virtual bookkeeper that works 24/7, never takes a vacation, and follows accounting best practices with perfect consistency.
## The Journey of a Transaction: From Checkout to Financial Statements
Let's follow the journey of a typical transaction through your system when using SyncTools:
Meet Sarah, a customer who just discovered your Shopify store. She purchases a makeup kit for $25 and a t-shirt for $10, pays $20 for shipping, gets a $1 discount, and is charged $2.04 in sales tax. Her total comes to $56.04, which she pays through Apple Pay.
In Shopify, this order (#1006) looks straightforward. But behind the scenes, this single transaction needs to be broken down into multiple accounting components.
### When Refunds Happen
A week later, Sarah decides the makeup kit and t-shirt aren't right for her and requests a refund.
In Shopify, you process the full refund of $56.04. This is where many e-commerce businesses make accounting mistakes-a refund isn't just "reversing a sale"; it requires proper accounting treatment to maintain accurate records.

SyncTools handles this refund by creating the perfect countering entry:

This entry properly categorizes each component of Sarah's purchase, ensuring your financial reports will accurately reflect your business performance.

### How Sales Tax is managed
For many online sellers, sales tax can be particularly confusing. You're collecting it from customers in various jurisdictions, but it's not your money-you're essentially acting as an intermediary between your customer and the tax authority.
Let's look at James from California who orders from your store. The 6% state tax on his purchase amounts to $2.04. This is what happens behind the scenes with SyncTools:

SyncTools creates an entry that puts this amount in a tax liability account, not revenue:

This amount now appears in your liability account, making it easy to see how much tax you've collected and need to remit.
If James gets a refund, SyncTools reduces the tax liability accordingly.
## Tracking Tips
For businesses that receive tips through Shopify, proper accounting is essential. Let's see how SyncTools handles this unique type of transaction.
### Understanding Tips as a Liability

Imagine a customer adds a $0.10 tip to their order. This money isn't your revenue-it belongs to your staff. Until you pay it out, it's a liability on your books.
SyncTools generates an entry that credits the "Tips Liability" account:


This approach ensures tips are never accidentally counted as business revenue and provides a clean audit trail for tip collection and distribution.
## Return Fees: Turning Returns into Revenue Opportunities
Let's say a customer returns a $9 item but is charged a $1 return shipping fee and a $0.02 restocking fee.
SyncTools handles this complex transaction by:

The return fees are treated as new revenue, not as a reduction of the refund.

This approach gives you visibility into how much revenue you're generating specifically from return fees.**Still have questions?** Our support team is ready to help at support@synctools.ai , or visit our Help Center for additional guides.
---
## Foreign Currency Conversion
URL: https://synctools.ai/help/shopify-xero-integration/how-synctools-converts-foreign-currency-to-your-home-currency-for-accurate-reconciliation
> NULL
Before SyncTools can properly convert foreign currencies from your Shopify store to your home currency in Xero, you need to enable and configure multicurrency features in Xero.
This guide walks you through the necessary steps to prepare your Xero account for seamless integration with SyncTools.
Please Note: The conversion to your home currency happens in your accounting software.
## Step 1: Access Settings
- Log in to your Xero account
In the top right corner, click on company name

Click on your company name and then choose 'Settings'

## Step 2: Navigate to Currencies in Settings
On the settings screen, click on 'Currencies' in the General section

Then click on 'Add Currency'

### Example: How Currency Conversion Works
Let's say you sell a product for €100 EUR, and your home currency is USD:
- Shopify processes the payment and converts it to $110 USD
- SyncTools retrieves both the original amount (€100) and the converted amount ($110)
- SyncTools creates an entry in QuickBooks showing:
Revenue of $110 USD
---
## Group by Channel, Gateway & Country
URL: https://synctools.ai/help/shopify-xero-integration/shopify-xero-grouping-by-sales-channel-gateway-country
> NULL
## Overview
The **"Group by Country"** feature in SyncTools allows you to configure your chart of accounts and tax details based on the primary country in which your business operates.
This feature enables SyncTools to optimize settings and financial reporting tailored to the specific requirements of your e-commerce and accounting needs for that country.
## Step 1: Login in and Accessing Settings

Once you log into SyncTools, you'll land on your Dashboard, which gives you a quick snapshot of your synced orders. To start setting things up, look at the profile name on the left and click on **"Settings."**
## Step 2: Choosing your Country of Operations

### Selecting the Primary Country of Operation
Under the **"Business Operates"** section, click on the country flag icon to select the primary country in which your business operates.
The available options include the United States, United Kingdom, Canada, Singapore, Australia, and when you click on **“Others”** you will get options of several other countries.

Kindly choose additional countries in which your business is registered.
This selection will enable SyncTools to activate advanced settings tailored to your business and financial reporting requirements. Select additional countries in which your business is registered."
### Group by Country Feature

This screen allows you to configure how Shopify sales are grouped by SyncTools for Invoice creation in Xero.
The **Default Grouping** option categorizes transactions based on the country, ensuring accurate and region-specific financial reporting.
## Key Features
### Default Grouping: Group by Country
- SyncTools automatically groups Shopify transactions by the **registered operating country.**- In this example, transactions are grouped under **United States.**### Why Use Grouping by Country?
- Automatically segregate sales, refunds, and taxes by country for compliance with regional tax laws (e.g., VAT, GST, Sales Tax).
### Benefits for the User
- Transactions are automatically categorized by region, reducing manual effort.
- No need for manual categorization of transactions by country-SyncTools does it for you.
### How to Configure
- Check the box for **Group by Country** to enable regional grouping.
- The selected country (e.g., United States) will determine the grouping criteria.
- Click **Save** to apply the configuration.
- SyncTools will now post Shopify transactions to Xero accounts based on the selected country.
### How It Reflects in Xero
**Example:** A Shopify store operates in two countries: the United States and the United Kingdom.
The store syncs its transactions to Xero using SyncTools, with Group by Country enabled.
#### In Shopify
- US Sales: $5,000 (with $300 in Sales Tax).
- UK Sales: £4,000 (with £800 in VAT).
#### In Xero
US transactions are grouped under accounts like **SyncTools Shopify Sales - US** and **SyncTools Shopify Sales Tax - US**.
UK transactions are grouped under accounts like **SyncTools Shopify Sales - UK** and **SyncTools Shopify VAT - UK**.
## Group by Gateway

### Purpose
- Allows grouping of transactions based on different payment gateways available in Shopify
- Helps track sales by payment method
### How to Configure
- Navigate to **Settings > Grouping**- Under **"Default Grouping,"** locate **"Group by Gateway"**- Check the checkbox to enable gateway-based grouping
- Select the payment gateways you want to track:
Manual
- Gift card
- Apple pay
- G-pay
- Shopify payments
- Bogus (if applicable)
### How It Works
- Each payment gateway is automatically grouped into its respective category, such as Shopify Payments or Gift Cards.
- SyncTools maps transactions to separate accounts in Xero for better tracking and reconciliation.
### Why Use Grouping by Gateway?
- Payment gateways often charge specific fees (e.g., processing fees). By grouping transactions, these fees are easier to track and reconcile.
- Provides visibility into how much revenue is generated through each gateway.
### How It Reflects in Xero

When Group by Gateway is enabled in SyncTools, Shopify transactions are mapped and reflected in Xero under clearing accounts for each payment gateway.
This setup provides clear visibility into the funds received and pending for each payment method.**Example**### Shopify Transactions:
- Total Sales via Shopify Payments: $3,000
- Total Sales via Apple Pay: $1,000
### In Xero:
- Shopify Payments Sales: $3,000 (deposited into Shopify clearing account).
- Apple Pay Sales: $1,000 (deposited into Apple Pay account).
- Processing fees for each gateway are recorded separately, simplifying reconciliation
## Advanced Grouping: Group by Channel for Sales Transactions
With this option enabled, SyncTools groups sales, refunds, and other transactions based on the specific sales channels used in Shopify. Examples of sales channels include: Facebook & Instagram, Online Store, etc.

### Purpose
- Enables organization of sales data by specific sales channels in Shopify
- Provides better visibility into performance across different sales channels
### How to Configure
- Navigate to **Settings > Grouping**- Scroll to the **"Advanced Grouping"** section
- Locate **"Group by Channel"**- Check the checkbox to enable channel-based grouping

### How it Works
- Choose the sales channels relevant to your business.
- Transactions from selected channels are mapped to separate accounts in Xero.
- Sales from unselected channels won’t sync and must be managed manually.
### Why Use Group by Channel?
- Provides a clear breakdown of revenue by channel.
- Each channel is mapped to its own account in Xero, ensuring clean and structured financial reporting.
### How it Reflects in Xero

The Profit and Loss Report in Xero shows a detailed breakdown of sales, discounts, and refunds grouped by sales channels, providing valuable insights into financial performance.**Example:**#### Shopify Transactions:
- Online Store: $10,000
- Facebook & Instagram: $4,000
- Point of Sale (POS): $3,000
---
## COGS Setup
URL: https://synctools.ai/help/shopify-xero-integration/shopify-xero-online-cogs-setup
> NULL
## Understanding Cost of Goods Sold (COGS)
**Cost of Goods Sold (COGS)** refers to the direct costs associated with manufacturing and the cost of the goods sold by a company. This includes the cost of materials and labor directly used to create the product. It's a crucial metric for businesses as it directly impacts profitability.
COGS is calculated using the following formula:**COGS for the period = Beginning Inventory - Ending Inventory + Any additional inventory purchased and sold within the period** By tracking COGS, businesses can:
- Determine the true profitability of their products
- Make informed pricing decisions
- Identify areas for cost reduction
- Accurately know the gross profit
### COGS Impact on Xero Financial Statements
SyncTools syncs COGS data into summarized entries in invoices in Xero. Here's how it impacts key financial statements:
### 2.1 Summarized COGS Entry as in the Invoice

For each sync period (daily or monthly), SyncTools creates a summarized invoice in Xero for the COGS associated with that period. This invoice:
- Reduces inventory and records the cost as an expense.
- Allows businesses to track overall COGS for a given period, instead of breaking down each transaction individually.

### 2.2 Profit and Loss Statement (Income Statement)

The COGS appears on the Profit and Loss statement, below the Sales or Revenue line. This helps businesses calculate their gross profit and gross profit margin, which are key indicators of profitability.
### 2.3 Balance Sheet

COGS affects the Balance Sheet in the following ways:
- **Inventory Account:** The inventory balance is reduced as goods are sold and synced to Xero.
- **Equity:** The Net Income (from the Profit and Loss statement) is adjusted by the COGS expense, which directly impacts the company’s equity.
## Enabling COGS Functionality
The COGS feature in SyncTools allows you to automatically track the costs of items sold during each payout period and post them as Invoice directly into your Xero. To enable this feature:

- In the SyncTools dashboard, click on the **Settings** menu located in the left sidebar.
- Click on **COGS** under the Shopify → Xero section.
- Click on the **Enable Cost of Goods Sold** button to activate the feature.

Once COGS is enabled, you’ll need to configure the settings to sync summarized COGS data to Xero:

### Choose Default Accounts for COGS Journal Entries:
- **Cost of Goods Sold Account:** Select the expense account in Xero where the cost of goods sold (COGS) will be recorded.
- **Inventory Account:** Select the asset account in Xero where your inventory balance will be tracked.
### Select the Frequency of COGS Synchronization
- **Daily:** When using Daily Sync (Automatic), the data for each transaction is captured daily, and the COGS associated with each sale is updated in Xero immediately. This ensures that your records are current without any manual intervention..
- **Monthly:** If the Monthly Sync (Manual) option is selected, a summary is created at the end of each month, consolidating the COGS for that period. This approach is ideal for businesses that prefer periodic updates rather than daily syncs.**Tip:** Select Daily for more frequent updates and real-time tracking of your financial performance.
## Daily Sync of COGS

When Daily Sync is selected, the cost of goods sold is updated on a daily basis as part of the Sales Sync. This means that the total COGS for the day is recorded and posted to Xero in the same journal entry, alongside the daily sales transactions.
This ensures that your Xero account is updated immediately after every sale, reflecting the cost of goods sold, inventory updates, and the corresponding sales revenue for that day.
## Financial Summary

The Financial Summary in SyncTools provides a detailed view of all COGS transactions for the day. This summary includes the total cost of goods sold, taking into account any products that were sold on that specific day.
However, if a product’s cost is missing from Shopify, it won’t be included in the daily COGS summary or journal entry. This ensures accuracy and prevents incomplete financial reporting.
In the example above, the Cost of Goods Sold for June 13, 2025 is listed as £1052.28. This figure is derived from all products sold that day, but if a product does not have a cost associated with it in Shopify, it will be excluded from this report.
### Managing Missing Product Costs

If a product’s cost is missing, you can manually add the set cost for that product directly in SyncTools.
Once the cost is updated, the new cost will be reflected in the financial summary and journal entry for the same day.
This ensures that the cost of goods sold is accurately calculated, even for products that initially lacked cost data.
After updating the cost, the set cost will be automatically reflected in both the Financial Summary and the journal entry.**Important Note:** If you add or modify product costs, the financial summary of the cost of goods sold might not match the daily journal entry, since the updated costs may only appear in SyncTools after manual adjustments.
## Monthly Sync of COGS

If you prefer to review your COGS on a monthly basis, you can opt for monthly sync. This method is manual and will update the COGS values at the end of each month, summarizing all sales and costs for the month.
The total cost of goods sold is calculated for the entire month based on the sales transactions for that period.
If any sales are made but the cost is missing, the missing costs can be manually added in the **Set Cost** field.

For products without a cost in Shopify, you can set the cost in the **Set Cost** field and click Update to reflect this in the month-end summary.**Note:** Similar to the daily sync, if a product's cost is missing, you can manually add it.
---
## Tax Threshold Limits
URL: https://synctools.ai/help/shopify-xero-integration/shopify-xero-setup-tax-threshold-limits
> NULL
## Managing Sales Threshold Limits in SyncTools

As your eCommerce business grows, staying on top of your tax obligations becomes increasingly important.
SyncTools' Threshold Limit feature is designed to help Shopify merchants like you avoid unexpected tax liabilities by proactively alerting you when your sales reach important thresholds in different countries or states.
The first time I crossed a sales threshold in California without realizing it, I ended up with unexpected tax obligations.
SyncTools' notifications would have saved me hours of accounting headaches!
## Why Threshold Limits Matter
When selling across multiple states or countries, each jurisdiction has different rules about when you need to register for tax collection. SyncTools helps you:
- Stay ahead of tax compliance requirements
- Avoid unexpected tax penalties
- Make informed decisions about where to expand your business
- Manage your accounting workflow more efficiently
## Setting Up Country-Based Threshold Limits
- Navigate to the **Settings** section in your SyncTools dashboard
- Click on **Countries** under the Configuration section
?**TIP:** Set up your operating countries before configuring threshold limits to ensure all relevant jurisdictions are covered.
?**NOTE:** The countries you select here will determine which threshold limits you can configure in the next steps.
Once you've selected your operating countries, you can set specific threshold limits:
- Click the **Set threshold limit** button located in the upper right corner
- Select the country tab you wish to configure (e.g., United Kingdom or United States)


?**PRO TIP:** Research current tax nexus thresholds for each state before setting your limits. Economic nexus thresholds change periodically, so check with your accountant for the most current information.

## How Notifications Work
Once your threshold limits are configured, SyncTools will monitor your Shopify sales data as it's synchronized with Xero. When your sales in a particular region approach or exceed your set threshold:
- You'll receive an email notification alerting you to the threshold crossing
- The notification will specify which country/state threshold has been reached
- You can then consult with your tax professional about any required filings
⚠️**IMPORTANT:** Threshold notifications are informational only. Always consult with a tax professional about your specific tax obligations.
---
## Auto Mapping & Categorization
URL: https://synctools.ai/help/shopify-xero-integration/shopify-xero-transaction-categorization-using-auto-mapping
> NULL
## Setting Up Your Mapping Rules
### Understanding Account Mapping
When connecting your Shopify store to Xero, it's essential to tell SyncTools how to categorize your transactions. The Mapping section is where you'll create these connections, ensuring your sales, refunds, and other transactions appear in the right accounts in Xero.
## Creating Basic Transaction Mappings
### To get started:
- Navigate to **Settings → Mapping**- You’ll see Shopify transaction types on the left and Xero accounts on the right
- For each transaction type, select the appropriate Xero account from the dropdown menu
### For example:
- Map your Shopify sales to a **"SyncTools Shopify Sales"** account in Xero
- Map refunds to a **"SyncTools Shopify Refunds"** account
- Continue mapping shipping, discounts, and other transaction types as needed for your business

## Quick Setup with Bulk Create & Map
If you're just getting started, SyncTools can set up your accounts automatically:
- Click the **"Bulk create & map"** button (highlighted in the interface)
- SyncTools will suggest appropriate accounts and create them in Xero
- Review the suggested mappings to ensure they meet your needs

Want to use your existing accounts instead? Simply click **"Map to existing accounts"** to select accounts you've already created in Xero.


?**Tip:** Use the **"Auto map"** button to quickly match transaction types to similar existing accounts, saving you time and reducing duplicate accounts.
Once you've reviewed your mappings and are satisfied with the connections, click **Save**. Your mappings will be listed under **"Mapped Accounts,"** and future invoices will follow these rules.

Now the invoices will be based on the mapping done.
⚠️**Important Note:** We recommend consulting with your accounting professional about your mapping structure to ensure it aligns with your financial reporting needs.
For additional assistance, our support team is available at [support@synctools.ai](mailto:support@synctools.ai)
---
## User Guide
URL: https://synctools.ai/help/linnworks-zohobooks-integration/simple-user-guide
> NULL
## SyncTools
Direct Sign up from the website is not available. So the user must install it from the Linnworks app store.
All the emails (Confirmation + User information) will be sent to the **email which is registered in the Linnworks account.** If the Linnworks email is of another team member, you will need them to forward two emails to you.
Please select the **Linnworks account from which** you want to sync the orders.

## Steps to install SyncTools app - (You can refer to this [ Video](https://www.youtube.com/watch?v=MSZPtVEswzI&t=58s&ab_channel=SyncTools))
Open and Log in to Linnworks
- Click on Application > Application store

- Search for ZohoBooks connector

- Click on the Read More button of ZohoBooks connector tool

- Make sure the developer name is **SyncTools.ai** and click on install button

- Accept Third Party Integrations Disclaimer

- Click on the **Next** button
- Click on the **Install** button
- You will get a confirmation email, click on the **confirmation link**
- User Information (Username + Password) will be sent

## Log in to the SyncTools
- Use the credentials sent by SyncTools to Login
- This is the link for SyncTools system: [https://system.synctools.io/](https://system.synctools.io/)
- Or you can go to [ https://synctools.ai](https://synctools.ai) and click on Login button
## Configuration and Setting Up the SyncTools Account
If any support is needed, you can send an email to [support@SyncTools.io](mailto:support@SyncTools.io) or
you can call us on [ +1 323 6723738](tel:+1 323 6723738) and [ +44 7380328797.](tel:+44 7380328797)
## Steps: Configure linnworks to ZohoBooks integration
- Select the plan as per order volume
- Set up the profile so that SyncTools team can reach to you faster
- Click on **Settings > Connections**- Click on the ZohoBooks icon and connect your ZohoBooks account by selecting the domain you are having for ZohoBooks.
- Make sure the button on the rightest side is at OFF. (It is for automatic sync)
- First You should test a few orders manually so that we can prevent back and forth.
- Click on the Configuration button
### Module 1 - Tax & Account configuration

(Tax and account configuration for ZohoBooks organization.)
- **Zoho Books Organization:** Here, you can choose the Zoho Books organization to which you want to sync Linnworks data. Depending on the selected Zoho Books organization, we will retrieve your organization's data and populate the dropdown menus for chart of accounts and tax rates that need to be configured.
- **Sales Account:** Choose the default sales account to be used for creating items in Zoho Books when a matching item by SKU is not found in Zoho Books.
- **Purchase Account:** Choose the default purchase account to be used for creating items in Zoho Books when a matching item by SKU is not found in Zoho Books.
- **Asset Account:** Choose the default asset account to be used for creating items in Zoho Books when a matching item by SKU is not found in Zoho Books.
- **Discount Account for purchase order:** Choose the default discount account to be used for creating purchase orders in Zoho Books. When discount is applied on linnworks Purchase order then we will be syncing this account in ZohoBooks.
- **Currency for contact:** Choose the default currency which will be used in creating contact when no currency is found from Linnworks.
- **Taxable Tax:** Choose the default taxable tax which will be used in creating invoice in ZohoBooks when Linnworks order item is found taxable.
- **Non Taxable Tax:** Choose the default non taxable tax which will be used in creating invoice in ZohoBooks when Linnworks order item is found not taxable.
- **Shipping cost tax:** Choose the default shipping(postage) tax which will be used in creating invoice in ZohoBooks when Linnworks order contains the shipping amount we will be creating shipping service line time with this selected tax.
### Module 2 - Sales configuration

(Sales configuration for ZohoBooks organization)
#### Enable sync of ZohoBooks sales order For Linnworks sales order:

#### Retrieve ZohoBook Sales orders following status.
This configuration is used to download only selected ZohoBooks sales orders and display them in the sync log page of SyncTools.
There are three different statuses which we can download in SyncTools.
- **Draft:** If only this option is checked then SyncTools will retrieve only Draft status orders of the ZohoBooks.
- **UnPaid:** If only this option is checked then SyncTools will retrieve only UnPaid status orders of the ZohoBooks.
- **Paid:** If only this option is checked then SyncTools will retrieve only Paid status orders of the ZohoBooks.
If all three statuses are checked, then SyncTools will download any sales order that has any of these three statuses.
#### How would you like to record the sales order in linnworks?
This configuration is used to choose the two different options for uploading the ZohoBooks sales order in Linnworks with selected status.
There are two options for selecting the status for upload in Linnwork.
- **Dropdown option:** Here you can choose that you need to sync ZohoBooks sales order as linnworks **Open** sales order **or** linnworks **Processed** sales order
- **Radio option:** Here, you can choose whether the Linnworks order is created as **paid** or **unpaid.**#### Where would you like to record the sales order in linnworks?
This configuration is used for choose the **warehouse location** for the creating linnworks sales order.
#### Enable sync of Linnworks sales order For ZohoBooks Invoice:

(Enable sync of Linnworks sales order For ZohoBooks Invoice configuration screen.)
#### Retrieve Linnwork Sales orders with following status
This configuration is used for choose the two different options for downloading the Linnworks sales order in SyncTools with selected status.
There are two options for selecting the status for downloading Linnwork orders.
- **Droupdown option:** Here you can choose that you need to download Linnworks sales order as in **Open** status **or** in **Processed** status
- **Radio option:** Here, you can choose whether the Linnworks order is downloaded as **paid** or **unpaid.**#### How would you like to record the invoice in ZohoBooks?
This configuration is used to select the status of the ZohoBooks invoice that will be created in ZohoBooks from Linnworks.
There are three options for selecting the status for upload in ZohoBooks Invoice.
- **Draft:** linnworks sales orders will be created in ZohoBooks Invoice as Draft.
- **Sent:** linnworks sales orders will be created in ZohoBooks Invoice as Sent. And if the email is present in contact then email will be sended to the customer.
- **Paid:** linnworks sales orders will be created in ZohoBooks Invoice as Paid. And the payment for that particular order has been created in ZohoBooks.
#### How do I set my invoice due date ‘Payment Terms’?
Here this configuration represents the **Invoice Due Date.** You can configure the **payment terms** in ZohoBooks Invoice based on this configuration.
#### How do I set my invoice Number?
Here this configuration is provided for **ZohoBooks Invoice number should be?** There are two options you can configure:Either it will be **Linnworks sales order number** or it will be an auto **generated** invoice number of the ZohoBooks.
#### How do I set my invoice Amounts?
There are two types of how you can **display your invoice amounts** in ZohoBooks one is **amounts****are included with tax** and second is amounts on the invoice can be displayed as tax exclusive **amounts.** So, you can configure this by checking your choice of selection of the radio buttons.**Payment Configuration For Zoho Books Invoice :**
(Enabled sync of payment in Zoho Books invoice.)
#### Enabled sync of payment in Zoho Books invoice.
Here you can configure the linnworks payment methods with ZohoBooks bank accounts. You can see all the linnworks payment methods with a dropdown option of zoho books bank
account. So, you can configure the right bank account of ZohoBooks based on the payment method.
### Module 3 - Purchase configuration

#### Would you like to sync the purchase order?
This configuration will sync the linnworks purchase order to ZohoBooks purchase order.
By enabling (checking this configuration) you will find some configuration which will help you to configure the right purchase order to be synced in ZohoBooks.

(Showing enabled would you like to sync purchase order? configuration.)
#### Sync Purchase Orders from linnworks based on following status.
- **Partial**: Enabling this configuration will sync the partial purchase orders from linnworks.
- **Delivered**: Enabling this configuration will sync the delivered purchase orders from linnworks.
#### Select mapping field for ‘Reference’ field in ‘ZohoBooks’ purchase order.
- **PO#**: Selecting this option the linnworks purchase order number will be mapped to the reference# field of ZohoBooks
- **Supplier Ref:** Selecting this option the linnworks supplier ref number will be mapped to the ZohoBooks reference# field of ZohoBooks.
#### Select ZohoBooks purchase order status.
- **Draft:** Selecting this option purchase order will be synced in “Draft” status of ZohoBooks.
- **Issued**: Selecting this option purchase order will be synced in “Issued” status of ZohoBooks.
#### Set shipping address same as billing address in ZohoBooks vendor.
This configuration is used for **mapping the shipping address same as the billing address** while creating a vendor in ZohoBooks
#### Do you want to apply advance tax settings on purchase order?
This configuration is provided to **make sure you are aware about the advance tax** configuration.
At **advance tax configuration you need to set some rules** like country and
region wise tax mapping, linnworks tax rate wise tax mapping, source subsource wise tax mapping, etc.
#### Would you like to override the item account in purchase order?
This configuration is provided for using the same COGS account that has been present in your existing items.
SyncTools provides an option to select a default COGS account, but this default may not be applicable for all purchase orders.
Depending on the line items being mapped in Zoho Books, each purchase order item might have a different COGS account associated with it.
So, SyncTools will not map default COGS accounts and it will directly **override default COGS** with the **product selected COGS account.**#### Would you like to add a customer note in ZohoBooks purchase order?
This option will be provided to **add some default customer note** for purchase orders that have been synced through SyncTools.
### Module 4 - Synchronization configuration

(Showing start from date in Synchronization configuration.)
- Pick a date from which you would like to start sync (Start From)
SyncTools will download all the orders from the Linnworks by the selected date in start from.
- Save **Note :***Configuration settings will be saved only if the Save button of Module 4 is clicked before closing the pop up.
#### Testing of few orders
- Make sure the button on the rightest side is at OFF. (It is for automatic sync)
- First You should test a few orders manually so that we can prevent back and forth.
- Go to Sync Log.
- Click on the Download button
- Select Sales so that sales order can be downloaded
- Once orders are downloaded, click on the Show button under the Sync History column.
- Click on Retry Upload.
- Order will be Uploaded and you will get the link of created ZohoBooks invoice under #ToRecord Column, click on that.
- Review the Invoice and compare with Linnworks order.
- If everything looks fine, Please go to settings > Connections and click ON the automatic sync button.
- Automatic sync will start in a few minutes.
- If any problem or doubt occurs, please contact the SyncTools support team.
#### Sync Report Email
- Everyday you will receive a sync report email which will include
Total orders downloaded
- Total orders uploaded
- Total orders not uploaded (If any) - with error description
- If you want to receive such email on any other email address than the registered email address Please go to settings > Email notification and add the email address.
## Data flow diagram
| Linnworks Sales order | | ZohoBooks Invoice |
| --- | --- | --- |
| Order no. | | Invoice no. |
| Reference no. | | Invoice reference no. in Zaho |
| Shipping/ Billing address | | Contact info |
| Customer information | | Contact info |
| Line items | | Line items |
| Unit price | | Unit price |
| Tax rate | | Tax rate |
| Shipping total | | Lineitem - shipping as service |
| Total amount | | [Subtotal + Total Vat] = total amount |
| Order payment status paid | | Invoice payment status paid |
| Order payment status unpaid | | Invoice payment status - [Draft / Sent / Paid ] |
| SKU codes of products | | SKU codes of Line Item (* If needed) |
#### Leave a review
Once you have used system for a month or two, please leave a review for us in Linnworks,
- Linnworks > Apps > Application store > Search ZohoBooks Connector > Click on the manage button of our ZohoBooks connector > Scroll down and you'll see the review section
## FAQs
Do you sync inventory?
SyncTools helps with Sales orders and Purchase orders. We do not specifically sync inventory as and when it changes.
How do you manage Resends/ Refund?
Yes, SyncTools handles refunds from Linnworks, automatically synchronizes them and creates a Credit Note in ZohoBooks.
How Long Does It Take To Get Setup & To Start Syncing?
The Full Process Normally Takes 15-30 Minutes In Order To Get Your Account Syncing.
Do You charge for onboarding?
On-boarding is totally free for SyncTools.ai
Do You Store My Credit Card Information?
Absolutely Not! Your credit card information is stored on our service providers (Authorize.Net) server which is tested hourly for possible breaches. Also your information is ALWAYS in compliance with PCI.
Is There A Contract With SyncTools?
No. You can cancel and restart your plan as many times as you wish by simply logging into your system portal and canceling or subscribing to a plan.
Once My Account Is Setup; How Long Does It Take For My Data To Transfer? (i.e. Sales Orders, Purchase Orders)
We normally suggest giving the system 1 hour to sync 10,000 items. However, in most cases, it will be complete within 15 minutes. This time may also be affected during our peak times on the server.
---
## Summarized Sync Configuration
URL: https://synctools.ai/help/shopify-xero-integration/synctools-shopify-to-xero-integration-guide-configuring-summarized-sync
> NULL
This guide will walk you through the configuration process for syncing summarized entries from your Shopify store to Xero using SyncTools. By the end of this guide, you'll be able to easily set up summarized sync for your store's financial data, ensuring automated accounting and easy reconciliation.
## Step 1: Sign In to Your SyncTools Account
_
- Visit the **SyncTools login page** and enter your registered email and password to sign in.
- If you're a new user, you can sign up for an account by clicking on **Sign up today**.
## Step 2: Navigate to the SyncTools Dashboard

- Once logged in, you'll be directed to your SyncTools Dashboard where you can view your Shopify store data and Xero account details.
- You’ll see key metrics such as monthly orders and sales totals.
## Step 3: Go To Settings

- In the bottom left corner, click on your profile (e.g., John S) to open the user menu.
- From the dropdown, select **Settings**.
## Step 4: Choose Synchronization Options

### Select Summarized Entries
- In the Configuration section, you will be prompted to choose between Summarized Entries and Individual Transaction Entries.
- Select Summarized Entries for the streamlined syncing of Shopify data on a daily, weekly, or monthly basis.**What is Summarized Sync?** This option allows you to group your Shopify store payouts into a single summary entry for each day, week, or month, reducing the volume of individual transaction entries._
### Choose Invoice Creation Frequency
- Under the Choose frequency of invoice creation section, select how often you want to create summarized invoices. Lets say, choose daily if you want your summarised entries to sync on a daily basis.
### Pick the start date for sync
- Choose the date from which you want to start importing Shopify records. This will define when SyncTools begins syncing your transactions to Xero.
### Choose Invoice Status how you want it in Xero
Select the Invoice Status that suits your accounting workflow:
- Draft: Draft invoices will be created in Xero.
- Submitted for Approval: The invoice will be submitted for approval in Xero.
- Approved: Automatically approve the invoice in Xero.
### Select whether you want Tax inclusive or Exclusive invoices
- Determine whether the invoices should be Tax Inclusive or Exclusive.
## Step 5: Select Your Operating and Registered Countries
_
- Choose the operating country and any additional registered countries.
## Step 6: Set Up Grouping Preferences

- **Default Grouping:** Group by country or gateway.
- **Advanced Grouping:** Group by sales channel, product category, etc.**Tip:** Use Advanced Grouping for more granular financial reporting.**Note:** For a detailed guide on the Grouping Feature, check out our documentation.
## Step 7: Map Your Shopify Data to Xero Accounts

- Map your Shopify transactions (sales, refunds, shipping income, etc.) to the corresponding Xero accounts.
- Use the **Bulk Create & Map** button to map multiple transactions at once.

## Step 8: Review and Confirm Mappings

- Review and confirm your mappings to ensure correctness.
- Double-check for any unmapped transactions to avoid errors.
- Repeat this for each enabled country.
## Step 9: Enable and Configure Cost of Goods Sold (COGS)

- **Enable COGS Sync:** Click the button to activate and post itemized costs.
- **Choose Default Accounts:** Select the COGS and Inventory accounts.
- **Set Synchronization Frequency:** Choose between Daily (automatic) or Monthly (manual) updates.
### Enable COGS Sync
To automatically track the cost of products sold at each payout period, enable COGS Sync. This feature will post itemized costs as invoice transactions into your accounting system.
- This ensures accurate tracking of inventory and profitability for each sale.
Click the Enable Cost of Goods Sold button to activate the COGS sync.
### Choose Default Accounts for COGS
Don't forget to select the notification settings, such as Notify via email for inventory products without costs or Restrict invoice posting until the cost is updated._
## Step 10: Review the Shopify Payouts and Sync in Xero

Select the Cost of Goods Sold account and the Inventory account that SyncTools will use to track and sync product costs to Xero.
- Track the monthly breakdown of Shopify payouts.
- Ensure all transactions are posted correctly to Xero.
- If needed, select and post transactions to Xero manually.
## Related Resources ?
- **Cost of Goods Sold Setup Guide**
---
## Setup Guide
URL: https://synctools.ai/help/shopify-xero-integration/synctools-shopify-to-xero-integration-setup-guide
> NULL
## Welcome to the **SyncTools** integration setup guide.
In this article, you will learn how to easily connect your **Shopify store** to **Xero** using **SyncTools**. This guide will walk you through each step to get your accounting automation up and running quickly.
## Step 1: Start your **Free Trial**
- Begin by visiting the **Synctools website**.
- On the homepage, locate the “**Free Trial**” button to start the process.
- Click on the button to initiate the signup process.**Tip:** Starting your trial gives you full access to the integration features without any obligation.
## Step 2: Choose Your **Platform**
- After signing up, you’ll be prompted to choose your **eCommerce platform**.
- Select **Shopify** from the list of available platforms.
This will enable **SyncTools** to connect directly with your **Shopify store**.**Tip:** Make sure you have **admin access** to your Shopify store before proceeding with the integration.
## Step 3: Enter your **Email Address**
- After selecting Shopify, you will be redirected to the **Synctools Sign Up** page.
- Enter your **email address** to begin the sign-up process.
- After entering your email, click **Continue**.
- If you already have an account, click on “**Sign in**.”
## Step 4:**Verify** the email address

- **SyncTools** will send a **verification code** to the email you provided.
- Enter the code on the SyncTools website to verify your email address and proceed with the setup.**Tip:** Check your **spam folder** if you don't see the email in your inbox.
## Step 5: Select Your **Role**
- **SyncTools** will ask you to select your role.
- Choose **E-commerce Merchant** if you own a Shopify store
- Choose **Accountant/Bookkeeper** if you’re handling multiple clients or businesses.
This helps **SyncTools** tailor the integration process for your needs.**Note:** If you're an accountant or bookkeeper, you can manage **multiple businesses** under one SyncTools account.
## Step 6: Complete Your **Registration**
- Provide your personal details, including your **name** and a **password** for your account.
- Once completed, click **Sign Up** to finalize your registration.
## Step 7: Invite an **Admin**(Optional)

- If you’re working with a team or another business owner, you can **invite** them to manage the integration by entering their email address.
- If you’re the sole user, you can **skip** this step.
## Step 8: Welcome to **SyncTools**!
**You’re Almost There!** Now that your account is set up, you’ll be guided through the next steps:
- Connect your **Shopify store**- Link your **Xero account**- Configure **SyncTools** for seamless transaction syncing
Click on **Let’s Get Started** to move on.
## Step 9: Connect **Shopify** and **Xero** to SyncTools

- On the integration page, select **Shopify** as your eCommerce platform and **Xero** as your accounting software.
- Click **Let’s Connect** to finalize the integration.
- **SyncTools** will automatically sync your Shopify sales data to Xero based on the configuration, simplifying your accounting.

- In the **Connect to Shopify** section Enter your Shopify store URL (e.g., _https://yourstore.myshopify.com_).
- Click **Connect** once you've entered the correct URL to establish the connection between Shopify and SyncTools.

- You will be redirected to **Shopify’s app page** to install SyncTools.
- Click **Install** to grant SyncTools the necessary permissions to access your Shopify store data.

- After connecting to Shopify, you’ll be prompted to **connect to Xero**.
- Click **Connect to Xero** and log in to your Xero account if prompted.
- You will need to **select the Xero organization** to sync with.

- Once you select the organization, grant **SyncTools** access to your Xero account by clicking **Allow Access**.
- This allows SyncTools to **sync your financial data** from Shopify directly into Xero.

- After completing the Xero connection, SyncTools will show a **confirmation page** that both Shopify and Xero are now connected.
- Click **Next** to move forward and begin with configuration.**Note:** You can connect **multiple Shopify stores** or **Xero companies** if needed.
## Related Resources ?
For the information on the , check out the following guide:
- **SyncTools Shopify to Xero Integration Guide: Configuring Summarized Sync**
---
## Complete User Guide
URL: https://synctools.ai/help/shopify-quickbooks-integration/user-guide
> Streamline Your Business: Discover How to Seamlessly Integrate Shopify with QuickBooks with This Comprehensive User Guide- SyncTools
## Create an Account for Shopify QuickBooks Integration:
- Go to the SyncTools site: [https://app.synctools.io/sign-in](https://app.synctools.io/sign-in)
- Click on "Sign up today!" if you're a new user or click on “Sign-in” after filling up the details if you’re an existing user.
## “Sign up today!” flow :
You'll be prompted to enter your email address. Type in your email address.
- After entering your email address, click on the **"Continue"** button.

- Upon completing the registration using your email, you'll be prompted to input a six-digit code sent to the email address you provided.

- After entering the code, click on **“Verify”**.
- You will be redirected to the **“Register your Account”** page where you will be able to enter all details and set up your password for your account. Remember to use a strong and unique password for your account to ensure its security.

- Enable the “By creating an account, you agree to the Terms of Service and Privacy Policy” checkbox and click on **Sign up** button.
## Invite an Accountant/Book-keeper to SyncTools
To invite an accountant or bookkeeper to your SyncTools account:
- You'll be prompted to enter the email address of the accountant or bookkeeper you wish to invite.
- After entering their email address, click on **"Invite".**- Once the invitation is sent, the accountant or bookkeeper will receive an email with instructions on how to access your SyncTools account. Make sure you have their correct email address to ensure they receive the invitation.
- Or **Skip** this step if it is not required.


## How do I Connect Shopify Store?
- Navigate to Integrations. This is typically found in the settings section of your SyncTools account.
- Once you're in the Integrations section, find and select Shopify & QuickBooks from the list of available E-commerce and accounting platforms.

Enter **Shopify Store Name** in the requested field and click on **“Connect”.**
You'll likely be prompted to authorize SyncTools to access your Shopify store data. Kindly follow the on-screen instructions to grant access.
- After clicking the Connect, a new window will pop up, typically displaying the Shopify login page.

- Enter your Shopify login credentials (username and password) into the fields provided in the new window and **install** the application\
- After authorizing access and providing any necessary information, complete the connection process. SyncTools should now be connected to your Shopify store.

## How do I Connect QuickBooks?
To connect your QuickBooks Online with SyncTools, please follow the similar steps as done while connecting your Shopify and it should be connected successfully with SyncTools.
After clicking the "Connect to QuickBooks" button, a new window will indeed open, prompting you to log into your QuickBooks Online account. Here's what you should do next:
- Navigate to the Integrations section in SyncTools and select QuickBooks App if not selected earlier. Once, QuickBooks is selected. connect to QuickBooks and click on the "Connect to QuickBooks" button.

Note: Kindly, ensure you have the Admin role and provide the necessary credentials for connection.

- After clicking the button, a new window will pop up, typically displaying the QuickBooks login page.
- Enter your QuickBooks Online login credentials (username and password) into the fields provided in this new window.
- Once logged in, QuickBooks will ask you to authorize SyncTools to access your QuickBooks Online account. Select the preferred QuickBooks Company and Review the permissions requested and click on the "Allow" button to grant SyncTools access.
- After authorizing access, the new window will likely close automatically, and you'll be redirected back to SyncTools..
- You will receive a confirmation message within SyncTools indicating that the connection to QuickBooks was successful.
Once Shopify & QuickBooks is connected successfully with SyncTools, you’re good to go ahead with the configuration & setting up your system and to do so, click on “**Next**”.

## Synchronization Options
### What are the synchronization options and which one is considered more advantageous?
- SyncTools offers two synchronization options: Summarized Entries and Individual Transaction Entries. Users can configure their preferred synchronization method based on their business needs.

- SyncTools strongly recommends using Summarized Entries for synchronization.

Note: Selection of synchronization option solely depends on you specific to your business needs. SyncTools doesn’t mandate users to opt for Summarized entries.
- Summarized Entries consolidate multiple transactions into a single Journal Entry in QuickBooks.
- The consolidation process is based on the selected time period frequency and configuration mapping within SyncTools.
- Summarized Entries simplify financial records, making reporting more concise and easier to understand.
- This approach saves time and effort during reconciliation and analysis processes.
- SyncTools also provides early access to the Individual Transaction Entries feature for beta users.
- Users interested in exploring this functionality before its official release can request access from the Sales team at [sales@synctools.io](mailto:sales@synctools.io)
## How to choose frequency of Journal Entry creation in Shopify to QuickBooks?
Choosing Frequency of Journal Entry Creation in SyncTools for Shopify QuickBooks Integration:
SyncTools offers flexibility in determining the frequency of Journal Entry creation, allowing you to tailor the synchronization process according to your business needs. You can select from three options:**Daily, Weekly, or Monthly.** Follow these steps to choose your preferred frequency:

After selecting Shopify order data importing date and sync frequency, click on **“Next”** and you would be required to select countries in which your business operates.
## Why to choose countries?

Click on **“Next”** once the countries are selected and you will be redirected to **Tax Preferences** You can either opt for tax preferences if your business is already registered for taxation purpose and engaged in the collection or remittance of sales tax or hit **“No”** if this doesn’t doesn’t sound relevant to you.
## Why configure tax preferences?


After selecting Tax Preferences, you would be required to choose the countries where your business is registered.
## Country and Payment Gateways
In SyncTools, there is a feature that allows you to synchronize Shopify payouts by grouping them according to **Country and Payment Gateways.** These registered countries will be considered for the grouping.

## Account mapping

After setup of grouping, you can also **enable QuickBooks’ class and location mapping with Shopify payouts.**
Once all the grouping settings are configured, you can proceed to map the QuickBooks chart of accounts with Shopify transaction types under **“Mapping”** in the left navigation pane.
This mapping process ensures that transactions from Shopify are correctly categorized and recorded in QuickBooks according to your desired account structure.

- Additionally, SyncTools offers an “Auto Map Accounts” to enable Shopify users to auto create and map charts of accounts automatically for Shopify transactions in QuickBooks Online.

- This functionality automates the mapping process between QuickBooks charts of accounts and Shopify transaction types.

- By leveraging SyncTools' automation capabilities, users can save time, reduce errors, and ensure accurate synchronization of financial data between QuickBooks and Shopify.

- Utilize the "Others" mapping tab in account configuration to manage transactions from other countries or orders with different shipping countries.
- This tab enables specific mappings for transactions outside primary mappings for individual countries.
- Configuring accounts in the "Others" mapping tab ensures accurate categorization and recording of diverse region transactions, maintaining consistency in financial reporting across different geographical regions and order scenarios.

## Enable Auto-Sync
- After completing setup tasks such as mapping charts of accounts and configuring settings for different countries and scenarios, you can activate Auto Sync by opting for “Enable auto-sync”

- Auto Sync automates the process of posting Shopify payouts in QuickBooks at regular intervals.
- This automation saves time, reduces errors, and ensures up-to-date and accurate financial records by synchronizing data between Shopify and QuickBooks automatically, eliminating the need for manual intervention.
## Bank Account Configuration
Under this configuration, users can choose the bank account where all the Shopify deposits payout needs to be recorded and choose one account where any Shopify negative balance is to be recorded in QuickBooks as shown below:

### Download Shopify orders in SyncTools

- Begin by accessing the Shopify orders downloaded in SyncTools.
- Review the Shopify Payout details alongside a QuickBooks preview for the specific payout.
- Once satisfied with the accuracy, proceed to successfully post it into your QuickBooks account by clicking on Post to QuickBooks.And, it will turn the payout status as “Posted” in SyncTools.
## Shopify Payout details:

The posted Shopify Payout creates a Journal Entry in QuickBooks Online with details in the “Memo” field and CSV attachment of all the Shopify transactions posted in that particular Journal Entry.

## Sync History
- Access to sync history is crucial for transparency and troubleshooting in managing Shopify payouts.
- Sync history enables tracking of synchronization processes over time.
- It includes details like sync dates, times, transaction statuses, encountered errors, and actions taken.

## Contact to Support Team
- Access to a dedicated support team is essential for assistance and queries related to setup and ongoing operation of synchronization processes.
- Support extends to clarifying setup instructions and offering general assistance to enhance the user experience.
- You can reach out to us at any time for any kind of support!
Feel free to contact us through the following channels in case of any queries or concerns:
Email: [sales@synctools.ai](mailto:sales@synctools.ai)
Telephone: [+44 7380328797](tel:+447380328797)
USA number: [+1 323 672 3738](tel:+13236723738)
---
## Why Shopify Finance Reports May Not Match Xero Reports After Syncing with SyncTools.
URL: https://synctools.ai/help/financial-reporting-differences-reconciliation/why-shopify-finance-reports-may-not-match-xero-reports-after-syncing-with-synctools
> Learn why Shopify Finance Summary and Xero Profit & Loss reports can show different refund and discount lines after SyncTools sync, and how to reconcile them correctly.
When reviewing **financial data**, it is common for users to compare **Shopify Finance Summary reports** with the **Profit & Loss report in Xero** after data has been synced using SyncTools.
In most cases, the **overall figures** reconcile correctly.
However, there are specific scenarios where **individual line items** particularly **refunds and discounts** may appear different between Shopify and Xero.
This article explains one of the most **common** and **expected reasons** for this difference and helps you understand **why the numbers look different even though the accounting is correct.**
## How Shopify Reports Refunds and Discounts
Shopify's reporting is designed primarily from a **sales and customer experience perspective**, not from a strict accounting classification perspective.
When an order includes a discount and that order is later refunded, Shopify often handles the reporting in the following way:
- The refunded discount amount is included inside the **"Refunds"** value
- The original **Discounts** line is not adjusted downward
- As a result, Shopify's **"Refunds"** total represents:
- Refunded product value
- Plus refunded discount value
From Shopify's point of view, this reflects the total amount returned to the customer.
However, from an accounting perspective, this approach merges **two conceptually different values** refunds and discounts into a single line.
## How SyncTools Processes the Same Data
SyncTools follows an **accounting-first approach**, designed to create clean, auditable entries in accounting systems such as Xero.
When SyncTools syncs Shopify data:
- **Sales** are posted to **sales accounts**
- **Discounts** are always **reported and posted separately**, based on your **mapping configuration**
- **Refunds** represent the **reversal of sales amounts only**
- **Discount values** are **never absorbed into refunds**, even when **Shopify** does so in its **reports**
This behaviour is intentional and aligned with standard accounting practices, where:
- **Discounts** are tracked independently for **margin analysis**
- **Refunds** represent **returned revenue**
- Each **financial component** remains **transparent**
## Why the Difference Appears in Xero After Syncing
When the data synced by SyncTools is posted into Xero, the Profit & Loss report reflects this accounting-accurate classification.
As a result:
- **Discounts** appear clearly under a **Discount account**
- **Refunds** appear under a **Refund account**
- **Shopify's** combined **"refund including discount"** figure is now **split across two lines**
This creates a visible difference when users directly compare:
- **Shopify's** **Refunds** line versus
- **Xero's** **Refunds** line alone
The difference amount is usually equal to the refunded discount value.
## Example Explained Using the Report Comparison
In the illustrated example:
### In Shopify Finance Summary
- **Discounts** are shown as a **negative value**
- **Refunds** include both **refunded sales** and **refunded discounts**
- **Net sales** are calculated **accordingly**

### In Xero Profit & Loss (via SyncTools)
- **Discounts** are shown **separately** under a **discount account**
- **Refunds** reflect only **refunded sales amounts**
- **Sales, discounts**, and refunds are each clearly classified

When comparing totals:
- The **refund line alone** does **not match**
- The **combined impact** of **refunds + discounts** **does match**
- **Net sales** and **overall turnover** reconcile **correctly**
This confirms that the sync is accurate and complete.
## Why SyncTools Uses This Classification
SyncTools is designed to:
- **Respect** the **account** and **tax mappings** you configure
- Produce **accounting entries** that make sense to **accountants** and **auditors**
- **Avoid hiding discounts** inside **refund values**
- **Preserve clarity** in **Profit & Loss reporting**
By keeping discounts and refunds separate:
- **Gross revenue**, **discounts given**, and **refunds issued** remain **visible**
- **Profitability analysis** is more **accurate**
- **Xero reports** remain **consistent** and **auditable**
This approach ensures long-term reporting accuracy, even if it differs from Shopify's presentation.
## How to Correctly Reconcile Shopify and Xero Reports
When reviewing reports after syncing with SyncTools:
1. **Do not compare refunds** in **isolation**
2. Always consider **refunds** and **discounts** **together**
3. Focus on **net sales** or **total turnover**, not **individual rows**
4. Ensure the **date range** matches **exactly** in **both systems**
Once discounts are included in the comparison, the apparent mismatch disappears.
---
# Integration Pages